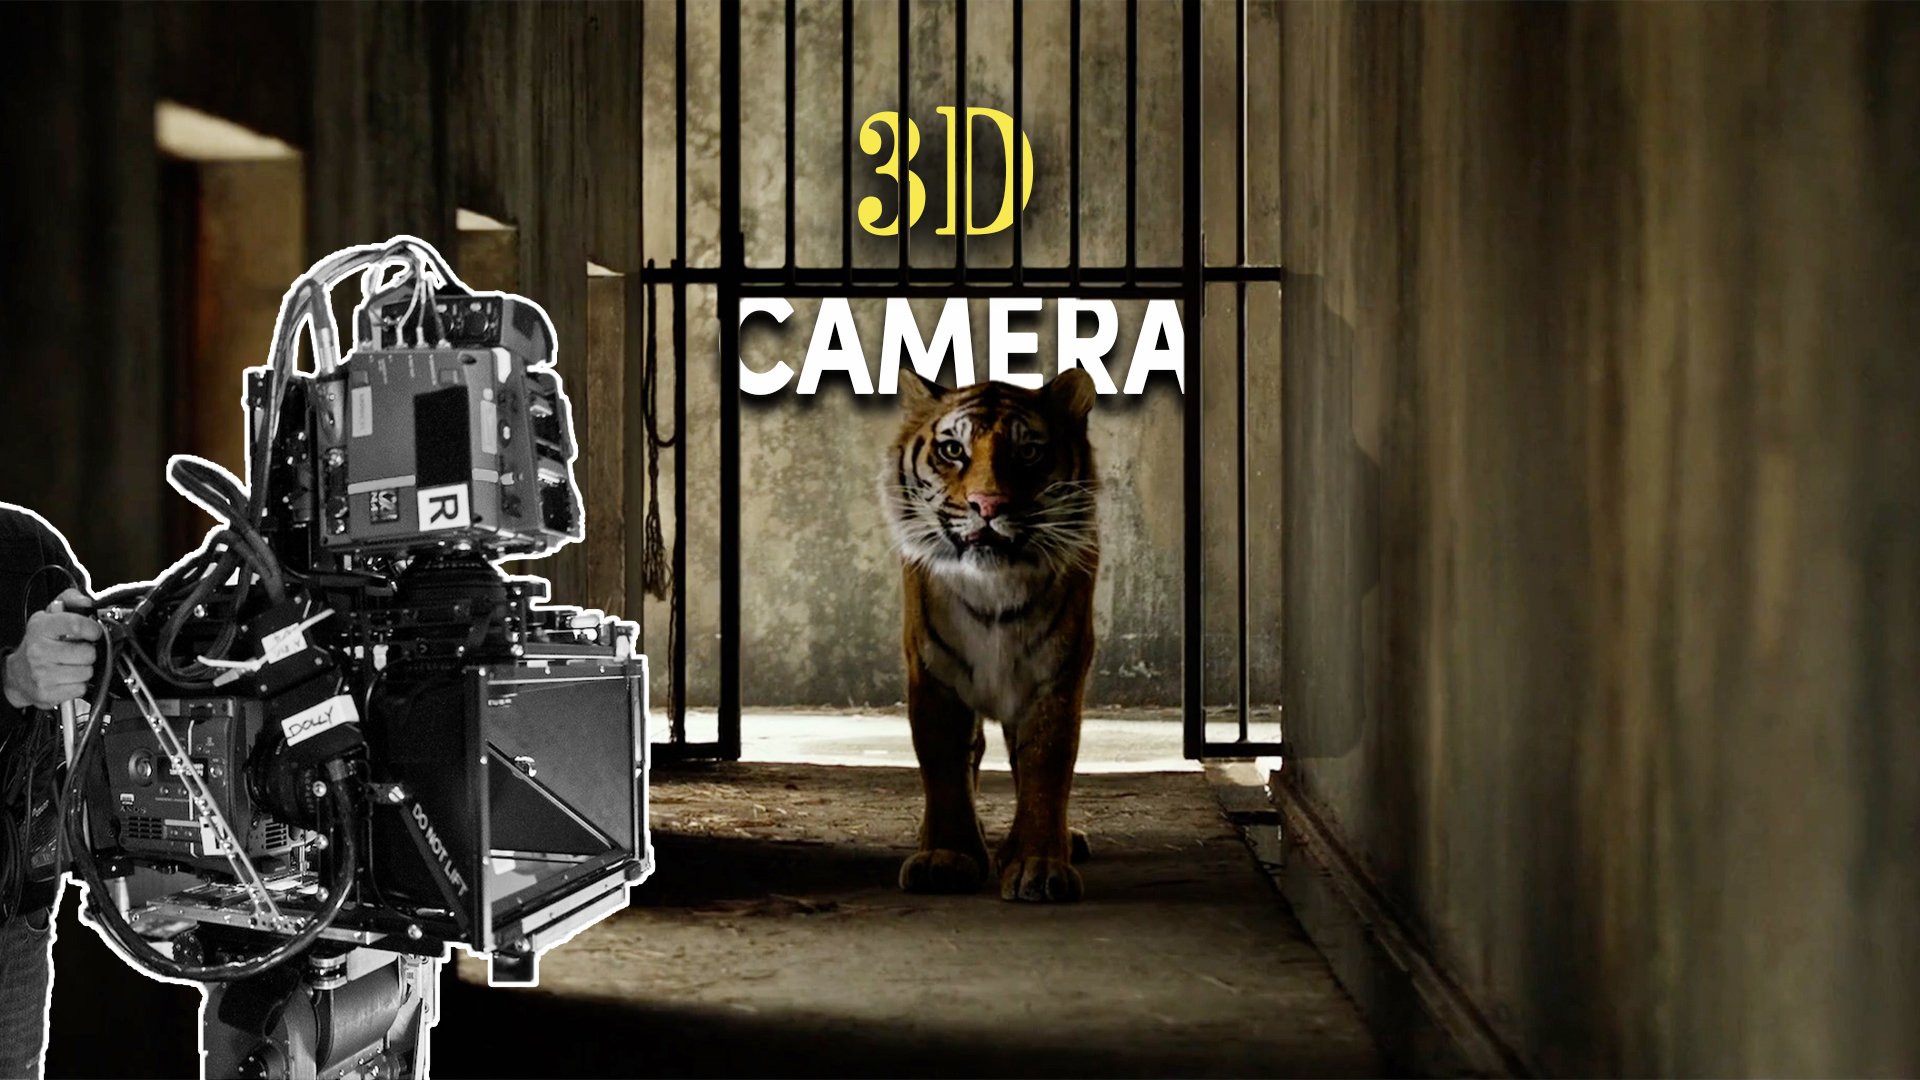
How Does A 3D Cinema Camera Work
Let’s go over how these cameras work, what extra film crew is needed to operate them and some methods that work best with this format.

INTRODUCTION TO 3D
Over the years 3D cinema has seen a few periods of resurgence and falling off.
Although it's in a bit of a dip at the moment, it does still exist as a niche format with its own unique method of capturing native footage on specialist 3D cinema cameras.
So let’s go over how these cameras work, what extra film crew is needed to operate them and some methods that work best with this format.
HOW 3D CAMERAS WORK
Unlike regular 2D cameras which capture and project a flat image against a flat surface, 3D cameras create the impression of footage having depth with different planes of dimensionality.
They do this by capturing images in the same way that human eyes use to see.
Light enters two eyes, is processed by the brain, to allow us to see the world with depth perception. In the same way, two cameras can be placed near each other at slightly different angles to capture two similar images.
When each image is viewed by a different eye, the brain is tricked into thinking that the 2D images have different planes of depth.
Presenting slightly offset images to the right and left eye is also called stereoscopic display, and is the same concept used for other 3D depth perception such as VR.
In 3D cinemas different images are fed to different eyes by using 3D glasses. There are some different varieties, such as glasses that use different colour lenses that only take in projected images of a certain colour, or glasses that have different polarised lenses for each eye that allow each eye to see a different picture.
It is now also possible to create a 3D film without a 3D camera, by manipulating 2D footage with post production software that separates the images into different planes. This Is the case for some movies that are shot in regular 2D that have been re-released in 3D. But, that’s a topic for another day.
3D CAMERA BUILD
There are two types of 3D camera rigs that can be used to get the two cameras close to each other to shoot these slightly offset images.
The first is called a parallel rig - where the cameras are placed horizontally alongside each other on a sliding plate. The second type of 3D camera configuration is called a beamsplitter.

This is where two cameras are placed at a 90 degree angle, pointing into a sort of cube that houses a mirror inside angled at 45 degrees. This mirror is like a one way mirror that you see in police interrogation scenes. This means that one side of it acts as a mirror that bounces the light off the 45 degree slope, while the other camera that is level sees through the other side of the mirror - shooting at a slightly offset angle.
As the footage from both cameras will converge to be almost exactly the same, it’s important that the cameras, lenses and any accessories used are all identical.
This means renting two sets of everything in the camera package. So shooting with one 3D camera rig will require 2 cameras, and 2 sets of lenses. Shooting with two 3D cameras will need 4 cameras and 4 sets of lenses.
This also applies to accessories like focus motors. Often the wireless follow focus will come as part of the specialised 3D camera package. If using a system such as a Preston with a zoom lens, this may mean using two MDR boxes and six motors: 2 motors to control the focus on each camera, 2 motors to control the zoom and 2 motors for the iris.

However, there are some focus solutions that exist that minimise all those extra cables and MDR boxes, such as the CMotion CVolution - which has a single motor box that can drive up to 8 different motors at a time, and run the focus from one wireless handset using multiple motors on multiple cameras.
All of this gear, combined with aligning two cameras alongside each other means that 3D cameras are very buky, heavy and awkward to move around. For that reason there are some best practices for working with this camera system, and also, a unique crew member that you don’t have on a regular 2D shoot.
CREW ROLES
There are two important control settings which are unique to native 3D cameras and they are both controlled by an extra crew member called a stereographer.
These two 3D settings are the interocular distance and the convergence.

The interocular distance refers to the space between the lenses on the two respective cameras. On a parallel rig this can be adjusted by sliding the cameras further apart or closer together on the horizontal axis, while on a beamsplitter it can be changed by adjusting the distance of the lenses from the mirror.
Usually this is controlled by the stereographer with an extra motor that can turn gears to adjust this distance between the cameras.
The reason that this distance between the lenses may need to change for different shots is because, as a general rule, the further away the subject is from the camera, the greater the distance between the two cameras should be. While the closer you are to the subject the nearer the lenses have to be to each other.
So wider shots, such as 3D aerial footage, may need to be shot with a parallel rig where the cameras can be more easily separated, while a beamsplitter 3D camera may work better for a close up where the camera lenses can be brought very close together using the mirror as a divider.
The stereographer will monitor this setting as well as the convergence, which is the angle at which the cameras are adjusted to line up the screen plane so that the images overlap correctly and are properly aligned.

If using zoom lenses this also includes making sure that both lenses are set to the exact same focal length and the width of both lenses, as well as the stop and level of exposure and other settings on each camera correctly matches.
The job of the cinematographer on a 3D film may involve some added technical complications, but otherwise their framing, lighting and other aspects to the cinematography will remain mostly the same as when shooting a 2D film.
The camera operator will have to deal with the implications of a heavier, more cumbersome camera build, but otherwise will also retain their usual role, with an important difference.
They will usually need to frame their shots a little wider than they normally would, allowing for extra frame room on the edges of the shot. This is because the 3D images may need to be slightly cropped into during post production if they need to adjust the convergence of the images.
For this reason they need to keep important parts of the frame away from the edges of the shot, for example, fully framing the top of the actors head without giving them too much of a ‘haircut’.
Custom frame lines can also be added to the monitor, which crop in on the fully captured image, so that operators know the bounds of framing that they need to abide by.

VT, who handle transmitting a live video feed from the cameras to monitors and playing back that footage, is another job on set which may get a bit trickier.
For example, on Prometheus, this involved setting up a video village for a multicam shoot with two 3D monitors, and two 2D monitors that could be flipped between seeing the left eye and right eye camera on a single 3D camera rig.
SHOOTING 3D
On top of these layers of complications, there are some other extra best practice rules that are often followed when shooting 3D.
Cinematographers may be advised to light with a little more contrast between dark and light parts of the frame than they normally would. Creating different planes of light and shadow helps to better sell the illusion of depth from 3D, than if everything were lit to be flat - with a low level of contrast.

For purely practical reasons it may also be easier for DPs to work with zoom lenses rather than primes. This is because changing to a new prime lens focal length requires realigning cameras each time, while zooming in and out minimises the setup time it takes to correctly overlap the images.
Because you are using two cameras, rather than a single camera, it also means that each rig is significantly heavier and bulkier. This means that if you want to move the camera you will have to use rigs that can take a heavier payload - such as a remote head on a Technocrane.
Or if something like a Steadicam is required it will take careful technical preparation to make sure the rig can correctly balance.
The large size of these cameras also make it difficult if not impossible to shoot in tight spaces, such as car interiors, get very low angle shots, or place the camera in any situation that usually requires a small build.
When it comes to moving the camera - stability of motion is usually encouraged. Shooting handheld is advised against as too much movement can be off putting and mess with the audience’s sense of motion. Which is why 3D cameras often rely on shots operated from a base, like a tripod or dolly, or shots with stable motion like Technocrane or Steadicam.
CONCLUSION
It’s easy to see why 3D is niche for a reason. Capturing native 3D images is quite a challenge both from the technical side but also from a financial point of view. It adds layers of complication to the production workflow which can, in many ways, limit filmmaking choices.
However, in the right context 3D can work really well in recreating the feeling of being in a real world environment and increasing the audience’s engagement in the world of the story. While at other times it can feel a bit gimmicky, distracting, unnatural and actually pull the audience out of the movie.
Whether or not it will make a mainstream cinema comeback again remains to be seen.
But, maybe these 3D rigs will be reimagined, reconfigured and applied to new visual projection experiences that use different but similar principles like the new Sphere or the world of VR. Only time will tell.
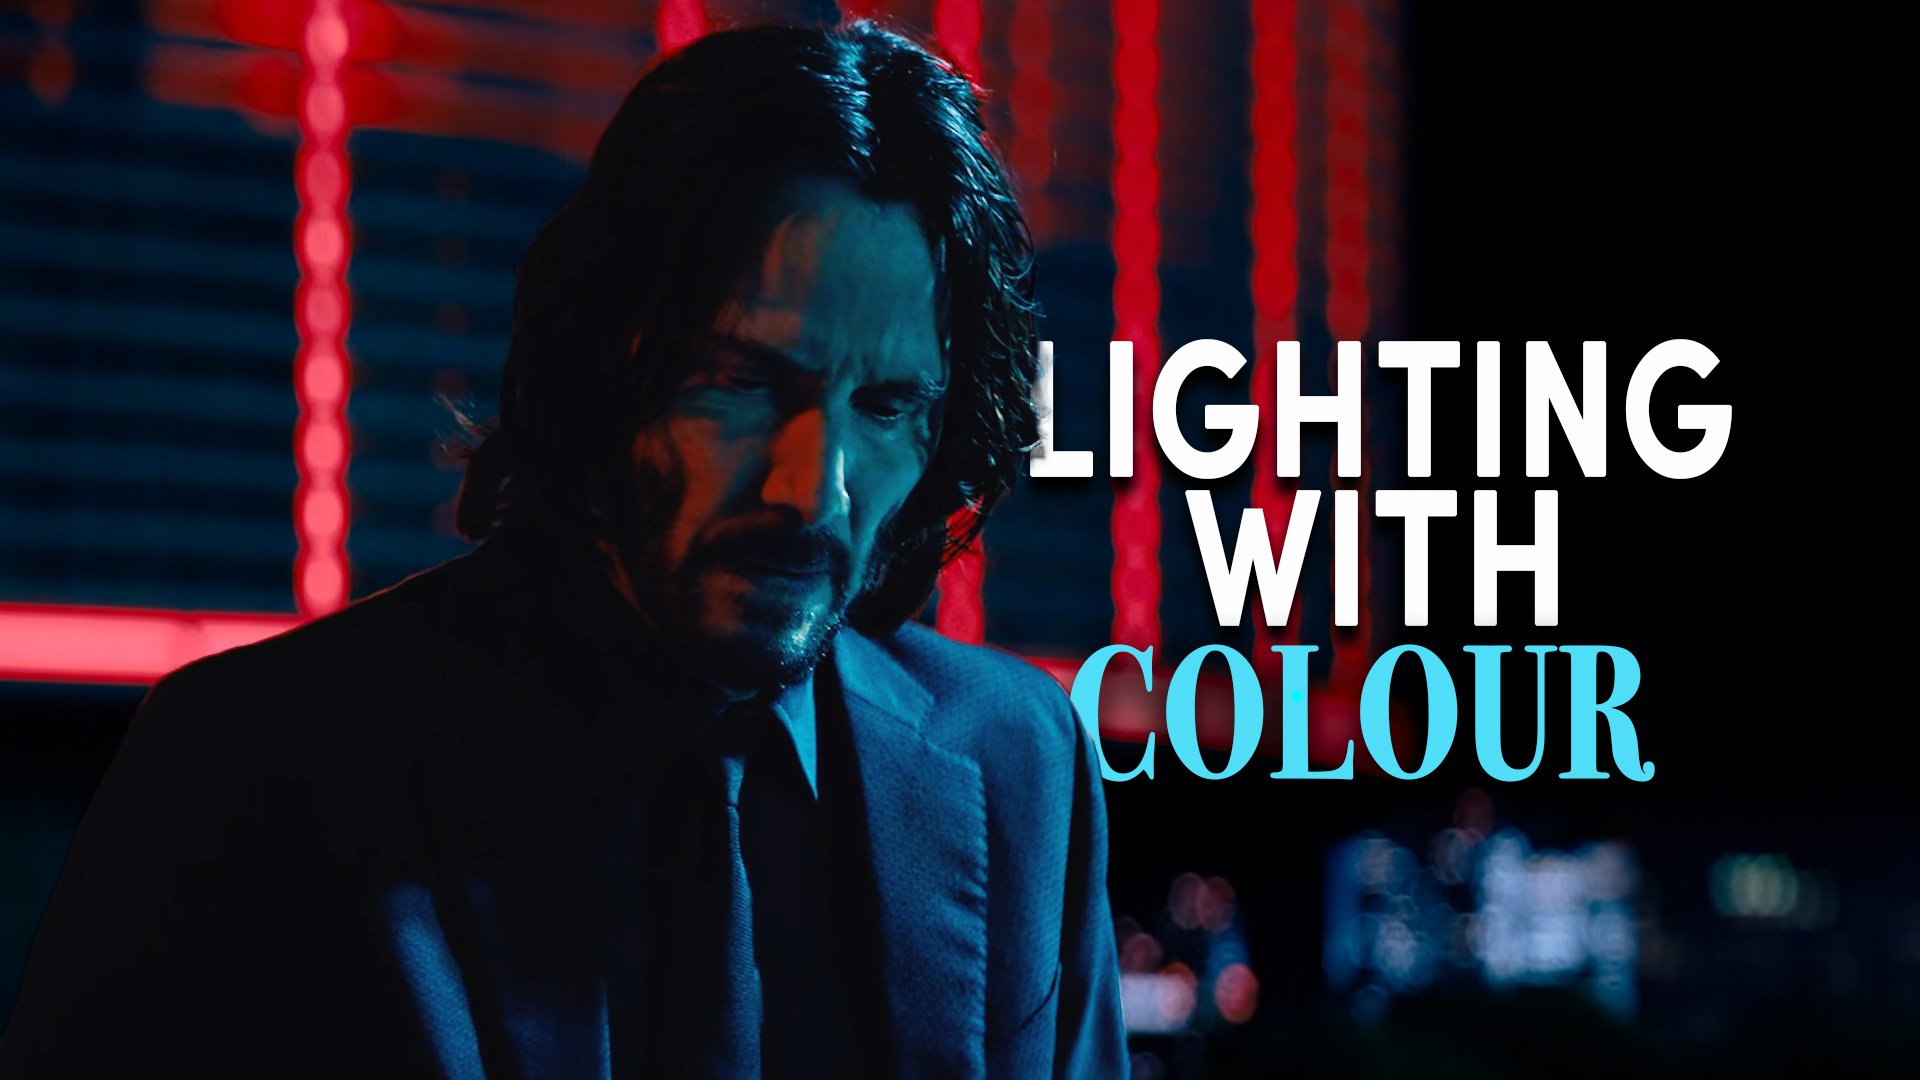
5 Reasons To Light Films With Colour
There are many reasons to use different coloured lighting when you shoot a scene. In this video we’ll go over 5 of them.

INTRODUCTION TO COLOUR
Since the dawn of three-strip film in the 1930s every cinematographer has been aware of the importance of using colour to create images. Different palettes can be constructed by using production design, introducing a look in the grade, or, as we’ll discuss today, with lighting.
There are many reasons to use different coloured lighting when you shoot a scene, so today we’ll go over 5 of them. By looking at a few clips from popular movies as well as some footage I’ve lit using different hues.
1 - MOTIVATED LIGHTING
Every environment that we walk around in has different frequencies of light bouncing around which - to both our eyes and cameras alike - read as colour.
Therefore, one of the most common motivations for illuminating with a vibrant hue, is to replicate or supplement what we call practical sources - lights that are seen within the frame of the shot - such as a lamp.
Here I’ve set the colour temperature of the practical in the background to 3,200K, then to increase its intensity and direction I’ve added a film light rigged above as a backlight. I’ve set it to the same colour temperature as the practical - supplementing the warm light that already naturally exists in the frame.

A big trend now is for DPs to build practicals into sets or locations - which are usually RGB so that they can be adjusted to different hues to add accents of colour to the lighting. Those practicals could be Astera Titan tubes posing as fluorescent bulbs, RGB strips built into signage, or yellowly, warm kitchen lights.
As well as adding coloured practical sources that can be seen in shots, another idea linked to this is to create motivated colour lighting - where the light isn’t necessarily seen in the shot, but the direction, colour and quality of the illumination still feels relatively realistic and motivated - like that light could be there just outside the shot.
One way to do this when shooting an interior is to shine a light through a window - with the imaginary motivation for it being that there is some kind of street lamp outside that window.
Here I’ve used a hard source with a sodium vapour gel outside a window which gets cut into strips of light and shadow by shutters. I’ve then used a cooler fill inside to motivate the dusky blue natural light outside and lift the ambience a bit. I’ve rigged this light on a C-stand so it backlights her in the same direction as the natural light coming from the window.

So, although we don’t see the exact source of light in the shot, it’s probably within the bounds of reality to imagine that there might be an old sodium vapour street lamp outside this apartment window.
Creating these extra imaginary sources is especially useful in night scenes for lifting the exposure so that there’s enough light to be able to shoot, but there are also other psychological motivations for lighting with colour.
2 - AGITATE VISUALS
When shooting exteriors or interior scenes that take place during the day, the default colour temperature to light with and set the camera to is around 5,600K.
If both the colour balance and light source match, you’ll get ‘normal’ looking natural colour - with white surfaces reading as white.
Some filmmakers like to use this look as a base for daylight scenes - but then add smidges of more vivid colours to parts of the frame. Now, I can’t speak to the intention behind these lighting choices, but I have noticed that within certain contexts this can have an agitating effect.

Take this location from The Bear. In different scenes there’s this ever present, just off camera red light - which adds a different hue to the otherwise naturally lit space. It’s subtle, but to me this visually ratchets up the tension just a tad - which suits the ongoing chaos and agitating tone that also comes from the story and direction.

There’s something about using a strong hue in contrast to the otherwise natural lighting, especially when it hits the skin tone of a character, which is slightly off putting and brash.
Uncut Gems is another film that does this - often mixing garish pink and off-green lighting, with more traditional CCT sources. This gives skin quite a sickly, unhealthy tone, which psychologically adds to its already tense, off kilter, chaotic atmosphere.
3 - DEPTH & SEPARATION
So far we’ve seen that lighting with colour can be done for motivational purposes or to induce a psychological feeling, but it can also be used for more classically photographic or aesthetic reasons.
More often than not, cinematographers like to use lighting to create different planes within the image. This creates an illusion that the 2D image has depth, feels more dimensional and can be used to separate characters from the background to make them better stand out.
They can do this by lighting different areas in the image, such as the foreground and the background, with different amounts of light, or with different colours.
The colours that cinematographers choose to place within the different planes of the image are also quite deliberate. Complementary colours are hues that sit at opposite ends of each other on the colour wheel. These tend to be quite visually pleasing to the eye when they are paired together.
This is why you often see films use a warm practical lamp in the background, that counteracts with a cooler light on the subject in the foreground.
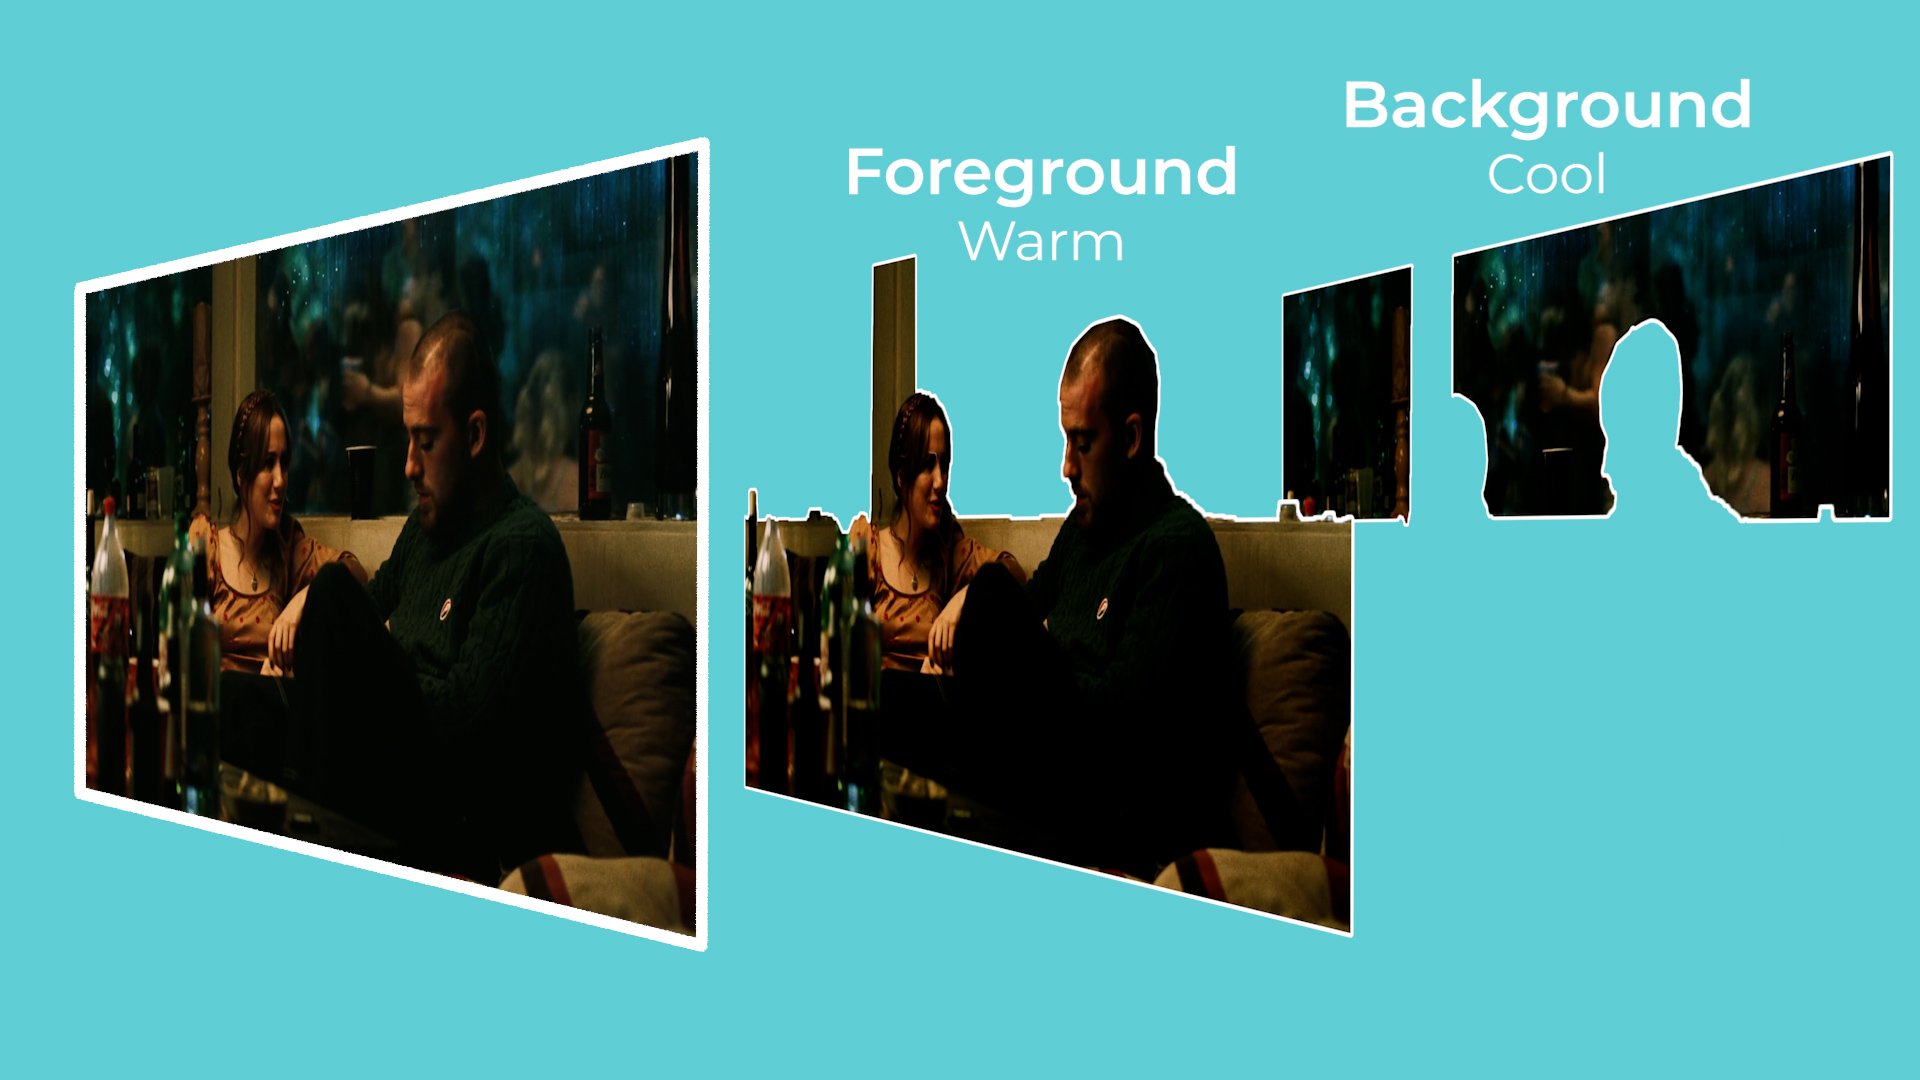
Not only are these colours complimentary, and therefore aesthetically appealing, but they are also placed in different planes or dimensions in the image - cool, warm and cool - increasing the feeling of depth and breaking up the subject from blending into the background.
Some other complementary or often used colour combinations besides cool and warm include: a dark orange and green, red with a lighter blue or cyan, or a pink-purple with a tungsten yellow.
4 - EMOTIONAL REALISM
There are many cinematographers, such as Vittorio Storaro, who like to talk about the psychology of lighting with certain colours. While the idea that different colours can be used to evoke specific emotions or themes is a whole other subject on its own, I think it's safe to acknowledge that as a whole colour affects mood and how images are experienced by audiences.
For that reason, cinematographers can sometimes deliberately exaggerate colour outside the bounds of reality so that the world represents how the character feels, rather than what it looks like in reality.
This is something that DP Marcell Rév referred to as emotional realism when shooting Euphoria.
As an example let's take this bathroom space, which in real life is lit by a rather ugly overhead tungsten bulb, and apply two different lighting looks to it to evoke two different feelings.

I’ll start by rigging the 60C on a polecat, so that we don’t see it in the reflection when shooting. It provides a nice downward, top light onto the subject.
Then I’ll place a second source so that it shines through the window, adding ambience and a different plane of light on the back wall.
For the first lighter, brighter, more upbeat tone and look, I’ll set the overhead source to a 5,600K daylight temperature, with a layer of diffusion to soften its intensity. I’ll set the outside hard COB light to 5,600K with an added quarter CTS gel to give it a warm, morning glow.
For the second harsher, darker tone, I’ll remove the diff on the 60C to make the downlight harder and set it to a fluorescent green gel look. I’ll then remove the CTS gel on the light outside and instead warm it up to 2,700K so that it takes on a tungsten look.
I’ll then decrease the camera’s exposure and balance the lights through dimming their intensity values to get a look that feels much dingier and far emotionally darker in tone than the first lighting set up.
By just tweaking the colour, quality and intensity of the two sources we can create two looks that put the character in a radically different emotional space.
5 - STYLISED COLOUR
Apart from all the above reasons for using colour it can also be used because, well, it just looks kinda cool.
One of the easiest ways to create a more visually stylised look with lighting is by using different hues. This is often done in short form content like music videos where realistic lighting can be thrown out of the window, and colour is used to elevate the visuals and inject an energy into them. Using a stylised colour palette rather than a naturalistic one.

It’s also a favourite party trick of YouTubers. Light the background wall with one RGB colour, then place another colour RGB source that only illuminates the subject in the foreground and just like that…you’re a YouTuber.
The reason this works comes back to the idea of using complementary colour and lighting different planes in the frame to separate the subject from the background.

The Filmmaking Pyramid: How To Start Your Career
Is it better for filmmakers to be a specialist or a generalist?

INTRODUCTION
Is it better for filmmakers to be specialists, who focus on developing one niche skill to the absolute max, or is it better to be a generalist whose knowledge is spread out across a diverse range of expertise?
In this video we’ll unpack this question by looking at what I call the film crew pyramid and think about the best way to build the creative and technical side of your career.
THE FILMMAKING PYRAMID
Just like the corporate structure within a company, or the ranking system within the military, the types of jobs on a large industry film set are organised in a hierarchical way.
While companies may produce a product, like fast food, or a service, like financial management, a film production company produces a movie.
At the top of the crew pyramid you have the ‘executive’ positions such as the director and producer who have a large degree of control over how the movie is produced, or are greatly responsible for coordinating the logistics and financing behind making it.

The role of these executives at the top of the pyramid is usually that of a generalist. In other words they have a very broad skill set and knowledge. They lead through delegating multiple tasks to other crew, who fall into different departments, a bit further down the chain.
For example, the director will communicate with the cinematographer to create a visual style, framing and lighting of the film. Or, once it’s been shot, they will work with an offline editor to cut the movie with the pacing, feel and story that is most suitable.
The further down the pyramid you go, the more specialised the role of the crew becomes.
For example, let’s look at the camera department. It’s headed by the cinematographer, a generalist whose role also includes liaising with many other departments, such as the art department that builds sets and does production design, the lighting department that rigs the illumination and the grips department who execute the camera movement.
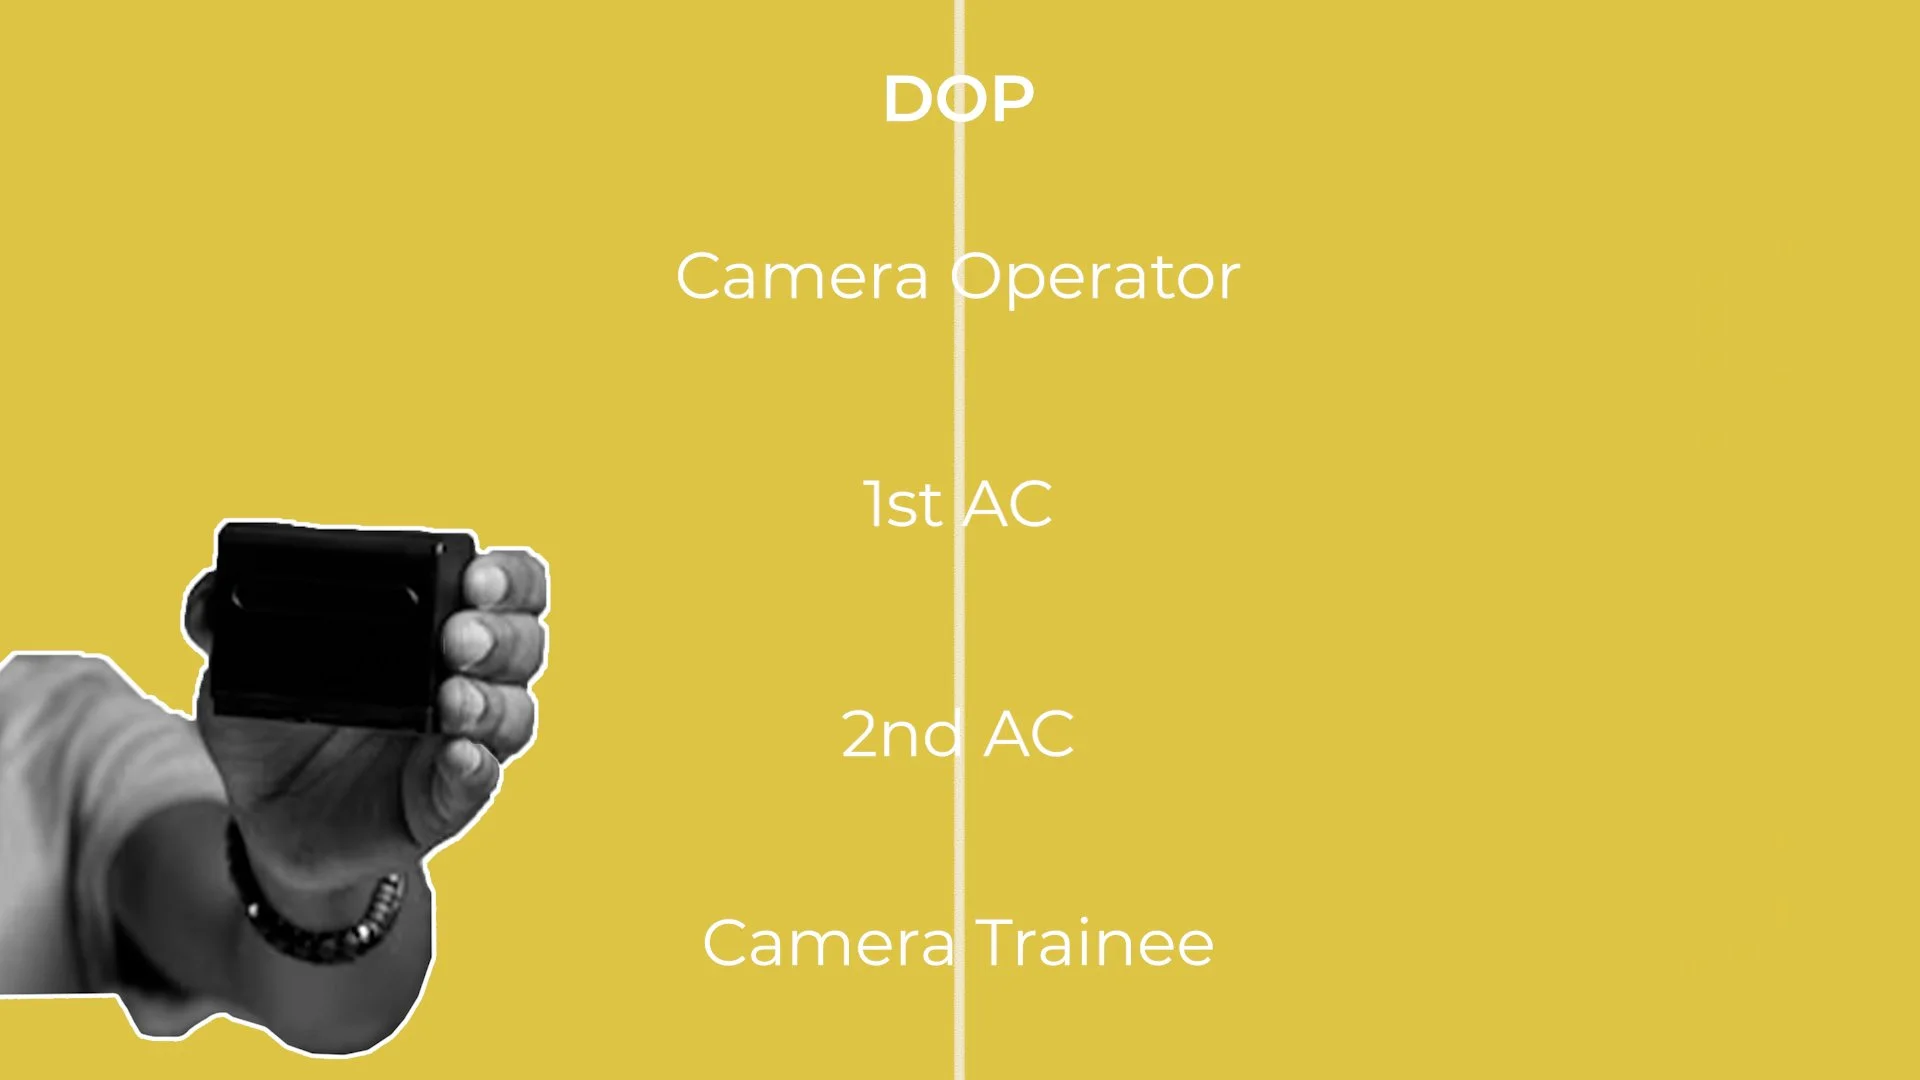
Under the DP we have the camera operator. They sit behind the camera, frame shots, expose the image and generally control how the camera is used while filming - under the direction of the cinematographer.
This role requires a broad knowledge base, experience and technical expertise. For example, they’ll need to understand the best ways to assemble the camera in different situations, how to compose shots, how to best change all the key camera settings, where to position the camera for the best lighting, and the list goes on.
Further down we have the focus puller or 1st AC - whose role starts narrowing and becomes a bit more technical and specialist - rather than generalist. They build the camera into its different forms, coordinate and troubleshoot any problems with the gear, and, as the name suggests, pull the focus so that the subject in the image remains sharp.
The loader, or 2nd AC is an assistant to the focus puller, and performs almost an entirely technical role - doing things like the clapperboard, marking actors and reloading the camera.
Then, right at the bottom there is the camera trainee, who works under the 2nd AC and acts as a general assistant to the camera department through more basic technical tasks like charging batteries or organising the gear in the camera truck.
If we zoom out on this pyramid you can see a trend. The higher up the job is, the more people they manage, and the more of a generalist they have to be - who fully understands all aspects of the filming process.
While the further down the pyramid you move, the more your job becomes specialised on performing a few, niche technical tasks.
It should also be noted that this structure only really applies to larger long form jobs and industry sets. For solo shooter work, or documentaries, many of these jobs may be combined into one, and fewer crew may be hired who will be expected to perform more tasks in a generalist role. Such as a documentary DP, who also needs to light and record sound by themselves.
SPECIALIST VS GENERALIST SKILLS
This filmmaking pyramid model was set up to use hierarchy as a way of on the job training - which started crew off by focusing on specific technical tasks, which would later continue to expand into more general knowledge as they moved up the ladder.

For example, a trainee starts off being exposed to film equipment, learning the names of all the gear and charging batteries. They move up to 2nd AC, where they need to be able to quickly locate all that gear, change lenses and learn the correct distance at which to put the clapperboard. These skills transfer up to 1st AC, where they need to use all that gear to build the camera any number of ways, and use their perception of distance to pull focus.
In this way film technicians continue broadening their skillset moving up or occupy the role of cinematographer, which requires a comprehensive knowledge of not only the camera but also lighting, grips, post production and of course a photographic eye for storytelling.
Therefore progression up this pyramid usually requires building more of the technical fundamentals of creating images at the bottom and later acquiring more of an overall creative view on how images can be used and created in different situations to suit the script.
This old school method of working your way up the ladder isn’t the only way to become a cinematographer. Today, there are more younger DPs stepping into this position than ever before, who may get there through a combination of producing and showcasing really good lower budget work, creating connections with directors, building their skills through film school, using online educational resources, or some combination of the above.
DIFFERENT KINDS OF FILMMAKERS
The idea of being more of a specialist or more of a generalist can also apply to the creative instincts of the filmmaker. For example, some cinematographers like to be known for creating a specific kind of a look - which is specialised and standardised across many projects.
This look could be shaped by things like selecting the same kinds of lenses, choosing to shoot on the same format, employing the same kinds of lighting techniques or framing shots in the same way.
Some directors are also known for creating a specialised feel, tone and look throughout their filmography. Movies by Wes Anderson will feature handmade production design, pastel colour palettes, symmetrical, centralised framing, straight tracking camera moves from a dolly, and very specifically directed performances.

Whatever the movie is, this specialised brand of filmmaking will be carried through.
On the other hand there are filmmakers who work in more of a generalist way - which is probably a more common way of working, especially for cinematographers.
What I mean by this is that they acquire a knowledge of cinematography which can be applied to a wide range of situations and shaped into different forms so that the visual style is built slightly differently to create a suitable feel for each unique story and director that they work with.

Some of their work may be more stylised, some may be more naturalistic.
Having a broad skillset as a DP can be useful as you’ll be able to take on a greater variety of projects and adapt to what the director wants.
While more specialist practitioners may only get the call from directors who want their movie shot in that particular style associated with the DP. If this is a bold style, for example with lots of colour, contrast, grain and haze, it may also draw more eyes to your work - especially to short form commercial or music video directors who want pieces to have a specific look and feel. This could be useful especially in building a career early on.
CONCLUSION
In today’s era of filmmaking there are no rules about how you should build a career as a cinematographer. But perhaps it's useful to keep this pyramid in the back of your mind, to remind yourself of how you need to develop.
In my experience I’ve found it useful to start accumulating skills in more niche positions in the camera department by working as a 2nd AC. Learning about all the other facets of filmmaking by being exposed to it on many different sets. Then broadening my creativity through watching films and deepening my experience by taking any opportunity to shoot that you can.
Regardless of how you go about it, you’ll need to move from inexperienced to experienced, from more of a specialist to more of a generalist and from a technical role to a creative role. All the way growing from a more focused, smaller, specific world, to seeing and crafting the wider, bigger picture.

What Makes IMAX Different
Lets go into the details of Imax by looking at what makes these cameras are different from regular cinema cameras, how it affects what the footage looks like and why this high quality format is only used on a small handful of movies.

INTRODUCTION
There are two parts to getting a movie into a cinema.
First, the film needs to be captured with a camera.
And second, it needs to be presented by projecting that image onto a screen.
Imax basically took both of these parts from traditional cinema and supersized them, creating a camera system that captured enormous, top quality, high resolution images, and combined that with a projector that cast the film onto a gigantic sized screen.
So let's dive a bit further into the details of this technical process by looking at what makes Imax cameras different from regular cinema cameras, how it affects the footage and why this high quality format is only used on a small handful of movies.
IMAX CAMERAS
To understand Imax and what makes this format different, we need to first know how most mainstream movies are captured. Up until about a decade ago, almost all movies were shot and presented using 35mm film. These have since been replaced by digital cameras, but we’ll get to that a bit later.
35mm film is a photochemical emulsion that, as the name suggests, has a total width of 35mm, which records by passing it vertically through the camera. However, as some of that frame width needs to be used to accommodate sprocket holes, which are called perfs, that pass the film through the camera - the total usable size of a 35mm frame is around 24.90mm.
Different methods can be used to record 35mm frames at different heights, which I went over in another video, however the tallest possible 35mm film size that can be shot is 18.70mm.
If we compare this to the Imax frame, with its approximate size of 70x48mm we can see that it’s over eight times the size of what traditional cinema cameras capture.
The larger the surface area of a piece of film, the more photographic information it will contain. This means that an Imax image resolves much more detail and has very little visible film grain. Basically, Imax footage will look significantly cleaner and higher quality.
But, how do these cameras record such a big frame?
Instead of using 35mm film, they use a larger gauge 65mm stock. Again, once the extra space for the perfs on the side has been removed, it leaves us with a frame width of around 48.5mm.
If you compare 35mm and 65mm frames on film, you may also notice that the perfs for the 65mm sprockets are on the top and bottom rather than on the left and right. This is because 65mm Imax film runs horizontally through a camera, rather than 35mm which runs vertically.
Passing through the gate horizontally gives Imax the advantage of being able to record a frame width that is larger than its 48mm size - which now becomes the frame height.
Each frame that Imax cameras record is 15 of these little perforations long, which is why this format is sometimes referred to as 15/70.
IMAX CAMERA GEAR
There are only 26 of these incredibly niche Imax cameras in the world. As such it’s a bit tricky to find information about these cameras but one of the most popular Imax film cameras is the MSM 9802, which is a sort of general purpose camera with a magazine that can hold 1,000ft of film.
Then there are also the Imax MKIV, MKIII and MKII bodies, which includes a “lightweight” version that holds 500ft of film.
Because the size of the film is so large, Imax have designed special lenses that have enough coverage to be used with these cameras without vignetting. They are made from glass by Carl Zeiss which are rehoused and designed specially for Imax.
Other third party lenses, such as rehoused Hasselblad medium format lenses from Panavision or their large format Sphero and System 65 lenses can also be used to cover the Imax format.
DIGITAL IMAX CAMERAS
Since the early 2010s digital cinema cameras have largely overtaken using physical film to shoot movies.
However, because of its enormous negative size, many have argued that there is still no digital equivalent that can match up to the extremely high resolution, photographic feel and colour that Imax film delivers - which is estimated to be the digital equivalent of around 18,000 pixels.
DIGITAL IMAX CAMERA GEAR
Having said that, Imax has moved with the times and approved a list of high end digital cinema cameras, which they consider to be ‘Imax certified’. These include the 6.5K Arri Alexa 65 Imax, the Alexa LF and Mini LF, the Sony Venice, 8K Raptor and Monstro from Red and the Panavision DXL2 - with its rehoused Red sensor.
PROJECTION
Just like the Imax camera, that captured footage by moving the film horizontally, so did the first Imax projector need to be reconfigured and designed so that the film could pass horizontally past a gate, pause for a tiny fraction of a second as the light from the projector bulb illuminated the image on the massive Imax screen, before moving to the next piece of film.
The area that they projected onto was also much larger than traditional cinema screens - with the average screen size being around 18x24m.
ASPECT RATIOS
15-perf Imax is shot and presented in its tall, native aspect ratio of 1.43:1. This squarer format is a great ratio for using more symmetrical, central compositions, for framing singular characters, and incorporating more lateral height into the shot.
While the film industry was transitioning to shooting on digital cinema cameras, so too were cinemas changing from film to digital projection. In 2008 Imax introduced their first 2K Xenon digital projector - which they used to extend the number of Imax screens by expanding to regular cinemas - not only the custom built, enormous Imax screens.
Digital projection changed Imax in two important ways: firstly it changed the aspect ratio for 2K digitally projected Imax movies to a wider 1.90 frame - that chopped off the top and the bottom of the original Imax frame. Secondly it greatly reduced the resolution of the projection from the estimated 12K to 18K pixels in the Imax film negative to a 2K file.
In 2014 a 4K digital Imax projector was also introduced. This higher resolution projector used lasers as a light source to project an image twice as bright with a better contrast ratio than the 2K projectors.
The increased power of this projector allowed it to show both the 1.43:1 full Imax negative on larger screens, or the wider 1.90 frame on smaller screens.
This means that some movies can now be distributed to both 2K Imax venues in 1.90:1 and some Imax film projectors in 1.43:1.
Filmmakers need to keep all of these formats in mind when lining up their shots, to find a frame that works well in a wide aspect ratio as well as a tall one. Usually this means that the original Imax negative will include a lot of headroom for characters, which can then get cropped for the wider format.
VISUAL CHARACTERISTICS
So, what is it that makes movies shot on Imax feel different from regular 35mm film or the equivalent Super 35 digital cinema cameras? Other than highly resolved detail and clean shots with minimal specs of film grain or noise.
Because the size of the negative that you are shooting on is so large, it produces a different field of view. In other words if you use the same lens on a Super 35 camera and an Imax camera, the Imax footage will look a lot wider, while the Super 35 footage will look more ‘cropped in’.
Cinematographers will often compensate for this extra width by using longer focal length lenses. So, where they would normally use something like a 21mm lens on a Super 35 camera to get a wide field of view, they’d have to go to a 50mm lens on Imax to get a similar wide perspective.
Using longer focal length lenses means that the depth of field will be shallower.
So, practically, this means that Imax cameras can film wide shots on longer lenses, and achieve a shallow depth of field - where the background is out of focus.
Whereas Super 35 cameras would use wider lenses to shoot a similar perspective which renders much more of the shot sharply in focus.
DRAWBACKS
Imax does come with some notable downsides. The first and most obvious drawback is cost. Imax cameras are incredibly niche which makes them a bit expensive to rent. But, more importantly, the price of buying and processing the amount of 65mm film required to shoot on Imax is incredibly high.
This is because 15 perforations per frame moving through the gate 24 times in 1 second, works out to around 337ft of 65mm film for every minute that is shot.
If we do a super rough calculation: 400ft of 65mm film costs $619, developing and scanning one minute of film can cost somewhere around $490, so you’re probably looking at paying somewhere close to $1,000 for each minute of film that is shot. Of course they'll be bulk discounts and whatnot for features but, point is it’s not going to be cheap.
Another negative is that because the 15 perfs of film need to run through the camera so much quicker than regular 4 perf 35mm, Imax cameras are incredibly noisy when shooting. This makes it difficult if not impossible to record clean sync sound audio without hearing the whir of the film running.
Finally, they are incredibly bulky, heavy and cumbersome to operate. They were designed to be operated from tripods or on a remote head on a helicopter - certainly not handheld.
These limitations meant that Imax was only used for many years to shoot exhibition sorts of films, like short documentaries with aerial footage and wides of landscapes.
Imax footage was later incorporated into feature films in key action sequences, while the majority of the film’s dialogue sequences were filmed using more traditional 35mm camera systems.
However in recent years, filmmakers like Chritopher Nolan who have access to large budgets have pushed hard for the format to be used to shoot entire narrative feature films. This has involved finding solutions to some of the technical challenges posed by these bulky, noisy, expensive machines.
Recent news has also come to light that Imax will release a new, redesigned version of the Imax camera, based on feedback from filmmakers, in 2024.
This may make the format even more usable and easy to work with as a feature film making tool. So, it seems that as long as cinema releases remain a thing and as long as there are directors and audiences that appreciate this super high quality format then Imax should still be around for quite some time.

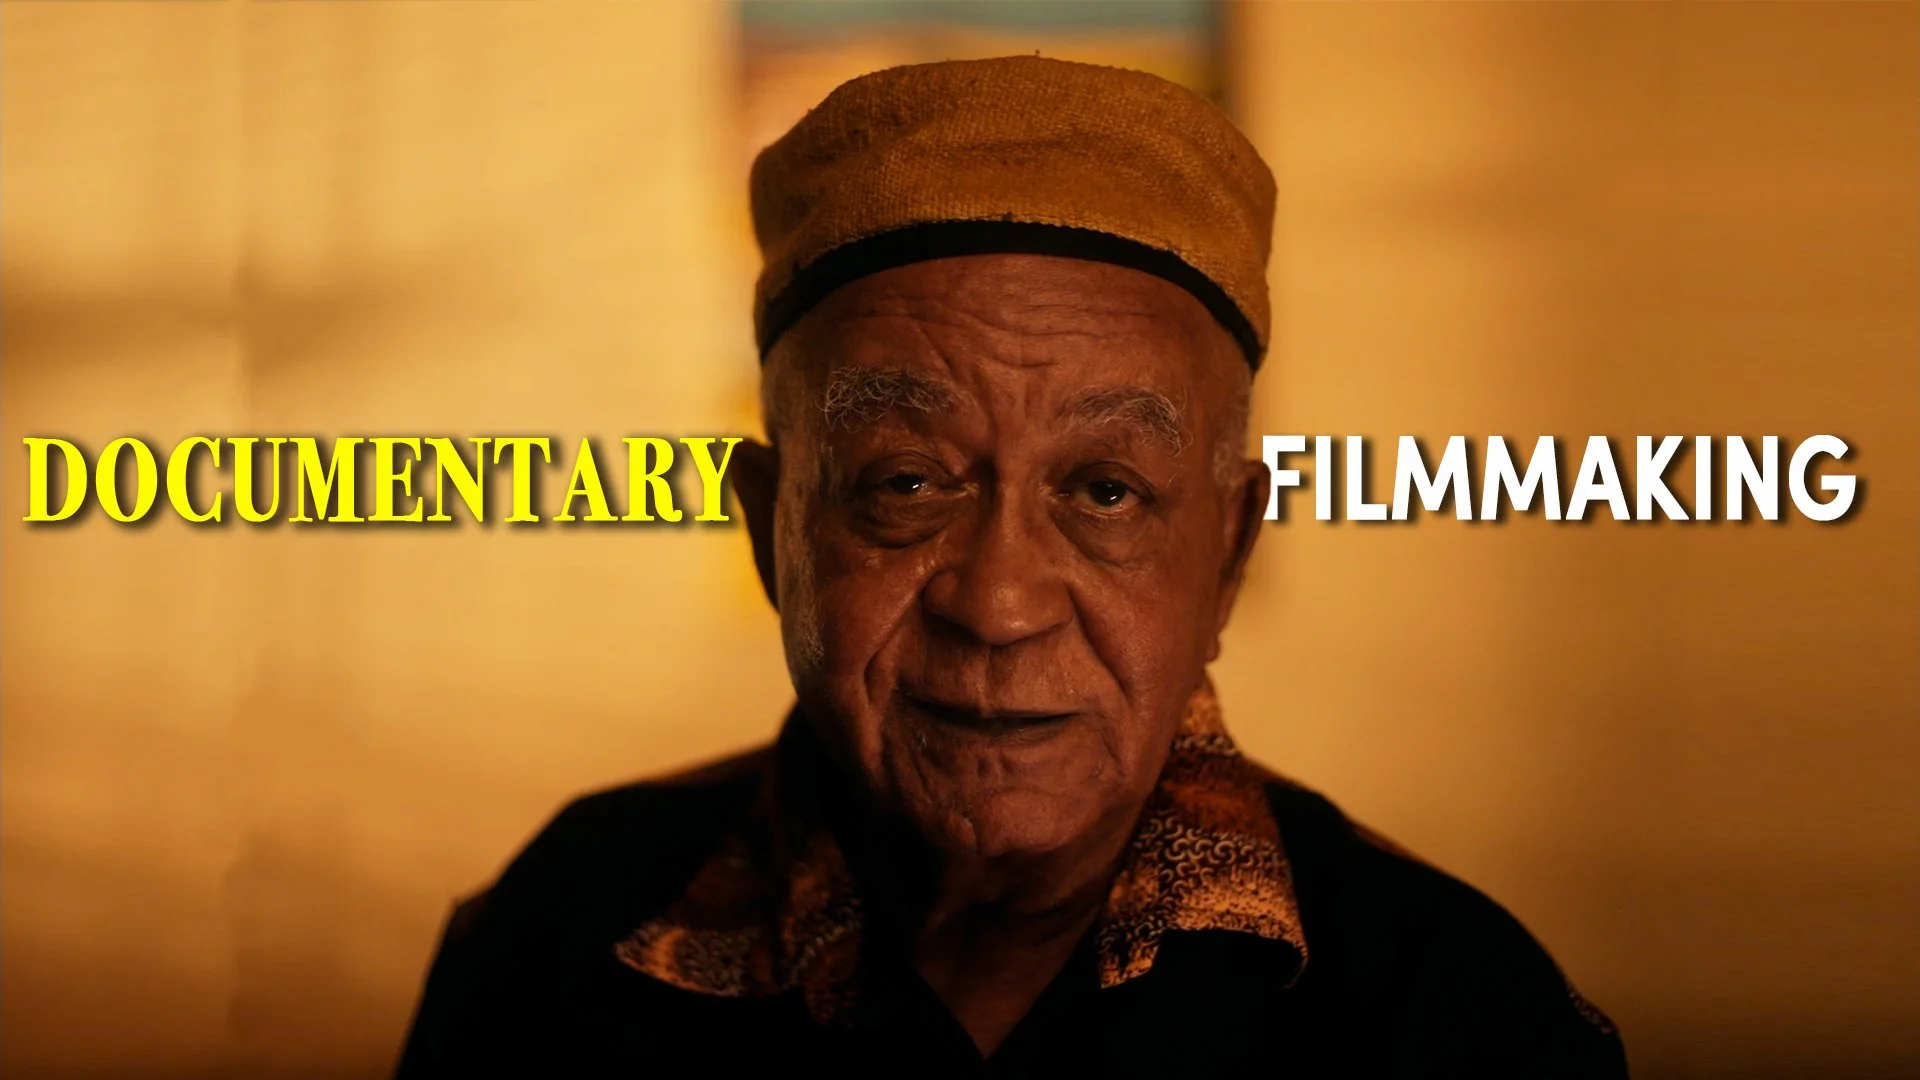
Tips For Shooting A Cinematic Documentary
In this video I’ll break down the importance of creating a coherent form and visual style for your film, and go over some technical tips you can use to do so.
INTRODUCTION
Documentaries come in all shapes and sizes. Some use re-enactments, others use interviews, while some films only stick to using observational footage. In this video I’ll break down the importance of creating a coherent form and visual style for your film, and go over some technical tips you can use to do so.
FORM
The visually strongest documentaries have a coherent style and overarching vision to them. Basically, choosing a visual approach and sticking to it for the entire film: whether that form relies on a mixed medium approach with archival footage, lets interviews play a prominent role, or means shooting in a completely observational style.
Going a bit deeper, within that overall form, you should think about how you want to visually present your footage and try to maintain a coherence to this look throughout the film. For example, if you’re shooting interviews try to use the same framing techniques for all the interviews throughout, or if you want a steady, observational feel to scenes, then commit to filming only using a tripod whenever is realistically possible.
You want the form and style of the documentary to be coherent and enveloping, not stylistically fractured and distracting.
When it comes to assembling the puzzle that is documentary, I’d say that there are 4 main pieces you can select - 3 of which you have visual control over. Number one, the interview, number two, B-Roll, number three, what I call ‘scenes’ and number four, archive - older footage or photos which have already been shot by other people, which is out of your control.
Some documentaries include all of these pieces, while some only include one - such as archive, or footage from observational scenes.
I like to think about footage other than interviews in terms of being either B-Roll or ‘scenes’. B-Roll is footage that usually doesn’t include dialogue between characters, and is composed of shots that create a mood or convey information. For example establishing shots of a location, more textural or atmospheric shots of objects, or undirected shots of subjects that are used to create a tone.
When I talk about ‘scenes’ this refers to sequences where there is either a dialogue exchange between characters, or a series of continuous shots of a subject are filmed that shows them performing some kind of action. Basically building out a mini narrative sequence of shots, rather than just filming more stand-alone, tonal shots.
INTERVIEW STYLES
Interviews are different as they provide direct, personal testimony from the subject that can be a great tool for conveying information, their thoughts and opinions or creating a narrative arc.
Let’s go over some tips for visually setting up an interview.
The first two decisions you want to make are how you frame the shot, and where the character’s eyeline will be. Whatever choice is made, I’d recommend sticking to the same format for all the sit down interviews in the film to preserve that overarching visual style we discussed earlier.
OFF-CAMERA INTERVIEW
The most traditional way to shoot an interview is by framing the subject in a medium shot or close up - where the bottom of the frame sits around the waist or chest of the character and the top of the frame includes a little bit of headroom. Usually the character will be placed either a bit more left of frame, or right of frame - which opens up their body a little bit and creates some empty, negative space on one side.
The interviewer will then sit next to the camera, with their head at around the same height as the lens. They will usually position themselves on the same side as the negative space. So if a character is placed on the left of frame, with more empty space on the right of frame then the interviewer will sit camera right so that the eyeline of the subject - where they look when they talk - will be orientated towards the open space, which makes the frame feel a bit more comfortable and natural.
This is called an ‘off-camera’ eyeline. A practical reason to shoot interviews like this is because the subject can talk to the interviewer face to face in a more conversational manner.
An off-camera eyeline can also be combined with a host of different farming ideas. Such as placing the character more in the centre of the shot, using a tighter shot size or a wider composition, all the way to shooting the interview from a more extreme profile angle.
Again, whatever frame you decide to go with it’s usually best to be consistent, rather than framing each interview in the film using a different angle and shot size.
An alternative to this is to use a ‘to-camera’ eyeline - where the subject’s gaze is fixed directly on the lens, looking straight at the audience as they talk. Because they are looking the viewer in the eye, this technique may create more of an intimate, personal feeling than a traditional, off-camera interview.
However, it comes with a practical downside. Trying to get a subject to look straight into the lens when they speak can be quite difficult. Often their eyeline will naturally drift off-camera to the interviewer who is asking the questions.
But, there is a solution to this which I’ve used. It’s based on a technique famously created by documentarian Errol Morris.
TO-CAMERA INTERVIEW
The Interrotron setup uses a teleprompter that is set up in front of the camera's lens. This would usually project text onto a piece of angled glass so that the person in front of the camera, like a news presenter, can read from it. However what we want to do is swap out the text with the face of the interviewer.
There are a few ways of doing this, but the setup I use involves wirelessly transmitting a video feed over wifi - using something like a Hollyland Mars wireless transmitter - from a low cost DSLR which is pointed at the interviewer, to an iPad, which is placed at the base of the teleprompter - that then gets projected onto the teleprompter screen.
I’ll then run a wired feed with an SDI cable from the camera that is actually shooting the interview to a monitor which I can place in front of the interviewer. That way the subject can see the interviewer on the teleprompter - which will make them look straight into the lens - and the interviewer can see the subject on a monitor.
This allows them to have a natural conversation, while the subject maintains a to-camera eyeline - kind of like how you would on a video conference call.
The straight-on directness of to-camera eyelines lends itself to symmetry and central framing. Therefore the subject is usually placed in the centre of the shot. Here’s an example of a tight, personal to-camera eyeline interview that I shot for director Jessie Zinn for a short doccie called Faces Of Fortune.
SHOOTING A SCENE
Now that you’ve decided on an interview format, and shot the character’s testimonial, you’ll probably want to fill it in with some of those observational ‘scenes’ or B-Roll that I talked about earlier.
There are many ways to do this. A lot of the approach to filming scenes will be dependent on the subject matter of what you’re filming. If you’re shooting in a war zone then obviously you’ll just have to run and gun and grab whatever footage you can. However, if a more controlled shooting environment is possible here’s how I tend to approach it.
Usually the director will want to give the subject or subjects some kind of action to perform - something which they would naturally do in real life. This could be anything from having a conversation with their friends, trying on clothing, to taking care and interacting with an animal.
Once I know what they will be doing I like to ‘block’ the scene. I use this term very loosely to mean that we’ll work out a space where the action will take place.
I’ll then create a sort of mental frame for the wider shot that we’ll need to film, think about what composition will work well for this, what objects we may want to add or remove from the shot and what I’d like the lighting to do.
The reason I always like to start wide is because then you know the cutoff point for where you can place gear, like a microphone or a light, without it being in the shot.
You don’t want to start by framing a close up and then move wide, only to find out that you need to stop shooting to move gear or remove an object from the frame that is visually unappealing. What you want is to set things up as much as you can so that once you start rolling the camera you don’t need to stop until the scene is finished playing out.
This means that if you choose to light a space, you want to do so in a way where the light placement will work well for the entire sequence. In other words, lighting the space itself, rather than a specific close up shot.
For this reason I usually like to use as few light sources as possible. For example if it’s a dialogue scene in a bedroom with a single window, I’ll place the fixture outside the window to give the natural light a bit more shape, contrast and consistency.
This frees me up to move quickly within the room without having to avoid gear or stands, and rapidly reframe shots to capture all the angles needed to cut the scene together as the actions play out in real time.
Again, I like to do this by first framing a wide, then as the scene plays out pushing in closer to shoot mids or close ups. Often if it’s a conversational scene, I’ll return to shooting a wide or a two-shot of the characters talking as it progresses, and finally go back to end on the wide as the scene dwindles out - to give the director a quieter, long shot to end the scene on.
Although it may seem counter intuitive, when you’re shooting a conversation it’s equally as important, if not more important, to get shots of whoever is not speaking, not only getting shots of whoever is talking.
We like to call these ‘reaction shots’. Having these in the edit allows the director to cut to a shot of whoever is not talking, and place it over shots of the character talking when they want to cut up and only use little bits of what they are saying. It’s a good way of hiding what would otherwise be jump cuts.
Although we’ll always try to get all the shots we need in real time, it is sometimes possible once you finish a scene to go back and ask the subject to repeat a specific action again that the camera may have missed. Usually it helps to film these shots tighter, so that they can be used as an insert without breaking continuity or jump cutting.

Cinematography Style: Ben Richardson
Let’s explore how Ben Richardson's career has evolved, all the way from his start in animation, to working on some of the most popular contemporary long form television series by breaking down his philosophy on cinematography and some of the gear he uses to achieve his look.

INTRODUCTION
Ben Richardson’s cinematography has subtly evolved from an organic, looser, handheld look, to a bit of a cleaner, smoother style. However, his photography has also maintained a naturalistic feel to it that makes it seem that what is happening on screen is true to life.
Let’s explore how his career has evolved, all the way from his start in animation, to working on some of the most popular contemporary long form television series by breaking down his philosophy on cinematography and some of the gear he uses to achieve his look.
BACKGROUND
Ben Richardson’s first adventure into cinema didn’t start with live action filmmaking, but rather with animation. He moved from England to Prague where he found a close knit creative community, as well as a low cost of living, that allowed him to work and survive outside of the industry system of filmmaking. There he directed and shot the animated short film Seed.
“For me animation was a way to have a kind of control without having to have a huge budget. You could accomplish things with animation kind of with just sheer will power. You know, you’re literally crafting every frame. You don’t need a lot of light. You don’t need a lot of equipment.”
In Prague he met his first major creative partner, director Benh Zeitlin, who was also there looking to make an animated short. They later worked together on the live action short film Glory At Sea - a stylistic precursor to their first feature Beasts Of The Southern Wild.
There are some notable similarities between the animated short Richardson shot and directed and the first feature that he photographed: both were shot on a textural 16mm film medium, both featured a handmade, cobbled together, art direction aesthetic and a neutral colour palette with greys, blues and browns.
PHILOSOPHY
Richardson’s work on the feature also incorporated another key thread in his work: the ability to visually translate the feeling of a character and their performance to the screen.
“I just remember having this experience of how she felt on screen and how you could translate the presence of this amazing little performer in the room to the camera. And it was the very subtle sort of movements and the way you framed her and the way you sort of held her that just, sort of, really translated what we could all feel in her physical presence into the screen image.”
Creating images that truly capture the feeling of the actor’s performance is a big focus of his.
Whether that was with the rough, loose handheld work on Beasts Of The Southern Wild that always chased around the character, keeping the camera low to the ground at her eye level to better empathise with her perspective of the world, or whether it was by using more smoothly operated camera work and long telephoto lenses to compress more hardened, calculated characters against the landscapes and make them looming and ever present in Yellowstone.
Whatever cinematic perspective he uses, his approach to photography is never heavy handed or reliant on stylised visual tricks.
A technique I noticed he often uses when framing is incorporating foreground elements into the shot. So, instead of shooting a ‘clean’ shot without any elements placed between the subject and the camera, he’ll often place something in the foreground of the shot while keeping the focus deep on the subject.
To me, this has two functions. For one it creates a bit more depth in the frame and makes images feel less flat and more dimensional. It can also create quite an objective feeling, like the camera and therefore the audience is a silent observer, crouching in the grass or sitting across the room watching a scene play out.
Richardson almost always shoots and lights in a way that is very naturalistic and tries to suck the viewer into the story, so that the camera’s presence is unnoticeable and offers as little distraction as possible.
His films often rely on shooting in real locations, rather than studios, use natural palettes which aren’t overly vibrant, and, most importantly, lights spaces in a naturalistic way - which truly represents the way the locations feel in real life, in much the same way as he tries to capture the feeling of actor’s performances.
“The references we were looking at in terms of colour palette and the lighting side of cinematography were very naturalistic and I definitely wanted to work with that and I wanted to work with as much natural light as possible. And what that really came down to was just a tremendous amount of tech scouting, making sure that I knew exactly where and when the sun was going to be doing the things we wanted it to be doing.”
This process of observing how the natural light interacts with each shooting location, and using that to schedule the perfect shooting time for each scene is a great way of controlling lighting conditions without having any lights.
Because these shooting windows were quite narrow on Beasts Of The Southern Wild this did mean any time they ran over schedule they significantly cut into their available shooting time. Such as this complex fishing scene - which they shot in the final 17 minutes of light remaining in the day. Covering the action with a single, long take in the wide shot and scrambing together the rest of the coverage with the final 11 minutes of light to spare.
GEAR
When working with a small crew and limited gear, the best way to light is to manipulate the light already present in a space by making small tweaks to balance it. In other words controlling how bright or how dim the light is in certain parts of the frame.
“Even simple things like opening and closing doors, you know, switching out a 25 watt bulb for a 15 watt bulb in the corner and, you know, tiny little shifts to keep balancing this place but all driven by this attempt to be very naturalistic and give the environments room to breath in the same way that the performances were.”
To preserve continuity and enhance the naturalistic look on other long form projects like The Mare Of Easttown, he used larger tungsten light sources to recreate the feeling of sunshine - specifically 10Ks and 20Ks.
Rather than shining these directly through windows he used CRLS aluminium bounce reflectors. These little panels act like mirrors that you can use to bounce hard light sources - but because they are made from polished aluminium rather than glass they reflect light with a slightly softer quality.
You can also use them to increase the distance between the source and the subject by placing the reflectors outside the window, and then the lamp away from the window pointed at the reflector. This creates less fall off and gives the light the quality of natural sunlight.
Because real ambient sunlight indoors comes from the sun bouncing off different objects in a room - it has quite a broad, soft, low intensity. Therefore most of his day-interior lighting tries to mimic this soft, spread out quality.
While his day-exteriors usually just use whatever the natural light is doing - whether that is hard, direct sunshine, or a dimmer, diffused cloud cover. Like most DPs when shooting with hard sunshine the characters are often blocked and positioned so that the sun either lights them from the side or from behind as a backlight.
When it comes to cameras, most of his feature films have been shot with a single camera. However, because television series, with their many episodes, usually need to be shot quite quickly with quite a lot of coverage, he’ll often have to bring in multiple cameras.
Yellowstone used three cameras - Arri Alexa Minis - to cover scenes. Normally when using so many cameras it makes it a bit practically easier to use zoom lenses. This is because the position of one or two cameras may need to shift so that the other cameras won’t see them. Having a zoom lens, rather than a prime, lets the camera operators then adjust the frame by zooming in or out just a little bit to avoid getting the other cameras in shot.
However, Richardson liked to shoot with fixed prime lenses - the Zeiss Ultra Primes. Knowing what prime lens was on each camera helped him structure the scenes more easily and know what coverage he would be getting - even if he wasn’t looking at every shot on a monitor.
For example, if he put A cam on a 24mm Ultra Prime and B cam on a 135mm lens, he knew he was getting one wide shot and one close up. However if he had both A and B cam on a 24-290mm Angenieux zoom lens, the operators would be able to zoom in and out and pick up different shots at different focal lengths in a way that may have been a little less focused and deliberate.
Richardson often likes to choose longer, telephoto focal length lenses. This is especially noticeable on shows like Yellowstone - where he would shoot close ups of characters on 135mm or even 180mm prime lenses.
Even wide shots, which are more often shot with wider angle lenses, he likes to shoot on telephoto lenses. This compresses the image - making it feel like the background landscapes are closer to the characters than they actually are. Because using a longer focal length means placing the camera further away from the actors to get a wide shot, it also means that these shots will often incorporate some foreground elements between the camera and the actors - which we mentioned before.
Unlike some DPs that only like using old vintage lenses with interesting swirling characteristics, anamorphic bokeh or heavy flares, Richardson often prefers spherical glass which is a bit more modern, consistent, sharp, and preserves some shape of the background in the bokeh. These lenses include the Zeiss Ultra Primes, Zeiss Master Primes, or Leica Summilux-Cs.
Again, this look pushes a naturalistic feel rather than an overly stylistic one.
Other than Beasts Of The Southern Wild, which was shot on 16mm film, he almost always uses a Super 35 digital Alexa: like the Mini or the XT.
He’s also used basically the same LUT file over his past 5 projects with the Alexa, to get a consistent, natural colour look that he’s happy with.

The 2 Ways To Film Stories
Let’s use this video to explore the different ways that camera, lighting, sound and editing choices can be used to create either a subjective feeling or an objective experience.

INTRODUCTION
In the process of writing, shooting and editing a movie filmmakers are faced with a choice. Do you want to tell the story in a way that is more objective, and detached from the character, or in a way that is more subjective and replicates the character’s point of view or emotions?
Let’s use this video to explore the different ways that camera, lighting, sound and editing choices can be used to create either a subjective feeling or an objective experience.


OBJECTIVE VS SUBJECTIVE FILMMAKING
In cinema, the perspective that you create is incredibly important. It affects how the audience interprets the story, feels about the characters and the kind of emotions that they experience along the way.
Although there are two perspectives: an objective one and a subjective one - there is also lots of middleground between them, and room for this to shift throughout a movie.
There also isn’t only one technique or way of creating a perspective. It is usually the result of a handful of different methods and ideas that are combined to create a point of view on the story.
Let’s start with objectivity. This is when filmmaking techniques convey information from an omniscient point of view: as if the shot is being observed by an audience member. There is little emotional emphasis attached to the perspective as the camera passively observes the action from a distance.
Most shots in movies are quite objective.
CAMERA LANGUAGE
To me, this feeling is best achieved by using a stable camera, operated off a tripod or dolly. If there is camera movement, it is usually because it is motivated by the characters themselves moving.
I have another more comprehensive video on shot sizes, but basically wider shots like long shots or medium shots, place the characters a bit further from the camera and therefore feel a bit more objective - like the camera is observing their actions from a healthy distance away.
Positioning the camera so that it sits at around the same height as the characters, and making sure it is filming at a neutral angle without a tilt, is another way of imposing a feeling of objectivity.
Subjective shots, on the other hand, may try to place the audience in the shoes of the character on screen by using what is called a point-of-view, or POV, shot. This is often achieved by cutting from a shot of the character to a shot that represents what they would be seeing.
Such as this sequence which cuts from a shot of a character whose eyeline is a bit off camera, to a shot of their perspective which mimics the same angle as their gaze.
Or, this sequence, which mimics a person’s point of view by using a macro lens to shoot the image through a scope - that the character is looking through. This POV technique is also sometimes done by using a black mask or shooting through other devices like binoculars, a keyhole in a door, a telephoto lens of a camera, or to recreate the perspective of looking through night vision goggles.

Some movies, like Enter The Void, even leaned on this POV technique so heavily that they incorporated the character blinking, by cutting to a couple black frames incredibly quickly to create this illusion.
An entire genre, of found footage movies, has even been created around the idea of only using shots taken from the literal POV of a character who is filming everything.
But there are also other camera techniques, other than using literal POV shots, that can be used to create a visual experience which is more subjective and focused on the character.
Using a tight shot where the camera is placed physically closer to the actor during filming creates a more subjective, closer bond between the audience and the character, than filming in a more objective wide shot.

Shooting from either a low angle, to make characters appear larger than life, or a higher angle that diminishes them, is a way of imposing a feeling on the image. This usually makes the audience experience the shot in a subtly more psychologically subjective way - where the camera makes the character feel stronger or weaker.
Although it depends a lot on context, I often find that handheld camera movement creates a more subjective language. Perhaps this is due to handheld motion’s connection to the documentary genre - where the character may interact with the camera and is more aware of its presence.
This handheld motion can also be combined with an over-the-shoulder perspective, to make it feel like we are following in the literal footsteps of the character. Again, bringing the audience and the character closer together.
Another type of camera rig that can be used to create a subjective feel is called a Snorricam - which attaches the camera directly onto the body of the protagonist. This glues the audience onto a close up of the character, so that we move with them in a subjective way.

A good rule of thumb is that the more stylised and experimental the camera language is, the more it is usually trying to impose a feeling on the audience, get them into the mind of the character, and therefore the more subjective it is.
While, the more naturalistic the camera’s role is, the more it creates an observational, detached perspective that is objective.
SOUND
Sound is a filmmaking tool that also plays an important role. Objective shots have sound that presents more of a general recording of the space. We pick up on things like dialogue and any ambient sounds in the location, such as a room recording of broadcast sound from a TV that is on, while excluding special sound effects, or audio that wouldn’t naturally occur from the mix.
Subjective feeling shots will often play with sound, and may share the sound that characters hear with the audience - in a similar way to how the camera uses a POV shot to share the perspective of a character. A good example of this is when the audience hears the same sound that a character is hearing in headphones or on a telephone.
Another, more extreme version of subjectivity is if the plot and filmmaking mechanisms dive into the mind of the character - through what is called a mental subjectivity.
This could be done by using a voice over spoken by the character, by showing their dreams, using a shallow depth of field to evoke their memories, or even using visual effects or camera trickery to convey hallucinations that they may be experiencing.
When the language of cinema takes on how the character is experiencing the moment it is subjective.
EDITING
How quickly or how slowly scenes are edited also has an effect on how stories are told. Usually, shots that play out in longer takes or scenes with very few transitions between shots tend to mimic how we experience time in the real world and therefore usually feel more natural and objective.
While rapidly cutting through many shots incredibly quickly has more of a deliberate emotional effect and can create feelings such as anxiety or tension - feelings that emerged artificially due to subjective editing.
LIGHTING
A final cinematographic concept that can be used to tell stories in different ways comes down to how cinematographers use light.
Objective storytellers like to lean into using naturalistic lighting. This is when either only natural ambient light is used, or, more often, when the film lights that are used to add illumination to a shot are placed in a way that is motivated by the light in the shooting location.
A good example of this is how when shooting interiors big sources of light with a daylight colour temperature are placed outside windows, shining in, to mimic the direction and quality of sunlight, while also adding a more cinematic contrast and increasing the levels of light inside the room.

For more subjective stories, cinematographers can employ more expressionist lighting techniques. This may include using RGB LED lights or fixtures with coloured gels, to add different unnatural hues of light to a scene. This use of vibrant, exaggerated colour elevates stories out of the real world, to create a feeling or a tone that embodies how a character sees the world in that moment - rather than merely presenting the world plainly and objectively as it really is.

How Greta Gerwig Shoots A Film At 3 Budget Levels
Let’s look at three films made by director Greta Gerwig at three wildly different budgets: the no budget Nights And Weekends, the mid-range budget Lady Bird, and the Hollywood blockbuster Barbie - to see how her approach to filmmaking shifted along with her filmmaking resources.

INTRODUCTION
Each filmmaking choice is based on its artistic merits but it can also be determined by budget. This leads to some movies being more loose, improvisational, realist and character focused, while others can create their own worlds, be larger than life and precisely manicured.
To show this let’s look at three films made by director Greta Gerwig at three wildly different budgets: the no budget Nights And Weekends, the mid-range budget Lady Bird, and the Hollywood blockbuster Barbie - to see how her approach to filmmaking shifted along with her filmmaking resources.
NIGHTS AND WEEKENDS - $15,000
Gerwig’s first interaction with director Joe Swanberg came when she had a minor role in his movie called LOL.
This began a creative partnership that resulted in her writing and starring in another of his low budget films. These micro budget, independent movies of the early and mid 2000s were dubbed Mumblecore and were grouped together as part of this new filmmaking movement.
They are distinguished by their heavy focus on naturalism, characters, dialogue, improvisation and lack of a traditional cinematic style or look.
Swanberg and Gerwig’s next collaboration which they co-wrote, directed and starred in, called Nights and Weekends, fell into this Mumblecore category.
“It’s about a long distance couple who have some problems and it’s kind of tracked over a year of their relationship. And it was shot over 18 months.” - Greta Gerwig
Most mainstream movies are heavily reliant on a structured plot, with characters that bring that story to life. Mumblecore films flip that convention by focusing on characters and their dialogue as the core of the film - with the plot being quite minimal and a byproduct of the actions of the characters.
Although this focus on the relationship of characters over plot had been done before in films such as Before Sunrise, normally it was accompanied by a more traditional filmmaking aesthetic.
Because Nights and Weekends had almost no budget, they disposed of these cinematic conventions and worked extremely loosely - almost like a documentary - and brought on Matthias Grunsky a documentary and indie cinematographer to shoot the first half of the movie.
“We didn’t have a script we had, like, an outline of certain scenes that we needed to shoot to tell the story and roughly maybe had an idea of what’s going to happen on the day.
Greta and Joe would basically go for a coffee. Before they left I would talk with them about roughly where they will be, let’s say the apartment. So I would light that apartment by myself, not knowing exactly what’s going to happen and then they would come back and we would start rolling: very improvised because no one really knew what was going to happen.” - Matthias Grunsky, Cinematographer
In filmmaking some of your major expenses are normally actors, crew, locations, production design, gear rental and post production.
Shooting in this super improvised, naturalistic and loose style meant that they could limit the crew to only a cinematographer and their producer who recorded sound, the cast to basically two actors, the locations to borrowed apartments or public spaces and the gear to a single handheld HD video camera.
This low budget filmmaking methodology imposed the naturalistic, documentary feel of the film, and vice versa, this super character focused, realistic style was suited to this filmmaking methodology.
This meant that the audiences for these films were usually very niche, which made it more difficult to sell or make money from these movies. As a result, Nights and Weekends was crafted for a film festival run, to try and garner critical and festival acclaim, rather than a more commercially focused widespread cinema release.
LADY BIRD - $10 Million
Following this experience, Gerwig shifted her focus to acting for a number of years, before she returned to write and directed her first solo feature - Lady Bird.
“The working title for the movie was Mothers And Daughters. To me that was the core of it and I feel like every scene I wanted to keep going back to that theme even if it literally wasn’t between a mother and a daughter. I wanted to keep exploring that because I think your relationship with your parents is how you first understand love.” - Greta Gerwig
Lady Bird was written in a far more structured way that conformed to more of a genre (coming-of-age drama) than that of her much looser, more improvised first film.
The screenplay had much more mainstream appeal, could be better marketed to a cinema going audience, and therefore was able to raise a mid-level indie film budget of $10 million from IAC films.
This budget meant that the movie could be shot and produced with a much stronger visual style than her more haphazard looking first no budget film.
“The biggest thing I think a director can do is create almost a bubble of magic safety for their actors and for their department heads and hold a perimeter so that they feel safe to play and bring their whole selves and also with the actors that they feel that they own those roles.” - Greta Gerwig
One of the department heads she brought on to shoot the film was cinematographer Sam Levy, who this time had a few more resources to work with than just improvised dialogue and an HD camera from 2006.
The visual direction or perimeter that she gave Levy to work within was that the movie should feel like a memory.
To try and evoke this visually, Levy chose to shoot on an Alexa Mini, and, instead of shooting in the sharper, higher fidelity 3.4K ARRIRAW format, he decided to shoot in the lower resolution 2K format.
On top of this, they wanted to use grain and texture to evoke more of an organic feeling of memory. But, instead of just adding a film grain emulation in the colour grade, as is normal, they added digital video noise that they pulled from the Alexa.
They did this by recording a black signal on the Alexa, pulling the noise from that, and overlaying it on top of the image. Levy and his colourist Joseph Bicknel could now amplify or decrease the noise, especially in the mid tones using the same idea of how you could bump up the gain on older ENG cameras to 12 or 16 DB to create more video noise and texture.
Another feeling that Gerwig wanted, was that the camera’s perspective shouldn’t be intensely subjective, super tight and handheld, nor should it be extremely wide, objective and detached. She wanted it to feel like the audience was an arm length away from the characters.
They created this sense of distance and a proscenium in the frame by playing out most of the scenes in stable medium shots, close ups which weren't too tight or wide shots which weren’t too far away.
Using these techniques along with a more traditional filmmaking methodology, Lady Bird was presented with a much more cinematic look that elevated the story from realism, rather than the rough, purely naturalistic feeling of Nights And Weekends.
After finishing the movie A24 bought the worldwide rights to distribute it. It turned out to be a very successful acquisition, being both a critical success and making close to $80 million at the box office against its $10 million budget.
BARBIE - $145 Million
“I wanted it to be obviously dazzling and hilarious and this kind of imaginative cornucopia of crazy Barbiness, but I also felt like actually in that state of, kind of, being in that sugar high is the place where you have the opportunity to be even more emotional because people aren’t really expecting it. So in a way, by design, it allows you to get at things that are harder because you have the cover of a glitter parade.” - Greta Gerwig
Gerwig paired up with the iconic global toy brand Barbie, to write and direct her first studio feature at an enormous blockbuster level budget.
Visually, she drew a lot of influence from Technicolor musicals with their vivid, colourful palettes and hand painted backdrops.
They, therefore, made the decision to film the portions of the movie set in Barbieland in a studio soundstage, where they built giant Barbie sets, erected enormous painted backdrops, at such a large scale that they caused an international shortage of pink paint. The size of these practical set builds was a massive financial undertaking.
Gerwig hired cinematographer Rodrigo Prieto to collaborate on lighting this artificial world and executing these sequences practically.
“I wanted to do practical builds for everything and I also wanted to use, anytime I could use, whatever film technique from like 1959 was. So I had to build the entire thing in miniature then shoot the miniature, then composite that into the image. I spoke with Rodrigo Prieto, Sarah Greenwood and Jacqueline Durran (the DP, set designer and costume designer). I talked to them for a year before we were even in like prep, prep.” - Greta Gerwig
The first lighting decision they made was that Barbieland should always be sunny. To create a sense of separation between the characters and the flat painted backgrounds he decided to create a beautiful backlit look. His team placed multiple enormous artificial sun sources called Soft Suns in each corner of the set, and had one roaming sun that he could move around on a lift.
This meant that whichever direction a character was facing he could turn on one of his sun sources that was positioned behind them and give the scene a backlight.
The spill from these lights was so strong that they would hit the set and bounce light back to fill in the actors. The problem with this was that because almost the entire set was pink this bounced fill light became very magenta, which turned the faces of the actors pink.
So to kill some of this magenta, but still maintain some bounce he draped the rest of the set that wasn’t being photographed in a grey material. This returned a natural bounced light without a tint.
Other visual decisions to make Babieworld more exaggerated and theatrical included using frontal, symmetrical framing that placed Babrie in the literal centre of each shot, using a LUT that emulated the rich, saturated colours of Technicolor, and using wide angle lenses and a large format Alexa 65 to exaggerate and expand the size of the sets in a cartoonish way.
They contrasted this look with photography in the real world that used a more neutral colour palette, a more subdued and desaturated film negative LUT and longer focal length lenses that compressed the background.
Barbie completed Greta Gerwig’s evolutionary journey as a director from micro budget realism to blockbuster cinematic fantasy: both in the subject matter of the characters and story, the size of her budget and audience, as well as in how she went about creating the visual world of each film.
3 Basic Camera Settings Every Cinematographer Should Know
Cinematography is all about controlling light. In this video I’ll take you through three of the most important camera settings that will allow you to control the amount of light that is let into the camera: ISO, shutter and aperture. This is sometimes called the exposure triangle.

EXPOSURE TRIANGLE
The first step to being a good cinematographer is to understand how images are created.
You need two things: a photosensitive surface, like a camera sensor or a piece of film, and light. How much light hits the sensor and the sensitivity of that sensor determines how an image looks. This is called exposure.
If too much light is used the image will be too bright, and if too little light is used then you won’t be able to see anything at all.
Therefore, cinematography is all about controlling light.
In this video I’ll take you through three of the most important camera settings that will allow you to control the amount of light that is let into the camera: ISO, shutter and aperture. This is sometimes called the exposure triangle.

If you’ve ever used a consumer camera you may know that there is an auto mode that will adjust all of these settings for you. So, you may be thinking, why not just use that?
I’d say there are two main reasons why changing the settings yourself, called manual exposure, is the preferred method for anyone who wants to take image making seriously.
Number one. When you put the camera in auto mode you are basically giving it permission to constantly change and adjust various settings at will to get you to an evenly exposed image.
The problem with this is that we will often be able to see the video footage changing from dark to light as it adjusts settings until it finds a level it is happy with. This can be very distracting and breaks the illusion of filmmaking, taking the audience out of the immersion in the story as they say to themselves, “OK, this was obviously shot on a camera.”
Number two. Cinematographers want to be able to precisely control how they want the image to look and not leave that decision up to the whims of a camera. They may want a comedy to look light and bright, a drama to look dark and moody, have a deep depth of field where everything in the image is sharp, or make the background soft, blurry and dreamy.
ISO

ISO, ASA, or EI are all terms that refer to the sensitivity of a camera’s sensor or a film to light. The higher the ISO number is the more light will be taken in by the sensor and therefore the brighter the image will be. And inversely the lower the ISO, the less light it absorbs and the darker the image is.
Therefore, it’s common to set the camera to a lower ISO when shooting outdoors in bright sunlight, and a higher ISO when shooting in darker conditions at night.
However, higher ISOs come with a tradeoff. The more that you increase this setting the more digital noise, those little dancing grainy specs, you will see.
Most digital cinema camera manufacturers will recommend shooting at a base ISO or a native ISO. Although this differs for each manufacturer, base ISOs usually offer the best trade off between a high quality, low grain image and a good dynamic range.
For example, most Arri cameras have a native ISO of 800. Some cameras, such as the Sony Venice 2 also have what are called dual base ISOs: such as a lower native ISO of 800 and a more sensitive native ISO of 3,200.
So, when setting up your camera to shoot each shot you need to pick an ISO based on two factors. Firstly, consider how much noise or grain you want the image to have, and secondly decide how sensitive you need your camera to be to shoot in the lighting conditions.
And, if you’re still in doubt, it’s probably best to set and leave the camera at whatever base ISO the manufacturer recommends, keeping the noise as clean as possible, and rather adjust other settings.
SHUTTER
Instead of changing the sensitivity of the sensor, another way of altering exposure is by controlling how much light hits the sensor. This can be done with the shutter: a section that can open up to expose the sensor to light, or close and prevent light from entering the camera.
This setting determines the duration for which a camera’s sensor is exposed to light.
In photography this is measured in shutter speed: the time a single frame is exposed to light, by quickly opening then closing a rectangular blind shutter. Usually this is measured in fractions of a second, like 1/100.
Cinema cameras need to shoot multiple frames within one second, for example 24 frames. Therefore, they need a differently designed shutter: one shaped like a circle that can spin.

More or less light can be let through depending on what angle is cut out of the circle. For example, 180 degrees may be cut out, so that each frame is exposed to light for half the time by the open shutter and not exposed to light when the closed half passes the gate.
Or, a 45 degree angle can be used, where only a narrow sliver of the shutter is open. This means that each frame is exposed to light for 1/8th of the time. Less light means the footage will be darker, and it also makes motion feel more choppy.
A 180 degree shutter angle is most commonly used because it gives the footage a normal feeling of motion that is not too jerky or too fluid.
Modern digital cinema cameras don’t have a physical shutter that opens and closes, but it uses the same principle by telling the camera’s sensor when to collect light and when not to collect light.
If using a camera with a shutter speed setting, a good rule of thumb is to set it to be double the frame rate - to get a normal feeling of motion. So if shooting at 25 frames per second, we will set the shutter speed to 1/50. Then if the camera increases its frame rate to 50 frames per second, we will double that and set our shutter speed to 1/100.
APERTURE
Moving even further away from the sensor, we get to our final important camera setting that controls exposure: aperture.
This is the size of the opening at the front of the lens through which light passes to get to the sensor. The size of the hole is controlled by iris blades narrowing or opening and is measured either in f-stops for photography lenses or t-stops for cinema lenses.

The wider this opening is, the more light is let through and the lower the stop value is. On the other hand, the narrower the iris is, the less light it lets through and the higher the stop number is.
Each stop represents a doubling, or halving of the amount of light that hits the sensor. So, to make the image brighter we need to decrease the stop number by doubling the light let through - for example from 4 to 2.8. Or to make the footage darker and cut down on half the light let through we can increase the stop from 2.8 to 4.
The aperture setting is a very effective way of changing how bright or dark an image is. However, aperture also has another, secondary effect on the image.
The wider the iris is, and the lower the stop number, the shallower the depth of field will become. In other words a low stop number means that more of the background will be out of focus.
Since cinematographers often like to shoot with a shallow depth of field that makes the background look soft and focuses on a single subject, the camera is often set to a low stop number, such as 2 or 2.8.
THE FINAL SETTING
But, this runs us into a snag. We’ve set the ISO to the base of 800, we’ve set the shutter angle to get normal motion at 180 degrees or 1/50th of a second, and we’ve set our aperture at 2 to get a shallow depth of field. However, the image is still too bright.
How do we make it darker and get it to the level of exposure that we want without changing our other settings? We can use what are called ND, or neutral density, filters.
These are pieces of tinted glass which are either placed in front of the lens, or inside the camera behind the lens, that decrease how much light is let into the camera without changing the colour of the image.

Adding a stronger tinted ND filter will take away more light, while a weaker strength filter will take away less light. Each stop of light taken away is represented by a value of 0.3.
So, most cinematographers will set the camera with a consistent ISO (to keep the same grain), shutter (to keep the same feeling of motion) and aperture (to keep a shallow depth of field) for most shots, then use ND filters to cut down on how much light enters the camera.

Why Movies DON'T Need To Be Shot With Expensive Cameras
In the wake of the announcement that The Creator was shot on a Sony FX3 let's examine how and why it is now possible to shoot high budget films on prosumer cameras.

A BRIEF HISTORY OF FILMMAKING TECHNOLOGY
Throughout the history of cinema, filmmaking has been inextricably linked to technology.
Each technical innovation in film gear has unlocked new opportunities for how stories can be told. Early silent films used intertitles in editing as a way of expressing speech without using words. The introduction of sync sound introduced written dialogue to the screen. Colour photography elevated cinema out of a more impressionistic black and white to a more realistic world. Smaller handheld cameras allowed filmmakers to move shots organically like a fly on the wall.
With each and every advance in technology came a new stylistic application.
One of the largest technical leaps forward came when digital cinema cameras, for the most part, replaced cameras that used 35mm film. Before this, dating back to the start of cinema, movies had been shot on celluloid.
The widespread adoption of digital cinema cameras on industry film sets happened in the early 2010s after Arri introduced the original Alexa.
This camera was groundbreaking as it offered filmmakers a digital medium that had great colour reproduction and dynamic range - which, for the first time, rivalled the quality and look of 35mm film. But let’s backtrack a little bit.
GAP BETWEEN PROFESSIONAL & CONSUMER CAMERAS
Before digital cinema cameras, there was an enormous gap between the quality of the image recorded by consumer video cameras onto tape that the average person could buy in a store and 35mm film captured on professional industry cameras. However, renting these high end cameras, and buying and processing 35mm film came at a significant price.
It costs a large amount of money to make a high end movie. You have to pay a big premium for getting well known actors, hire a large technical crew for weeks or even months at a time, and pay for the construction of large sets. These costs are usually greater than the sum of the gear rental.
Therefore, although it was expensive to rent a high end cinema camera, it still made financial sense in the scope of the more expensive production, to try to capture the best image possible that could be sold and presented to an audience as more of a spectacle.
The thing is, as time went on and digital cinema cameras replaced film cameras, that enormous gap in image quality between cheap consumer video cameras and expensive high end digital cinema cameras, got exponentially smaller and smaller.
This trend followed a prediction made by a guy called Gordon Moore in the 1960s, who basically said that computing power would roughly double every two years. Not only would this allow equipment that used computing power, like digital cinema cameras, to get exponentially better, but they would also get increasingly smaller and cheaper on a relative basis.
This has meant that in the last few years, manufacturers have been able to produce video cameras aimed at the consumer or prosumer market which are affordable, small, yet produce images that are incredibly high quality.
Whereas before the quality of video from a high end camera was many multiples better than that of consumer cameras, now the difference between them is much more difficult to notice for the average viewer - if they notice at all.
THE CREATOR USING A SONY FX3
In this changing technical landscape, news emerged that I think may go down in history in the same way that previous technologies altered the course of filmmaking. It was announced that The Creator - a high budget, sci-fi, Imax distributed blockbuster - would be shot on a Sony FX3: a prosumer video camera.
“For a long time the difference between shooting on film and what you might call consumer or prosumer, the stuff you might buy in a store is getting narrower and narrower. And that gap is getting indistinguishable to some extent.”
“We shot The Creator on a new camera, it’s a Sony camera, it's called an FX3. Pretty much the whole movie is shot on this.” - Gareth Edwards, Director of The Creator
Shooting with the FX3 allowed them to work with smaller crews and therefore film in 80 real shooting locations, rather than spending truckloads of money on building large sets in a studio and shooting against green screens.
Then in post they basically took the real location footage and used VFX to paint the sci-fi landscapes that they wanted on top. The director, Gareth Edwards, claims this method of working turned a $300 million film into an $80 million movie.
Shooting with a prosumer camera isn’t new to Edwards as his first film, Monsters, was shot on a Sony EX3 video camera.
Because so much can be achieved in the grade and created in post production nowadays, you want the footage to be as malleable as possible. What you need from a camera can sort of be boiled down into three main categories: resolution, dynamic range and the bit depth of the colour.
If we take these specs from the $3,900 full-frame Sony FX3 and the $75,000 Arri Alexa Mini LF, you can see how small the technical gap between them is. The FX3 can record in 4K resolution, while the Mini LF can do 4.5K. In terms of dynamic range Sony reports 15 plus stops, while Arri claims 14 plus stops. When it comes to bit depth, the FX3 shoots 10-Bit 4:2:2 internally in SLog, whereas the Arri can shoot 12-Bit 4444 XQ in Log-C.
While of course the Arri does outperform visually, especially in the colour department, the point remains that the gap between them is pretty slim when comparing a prosumer and a professional camera - and seems to be closing more and more every year.
Also, when you have millions of dollars to polish the footage in post production on top of that then the difference in quality between the two cameras becomes even more negligible.
ADVANTAGES OF PROSUMER CAMERAS
So, what are some of the advantages of using a smaller prosumer camera like an FX3?
Firstly, the size of the little Sony means that all the grips gear needed to move the camera cinematically and the supporting accessories are greatly reduced - in both cost, size and crew.
In the BTS, you can see them working with what looks to be a modified Ronin gimbal rig with handles. The operators can use this to adopt a very flexible shooting style, run and throw the camera around, getting stable, smooth movement - while also eliminating the time, manpower and cost of needing a dolly or a Steadicam that would be paired with a high end cinema camera.
Or, in other shots you can see them using a mini jib arm with the Ronin as a stabilised head. Again, saving hugely on the time, cost and crew needed to run a high budget industry alternative like a Technocrane.
Working with a little camera also downsizes the accessories needed. For example the BTS shows the focus puller using a low cost, little Tilta Nucleus instead of the larger follow focus systems from Arri and Preston that are normally paired with high end cameras.
The FX3 also has the ability to boost the base ISO to 12,800 and shoot in incredibly low light conditions - whereas the Alexa is usually kept at 800 ISO.
“The Sony FX3 for example: amazing prosumer camera. I’m about to use that on a film that I’m shooting in Thailand. And it’s so ridiculous that it’s so small and it can [record in] such a high ISO for such a small camera.” - Greig Fraser, Co-Cinematographer of The Creator
This high ISO allowed them to work in a very flexible style. For exterior night scenes they could discard the large, high output lighting fixtures that normal cinema cameras require.
Instead they used battery powered LED carpet lights rigged to a boom pole, that the best boy could use to walk alongside the talent and handhold the source to give enough illumination.
“The actors had this freedom. If suddenly the shot looked better over here Nancie would suddenly move around with the light and Oren would be talking to Nancie through a little microphone. And we were just really fluid, organic. We’d shoot for like 25 minutes at a time. It was, like, a very liberated experience and it looks like a much bigger film than it cost because of that reason.” - Gareth Edwards, Director of The Creator
SO, WHY DOES HOLLYWOOD STILL USE HIGH END CAMERAS?
Does this spell the end of the Alexa forever and mean that all future Hollywood productions will use the FX3? Well, no, probably not.
Why are almost all high end movies and series still shot on variations of the Alexa, the Venice and other high end cinema cameras?
For one, many filmmakers and especially cinematographers still like to try and shoot the highest quality image possible - even if the gap between that and a prosumer image is not as big as it used to be.
Secondly, the film industry has been built over many decades with crews, technicians and filmmakers trained to work in a very specific manner. For technicians this means working with production style cameras, grip rigs and high output lighting setups.
This legacy has also been established on the production side. Studios know what they will get when shooting with an Alexa, and producers are used to budgeting for gear in terms of an Alexa rental fee.
The entire industry is set up around working with high end production cameras and I don’t think that this will change any time soon.
However, what we may see is that features from these prosumer cameras - such as its high ISO base and smaller form factor - filter into the higher end cameras. And that this prosumer gear will increasingly be adopted across lower budget projects.
Then, eventually, as Moore’s law continues to take effect, we may find that productions will only need to work with a camera that can easily fit into the hand.

How To Use A Clapperboard The Right Way
Since I used to work as a 2nd AC for a number of years it was my job to use the slate or clapperboard on professional film sets. Let's go over how to use a clapperboard the right way.

INTRODUCTION
This little piece of equipment is perhaps the most iconic symbol in filmmaking, but it also has a number of pretty important practical purposes.
Since I actually used to work as a 2nd AC or loader for a number of years, it was my job to use this little guy on set.
So I thought I’d track down my old slate and provide a bit of an explainer as to what the purpose of it is, what all the information on the board means and go through the ins and outs of the real ways that a slate is used on an industry level set.
WHAT IS A SLATE?
The slate, sticks, or clapperboard are all names for this piece of translucent acrylic attached to a pair of wooden sticks that can go clap.
It has two main uses on a film set: synchronising the sound with the video footage and conveying information.
While broadcast, documentary or solo shooters may have a mic that records both sound and video footage as one single file, on an industry film set the footage is recorded on a cinema camera, while the sound is recorded separately on a mixer by a dedicated sound recordist.
A slate uses both a visual cue, the action of the sticks coming together, and an audio cue, the sound of the clap, as a reference marker for synchronising them together. Practically this means that editors can find the moment that the sticks collide, and the moment that the clap is heard, and use that as a starting point for both clips.
Now the video and the sound are in sync.
The second use of a slate is to give the editor information. All of the numbers, letters or even symbols that are written on the acrylic section of the slate in a black whiteboard marker are a way of passing on information to the editor.
Each shot in a movie has a unique series of numbers that identifies it, and places it within the order of the story. Properly labelling each take and having a system to find them is important because there may be hundreds or even thousands of different takes on a production.
Slate information allows the editor to both know which scene in the screenplay the shot fits into and gives each shot a label so that it can be talked about and identified by the editor, as well as correspond to any notes from the script supervisor or camera report.
On top of this, the 2nd AC may write additional information on the board, such as to notify the editor that VFX work is intended to be added to the shot or to convey the camera settings that were used.
There are two types of slates that can be used: a smart slate which has a timecode running on it, and a regular, old clapper board or dummy slate which can only use a clap to sync the sound. The timecode on a smart slate can be synchronised with both the camera and the audio mixer.
How this works is that the audio recording device will have a kind of digital clock that outputs an exact time in hours, minutes, seconds and frames - called timecode. The sound person will then ‘jam’ the timecode by connecting a timecode cable between the audio recorder and the smart slate. This sets the timecode on the slate to be exactly the same - frame perfectly - as the time on the audio recorder. The same is then done to the cinema camera so that all devices are running the same timecode as the audio recorder.
This means that every time the smart slate is opened on camera it displays a running timecode that can be synchronised perfectly to the same timecode as the audio recorder - thus syncing the footage - with the physical clap being a backup way of syncing the sound.
SLATE INFORMATION
When a screenplay is written, each scene will be given a number. The first scene is 1, the second scene is 2, etc. However, during the process of shooting, scripts are almost never shot chronologically.
So, to avoid confusion and to stay on top of what scene is being shot and when, it is labelled on the board with a scene number.
When the editor gets the footage they can then group all of the shots with the same scene number into the same bin.
Next we’ll move onto the slate. Most scenes that are shot will use multiple camera angles and lenses to cover the action. Every time that the camera moves onto a new shot size, angle, or switches a lens this is called a new slate, or slating up.
There are two systems for representing this: the US system and the UK system. The US system is probably the most common and uses letters to represent a slate.
For example, the first board for the wide shot on scene 26 will just say 26, with no letter. When the camera moves onto the second shot, a close up, the board will slate up to 26A, then when a third shot is filmed, the board will slate up again to 26B.
When speaking about slates we use the NATO phonetic alphabet: 26 alfa, 26 bravo, 26 charlie. Although sometimes 2nd ACs can also come up with creative names that start with the first letter of the slate.
You also usually skip the letters I and O, so that they aren’t confused for a one and a zero.
If shooting a VFX shot, this can either be written on the board or a V can be added before the scene number. The same can be done with an X to show that this was shot by a second unit, or with an R to indicate a scene that is being reshot. Different productions and different script supervisors may also use different letters or methods for communicating these cases.
The UK system uses numbers instead of letters. So the first shot of the production will be slate one, the next shot will be slate two, and this slate count keeps going up with each new shot setup or lens change until the production ends.
This means that you don’t always have to announce the scene number, only the slate number - although the scene number will usually also be written on the board.
Then, for each slate setup, usually multiple takes will also be recorded. This starts at one for the first take and keeps going up. Then when you change to a new slate you start over with take one again. So, an example of a typical board may read 26A, take three.
At the front we also have the roll number. This comprises a letter followed by a series of numbers. Each letter represents what camera shot this footage. If there is only one camera it will be called A cam. This letter goes up for every extra camera that is used. So if it’s a multicam shoot with one main camera, one Steadicam camera, and one action camera, the main camera will be A cam, the steadicam will be B cam, and the action camera will be C cam.
Then each card that goes into this camera, shoots and gets transferred to hard drive will be labelled with a series of numbers. So the first card shot by A cam will be A001, or the 112th card shot by B cam will be B112. If shooting on film, the same principle applies to each new roll of film that is used. So the 8th roll of film shot by A cam will be A008.
All of this information about the roll number, scene, slate and take will be recorded by the script supervisor along with any extra notes, such as what takes are good, what lenses were used for each shot, or what takes may have had lapses in continuity.
The board is also labelled with fixed information like the production company, title of the production, director’s name, cinematographer’s name and the date. Because this information doesn’t change much, it is usually either done using a printed label from a label maker, or handwritten with a permanent marker on tape.
HOW TO USE A SLATE?
When 2nd ACs do a slate they need to be as quick and as accurate as possible.
If you put the board into shot too early, it will block the framing and view of the camera operator. If you leave the board in shot too long while the camera is rolling then you are wasting valuable card recording time or film stock that is running through the camera.
What 2nd ACs do is carefully listen to the instructions of the 1st assistant director.
They will call ‘roll sound’, to which the sound recordist will press the red button and say ‘sound speed’. The instruction ‘roll sound’ is a good cue that it’s time for the 2nd AC to insert the board into the frame.
This gives the 1st AC a moment to pull the focus to the board so that it is sharp and can be read by the editor. Next the AD will say ‘roll camera’.
Once the 1st AC is ready they will press record on the camera and say ‘speed’ or ‘rolling’. Because the board is already in frame and sharply in focus when the camera rolls it means that the first frame that the editor will see for each take will be the slate. This helps the editor immediately identify the shot number without needing to search through the takes for it.
Once the 2nd AC hears the focus puller say ‘speed’ they can announce the board. If using the US system this means saying the scene and slate letter followed by the take: for example, ‘26 bravo take three’.
The focus puller’s I’ve worked for like to then say ‘mark’ or ‘mark it’ to confirm the camera is rolling, the board is sharp and it can be clapped. Then as soon as they’ve clapped the board, the 2nd will get out of the shot and duck for cover as quickly as possible.
Running through the whole process, it’ll sound like this:
‘Roll sound.’
‘Sound speed’
‘Roll camera’
‘Rolling’
‘26 alfa take three’
‘Mark’
*clap*
In most cases you want the clap to be quite loud so that it is clearly picked up by the boom and lapel microphones, but not to be deafening. Loaders also modify the strength of the clap depending on how close it is to the actors.
If shooting a tight close up and the board needs to be right in front of the actor’s face, it’s best to notify the boom operator ahead of rolling that you’ll do a soft clap. They will then get the mic close to the board and you can do a nice gentle clap in front of the actor’s face that doesn’t put them off.
For tight shots, some loaders carry a cute little insert slate which is small enough to be fully read in a close up.
If they fumble the clap or it is too soft to be picked up, the 2nd AC will then loudly announce ‘second clap’ and hit it again.
When positioning the slate in frame, you want it to be as readable as possible - not too small and far away or too large and close to the camera. The rule of thumb when shooting with a Super35 sensor is that the focal length of the lens should be equivalent to how many feet away from the camera the slate is. So, if using a 50mm lens, the board should be 5 feet away. If using a 100mm lens the board should be 10 feet away.
If shooting with anamorphic lenses or with large format cameras that have a wider field of view, the board can be placed a bit closer to the camera than this rule. Good loaders are able to place the board in frame without looking at a monitor based on knowing the focal length of the lens alone.
There are three different sound variations that can be done, all of which are signified a different way with the clapper board. The most common is sync sound, where the sound recorded is intended to be synchronised with the recorded footage. To convey sync sound, the clapperboard must always enter the shot with the sticks open, showing the editor that it’s meant to be clapped.
This is often incorrectly done in pop culture references where the board starts closed, then opens in shot and claps.
Wild sound means that sound will be recorded for the take, however this sound does not have to be synchronised with the footage. This is sometimes done when recording ambient noise or sound effects.
Loaders will write ‘wild’ on the board and this time either enter the frame with the board closed, or with their fingers holding the board between the sticks - this will allow the timecode on a smart slate to run, but indicates that the board will not be clapped.
Then there is MOS - which signifies that no sound will be rolled on this take. Again, a big MOS will be written on the board and the board will enter and exit frame closed - without a clap.
If multiple takes in a row will be done within a single roll of a take then the loader may write ‘series’ or put an arrow next to the take.
Next we have the end board. This is where either the 2nd AC is not quick enough to fetch their board and complete a front slate after ‘roll sound’ has been called, or if no board has been requested up front, such as if working with animals or children that may be spooked by a loud clap.
In this case, after ‘roll sound’ is announced, the 2nd AC will say ‘end board’ loudly at the beginning of the take. The scene will then play out in full. Just as ‘cut’ is called to end the take, the 2nd AC needs to quickly and loudly again announce ‘end board’. They will then quickly put the board in front of the camera with the sticks open, but in an upside down position, they will announce the board, ‘26 alfa take three, end board’, give it a clap, then spin the board so that the editor can read it.
Putting a board in upside down means that the board signifies whatever was previously shot. For example, if no slate was done on a take, then the board can be placed in frame upside down with the sticks closed, a new clip can be rolled, then the board is spun to the correct orientation. This signifies that this board is the label for the previous take.
If shooting with multiple cameras that can all be synced with one board, then the roll number of each camera should be written on the slate, such as A008 and B007. In this case the loader will say ‘alfa, bravo common mark’ before clapping.
If multiple cameras are being used and there is a 2nd AC for each camera, then each loader will announce their camera, in alphabetical order before clapping. For example, ‘26 apple take three alfa mark’, ‘bravo mark’.
Finally, if a director decides that they only want to record a small portion of the scene, such as a specific line, then P/U will be added next to the take which stands for pick up. This will be announced as ‘26 alfa take three pick up’.

How LUTs Can Elevate Your Cinematography
Let's explain the colour workflow process, what LUTs are, and how they can be used to improve the look of your footage.

INTRODUCTION
If you’ve ever shot something in log and accessed that raw footage straight from the card, you’ll know that it looks extremely flat and visually unappealing. But don’t panic.
This is because that log footage needs to be processed through a specific colour workflow in order to elevate how it looks. Part of this workflow involves using what is called a LUT.
If you’ve at all dived into the YouTube rabbit hole of LUTs, you may have been left a little confused, with the added expectation that I will start trying to sell you my special LUT pack straight after the intro…Don’t worry I won’t.
Instead, I’ll try to provide an overview to clearly explain the colour workflow process, what LUTs are, and how they can be used to improve the look of your footage.
WHAT IS A LUT?
The reason that cinematographers choose to shoot in RAW or with a flat colour profile is that it offers the most colour flexibility in post production, with the widest dynamic range.
Shooting with a colour look already applied or baked into the footage that comes out of the camera leaves minimal room for colour correction to be made or a different look applied to the footage later.
While shooting in a flat colour profile, means that you can later alter the look of the colour and exposure to much a greater degree, manipulate the image and easily make any colour corrections, like changing the white balance, or the exposure without the footage falling apart.
This is all well and good, but what does this have to do with LUTs and what are they?
LUT stands for ‘lookup table’ and is a way of adjusting the colour and tones in an image. The way I like to imagine a LUT in my brain is in terms of layers.
At the bottom layer we have the raw footage that is recorded by the camera. When you download the footage from the card onto a hard drive this is what you will get. As we mentioned, when working with cinema cameras, this is usually recorded in a flat, desaturated colour profile.
A LUT is an extra layer that can be applied on top of the bottom layer. This LUT transforms each pixel’s colour value to give the footage a new look. Different LUTs can be created that output different looks: such as a more standard, natural look, a warm, romantic look, or a look that tries to emulate a film stock.
The reason that I like to think of the raw footage and the LUT as separate layers, is because when using a cinema camera, the LUT is not baked into, or combined with the raw footage. Rather the flat footage is recorded onto the card, while the LUT exists as a separate file that can be applied to the footage or deselected at will.
Because the raw footage is so flat it is difficult to judge things like exposure or colour temperature by using it as a reference on a monitor. To get around this, cinema cameras can apply a LUT as a reference on top of the raw footage that the camera will record, so that the cinematographer can better imagine the final image.
If this same LUT is later applied on top of the flat, recorded footage during the colour grade in software such as Da Vinci Resolve, then the image will look the same as how it was viewed on set with the same reference LUT.
Alternatively, different types of LUTs, other than the reference LUT that was used for exposure on set, can also be chosen and applied on top of the raw footage in the grade.
If there is a colourist, they may choose to either use a LUT as a starting point for the grade and then make additional colour corrections on top of that, or they may prefer to start from scratch and build a new look during the grade.
3 WORKFLOW LEVELS
Before I discuss the way in which LUTs are typically used by filmmakers in the industry on movies, series and TV commercials - I think it’s important to address the common colour workflows that are used across three different budget levels: from solo shooter-level, to mid-level, to industry-level.
Starting at the solo shooter level, such as wedding videographers - many people within this bracket have their own cameras and also edit and grade the footage that they shoot.
Having the ability to completely control how you want the colour in your image to look at this stage is fantastic - as you can deliver the grade exactly as you imagine it.
However, there’s sometimes a bit of a misconception that a LUT is this magical colour-thing that can be downloaded online then thrown on top of your footage like a filter when you’re editing to make your footage ‘cinematic’.
While this sometimes works, the issue with applying a LUT after you’re already shot all the footage comes down to intention and control. What you want to also be doing is using that same LUT that you use in the colour grade to also monitor how your colour and exposure looks as you’re shooting.
That way you will be able to correctly expose and light the footage in a way that suits the LUT, rather than shooting footage, applying a LUT in the edit and then seeing that you’ve underexposed, overexposed, or lit with an undesirable white balance.
You want to shoot the footage to suit the LUT, not grade the footage to suit the LUT.
Once you start shooting more mid-level content, such as for broadcast TV, you may find that although you shoot the footage, that footage will now get handed over to an editor, and sometimes go through an online edit, which will be done quickly and which you often have no input in.
The next time you see the footage after you’ve shot it is usually when it is broadcast. In my experience this can sometimes go OK, and other times go disastrously wrong - especially if the online editor just throws a random LUT over everything.
Therefore, what I’ve started doing, to try and regain control back over the look of what I’ve shot, is to expose with a LUT that I’ve created in Resolve, get it as close as possible to the final look that I want on set, then hand over that same LUT file to the editor to use as the base look. They can then make small colour corrections if necessary - which saves them time and at the same time preserves the look that you want.
Finally, at the high-end industry level, particularly on long form jobs, cinematographers often regain most of that control of the colour back. This is because there is now money to spend on a proper colourist, who can help get the footage to the look that you and the director imagine.
INDUSTRY COLOUR WORKFLOW
Before filmmakers transitioned to using digital cinema cameras, productions were shot, processed and printed on film. It was the job of the cinematographer to choose which film stock worked best for the job and how that film stock should be processed, colour timed and printed at the lab. This all determined the ‘look’ of the footage.
After the digital intermediate and digital cameras were introduced as the norm, some of this control of the colour and ‘look’ of the footage was taken away from cinematographers - especially if they weren’t allowed to participate in the colour grade.
In recent years many cinematographers have tried to regain control of the look by using a workflow with LUTs that treats them more like you would a film stock back in the day - by exposing with the LUT on set rather than plonking a look onto the footage in post production.
That way they can get as close to the final look of what they want while they are shooting. They can do this by getting a colourist to create a custom LUT for the film before shooting begins.
“The process for me in prep is how close can I can get things ready so that when we are shooting we’re delivering the best product. You know, we start talking about colour - a lookup table, a LUT. You know, I believe the future is creating the strongest negative you can on set.” - Andrew Wehde, Cinematographer
Earlier we talked about the idea of a LUT being like an extra layer that’s applied on top to enhance colour, well, there are also a few more nuances to the colour workflow.
Before adding a look or a LUT, the flat files that come straight from the camera need to use colour processing to be converted to the correct colour space. The most common colour space is Rec 709. This adds saturation and contrast so that the colour looks normal or realistic.
In grading software this is often called doing a colour space transform by inputting the colour space of the camera files - such as Arri Log C - and then choosing the output colour space that you want - such as Rec 709.
Now that we have the footage in the correct colour space we can add a LUT layer or a look to the footage. On professional cinema cameras this can be done with either a 3D LUT or what is called a CDL - a colour decision list.
A CDL is basically a way of tweaking the colour on set as you shoot, by doing things like adding a tint, or controlling how much colour is in the shadows, midtones or highlights. This is usually done using live grading tools on a DIT cart.
“For about two years now I’ve been working on on set colour and trying to deliver my on set dailies to be as close to final as possible. So I’m doing a large amount of on set adjustments. I have a panel so that I can do my highlight and shadow control, I can do full individual colour channels for high, medium, low and I have tint adjustments. I‘m basically pushing the CDL as far as possible. The Bear season two, what you see on TV is my delivered CDL. That’s the first time I’ve proven I can do final colour on set with minor adjustments.” - Andrew Wehde, Cinematographer
His DIT can then create proxies using the look he’s created on set, which are used for editing and passed all the way down the post production pipeline - retaining his look.
Other methods I’ve seen cinematographers use, without live grading tools on set, is to either expose with a specific LUT that their DIT will use to create the proxies, or to get their DIT to grade their dailies on set with software like Resolve, before they create proxies with that look.
Sometimes the DIT will carry an iPad which they can export graded stills to that the DP can view, get feedback on and approve on set before the proxies with that look are created.
Whatever method is used, I think it’s good to at least have some idea about the kind of colour look you want to create before you start shooting. I personally really like this new trend of DPs trying their best to maintain as much control over the look of the colour that they can by using a CDL or a LUT - both when exposing the footage on set as well as when finishing it during the grade.
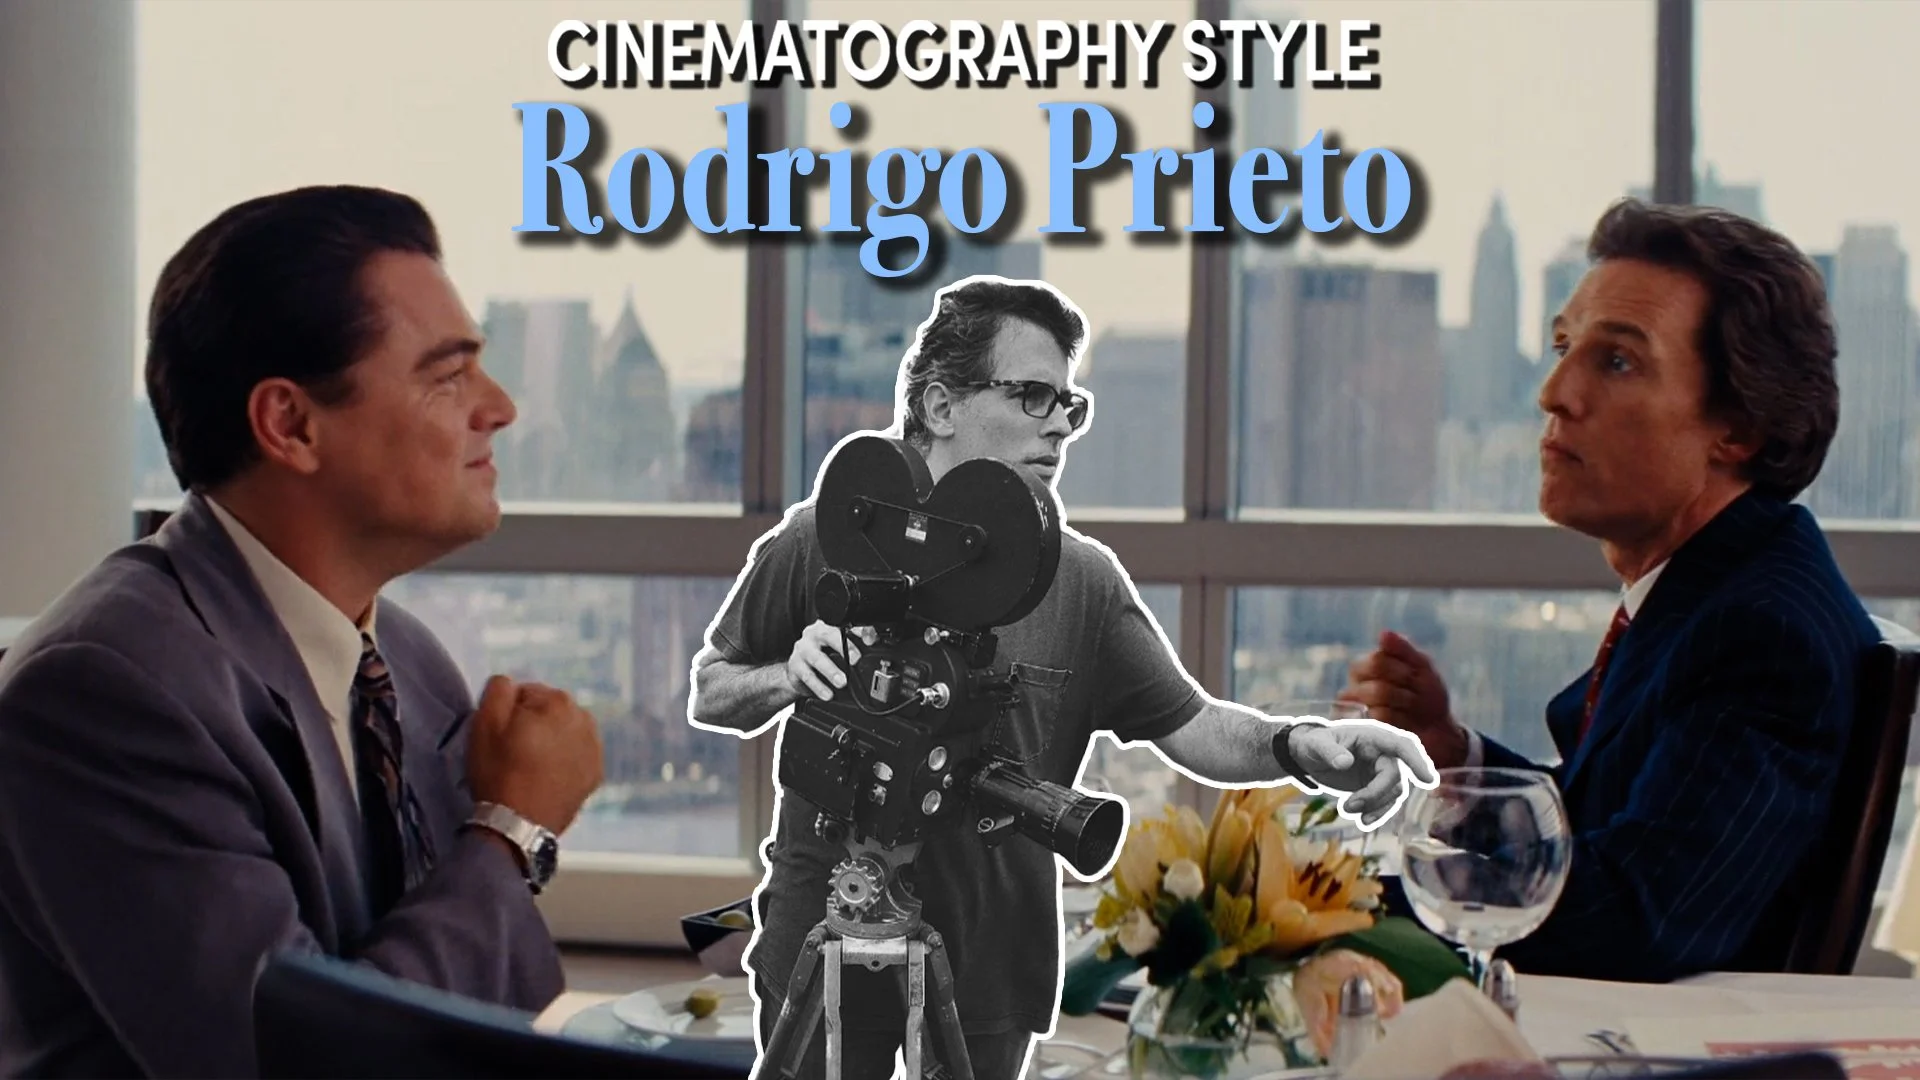
Cinematography Style: Rodrigo Prieto
Let’s dive into how Rodrigo Prieto’s philosophy on image making affects the camera and pick out some of the film gear he uses to create his masterful images.

INTRODUCTION
If you put together a list of some of your favourite working directors of the last two decades, there’s a decent chance that Rodrigo Prieto has shot for one of them: Martin Scorsese, Spike Lee, Alejandro Iñárritu, Greta Gerwig, Oliver Stone…the list goes on.
Although his cinematography spans decades, it often contains a deliberate use of rich saturated colours, a widescreen aspect ratio and visually bold decisions, which are always focused on presenting a subjective view of the character to the audience.
So, in this episode, let’s dive into how Prieto’s philosophy on image making affects the camera and pick out some of the film gear he uses to create his masterful images.
PHILOSOPHY
“I try to make the cinematography subjective. And that’s in every movie, really, I do. I try to make the audience, as much as possible, be in the perspective of the character. That is not only literally the camera angle being in the POV of a character. It’s more making the camera behave, and the lighting, and everything about it - the texture and the feel of the movie - behave like the main person we’re following.” - Rodrigo Prieto
The idea of creating images that put the viewer into the shoes of the protagonist is one of the underlying philosophies in his work. For example, how do we visually convey a character’s progression from a naive, straight laced graduate to an excessive, risk taking, paranoid white collar criminal.
The camera could start by moving with a smooth, steady motion, under a well exposed light, and later shift to a rough, raw, handheld aesthetic with harder light and stronger shadows.
Or, if we take another story, how do we visually present a series of interweaving timelines and narratives so that the audience doesn’t get too confused?
You could do it by using a different colour cast for each different character arc. Using more sickly, cooler tones for a man in need of medical care, and a much warmer palette for a man trying to hold his life together through his faith.
Or, how do you put the audience in the shoes of a disorientated warrior during a surreal, near death experience during a battle?
How about by radically shifting colour out of the bounds of reality.
You could pick apart each and every one of the film’s he shoots in this way and uncover a philosophical rationale behind the often bold visual decision making that supports the story.
It’s more about creating a feeling and a tone that is representative of a character’s state of mind than it is about shooting from the physical POV or perspective of the protagonist.
Each director he works for brings a different artistic sensibility, however the camera’s subjectivity is always present.
“Every director is completely different. For example, Ang Lee is very precise and also very methodical. And he likes to pick the focal length of the lens. And he talks to me about the framing and composition. He’ll look through a viewfinder and tell me have that corner of that window in frame and this and that, you know. Oliver Stone thrives in chaos. So every time I say, ‘Oliver we have this problem with the camera’, there’s a bump in the dolly, whatever, he’d say ‘Rodrigo Perfect is the enemy of good.’ And Scorsese is maybe a mix of both. He’s very precise in the shot listing he designs and he has a very good idea of the energy he needs the camera to have. But he also leaves space for improvisation by the actors and for new ideas to come.” - Rodrigo Prieto
Being able to adapt to how different directors work is an important skill. Cinematographers should be able to offer both their technical skills and practical advice on how to achieve a desired look or an unconventional shot, as well as lighting each scene.
Some director’s like to maintain more control over how each shot is composed, while other director’s may just describe a tone or feeling that they want to achieve and then leave room for the DP to offer their own ideas and suggestions as to how to achieve that.
When working with directors that like to maintain creative control over small details, it helps to build up a trust in their visual sensibilities and accept the challenge of focusing on the lighting and technical execution of the shots.
Sometimes it may also be necessary to surrender control of minor visual details in order to capture better performances.
“The performances were the essential thing in this film. So, you know, I had to compromise sometimes the possibilities of the lighting to be sure that we captured the performances of these amazing actors.” - Rodrigo Prieto
On The Irishman, this meant embracing the decision to use multiple cameras to cover dialogue scenes - which allowed them to get greater coverage of the performances.
The reason this may compromise cinematic choices is because the more pieces of gear that you place within a set, the more you limit the kind of angles you can shoot, or the space that you can place light without it getting blocked or seen in a shot.
To further complicate things, they had to use an interesting but cumbersome rig that actually accommodated three cinema cameras in order to de-age characters.
GEAR
This 3-D rig consisted of a Red Helium that could shoot high res, 8K files that could later be used for VFX work. This camera was placed in the centre of the rig and captured the actual shot and frame that they would use.
Two, special infrared Alexa Minis were then placed alongside the capture camera as ‘witness cameras’ that also had an infrared ring light to neutralise shadows that could only be picked up by the Minis and wouldn’t show up on the recorded Red image.
They could use these reference clips with the recorded clips and combine it with some AI and machine learning, powered by a NVIDIA GPU chip, to de-age the actors.
Prieto got his camera and grip team to reconfigure this large rig and made it more modular so that the ‘witness cameras’ could be moved around to either be alongside the main camera or at the top and bottom. This allowed them to use this hefty setup on a variety of grip rigs.
Prieto’s photographic decisions are often bold, and use colour expressively. Across his career he has manipulated colour in different ways as the technology has progressed. He’s done it photochemically with film, by using a combination of film and the digital intermediate, as well as with digital cameras and the colour grade.
Let’s compare some of the techniques he’s used - starting with film.
The most common way of shooting on film, is to use a colour negative stock and expose and develop it normally. However Prieto has often experimented with different stocks and development methods.
For example, on Alexander he used the rare Kodak Ektachrome 2443 EIR stock. Sometimes called Aerochrome, it is sensitive to infrared light and displays colour in unusual and often unpredictable ways: turning greens to red, purple or blue. He rated this stock at 125 ISO and used an ND0.3 and a Yellow No. 12 filter to make the effects of infrared light more intense.
Another technique he used in many films, such as Amores Perros, is a type of development called bleach bypass processing. During the processing of film in a lab, the step of bleaching the film is skipped. This results in a black and white layer that is overlayed on top of the colour image, which reduces the saturation of colour, but increases both the contrast and film grain - creating a raw, gritty look.
Instead of doing this technique photochemically on Babel, he did it in the digital intermediate. In other words he processed the film normally, then added a half bleach bypass look to the film in the colour grade.
This allowed him to control the intensity of the look, creating colour that was somewhere in between a bleach bypass and regular development.
As the technology has shifted more towards digital, he’s been able to do everything digitally instead of photochemically: from picking the look of a stock to choosing a development method, all within the grade.
On The Irishman, he chose to differentiate the time periods by applying different film emulation LUTs to both the digital and film footage from different eras: a Kodachrome look for the 50s, an Ektachrome look for the 60s and a bleach bypass development look for the 70s onward.
You can see how foliage looks different across these looks: including deeper shades of blue and stronger contrast in the shadows for the 50s, a bit of a warmer look in the 60s, and a very destaurated but high contrast look from the 70s onward.
He’s used many lenses over the years, but has often reverted to shooting in a widescreen format with anamorphic glass, such as the Hawk V-Lites, the Arri Master Anamorphics or Panavision G-Series.
Prieto also likes using Arri cameras, whether that is the Arricam ST or LT when shooting on film, or on variations of the Alexa when shooting digitally.
Another example of how he uses colour can be found in how he lights night interiors and exteriors. He often uses quite a classic technique of creating alternate planes of colour in different parts of the image. Specifically, he likes to create pockets of warm light indoors and then place cooler, blue sources of light outside of windows. This creates increased colour contrast and more depth in the frame.
CONCLUSION
Although he often paints with lots of colour and quite strong visual techniques, it is always done deliberately. Prieto uses the technical tools at his disposal to craft images that create a mood that mimics that of the main protagonist.
Whether that’s through his use of colour, lighting or camera movement.
The cinematography remains subjective and deliberate in a way that subtly or sometimes not so subtly helps to support the story.

Cinematic Lighting Vs Natural Lighting
In this video I’ll show you two different lighting setups for two different looks and compare how you can get away with using only natural light, or how you can elevate that look a bit more by supplementing natural light in a motivated way.

INTRODUCTION
You may think that cinematography would be all about using a camera. However, the most important part of a cinematographer’s job is actually lighting.
Scenes are lit to: create a look that tonally suits the story, to provide a consistent source of illumination that doesn’t change or effect continuity, and to give the camera enough light to be able to properly expose.
In this video I’ll show you two different lighting setups for two different looks and compare how you can get away with using only natural light, or how you can elevate that look a bit more by supplementing natural light in a motivated way.
MOTIVATED LIGHTING
Lighting can take two forms. It can be more expressionist and exaggerated, to completely elevate the footage out of the real world. Or it can be naturalistic, where, although artificial lights are used, they are used more subtly in a motivated way to keep the story within the bounds of realism.
Today we’ll focus on creating a naturalistic look by using motivated lighting. What exactly is that?
Motivated lighting involves first examining the natural light sources that are present in the space and then placing additional artificial film lights to supplement the natural light.
Or, sometimes, if a source doesn’t exist, cinematographers will create an imaginary motivation for it in their head (outside of the frame of the shot) and then add artificial light using that idea.
There are three things to consider when lighting in this way: the direction of the light, the quality of the light and the colour of the light.
Let’s keep these three factors in mind when we go about creating two different looks: a brighter illuminated high key look and a more shadowy low key look.
HIGH KEY - NATURAL

Let’s start by showing how we can create a high key look - without many shadows on our subject - using only the natural available light.
When only using ambient light in a space, it’s very important to be aware of what the natural light is doing.
I chose to shoot the natural light look at a specific time in the morning where the sun was still low enough in the sky that it would angle in I through the main window in the space. I checked the forecast beforehand and made sure it was a sunny day. Light scouting, weather observation and scheduling is very important when dealing with only natural light.
Next we need to think about direction. In this room the main source of light comes from a large window on the side and a smaller window from the back.
Another important part of natural lighting is how you position the subject. Rather than placing her so that she is directly in front of the window and the light source is totally front on and flat, I’ve positioned her so that she is side lit by the sun coming through the window.
Also, placing the main source of light directly behind the camera is normally not a good idea as it may cast the shadow of the camera onto the subject.
This positioning of the subject means the natural light comes through and creates contrast on one side of the face. Also this little window provides a small backlight which separates her from the background.
Now that direction is sorted we can focus on the quality of the light. I’ve used a muslin curtain to diffuse the intensity of the light, softening any shadows, and reducing the brightness of the illumination outside the window.
When setting the exposure level for a high key look I’ve focused on the illumination of the skin by increasing exposure - in this case with an ND filter - until I’m happy with the level of light on the face. This may mean that the area by the window blows out a little bit - or turns to pure white - which isn’t ideal but we can’t control that. Not without lights anyway.
Finally, the colour of our light is that of the natural sun - which also can’t be changed. One reason I usually don’t turn on any overhead house lights when using natural light is because mixing the colour of artificial warmer ceiling bulbs and natural daylight may throw off how colour is recorded.
So there we go, a high key look using only natural light.
HIGH KEY - CINEMATIC

One reason that DPs use lights to still create a naturalistic look is because of this curtain in the background. It’s a bit blown out. In other words the natural light from outside is much too bright and turns to white, lost information. This is not pleasing to the eye.
So to create a better look I will start by setting the exposure of the camera so that it is balanced to the light in the background by only looking at this window. Now it’s not blowing out, however, it’s much too dark to be a high key look.
So, we need to add light. Let’s start by thinking about direction.
Our strongest source of light is coming from the window - we’ll call this our key. Then some of that lighting from the window is coming inside and bouncing back as a soft ambient source - we’ll call this our fill. Then, finally, ambient light from that little window is hitting the back of her head - we’ll call that our backlight.
Using three light sources in this way is called three point lighting.
Now that we’ve identified where the light is coming from, let’s add film lights that mimic the direction of the natural sources.
With our lights on hand, let’s think about the quality of the light that we want. Because the sunlight coming through the big window is strongest we’ll put our biggest light there - a Nanlite Forza 500B II.
The sunlight coming through the window has been diffused by the curtain and is nice and soft, so we’ll do the same and add a softbox, with a layer of stronger diffusion in front of it to soften it as much as possible. I’ve also added an egg crate grid to it which controls the spread of the light, focusing it more directly on our subject and preventing it from spilling everywhere.
Next, we’ll take our second strongest light, a Forza 60B, and use it to recreate some of the natural ambient fill light. This we’ll also diffuse and make nice and soft by using a lantern. This creates more of a soft spread of light. As you can see here it hits the little plant on the table. This mimics the spread and quality of natural ambient sunlight bouncing off a wall.
Finally I rigged a little tube light on an extended c-stand arm as a backlight. This ever so slightly adds to the feel of the light coming from the back window.
Now, for our third variable: colour. To me, the brightness of high key lighting feels like it would go well with a warm, morning look, so I cranked all the colour temps on my lights to 5,000 Kelvin - which is just a bit warmer than normal sunlight.
The 500B also comes with a cool new feature of being able to adjust the amount of magenta or green tint to the light. So I added a bit of magenta which to my eye helps give a warmth to the skin tones.
And there we have it. A high key look - this time with added artificial lighting that should still feel quite natural.
LOW KEY - NATURAL

Let’s take away those lights and create a new low key look with only natural light.
Rather than being bright like the high key look, low key lighting accentuates shadows and darker tones and usually has an overall higher contrast between areas of light and shadow.
Since we’re not allowed to use any lights we’ll keep the same positioning, quality and colour of light as before. However, we are going to change our overall exposure.
To prevent those window highlights from blowing out like they did for the high key look, we’ll lower the exposure using an ND filter on the front of the lens, until we can still read information on the window and it’s not blown out.
This leaves the frame looking much moodier than before, even though the only change made was in exposure, not in lighting.
This creates plenty of shadows across the frame, which may work as a nice look for some stories, however may be a bit too dark for others.
LOW KEY - CINEMATIC

So, let’s see if we can’t find a middle ground between the very shadowy low key, natural light look and the high key look - by introducing some film lights.
We’ll use almost the same placement for our key light as before. But this time, instead of being more in front of the character, we’ll bring it around a little bit more until it’s right on the edge of the frame and is lighting more from the side.
This will create just a little bit more contrast, as less light will fall on the side of her face nearest to the camera.
We’ll go ahead and turn on the same backlight as before. However, this time, we’ll leave our fill light off.
If you compare the high key lighting shot that uses a fill light and the low key shot without one you’ll see that not illuminating the one side of her face creates a gentle shadow on the side that favours the camera - therefore creating more contrast.
Because I’ve moved the key light around, there is less light that spills on the wall behind her, which also makes it feel like more of a low key look.
On top of this, there is a slight difference in colour. Because the low key look is a bit moodier, I cooled down the colour temperature on my fixtures from 5,000K to 6,000K.
So there we go. A low key look that was achieved with motivated lighting, by simply eliminating the fill.
ADVANTAGES OF USING ARTIFICIAL LIGHT
Four different looks: two created without any lights and two created using artificial sources. Lighting is always subjective and should change depending on the nature of the story you are telling.
This look may be better suited for commercial applications, while this look works for a film with more dramatic content.
But besides the look, what other advantages does using lights provide? Perhaps most importantly using lights creates a consistent look, which will hold up for much longer periods of shooting.
If it takes a couple of hours to shoot a scene using only natural light, the look of the ambience may have completely shifted as clouds came over, or the sun got flagged by a building. This means that the consistency and continuity when cutting to different shots will be off.
Using film lights means that even if the natural light changes, the artificial light should maintain the continuity of the look, which means you will be able to shoot for longer.
Also, relying purely on natural light means you have limited to no control over the look of the image. For this video I could pick a day and a specific time where I knew we would get strong sunlight, but that isn’t always the case. If you need an interior to look warm and sunny, but it rains that day and you don’t have any lights, then there’s not much you can do.

2-Perf vs 3-Perf vs 4-Perf: 35mm Film Formats Explained
By far the most popular film format is 35mm. But what you may not know is that there are then 3 further format choices that need to be made between: 2-perf, 3-perf or 4-perf. But what is a perf and how does it affect both the budget and how the footage looks?

INTRODUCTION
The starting point when it comes to choosing which format to shoot a movie on is between digital and film. If film is selected, by far the most popular film format is 35mm. But what you may not know is that there are then 3 further format choices that need to be made between: 2-perf, 3-perf or 4-perf. But what is a perf and how does it affect both the budget and how the footage looks? Let’s find out.
WHAT ARE PERFS?
The manner in which a piece of 35mm film is exposed is determined by the negative pulldown. This is described in what are called perfs. Perfs stand for perforations and are the little holes that you see in the film that span the length of each individual frame.
These holes align with sprockets, which turn in order to mechanically pass an unspooling roll of film vertically through the camera. The film is exposed when it is hit by light which is let through the lens.

35mm film frames can be shot with either four vertical perfs, 3-perf, or 2-perf. As the width of a 35mm frame is standardised to a size of 24.9mm, the number of perfs only effect the height of the frame that is recorded - with 2-perf capturing the skinniest surface area, and 4-perf capturing the tallest surface area.
Exposing a larger area of film to light is kind of like the digital equivalent of recording at a higher resolution - the larger the area the more clarity and higher fidelity it will be. However, the larger the exposure area, the more film needs to be used and the more you will need to pay for film stock and development. So perfs affect both the cost of shooting as well as the quality or fidelity of the image.
The motion picture camera that is used must be specifically set to record frames with a certain number of perfs by adjusting the speed at which the film runs through the camera as well as the height of the gate that lets through light. Most cameras can record either 4-perf or 3-perf, while only specific cameras can record 2-perf frames.
There are two different steps to the filmmaking pipeline. Capturing images on film with a camera and projecting those images on film by passing light through them.
Image capture can happen on either 4, 3 or 2-perf, however 35mm film projectors are set to work with a 4-perf film print. This means that if you capture film in 2 or 3-perf, you would still need to print the final 35mm projection roll in 4-perf frames.
However, now that digital projection has taken over, it’s possible to capture 35mm in either 2, 3 or 4-perf, scan the film negative and then work with the scan in the same way as a digital file - which can later be sent out to cinemas that use a digital projector or for online distributors to upload the file and stream it digitally.
4-PERF
In the late 1800s and early 1900s when motion picture film technology was undergoing development, 4-perf 35mm film capture and projection emerged as the industry standard. This produced a tall aspect ratio of 1.33:1.
4-perf offers the largest exposure area of 35mm film at 18.7mm tall. Because more surface area is used the film grain will be smaller and the image will be of a higher quality.
This large surface area also allows lots of possibilities for aspect ratios. When shooting Super35 with normal sphercial lenses the frame can be used for taller aspect ratios like 1.33:1 or the top and bottom can be cropped to get widescreen aspect ratios like 1.85:1 or 2.40:1.
Before digital, this crop would have been done by printing the final film to a different ratio with a letterbox, or by using a narrower plate that chopped off the top and bottom of the frame when projecting. Now this can be done by scanning the negative and using software to crop the image.
4-perf can also be used with anamorphic lenses. These lenses squeeze the image by a factor of 2, to around a 1.2:1 aspect ratio, so that it is captured as a tall, compressed film frame. It is then later de-squeezed by a factor of 2 to get it to a widescreen 2.40:1 aspect ratio.
Because this method uses such a large portion of the tall 4-perf frame, anamorphic negatives have a higher fidelity and low amount of grain.
Another advantage of 4-perf is that when shooting Super35, the extra recorded area on the top and bottom of the image, that will be cropped out, can help with VFX work, such as tracking.
A disadvantage of 4-perf is that more film must run through the camera faster, which makes it noisier. This also means that it uses the most film out of the 35mm formats, which means more money must be spent on buying film stock and developing it.
It also means that a 400’ roll of film will only be able to record for a mere 4 minutes and 26 seconds, before a new roll must be reloaded into the camera.
3-PERF
In the 80s, cinematographer Rune Ericson collaborated with Panavision to produce the first 3-perf mechanism for 35mm cinema cameras.
Shooting each frame 3 perforations tall as opposed to 4, produced a less tall frame with a height of 13.9mm and an approximate aspect ratio of 16:9.
When shot with spherical lenses this negative could easily be ever so slightly cropped to get to a 1.85:1 aspect ratio, or more cropped to get to a 2.40:1 aspect ratio.
Because of the lack of height of the frame, 3-perf wasn’t suitable for using 2x anamorphic lenses, as it would require too much of the frame width to be cropped and therefore go against the point of getting a high quality anamorphic image. Therefore, 3-perf is best when used with spherical lenses.
However, it is possible to use the much less common 1.3x anamorphic lenses with 3-perf film, as they squeeze a 16:9 size negative into a widescreen 2.40:1 aspect ratio.
Due to the decrease in recording surface area, grain will be slightly more prominent in the image than when using 4-perf.
The main reasons for shooting 3-perf rather than 4-perf are financial and practical. 3-Perf uses 25% less film - which means a 25% reduction in the cost of both film stock and processing of the film at a lab.
It also means that the camera can record for 33% longer than 4-perf. So a 400’ roll gives a total run time of 5 minutes and 55 seconds before the camera needs to be reloaded. This is practically useful especially when shooting during golden hour or in situations where taking the time to reload a camera might mean missing a shot.
2-PERF
2-Perf, first called Techniscope, gained popularity in the 60s when it was used to shoot lots of Spagetti Westerns. These movies were often done on quite low budgets, yet wanted a wide 2.40:1 aspect ratio to frame the characters in sweeping landscapes.
2-Perf does this by further cutting down on the vertical recording height of the negative, taking it to 9.35mm, creating a native widescreen aspect ratio.
At the same time, this reduction in frame size also equates to a reduction in the amount of film that needs to be used. Since it is about half the height of 4-perf, about 50% can be saved on purchasing film stock and processing film. Therefore 2-perf was a great solution to both save money and create a widescreen aspect ratio.
It also basically doubles the recording time of each roll, allowing you to get 8 minutes and 53 seconds with 400’ of film. This means that it’s possible to either roll for longer takes, or that many more short takes can fit on the roll before needing to reload the camera.
Because it is so skinny and lacks height it’s not possible to use this format with anamorphic lenses - not that you would need to since you get the same aspect ratio by using spherical lenses.
It’s also only really suitable for using this aspect ratio, as getting a taller ratio would require cropping into the image far too much and increase how the film grain looks significantly.
Although it has the same ratio as anamorphic, it has a different look. Because the surface area is much smaller than 4-perf, the grain shows up as much more prominent.
In the modern era where film stocks have become much finer grain and cleaner looking some cinematographers like using 2-perf to deliberately bring out more filmic texture and make the footage feel a bit more gritty.
I’d say 2-perf 35mm is basically a middle ground between a cleaner 4-perf 35mm look and a grainier 16mm gauge stock.
CONCLUSION
How many perfs you choose to shoot on has an effect on a number of factors.
4-Perf records onto a greater surface area, which looks cleaner, with less grain, can be used with both anamorphic lenses, or spherical lenses, and has room to crop to different aspect ratios.
However, this comes at a higher cost, with a camera that makes more noise and very short roll times.
On the other hand 2 and 3-perf, use less of the negative, which makes the image a bit grainier, isn’t compatible with 2x anamorphic lenses, and limits the amount of taller aspect ratios you can choose from. But, it’s much cheaper and the camera can roll for longer.
In this way, the choice of 35mm film format, is another technical decision which filmmakers can make that effects both the look and feeling of the image, as well as providing certain technical limitations and advantages.

What Directors Do Vs What Cinematographers Do
How much of the look of each film is created by the director and how much is the look influenced by the cinematographer?

INTRODUCTION
In modern cinema the authorship of a movie is always attributed to the director. And much of a movie is made up of how the visual information is presented in shots.
However, most directors don’t directly operate a camera, pick out the camera gear or determine how each scene is lit. This is usually overseen by the cinematographer, otherwise called the director of photography.
This begs the question: how much of the look of each film is created by the director and how much is the look influenced by the cinematographer? The answer is…well, it depends.
Some directors like Stanley Kubrick were famous for having a large hand in the cinematography choices - from framing and shot selection all the way to picking out what individual lenses would be used.
While other directors may be far more concerned with working on the script and the performance of the actors, and leave many of the photographic choices up to the DP.
Normally though, the answer is somewhere in between these two extremes.
VISUAL LANGUAGE
In order to determine the authorship of a film’s look, it helps to define all the individual elements and creative choices which go into creating a visual language.
Each frame is due to a compilation of choices. This includes: what shot size is used, how the shot is angled and framed, how the actors are blocked within that frame, the arrangement of the production design and what is placed in front of the camera, the choice of medium and aspect ratio, how the camera moves, the choice of lens, how it is lit, graded, and how each shot is placed next to each other and paced through the editing.
There are no doubt other creative choices that also go into creating a visual language, but these are some of the main ones to think about.
Although some directors and some cinematographers may have a hand in guiding each one of those choices, many of these decisions are controlled more strongly by either the director or the DP.
CREW STRUCTURE
The decision making process on a film set is similar in many ways to how a company operates. It is headed by the director, the CEO, who manages an overall vision and direction, and has to make lots of small decisions quickly to manage the project of making a film.
Below the director are other ‘executives’, who also have a large impact on the film, but who occupy a more specialised role. For example the producer, or CFO, who focuses more on the niche of the finances.
Or the cinematographer, the CTO, who is responsible for overseeing how technology is used to capture the film.
Then there are loads of other department heads that occupy leadership roles that are increasingly specialised: like the production manager, or the focus puller.
This analogy isn’t perfect but you get the idea. So, let’s unpack this a bit further by breaking down what a director does versus what a cinematographer does and which visual decisions each is usually responsible for.
WHAT A DIRECTOR DOES VS. WHAT A DP DOES
Creating shots and shot sizes is hugely important in establishing the look. Typically directors and cinematographers collaborate on this, but I’d say more often than not director’s have a stronger say in this, especially in the more structured world of TV commercials - where each shot is storyboarded ahead of shooting.
On larger Studio series or films where shooting time is quite expensive, many directors will create a storyboard in pre-production, which will be passed on to the DP when they come onboard.
Even on less expensive movies directors often like to use this technique to express their vision, keep to schedule and not overshoot a lot of coverage. For example, the Coen brothers are known for using storyboards and being quite particular about each frame which is shot.
However, other directors, such as Steve McQueen, prefer to work in a more collaborative fashion, coming up with shots with the DP and choosing how they want to cover scenes once they are in the location with the actors.
Choosing whether to move the camera and how to do so is built into this decision about creating shots. Often directors will determine what kind of camera moves they would like to build into the shots, such as a push in, or lateral tracking motion.
The cinematographer will then take those ideas and work out the best way to practically execute those moves: whether that be with a gimbal, a Steadicam, a dolly or handheld on a rickshaw.
In other words taking the overall tonal direction and making it happen practically.
Which lens, particularly which focal length is chosen, has an effect on how the shot looks. This is an area where the cinematographer usually controls this choice more than the director.
However, some directors may like to lean into using particular lenses for a trademark look, for example the Safdies have often used long, telephoto lenses on their films, which helps elevate the tense, voyeuristic tone.
While in other cases the cinematographer may bring a look to the table based on their lens selection, such as Emmanuel Lubezki’s work, which is known for using extremely wide angle lenses close up to characters. He’s used this technique in different films, working for different directors.
Blocking, or how actors are placed or moved within a scene, is a visual component that is also entirely determined by the director in most cases. They will work with the actors and walk through the scene, while the cinematographer watches and thinks about camera placement.
Occasionally DPs may provide suggestions to the director if they think that certain movements or positionings may not work visually - but more often than not they will try to work with whatever blocking the director puts forth.
Another part of the process which is mainly controlled by the director is the production and costume design - which is done in collaboration with the art director and costume designer. When pitching a film or commercial, a director’s treatment will often include direction about the kinds of locations, colour palettes and costume which they envision.
However, some director’s may also be open to collaboration with the cinematographer, particularly when it comes to crafting a colour palette.
The palette can also be influenced by lighting. This is a factor controlled almost entirely by cinematographers, and is probably the biggest stylistic part of the look that they bring to the table.
The easiest way to see this is to look at the work of directors, who have worked with different cinematographers on different projects.
These are all night scenes in films by the same director: Luca Guadagnino. Two of them were shot by cinematographer Yorick Le Saux, which feature toppy lighting, a darker exposure and a more muted, darker palette.
The other two were shot by cinematographer Sayombhu Mukdeeprom and feature a more vibrant, earthy palette, a brighter, side key light and hanging practical bulbs in the background.
Or how about these films from Quentin Tarantino. Two were shot by Andrzej Sekuła and are lit with hard light from cooler HMIs through windows. These are cut in the background to have different areas of hard light and shadow.
While the other two were lit by cinematographer Robert Richardson, which have more warmth in the skin tones, and are cooler in the shadows. Both use his table spotlight technique: where he fires a hard light rigged in the ceiling into the table, which then bounces a softer warmer light onto the actor’s faces.
Again, same director, but subtly different looks from different DPs.
However, occasionally directors will communicate a specific lighting style across multiple films to the different DPs that they work with. For example, Terrance Malick’s exclusive use of natural light and emphasis on filming in golden hour.
The choice of medium is one that is probably equally contributed to by directors and cinematographers. By this I mean the choice of whether to shoot digitally or on film, in large format or Super35, with spherical or anamorphic lenses.
These overarching decisions about medium are usually made by the DP and director based on their artistic and practical merits. The further technical nuances of that choice, such as which large format camera to shoot on, or which anamorphic lens to use will then almost always be made by the cinematographer.
Choosing the visual language of how shots are juxtaposed and paced in the edit is almost 100% done by the director and editor. The only input a DP may have in this regard is when they provide guidance about shooting a scene in a very specific way during production - such as using a long take, or shooting with very limited coverage - which leaves the director minimal cutting options in the edit.
Once the final cut enters the grade in post production, on average I’d say the director has slightly more control than the DP. But, not always. Some DPs like to expose and shoot digitally on set with a specially built LUT. This LUT is later used as the basis of the look in the grade.
Some cinematographers also push to always be present in the grade, as how the footage is shaped in post production hugely contributes to how a film looks.
A good example of this is how the Coen brothers work with two different cinematographers: Roger Deakins and Bruno Delbonnel.
Whether working digitally with a LUT, or with film in the DI, Deakins tends to favour a more saturated, vibrant, contrasty, look with warmer skin tones and deeper, darker shadows.
While Delbonnel is known for crafting a specific look in post with his film negative that is lower in saturation, cooler in both the highlights and the shadows, and quite often introduces heavy layers of diffusion on top of the image to give it a more of a dreamy look.
CONCLUSION
Ultimately, the creation of the images is a balancing act which is dependent on the input of multiple collaborators - from the director to the DP to the production designer.
Directors tend towards providing more of a conceptual guidance about how a movie looks, while cines generally are more about taking those ideas and visually executing them by working with technical crew and equipment.
A DP working for a good director, shooting a good story, will make their work look better. And as a director you want someone who will help you to enhance and photographically bring your vision to life.
Regardless of who does what, the most important thing is to find great collaborators and be open to at least hearing what ideas they bring to the table.
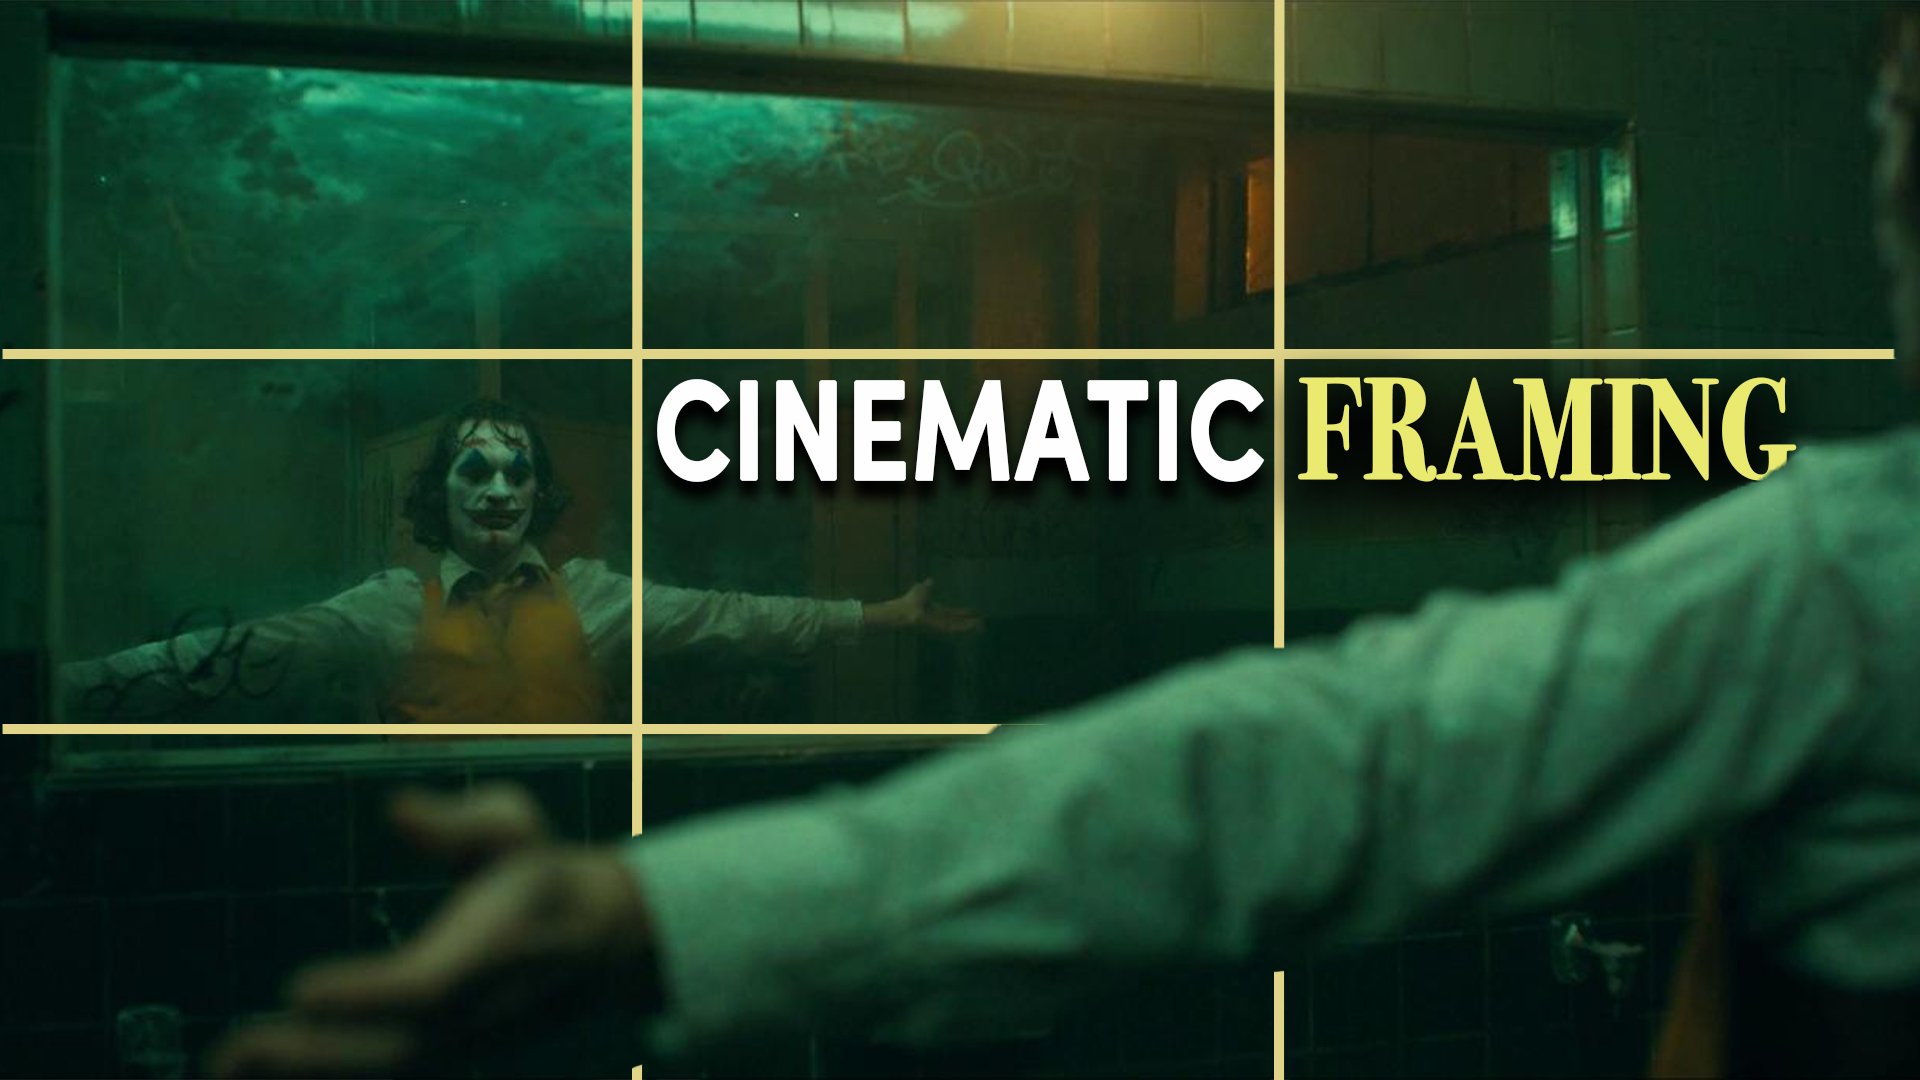
5 Techniques For Framing Cinematic Shots
Filmmakers compose and visually present information within a frame. Let’s go over five different techniques which may help you frame with more of a cinematic eye and tell stories using only images.

INTRODUCTION
Filmmakers compose and visually present each shot within a frame. Frames can be of wide expanses, close up details, symmetrically balanced or even off kilter.
It’s also probably the easiest cinematography skill to practise: as all you need is to be able to snap away on a camera - including the one on the back of your phone. But what is it that makes a good frame?
In this video, let’s go over five different techniques which may help you frame with more of a cinematic eye and tell stories using only images.
1 - USING THE BACKGROUND
What we choose to include or exclude from each shot is a deliberate choice that any image maker should be aware of.
Most shots, whether in cinematography or photography, can be broken down into two components: the subject which the eye is most drawn to and the background, which the subject is placed against.
When filmmakers run through, or block, a scene with actors, one of the factors that they use to decide on the placement of the camera, and therefore the frame, is what background they want to place the subject against.

The background does a few things. First and foremost it’s a way of conveying information within a shot. An isolated, tighter shot of a character against a white wall background includes limited information for the audience. While shooting a character in front of a wider, carefully dressed set with windows reveals several layers of information. This person is sitting in a shabby dressing room, so perhaps he’s a performer.
The highrise building outside suggests that it’s in a city. He’s interacting with another character, but because he is in sharp focus, the camera is suggesting that the man sitting is the main subject in the scene.
For more untraditional, atmospheric filmmakers, who let stories play out slowly without much exposition, how they present each frame is especially important for the audience to glean as much information about the characters and their environment as they can.
A background can either be flat or have depth. This depends on the distance between the subject of the shot in the foreground and the distance to the objects in the background.
Normally, shots which have more depth to them are considered a bit more cinematic - as they create more separation between the foreground and the background and therefore a greater feeling of dimensionality, and more of an illusion of reality.

Like this shot which places a wall of highrises far off in the distance, rendering the looming city with a sense of scope while at the same time isolating the character.
This is also why documentary filmmakers often try to pull their interview subjects away from walls or backgrounds, both to render them more out of focus and to create more depth in the frame.
2 - LENS SELECTION
Each frame is not only affected by the direction in which the camera is pointed, but also by the focal length of the lens that is chosen.
The focal length is the degree of magnification that a lens has and is denoted in millimetres. An easy way to start thinking about focal lengths is by breaking them into three camps: wide angle lenses, medium lenses and telephoto lenses.
There aren’t any official millimetre categories when it comes to grouping focal lengths but I generally think of Super 35, spherical wide angle lenses being somewhere between 16mm and 25mm. With medium focal lengths being around 35mm to 65mm, and telephoto lenses approximately 75mm or longer.
Not only do wide, medium and telephoto lenses provide different levels of magnification, but they also change how the background of a frame is rendered.

The wider the focal length, the more the frame will be distorted and stretched and therefore the more background you will see. Whereas the longer the focal length, the more the frame will be compressed and the less background you will see.

Therefore when framing a close up shot of a subject it’s important to consider whether you want to use a super wide angle lens, with the camera physically closer to the actor, that displays more information in the background.
Or, whether you want to frame using a telephoto lens, with the camera further away from the actor, and show less of the background with a shallow depth of field.
3 - FRAMING GUIDELINES
Although there is technically no right and wrong when it comes to framing, there are a few aesthetic and cinematic conventions or guidelines which have been widely adopted in filmmaking over the years.
One of the foundational framing guidelines is called the rule of thirds. This principle suggests dividing the frame into nine segments made up of two evenly spaced vertical lines and 2 evenly spaced horizontal lines.
You then place the most visually strong elements in the frame, like the subject along these lines, or at the intersection of these lines.

Probably the easiest example to show this is by framing the horizon. Usually cinematographers will either frame a landscape so that the sky portion occupies the top third of the frame and the earth portion occupies the bottom two thirds, or they will flip it and place the earth portion on the bottom third and the sky on the top two thirds.
Another convention is the idea of leading lines. These are where objects in a frame are lined up compositionally so that they create an invisible path which guide’s the audience’s gaze towards a specific part of the frame.

These lines can be created in symmetrical frames by finding elements that lead to a centralised point, like a doorway where a character is standing.
Filmmakers can also create a frame within a frame by composing the subject within a shape, like a mirror, a door or a window to create a more formal perspective.
4 - SHOT SIZE & ANGLE
One of the most important decisions there is when it comes to framing is deciding how wide or tight you want your shot to be.
As we hinted at earlier, wider shots are great at establishing the environment around characters and familiarising the audience with the geography of the film’s world.
While tighter shots, where the subject occupies a large area within the frame, can be used to punch in and highlight details: whether those are an important object in the story or to better read and empathise with the emotion on someone’s face.
I’ve made a whole video on shot sizes before, which I’ll link below, but I think the biggest take away from it is the idea that, in life, our proximity to a person defines our emotional relationship to them.
Therefore, the tighter we frame a shot on a character, the more intimate it feels, while wider compositions feel more emotionally neutral and observational.
At the same time, the angle at which we point the camera at a subject also has a large effect on how frames can be perceived by audiences.
Most shots in filmmaking are taken from a neutral, or medium angle, where the camera is positioned roughly at the eye level height of a character without any significant vertical tilt.
This approximates the viewer’s own eye level and creates a level of empathy and identification with characters. It also conveys a sense of normalcy and realism as it’s not visually jarring.
Low angles, where the camera is positioned at a height below the character's eye line and angled upward, creates more of an uneven emotional connection, which is often used to make characters feel more powerful, physically larger, dominant, imposing and stronger.
While high angles, shot from a tall position with the camera tilted down, tend to have the inverse effect of creating a sense of vulnerability, diminished size or weakness.
5 - BALANCE
Shots that are thought of as cinematic generally have a degree of balance to them. However, this balance can also be deliberately thrown off and subverted for effect.
A balanced frame is one where no part of the image has an overwhelming visual weight from elements that throws off other areas.

One way to think about this is in terms of negative space, empty areas in the frame without significant visual elements, and positive space, parts of the frame that draw the eye towards a focal point.
Filmmakers can create a symmetrical balance by centrally framing a subject and then equally weighting areas of negative space against the middle area of positive space.
Or they can frame shots with asymmetrical balance by placing the main subject in the image off-centre and then weighting the other side of the image with elements of negative space.
Other visual aspects like colour or areas of light and shadow can also be layered to either achieve symmetrical or asymmetrical balance within a shot.
When it comes to framing a dialogue scene between two characters, a common technique is to use a tik-tok or shot-reverse-shot: where each shot is taken from the same side of a 180 degree circle, in a way that may place the characters on opposite sides of the frame.
This introduces another two framing concepts: breathing room and headroom.

Breathing room is the amount of negative space between the subject and the edge of the frame. Traditionally this space is left open in front of characters to give a sense of normalcy. Unless filmmakers want to deliberately introduce a bit more uncertainty or tension by leaving characters with limited or no breathing space.
Headroom is the amount of space above a subject's head. This can either be traditionally framed so that there is some negative space above the character, or the subjects can be given a haircut, so that they have no headroom and the top of their scalp is framed out - which may make the shot feel a bit tighter, more intimate and even tense.
CONCLUSION
There’s no magic tool that will allow you to create perfectly cinematic frames. Probably because there’s not really such a thing as a perfectly cinematic frame. Some movies may need uglier, off kilter shots, while others may benefit from a more precise, symmetrical form.
It always comes down to forming a perspective on a story that you then translate into a look. Every brain will do this differently and interpret how the world is framed in different ways. But hopefully the next time you are practising snapping photos or composing your next shot, you will have some of these techniques in the back of your mind that you can use to manipulate how you want your images to look.

Cinematography Style: Shabier Kirchner
This video will unpack Shabier Kirchner's work as a cinematographer a bit further by going over how he got his start in the industry, looking at some of his thoughts and philosophies on filmmaking and breaking down some of the gear he’s used to create images.

INTRODUCTION
After getting his first big breakthrough working with director Steve McQueen, Shabier Kirchner has emerged as a prominent, self-taught cinematographer in the world of festival and indie films.
His photography mixes expressive but not heavy handed lighting, different formats, big close ups, handheld movement and naturalism to create an often dense, grainy, filmic look that evokes unconscious feelings from the audience.
This video will unpack his work as a cinematographer a bit further by going over how he got his start in the industry, looking at some of his thoughts and philosophies on filmmaking and breaking down some of the gear he’s used to create images.
BACKGROUND
“Images were always something that I was surrounded by. I was just immediately attracted to drawing and eventually photography as a way of expressing how I was feeling. In a way that I couldn’t really do with words or I couldn’t do with writing.”
Although the Antiguan born cinematographer struggled a bit in school, he developed an early love of photography. This was amplified by his dad who also loved photography, so much so that he had his own darkroom.
Here, Kirchner got to experiment with film and learn the basics of exposure and development. As he got older he began shooting a lot of what he was surrounded by, such as surfing and skateboarding. He slowly built a reel, which he would later use to apply to study a Masters in cinematography at the NFTS film school in London.
After making it to the final round of selection, he wasn’t selected. On his way from a job he landed in New York, where he managed to work as a trainee on a movie. The DP on that movie, Thomas Scott Stanton, immediately landed him the amazing opportunity to shoot 2nd Unit cinematography.
After that he settled in New York, working on commercials, music videos, short films and indie projects for the next eight years.
One day he got an unexpected call from Sean Bobbitt, Steve McQueen’s regular cinematographer. Since Bobbitt sometimes worked with NFTS, he assumed it was in regard to his earlier application to the film school, however, it was something far better.
He was looking to introduce a new cinematographer to Steve McQueen, as Bobbitt would be unavailable to shoot an upcoming series he was working on called Small Axe. This sparked another opportunity in his career.
PHILOSOPHY
By breaking down the choices that cinematographers make, my videos may make it seem like cinematography is a very analytical process. But often it’s not at all. Many DPs internalise their years of practice and formal and technical training, then use that to unconsciously make decisions which dictate the visual language of a film based on what feels best.
“Like, everything about this project I felt was done on a very unconscious level. It’s something that now looking back on it I feel that there is a lot of value to operating on your impulses and operating on your emotions. Things that you feel that you may not be able to quite put into words.”
This doesn’t mean that he doesn’t prepare. Depending on the project he may put together a collection of images from photographers that he likes, or conduct research through conversations with the relevant people or communities that the story takes place in. While at the same time shaping a perspective based on his own experiences.
And, of course, he may put together a shotlist. For example, during prep on the first episode of Small Axe, he compiled comprehensive lists of shots for covering scenes - with as many as three different alternatives per shot.
The director, McQueen, dismissed this approach, preferring to work off conversations about the story and characters, which ultimately led them to finding the right visual approach for each episode in the series.
Kirchner also drew from the wall full of period reference photos that the production designer had gathered. This gave everyone a sense of direction of the look, which also fed into his spirit for open collaboration with the crew.
“I want everybody to have read the material. I want everybody to feel what it is that we’re trying to achieve. That, you know, everybody had agency. I think that’s a really important thing. And when you feel that happening throughout a whole crew, the reverberation of that is, like, intoxicating.”
This collaborative environment that he encourages also extends to some of the gear decisions that are made by his technical crew.
GEAR
Fostering an environment on set where everyone, including the technical crew, is on the same page about the look helped when it came to selecting gear and designing lighting setups.
“I wouldn’t call myself the most technical of people and I’m, like, totally OK with that because I have so much trust in people like Ian and his crew. To go and be able to describe a feeling or describe an aesthetic or a quality of light and have someone like Ian take that and interpret it in a way that is achievable is really great. Here’s a photograph, you know, Eggleston took at night and this is the light and it looks like we’re underwater. What do you think?”
This led to a member of the lighting team proposing to the gaffer that they use ETC Source Four fixtures to create different pools of overhead light. These spotlights, often used in stage lighting, can be used to create crisp beams of light that can be spotted. This means that the spread of light can be controlled and dimmed.
They were also easy enough to rig, as top down lamps, from the highest windows of the street facing apartments.
They were all gelled blue-green to mimic the silver allied Mercury vapour lights of that era, to create multiple, controllable top down pools of bluish light reminiscent of Kirchner’s reference photo.
When lighting, he often uses contrasting colour temperatures and fixtures, to create different pops of colour across the frame.
For example, in this interior he used super thin LED Lightmats which could be velcroed to the ceiling, diffused with an off-colour fabric and gelled with leaf-green, steel-green or yellow in different areas to break up the modern, perfect feel of LED light.
This overhead ambience lifted the light levels of the entire space, which was further accentuated by practical tungsten wall sconces to create a warm look. This warm interior light was offset by the cooler Source Four street lights that were rigged outside.
Even for more traditional day interior scenes, which are often lit through windows with stronger, daylight balanced HMIs, he may add little pops of tungsten practicals in the background to contrast the cooler daylight feel with a homely warmth.
“I have so much love for celluloid. I just think that there is something very special to it. The way it treats skin. But I also think that the process in which we work with film, as well. There’s a lot of value in that. To be able to think, like, in an economical way and not just sort of spin the camera and roll and roll and roll. To, sort of, really trust what you’re doing as well.”
When it comes to choosing a medium, he does love the look of shooting on film, but will also choose digital cameras like the Alexa Mini or a Sony Venice, depending on his practical needs or the needs of the story.
A great example is the five part series Small Axe. Each episode was shot on a different medium. He used the cleaner, wider perspective of the large format digital Sony Venice for one, the digital Super 35 Alexa Mini for another episode for its ability to roll for long takes up to 45 minutes.
With grainier, 16mm film used to bring out a 1970s aesthetic, the textural, widescreen 2-perf 35mm film look to frame wider aspect ratio shots of a community, and the more stabilised, structured, taller aspect ratio in 3-perf 35mm for another episode.
Each choice of format brought a different look that better suited the story of each episode.
When shooting on film he used 500T stock from Kodak, 5219 for 35mm and 7219 for 16mm. This stock has a beautiful, higher textural grain to it, and - being rated at 500 ASA - is fast enough to practically use it for both day and night scenes. He’s even push processed this film at times to create even more grain.
Kirchner shoots this tungsten balanced film without using any correction filters - even when shooting in daylight. Prefering to correct the colour temperature in the grade, rather than in camera.
Like his choice of formats, how he chooses lenses is also dependent on the kind of look for the story that he is after. For example, he’s used the Cooke Speed Panchro 2s for their soft vintage roll off and warmth, the PVintage range from Panavison for their smooth, fast aperture, romantic look, and the Zeiss Master Primes for their modern, cooler, sharper rendering of detail which helped capture 16mm with a higher fidelity look.
Although the type of camera movement he uses does depend on the director and the story they’re telling, his camera motion often has a rougher, handmade feeling to it.
Whether through his regular use of handheld, or even by choosing not to stabilise bumps by using software in post production.
Instead, embracing the little imperfections that come from a human operated crane movement in a sweeping shot across a courtroom.
CONCLUSION
“I took some wild chances on things that I didn’t really believe that I could do but I just did it anyway and I failed terribly. But if I could go back again and do it all again I’d do it the exact same way because failing is success. I’ve learnt the most from things that I didn’t succeed at 100%.”

Grip Rigs For Cinematic Camera Movement (Part 2)
To move a cinema camera in different ways requires different types of mechanical rigs. In this video let’s go over some of the common, interesting and even unusual rigs that are used in the film industry to create motion.

INTRODUCTION
There are many reasons to move the camera in filmmaking. It can be used to reveal more of a space and establish the geography of a scene. It can elevate action in fight sequences. Evoke an emotion or a tone. Or even provide an unusual perspective to a scene.
To move a cinema camera in different ways requires different types of mechanical rigs. In this video let’s go over some of the common, interesting and even unusual rigs that are used in the film industry to create motion.
BOLT

The Bolt is a specialised robotic arm rig, which is designed to move the camera at extremely high speeds, extremely precisely. It is built by Mark Roberts Motion Control and is the go to robotic arm for industry level film work.
So, how does it work? This cinebot has a 6-axis robotic arm - which means it has 6 different points where the arm can swivel, rotate, pan, tilt and roll the camera. This arm is attached to a heavy base which is designed to slide along a track - which come in 3 metre length pieces - giving it an additional lateral movement axis.
This total of 7-axes of movement means that it can move the camera in very complex ways, almost anywhere within a confined area. What makes the Bolt special is that it comes with software called Flair that is used to program each move that it makes, frame by frame.
Once a move is programmed it can be saved and repeated as many times as necessary in frame perfect passes. In other words it can perform the exact same motion multiple times, so that each move records exactly the same image, even when broken down frame for frame.
This allows filmmakers to record multiple plate shots of the same take - where they can record different details in different parts of the frame multiple times, then layer different sections of each plate on top of each other in post production.
For example, this is a shot from a commercial that I camera assisted on a few years ago. The Bolt could be used to record two passes. One plate shot of the boy drinking orange juice, and another plate with a dog being cued to jump by an animal wrangler.

In post, the animal wrangler could be cropped out and the motion of the dog jumping overlayed on top of the shot of the boy, so that it looked like it was recorded in a single take. This is made easy by the Bolt’s frame perfect, repeatable, programmed camera moves.
The Bolt is often combined with a high frame rate camera, like a Phantom, to shoot slow motion because the Bolt can move at extremely high speeds. When shooting slow motion, everything, including camera motion, gets slowed down. This means that to shoot extreme slow mo and still get a normal tracking movement, the camera needs to move at a much faster speed than normal.
It can also be used to get super fast camera motion when shooting with the camera at a normal frame rate.
It’s actually a bit scary how fast this heavy chunk of metal can move. That’s why the Bolt operators will usually either cordon off the area that the arm moves in or give a stern warning to cast and crew not to go anywhere near the arm, unless the operators give permission. Because if this thing were to hit anything at a high speed it’d be super dangerous if not fatal.
For this reason, camera assistants will usually strip the camera of a monitor, mattebox, eyepiece and any additional weight that could offset balance or upset smooth movement or even pieces that could fly off while the arm moves and stops at extreme speeds.
Another use case for the Bolt is to program it to do very specific, macro moves. Using the Flair software and a special focus motor, the focus distance can also be programmed for each frame - since pulling focus at these extreme speeds manually is very difficult, if not impossible.
This means it can repeat moves in macro shots, get multiple plates, all while maintaining perfect preprogrammed focus.
Although you can do incredible things with the Bolt, it’s usually reserved for specialised, pre-planned shots only, as it's both an expensive toy to rent and because moving it around and programming it takes a lot of time to do.
TOWERCAM

Another piece of equipment which is designed for a very niche type of camera movement is the Towercam. This is a telescoping camera column which is designed to get completely vertical, booming camera motion. It is remote controlled by an operator near the base of the rig.
Unlike a Technocrane, which is more of an angled telescoping arm, the Towercam is an arm that moves completely vertically and can either be rigged from the ground or rigged from above and telescope up and down.
Although the hydraulic arm of a dolly can also be used to do vertical up and down moves, the range of its arm is much more limited to around 1 metre of vertical boom movement. There are different versions of the Towercam, but the XL can extend the height of the camera to almost 10 metres.
This is a great tool for getting large, symmetrical, up and down moves - which is why Robert Yeoman often uses it when shooting with Wes Anderson, who loves himself some symmetry. Using a dolly for horizontal tracking moves and a Towercam for vertical tracking moves.
But, it can also be rigged with a remote head, which allows an operator on the ground to pan and tilt the camera while it moves vertically. Which is great for this kind of a shot of tracking an actor walking up a flight of spiralling stairs.
It can also be used for doing fast vertical moves, capturing live events, nature documentaries, or any other application where straight, vertical motion is required.
3-AXIS GIMBAL

Let’s move on to a piece of gear that most people may know: a 3-axis gimbal. This is a stabilisation device that is used to keep the camera steady while capturing fluid motion.
3-Axis refers to the three motorised points on the rig that counteract any unwanted camera shake. These axes control the tilt, sometimes called pitch, which is the vertical up and down motion, the pan, sometimes called yaw, which is the horizontal left and right motion and the roll, which is the side to side camera motion.
By stabilising the camera across these three points, these motors minimise shakes and vibrations, and give the camera movement a smooth, floating, fluid feeling - very similar to what a Steadicam does.
Probably the two most popular gimbals on the market for industry level film production are currently the DJI Ronin 2 and the Freefly Movi Pro.

There are many reasons these stabilising devices have soared in popularity in recent years. For one, they make it very quick to set up and adjust a shot with stable movement - much quicker than setting up and levelling a dolly and tracks.
For another, their relatively light weight makes it easy to shoot in hard to access locations, where bringing other heavier gear like a crane or a dolly isn’t possible.
They are also flexible in their applications. For example, they can double up as a stabilised head - which can be operated remotely with camera wheels or a joystick - or they can be operated in a handheld configuration using the natural drift of the motors.
Whereas in the past it may have been necessary to hire a Steadicam, a Steadicam operator, a stabilised Libra head and a Libra head technician. Now the productions can get away with hiring one gimbal technician with a gimbal - which can be switched between different rigs - including a drone.
Their flexibility also extends to how they can be operated. For example, shooting from a dolly on a track locks you into one lateral line that you can shoot from, while shooting with a gimbal is like shooting with a stabilised handheld rig. It can go anywhere your feet go, which makes it easy to adjust to the movements of actors changing position during a take.
However, there are a few reasons why some DPs don’t like using them much.
The camera needs to be balanced so that no undue strain is applied to one of the motors. Sometimes this is easier said than done, especially when using a heavier camera build or longer lenses. Any time a lens is changed it needs to be rebalanced. If a certain weight is exceeded it may not be possible to balance it at all.
Even when accompanied by a gimbal technician, these machines can give technical issues. In my experience, working with a Steadicam and working with a gimbal is like night and day. A Steadicam is simply engineered and almost never runs into technical issues, whereas gimbals almost always need to be tweaked by assistants to deal with technical glitches that pop up.
Also, unless the gimbal is being operated by a second operator with wheels or a joystick, it can be difficult to get precise framing, as the motors create a natural drift of movement as you move or stop, which can be hard to predict.
A last advantage of a gimbal is that they can sometimes be combined with other grip rigs for a special move. For example, when I assisted on this show, the key grip came up with an overhead sliding rail system with a bungee cord that the gimbal could be attached to. This took some of the strain of operating the heavy camera away and made it quick and easy to shoot fight scenes.
Or there are special shots like this, which combine a gimbal with the final rig we’ll talk about: a Spydercam.
SPYDERCAM

A Spydercam is a cable suspended rig that allows for smooth, controlled aerial movement.
Setting one up begins by rigging several high tensile strength cables which need to be securely anchored above the shooting area so that the cables don’t touch the ground.
A camera rig with a stabilised remote head is then suspended from those cables and its lateral and horizontal movement is controlled by motorised winches that are connected to the suspension cables.
This way the physical position of the overhead camera can be changed by an operator, called the pilot, using software while at the same time another camera operator can pan, tilt or roll the camera to change the frame that it sees.
The Spydercam was regularly used in films before the widespread use of commercial drones, to get controlled, smooth aerial footage within confined spaces, which couldn’t be shot by using a helicopter.
For example, aerial plate shots which swing or fall through a highrise city which they could later drop shots of characters into.
Even after drones became popular production tools, there are still applications for the Spydercam - most notably for indoor scenes or scenes shot in a studio that require controlled aerial camera moves.
For example, the shot mentioned before used a Spydercam with a specially designed release. This allowed a stabilised gimbal to float from one floor to the next, which the camera operator could then grab on the second floor and begin shooting with in a handheld configuration.
Another reason filmmakers may want to use a Spydercam is for a shot which starts close to actors. Having a drone start this close to the ground, objects or actors would cause a visible wind on screen and would also be a bit dangerous. Instead a precisely controllable Spydercam could be used to start on a nice, tight shot, which was then brought all the way up to a massive aerial wide by winching it up the cables.

How To Shoot Action: John Wick 4
Let’s break down how cameras, lights and grips were used to elevate action scenes in John Wick: Chapter 4.

INTRODUCTION
The first thing that I thought about while watching the fight scenes in the new John Wick movie, was another fight scene in Oldboy. And it’s not only because of the great action choreography.
Both movies use cinematography in a very deliberate way to enhance these fight scenes. Through the use of wide shot sizes, vividly saturated lighting and a smoothly moving camera.
So, let’s break down how cameras, lights and grips were used to elevate action scenes in John Wick: Chapter 4.
APPROACHES TO SHOOTING ACTION
Watching this movie got me thinking about the different ways that fight scenes can be presented by filmmakers. I think a large part of how we as an audience interpret or get involved in these scenes comes down to the kind of visual style in the cinematography.
There are basically two directions that filmmakers can go in when shooting action: one is more realistic, immersive and first-person, the other approach is more elevated, observational and third-person.
John Wick very much falls into the second camp. The fight scenes are larger than life and something of a spectacle. Somewhere in between semi-reality and a comic book world.
This look is in a large part created by three aspects of the cinematography: the shot sizes used, the lighting and the camera movement. Lots of slower cutting wide shots are used. The lighting is hard and vividly colourful. And the camera moves are smooth.
Compare this to a fight scene in The Bourne Identity. There are lots of quick cutting close ups. The lighting is softer, more motivated and naturalistic. And the camera moves are rough and handheld.
To me, this way of shooting feels much more like the audience is being forced into the more realistic perspective of the main character.
While this way of shooting feels like the audience is being invited to sit back and enjoy a heightened, action packed spectacle.
Of course, this isn’t a hard and fast rule that has to apply to each and every fight scene in a movie. For example, Oldboy has one long-take fight scene that feels almost like you are watching a video game from a wide, 3rd person perspective.
And, it has another fight scene where the perspective shifts to first person, includes POV shots, and covers the scene with close ups, quicker cuts and a rougher camera movement.
SHOT SIZE
Part of what makes the fight scenes in John Wick impressive from a technical perspective is that they often play out in wider shot sizes, with slower cutting. This relies on the performances of the stunts by the actors to be at a high level, rather than getting stunt doubles to do the action and using lots of quick cutting to break each stunt down shot by shot.
Cinematographer Dan Laustsen enhanced this feeling of width through his camera selection.
“I think that is the goal or the key. To shoot it wide and beautiful. As wide as we can.” - Dan Laustsen
The previous John Wick movies had been shot on Super 35 cameras with Master Anamorphic lenses. One way to pull off an even wider look is to shoot on a camera with a larger sensor - the Arri Alexa LF.
The bigger the sensor is the wider the field of view that it is able to capture. However, they ran into a snag. Previously you could either choose to shoot with a large format camera and spherical lenses, then crop to widescreen in post, or you could shoot with a Super 35 size sensor with anamorphic lenses that natively creates a widescreen aspect ratio.
To overcome this issue, they turned to Arri, who had recently developed a set of anamorphic lenses which were able to cover large format sensors. These lenses are called the Arri Large Format Anamorphics, or ALFAs.
This gave them the combination of a large format wide field of view and the anamorphic look - all in one. These were used to shoot 95% of the movie.
Since the widest ALFA lens is a 32mm, the remaining 5% was mainly made up of super wide angle shots using spherical Signature Prime lenses - probably with a 12mm. You can tell which are the spherical lens shots in the movie because of their almost fish eye look and round bokeh, while the ALFAs have oval bokeh.
“We also shoot wide so Keanu could do what Keanu had to do. And then getting into the close ups for whatever reason super fast because Keanu is running out of speed, of course, because he’s not a stunt guy.” - Dan Laustsen
So, they mainly used wide focal length lenses to capture the stunt scenes in two or three full takes of wide shots. Then used long focal length lenses mainly for close ups during dialogue scenes, not really using many focal lengths in between.
LIGHTING
Another large part of what elevates the John Wick movies from reality, and places them in an exaggerated, comic book like world is due to the lighting.
Laustsen is known for lighting with exaggerated colours, often mixing steel blue, cyan, or green tones, with warmer light. In fact it was partly his use of colour in Crimson Peak that won him the job to shoot the franchise with the director.
“I think he loved Crimson Peak because he loved the colours. We talked a lot about colour. He really likes colour. You know, he loved this heavy world.” - Dan Laustsen
This coloured lighting, that lifted the story out of the normal, realistic world, was created in two ways. Firstly, with practical lighting and secondly by using film lights.
Practical lights are sources that are included in the frame of the shot. These were normally built into the sets themselves using different coloured strips of LEDs. Or, in this movie, they were done by rigging hundreds of RGB Astera Titan Tubes across the set, which were placed inside fluorescent housings.
These fixtures could then be wirelessly controlled through a DMX board to tweak their brightness or colour.
Often these tubes would be set to a colour that contrasted with the colour of the key light. For example if the key was set to a cyan-green, then the practical tubes could be set to an orangey-red. This not only creates a vivid, exaggerated, colourful palette, but it also separates the background from the foreground.
These practicals also served an extremely important practical purpose - they could be seen in the shot. This is especially necessary for the kind of super wide shot sizes they were shooting, where the camera saw everything. Like this scene, where they rigged these practicals next to the canal for an incredible 2km.
When you’re shooting in such an enormous space at night, there is little to no place to hide film lights anywhere near the actors without them being seen.
“You know, that is my goal with lighting all the time. I want to have the light as far away as possible. Of course if you do a close up of something I have light close to the camera but normally all my light is far, far, far away.” - Dan Laustsen
The further that you place a light source from an actor, the less effect that light will have. The only way to counteract this is by having stronger sources of light that compensate for the light lost through distance. This means either hiring higher output sources, or increasing the amount of sources - which, either way, is an expensive endeavour.
The wider you want your night exterior shots to be, the more difficult and expensive it becomes to light.
They also shot basically everything at night - even the day interiors and a scene that was meant to take place at dawn. This is because it was the only way to control the level of ambient sunlight and maintain the kind of strong, hard, consistent light for long periods of time without competing with sunlight - which would have overpowered the film lights.
His team either lit the scenes with very high output, hard sources, like T12 or T24 tungsten units. Or they used loads - and by loads I mean like 85 units - of lower output, RGB LED Creamsource Vortex 8s. These gave an even spread of RGB light and were also water resistant - which was very necessary for certain scenes with lots of water.
CAMERA MOVEMENT
The camera movement generally tracks the action of the choreography with slow, fluid, smooth movement.
The technical team pulled out almost every piece of gear they could to do this in a variety of different situations: from a drone, to a Spidercam, to a Technocrane. For example, this long take, top-down God’s eye view shot meant rigging a line with a Spidercam, that could move the camera precisely above the large set.
However, the two main tools that they used to move the camera for the fight sequences were a Steadicam and a dolly - with A-cam on dolly and B-cam on a Steadicam AR.
The AR allows operators to quickly change from high mode to low mode, while keeping the camera completely stabilised.
Shooting from a Steadicam meant that they could get smooth, flowing movement that followed the action, but which also allowed the operator to be flexible and adjust their movements to the movements of the actors.
Because the fight scenes were not easy on the actors, they didn’t want to have to do more takes than were necessary. Therefore, the whole movie was shot at quite a deep stop of T/4, which gave the focus puller a little bit of leeway for the difficult, fast moving action scenes.
Because of the speed of the scenes, the 1st AC also chose to often pull focus by judging distance by eye. Since it’s easier to pre-empt where the actors, and therefore the focus, needs to be when you are watching their movements as opposed to watching on the monitor.
CONCLUSION
John Wick 4 is a great example of how action and the world of the story can be made to feel more elevated due to the cinematic choices made by the filmmakers.
All three elements of wide shots, vibrant, colourful lighting and fluid movement combined to make the action scenes in John Wick feel like an entertaining, extravagant spectacle.