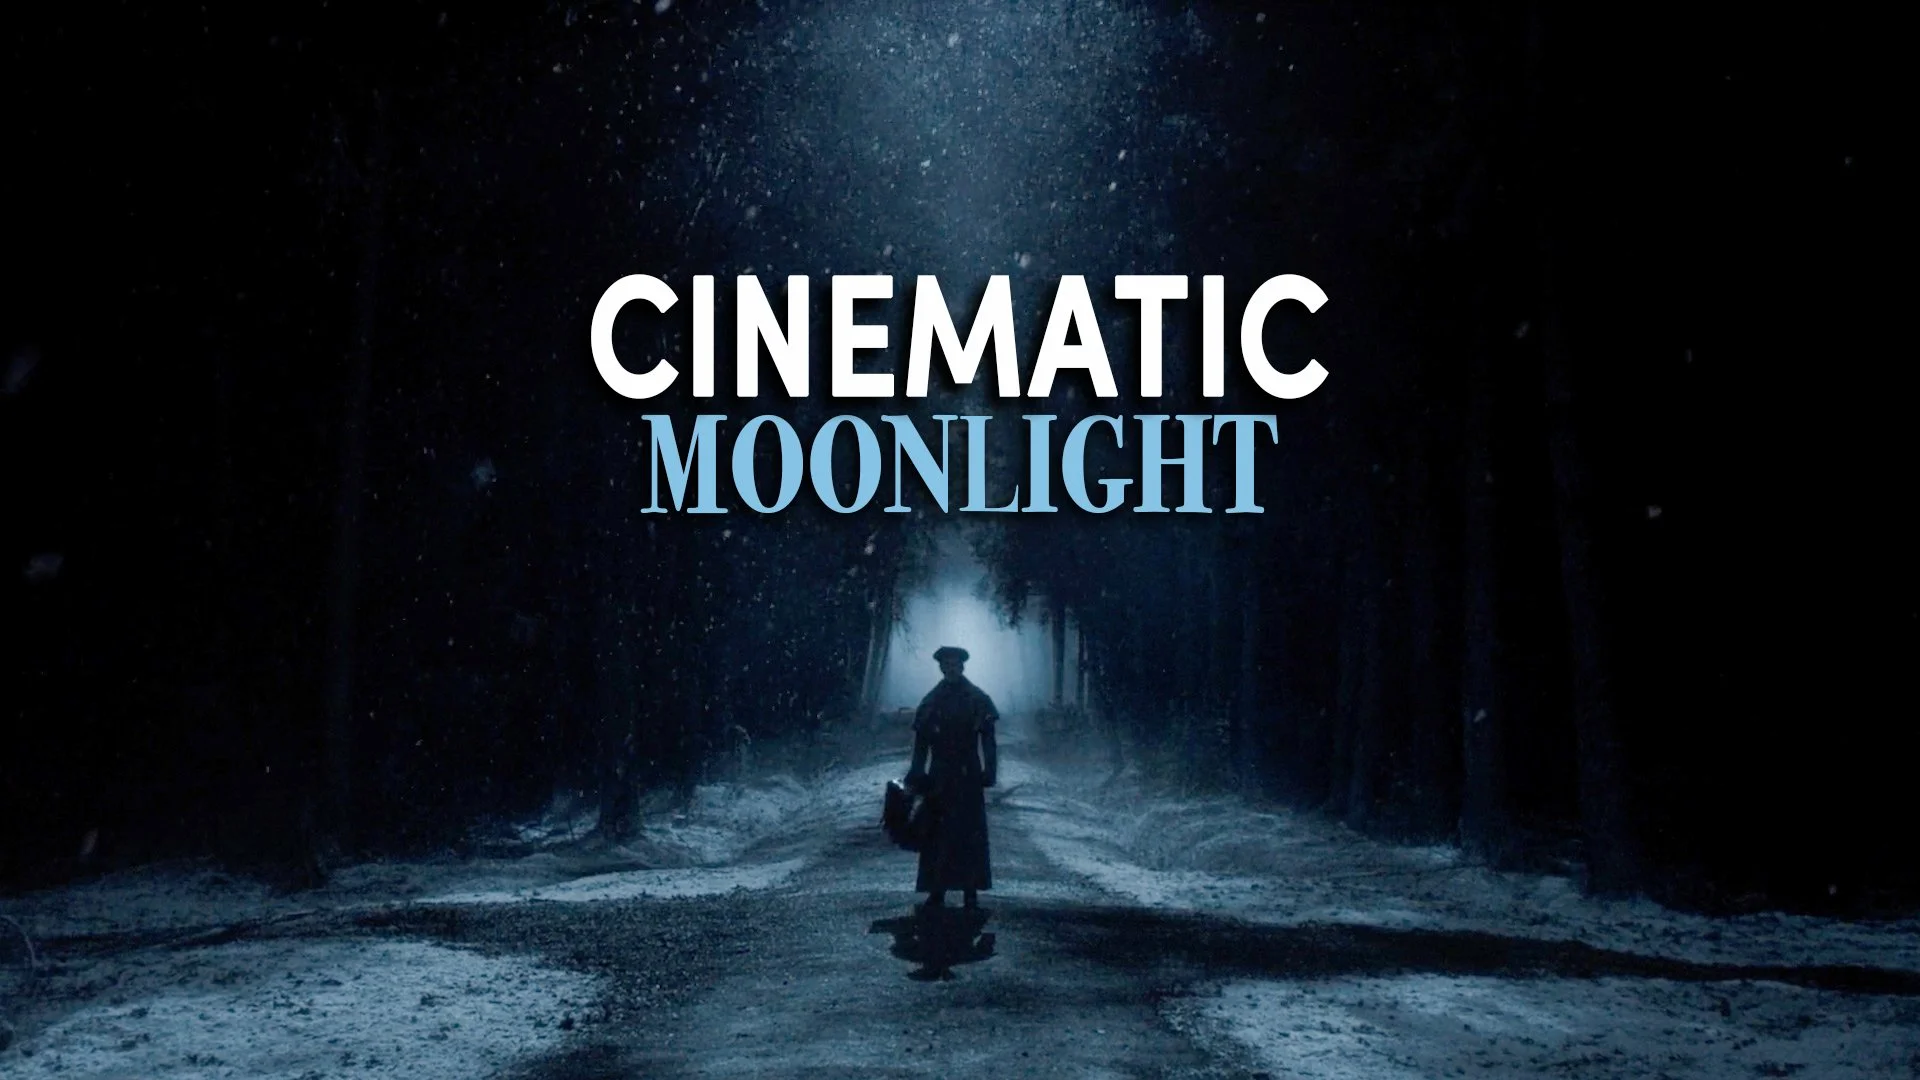
5 Ways To Shoot Night Exteriors
In this video, we’ll look at some of the most common approaches by cinematographers to shooting moonlit night exteriors, and one less common but innovative solution used at the highest levels of production.

Introduction
As a cinematographer, there’s one line in a script that always makes me pause. “Exterior. Night.” More specifically a night exterior lit exclusively by moonlight.
It’s simple to write on a page, but the moment you begin breaking it down technically, it becomes one of the most complex lighting scenarios in filmmaking.
Moonlight, by definition, is dark and barely there. Yet cinema demands we see faces, performance, geography and depth. Do you try to recreate the reality of how our eyes perceive moonlight, or do you elevate it into something more expressive, more cinematic, more legible?

In this video, we’ll look at some of the most common approaches by cinematographers to shooting moonlit night exteriors, and one less common but innovative solution used at the highest levels of production.
Characteristics of Moonlight
Before lighting moonlight, it helps to understand what it actually is.
If you go for a walk far away from artificial light pollution and stand in nature during a full moon, without a torch and let your eyes adjust, you’ll notice something surprising. Moonlight produces shadows. Just like sunlight, it has direction.
However, its luminance is dramatically lower. The moon reflects only roughly 12% of the sunlight that hits it. So while it has a direction, the intensity is a tiny fraction of sunlight.

It’s also a bounced source. Think of the sun as a giant HMI, and the moon as a massive natural bounce board. Because the light is reflected rather than emitted, its quality is slightly softer than direct sunlight.
But because it’s night time and there isn’t any sunlight to bounce around and fill in shadows like there is during the day, moonlight’s shadows are quite deep and dark.
Then there’s colour. Moonlight can appear slightly cool to our eyes. But this isn’t because the moon emits blue light. It’s due to the Purkinje effect, where our eyes shift sensitivity toward the blue end of the spectrum in low-light conditions. As luminance drops, our cone cells become less active and our rod cells take over, making colour appear more monochromatic.

So moonlight is low luminance, relatively directional, slightly softened, cool in perception, and desaturated of colour.
1. Day for Night
The biggest challenge with filming moonlight is that it’s simply too dark.
Even modern digital cinema cameras struggle to capture scenes lit purely to realistic moonlight levels without introducing noise or losing detail entirely. So one long-standing solution, instead of filming at night, is to shoot in daylight and manipulate the image in post. This is called shooting day for night.

The advantage is that the camera can see everything. Background elements that would otherwise fall into darkness remain readable. You’re working with the sun, which, like the moon, is a single light source in the sky that gives you natural shadows from a single direction.
To make day for night convincing, you typically want strong directional sunlight. Having hard shadows will help sell the illusion once exposure is lowered. If a scene is brightly exposed without many shadows, it can be a clear giveaway that it was shot day for night. Often this means placing the sun behind your subjects or side on to them to create more of a backlit silhouette or sidelight.

Another immediate giveaway for day for night is to look at the sky. If it has bright details or even clouds that are visible then the footage was shot during the day. Sometimes this can be cheated by framing out the sky but other times it is unavoidable.
It may seem counter intuitive but the trick is to not underexpose the daylight footage with the camera, but rather give it a healthy level of light to preserve enough detail and then take that light away in the grade.

Colourists will take the day footage and reduce overall exposure, compress contrast, and desaturate and cool the colour temperature. Colourists can create this look adjustment as a LUT file, that can be applied to monitors when shooting, so that people on set will have an approximation of what the footage will look like in post.
Day for night rarely looks identical to real moonlight. It’s an interpretive solution. For some filmmakers, that stylisation is desirable and feeds into the look and tone of the movie. For others, who want a look closer to naturalism, it can feel a bit distracting.
2. In the Blue
Another approach, which is a bit more natural, is to shoot during blue hour.
This is the short window just after sunset when the sky retains a dusk light, but the sun itself has dropped below the horizon. Without direct sunlight there will be a natural ambience in the air which is soft, often cool and directional from where the sun set.

Because there is no direct sunlight filling in the shadows, and you need to orient the camera towards the bright part of the sky and expose for that, shadows will become significantly crushed. Meaning you’ll most likely have silhouettes and high contrast, unless you choose to lift those shadows by adding a bounce or fill light.
Of course, since it is dusk rather than truly night and you shouldn’t be able to see any sky ambience, this look isn’t technically correct, but I do like the more natural feel of it, which is why I’ve used it on a few productions.
A big downside to this technique is time.
You typically have somewhere between 20 to 40 minutes before that ambient light disappears. That may be sufficient for a shot in a commercial, a music video, or a short non-dialogue scene. But for extended dialogue coverage which requires multiple angles, this technique may not give you enough time.

Although, for those with enough budget, a trick to digitally prolong this look is to do so with visual effects. On Killers of the Flower Moon, Rodrigo Prieto shot the wide of this night scene against a backlit sky in the dusk sweet spot - completely in camera. However, to maintain this lighting continuity over multiple angles and pages of dialogue, as the light faded, they captured a plate of the dusk sky and then replaced all the backgrounds of the close ups with that plate digitally after the sun had set.
The key is preparation. Every shot must be planned. The shooting order must be locked. The crew must be ready to move quickly. You’re constantly adjusting exposure between takes, removing ND filters, increasing EI, or opening the aperture as the light fades.

Fast lenses and cameras with higher native ISO ratings will extend your usable shooting window. But eventually, it will become too dark.
Blue hour can look incredible. But its practicality depends entirely on the scale and complexity of the scene.
3. Moonlight Source
The most common solution in narrative filmmaking is simply to create moonlight using film lights.
Unlike blue hour, this gives you time. You can shoot coverage. You can relight for different angles. You’re not racing against the sun disappearing below the horizon.

Traditionally, cinematic moonlight is created as a strong single source. This light is often placed as a backlight behind the character, high and angled down, mimicking the moon’s position in the sky. Faces are sometimes then filled subtly using bounced or diffused sources.
On a smaller scale, this might involve a powerful COB LED such as an Aputure 1200, pushed through a lantern softbox and raised on a high stand, like a triple lift combo or wind up stand. The lantern softens and spreads the light over a larger area to approximate how moonlight blankets a space.
Since you’re working at low light levels, it’s often safer to expose slightly brighter than intended and bring the image down in the grade. Underexposing too aggressively can lead to noise and unrecoverable details.

On larger productions with higher budgets, the same concept scales up. Larger units such as an Arri SkyPanel S360 or a high output HMI are rigged high on cranes or cherry pickers or a suspended balloon light can be used. Elevation is crucial. The higher the source, the more natural the falloff and shadow direction.
The challenge is scale. The larger the location, the more output and coverage you need. Light only reaches so far. Wide landscapes demand either multiple units or extremely powerful fixtures, both of which increase budget and complexity.

But this approach remains the industry standard because it balances control, flexibility and a look that audiences intuitively recognise as “cinema moonlight.”
4. LED Volume
A more recent solution that sits between shooting in the blue and building a large artificial moonlight setup is the LED volume.

A volume is a soundstage surrounded by high-resolution LED panels that display either a pre-shot plate or a CG environment. For moonlit scenes, this means you can maintain the perfect blue hour ambience by freezing that final moment as a background and playing it back on the screens. The soft, cool dusk light that normally lasts 30 minutes can now last all day.

That ambient light from the LED screens becomes your base. Cinematographers can then add film lights if they desire, such as a stronger backlight to mimic a defined moon source or a subtle fill light to faces for clarity. Because the LED wall emits real light, it creates interactive reflections and a natural colour response in camera.
The trade-off is space. Movement is limited to the physical size of the stage and the LED screen. Large-scale action can quickly outgrow the confines of the volume. But for contained scenes, it offers a controlled, repeatable, if pretty expensive, way to achieve a naturalistic night exterior without fighting real darkness.
5. Infrared Camera
So what happens when you need to shoot large-scale scenes at night, with extensive movement across vast terrain?
This was the challenge faced by cinematographer Hoyte van Hoytema on Nope. Instead of using traditional day for night, as is the norm, he experimented with infrared photography.

Infrared cameras are sensitive only to specific wavelengths of light. When shooting in natural sunlight with an infrared filter, the resulting image is a monochromatic image with a bright enough luminance but dramatically dark skies.
This is a technique he first conceptualised On Ad Astra, to create a believable moon-like surface by combining infrared luminance with colour and texture captured on 35mm film.
For Nope, the technique evolved further. Using decommissioned 3D stereo rigs, two cameras were mounted to capture the exact same image simultaneously. One was a modified Alexa 65 with a filter that let it capture infrared light. The other was a 65mm Panavision camera that captured standard colour information on film.

In post-production, the luminance data from the infrared footage was combined with the colour and texture from the film negative. Working with colourist Greig Fisher at Company3, the images were composited into night footage that felt extremely plausible and allowed the audience to see deep into the darkness - which wouldn’t have been possible with night time film lighting.
Additional VFX light elements that couldn’t be captured in camera under the sunny conditions, such as warm car headlights, were added later, completing the illusion.

The result was a night exterior that retained a super realistic moonlight look at scale, seeing into the dark without feeling artificially lit.
Conclusion
Moonlit night exteriors are difficult because they sit at the edge of visibility.
Whether you shoot day for night, embrace the fleeting beauty of blue hour, construct your own artificial moon, or turn to an LED screen, each method is a balance between realism, practicality and cinematic clarity.
And that tension between what is real and what is readable is exactly where cinematography lives.

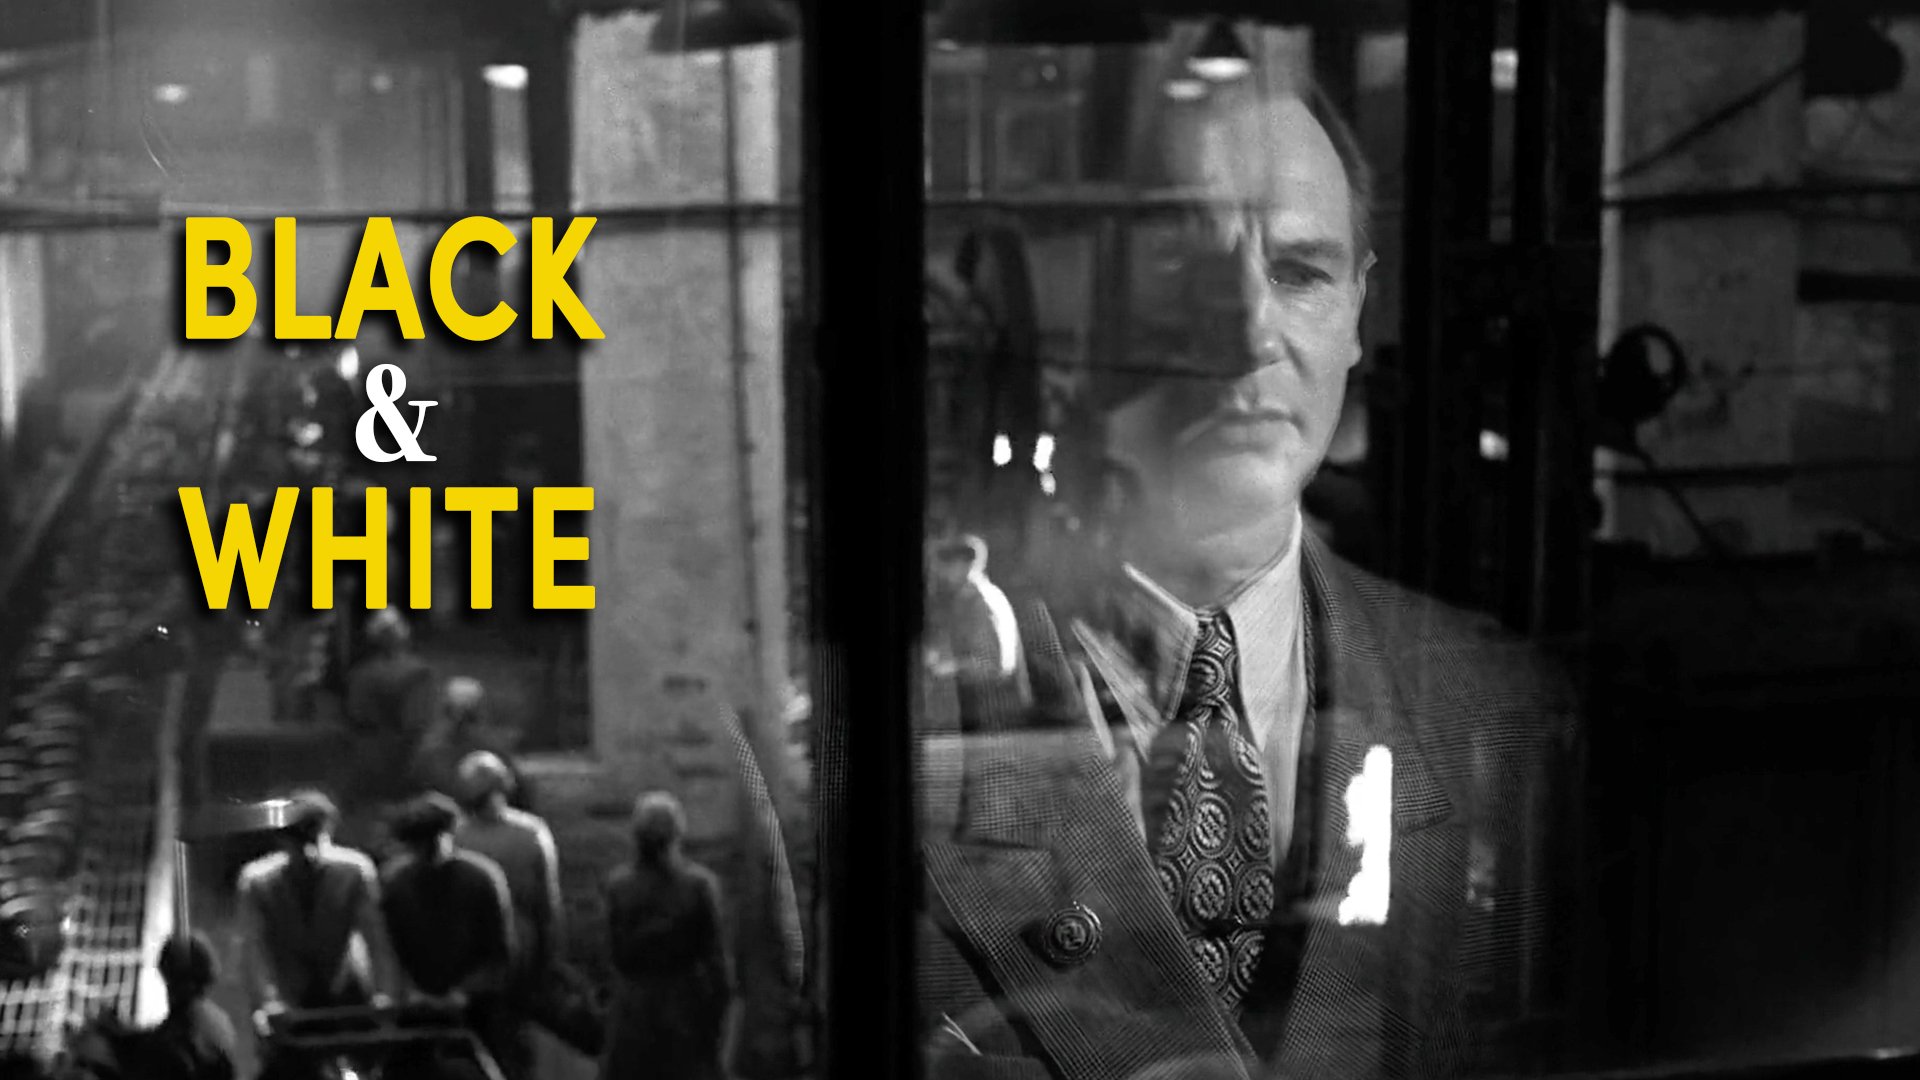
5 Reasons To Shoot Movies In Black & White
Here are five reasons why a filmmaker might choose to shoot in black and white.
INTRODUCTION
There is something that happens when colour disappears from a film frame. Details you would normally skim past, like the texture of a wall, or the fall of a shadow across a face, suddenly demand your attention.
Cinema may have started with black and white photography, but this tradition still continues long after colour has become the default. Because it does certain things which colour simply cannot.
Here are five reasons why a filmmaker might choose to shoot in black and white.
1 - PALETTE CONTROL
On a major production, there is an entire Art department controlling what colours appear in every frame. The production designer coordinates with costume, set decoration, and other creative crew to build that palette.

Period dramas may want a more neutral look with browns, creams, black and greys. Other stories may call for saturated, punchy primary colours. Or even specifically curated, soft, pastel washes of specific hues. This level of control costs time and money.

When you are a filmmaker without that infrastructure, that lack of control over each scene’s palette may become an issue. If you’re filming in real locations, they won’t care about maintaining your visual language, which could potentially lead to a look which feels less deliberate, curated, messy or even lacking visual appeal.
Black and white gets rid of that problem - by creating a built in look and palette without trying. Something we used to our advantage when we were inexperienced and making our first no budget movie.
As long as you create considered frames and compositions, black and white has a way of elevating amateur footage, shot on cheaper cameras or with minimal lighting. Building in a more cinematic look by simply removing saturation.

You also don’t need to worry about certain technical things like the colour temperature of two light sources fighting each other, or a background detail pulling focus away. The image organises itself into light and shadow. You only need to think about contrast.
2 - EXPRESSIONISM
The moment you present an audience with a black and white image, you are removing the suspension of naturalistic disbelief. You’re giving the audience an instant signal that what they’re seeing isn’t reality, but an image constructed by an artist that feels more expressionist.

Robert Rodriguez and Frank Miller pushed this to an extreme with Sin City and its high contrast, film noir inspired ink-black shadows. It has the visual grammar of a stylised graphic novel translated directly onto film. The monochrome palette feeds into the world being a nightmare in a stylised, expressionist way.
Alfonso Cuarón used monochrome very differently in Roma, yet still kept it as a tool to sway the tone away from complete realism. Here the black and white is softer, more photographic. Shooting in black and white gives scenes the feeling of a memory and a quiet recollection rather than strictly realistic documentation.

You are not watching events unfold. You are watching them as they are remembered, and there is a layer of time already present in the black and white image that changes how you receive the story emotionally.
Two completely different uses of the same technique. Black and white is not a single effect. It is a choice that opens a range of expressive possibilities for portraying abstract, emotional or psychological feelings that aren’t necessarily real.
3 - DIFFERENTIATING TIMELINES
Movies aren’t always told through a linear narrative. When a film moves between different points in time, across different perspectives or through different tales filmmakers may want to use a visual cue which orientates the audience without resorting to on-screen titles. Black and white can be used as a structural tool.

Christopher Nolan has used this more than once. In Memento, the film alternates between colour and black and white sequences. The black and white sections move chronologically forward; the colour sections move in reverse, before they meet at the end. Black and white helps signify time to audiences, so that they can process the film without getting lost.

He returned to it in Oppenheimer. The first person sequences, Oppenheimer's interior world and perspective, are in colour. The objective sequences which unfold later in time, like a Senate hearing, are in black and white. It is a formal distinction between interiority and exteriority, as well as differentiating timelines.
Wes Anderson also used black and white as a structural tool in The French Dispatch. He shifted between monochrome for representing each article by a writer - like black words against a white page - and colour, for contemporary timelines or additions to each story which wasn’t included in the text.

In all of these cases, black and white is a structural tool. The filmmaker is communicating directly through format, trusting the audience to read the visual language without being told what it means.
4 - TIME PERIOD
Every decade of filmmaking has its own visual fingerprint, its own lenses, its own format, its own relationship to light. For most of the medium's early history, that fingerprint was black and white. Colour only became the industry standard in the late 1960s.

When a contemporary filmmaker chooses to shoot in black and white, they tap directly into that heritage. Nouvelle Vague feeds into the late 50s period which it’s set in with a visual look that uses a tall academy aspect ratio, vintage lenses, heavy film grain and black and white. Also mimicking the look of its source material: Breathless.
Likewise, The Artist was shot in black and white and the tall aspect ratio of silent-era Hollywood. The subject matter of the film and time it took place was reflected in the look and format.
Not only was The Lighthouse photographed in black and white, but the DP Jarin Blaschke tried to emulate the look of the early orthochromatic film stock of the time by using a special filter, which rendered skin tones dark and full of texture, just like weathered early 1890s photography would.

Black and white can be used as a mirror to evoke a moment in time with a visual language that reflects the very look associated with that period.
5 - TIMELESSNESS
Watch a colour film from the 70s and you know immediately it is from the 70s. The same could be said for a contemporary Netflix movie. Not just because of the fashion or the props, but because of the colour palette itself. The grade, the saturation, the way skin tones are rendered. Certain colour film or even digital film LUTs tend to go through phases of popularity, and are therefore anchored to a moment in time.

The technology changes, the aesthetic trends change, and those changes leave their marks on every frame. Black and white exists outside of that. Strip colour away and you strip away one of the primary mechanisms by which an image dates itself. Arguably the look becomes a bit more timeless.

Schindler's List came out in 1993 and yet isn’t as visually anchored to the 90s as many of the colour films from that period. The monochrome places it in a different register, somewhere between document and timeless work of art.
Ida and Cold War both shot in black and white by Pawel Pawlikowski carry this timeless feeling. By removing camera movement, excessive close ups, and even colour he stripped the visual language of every artifice of cinema. Simplifying it and preserving its emotional power.

A colour film, however brilliant, is always to some degree a product of the moment it was made. Black and white is a way of trying to step outside of that and remove the time of its authorship.
CONCLUSION
Five reasons, ranging from the practical to the philosophical. No control over your colour palette. Expressionist stylisation. Differentiating time periods. Evoking a specific era of cinema. And the pursuit of timelessness.
What all five have in common is that removing colour is a deliberate decision that hopefully adds meaning. Next time you watch a film in black and white, ask yourself what the format is doing and why you think it is doing it.
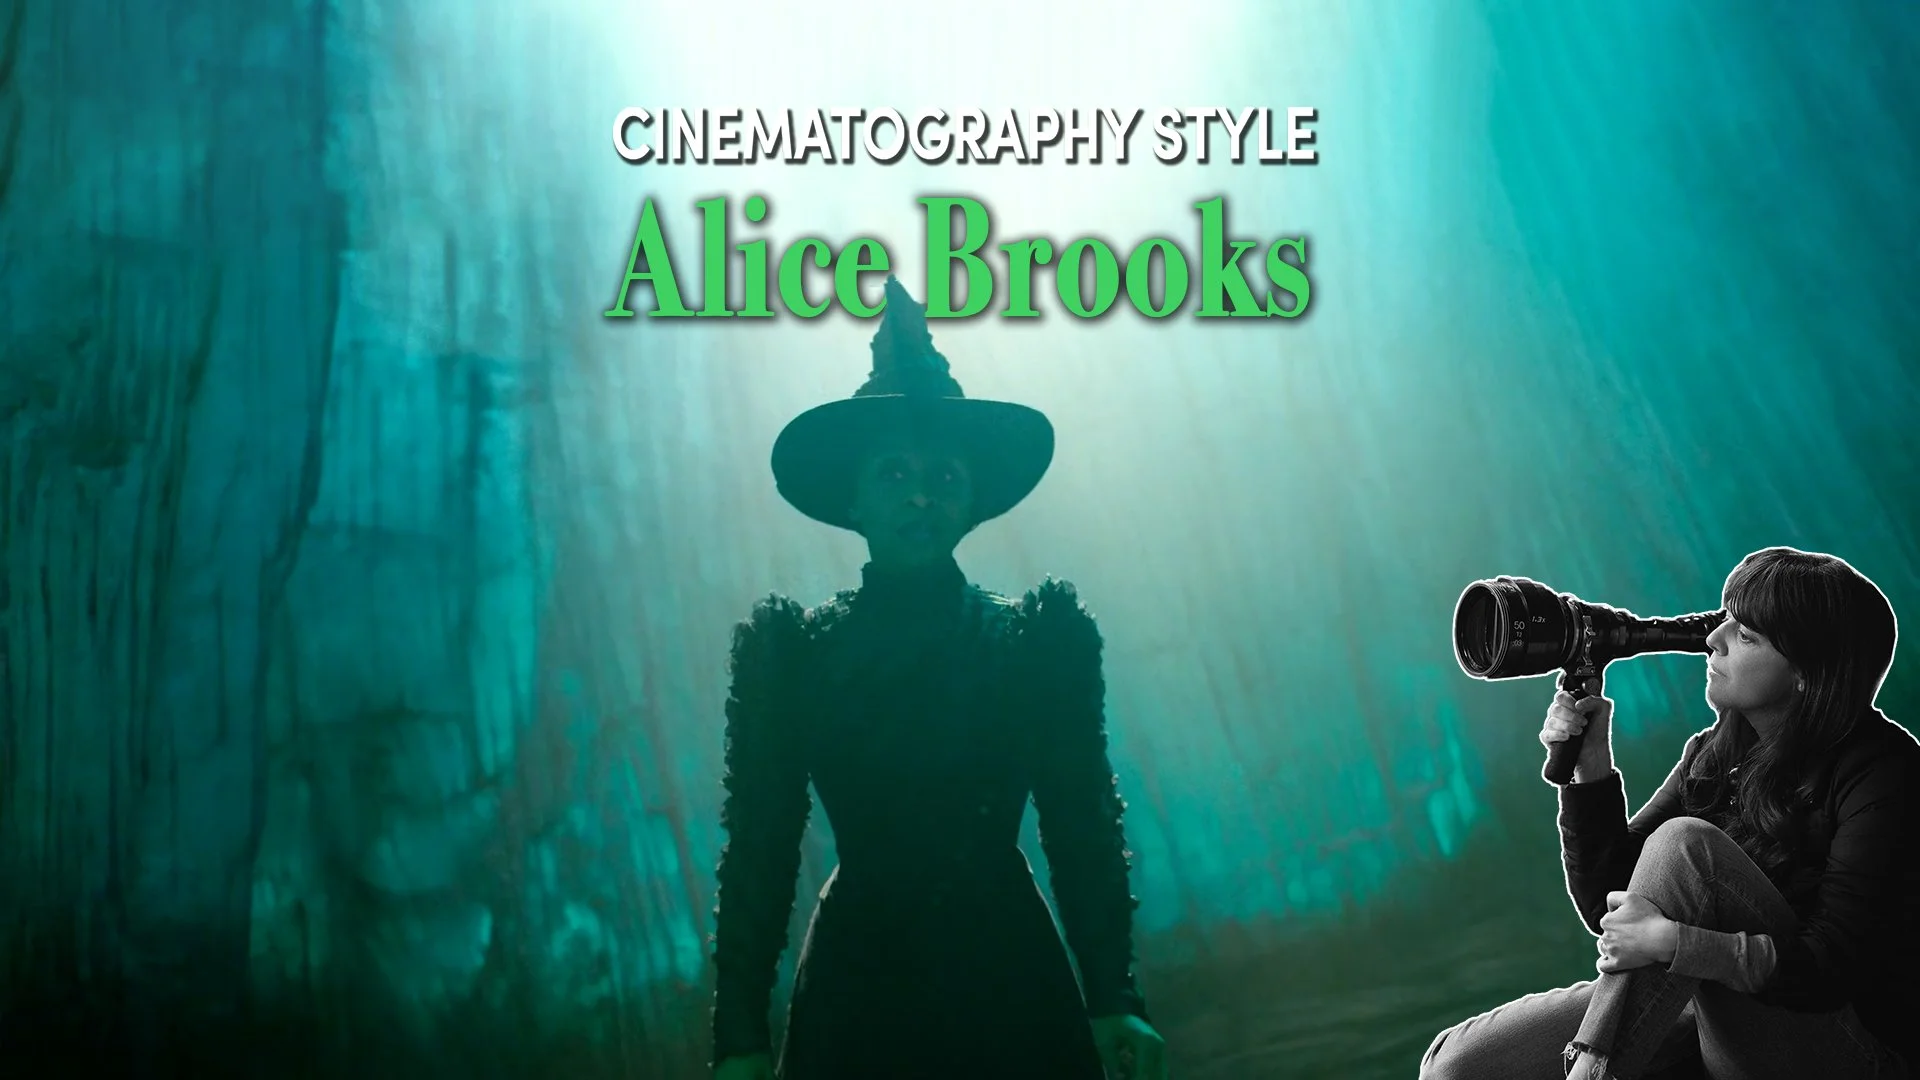
Cinematography Style: Alice Brooks
Let's take a look at the cinematography in Alice Brooks' recent large-scale musicals, including In the Heights, Tick, Tick, Boom and Wicked, to show how they provide a particularly clear window into her recent visual style.

INTRODUCTION
Across contemporary screen musicals, cinematographer Alice Brooks has established a look defined by textured anamorphic lenses, delicate softness, vibrant palettes and an instinct for placing emotional performance at the very heart of the image.
In this episode of Cinematography Style, we’ll explore how Brooks' long-standing collaboration with directors like Jon M. Chu shaped her work, examine the philosophy behind her camerawork, and unpack some of the technical tools she uses to craft her images, by balancing spectacle with intimacy on some of the largest musical productions in recent years.
BACKGROUND
Brooks is something of a specialist in musicals.
She and director Jon Chu have known each other since their college days where they studied together at USC. They first collaborated together on Chu’s 2002 student musical short When The Kids Are Away.
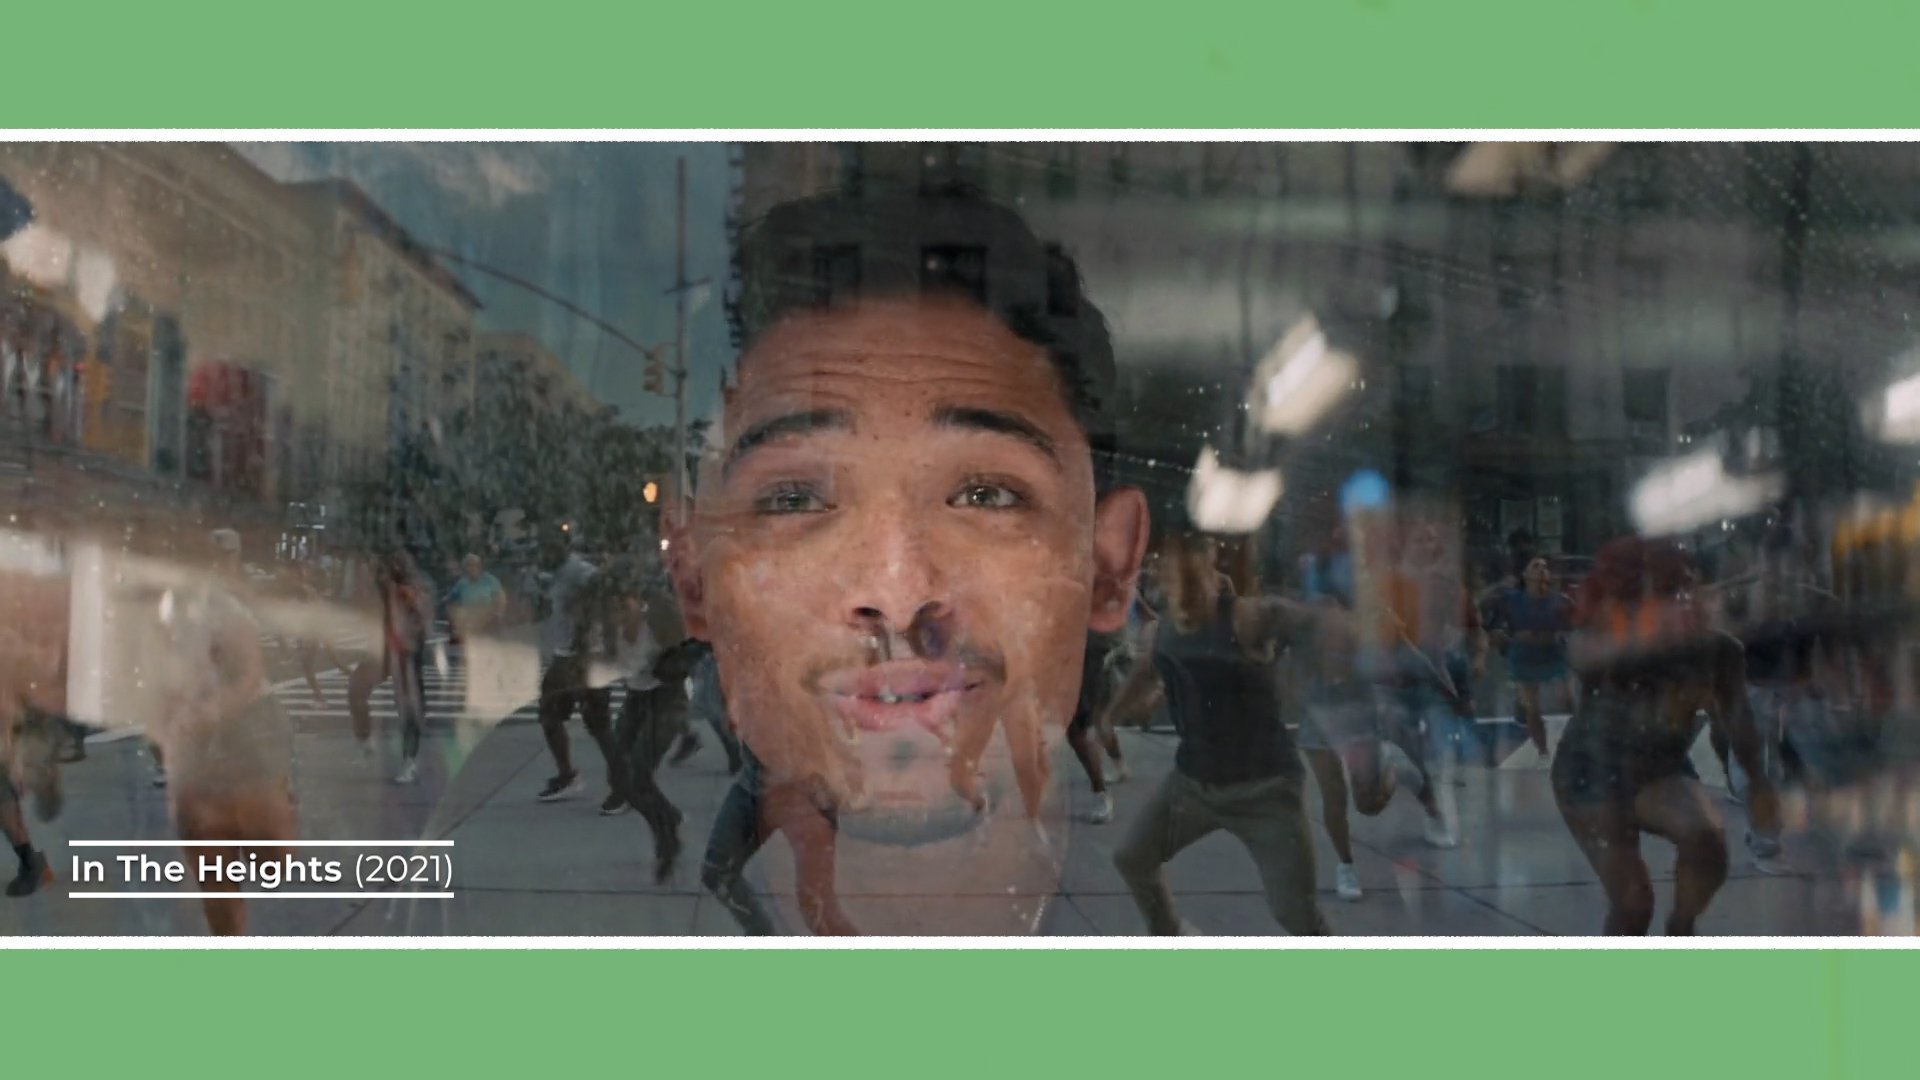
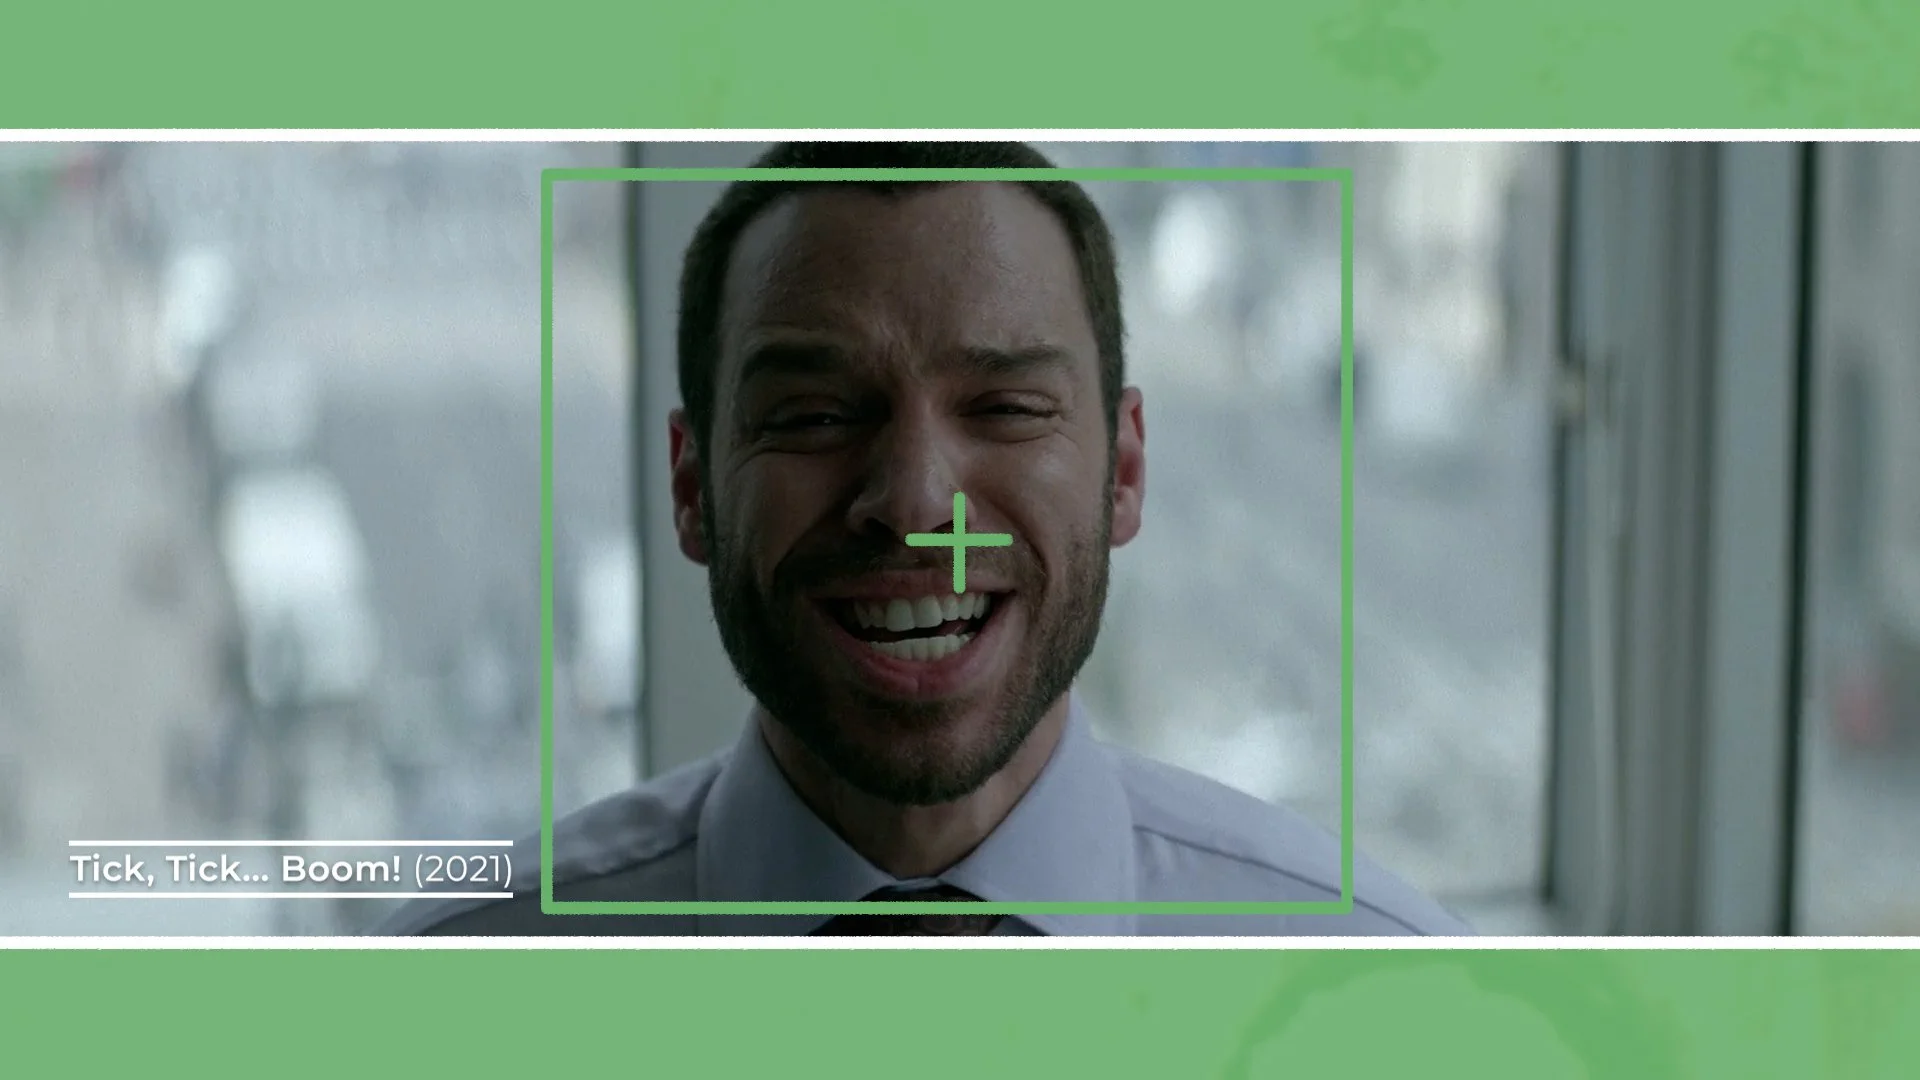
Although she has worked consistently since the early 2000s across a wide range of genres, her recent large-scale musicals, including In the Heights, Tick, Tick, Boom and Wicked, provide a particularly clear window into her recent visual style.
PHILOSOPHY
While musicals are often associated with spectacle, wide shots, choreography and production design, Brooks approaches them from a surprisingly intimate angle.
“John Chu and I approach musicals in the same way that Lin Manuel Miranda and I approach musicals - is definitely from the inside out rather than the outside in. So, the close up is everything. And finding a lens that can create the close up that pulls something extra out of the character, that has that magic.” - Alice Brooks
The close-up operates as more than just coverage: it’s the emotional anchor of the scene.
These close-ups can feel isolating and melancholic, or bright and euphoric. But in each case, they reinforce the emotional state of the character. She often centre-frames her subjects within the wide 2.39:1 anamorphic frame which she favours, using negative space along the outside edges, or positioning characters within shapes or objects to create a proscenium like frame that subtly draws the audience’s eye towards them.
The extra width of anamorphic doesn’t just accommodate wide shots of grandiose sets and choreography, it also intensifies singles. A character placed dead centre, surrounded by a soft background creates a tangible emotional connection with the audience.
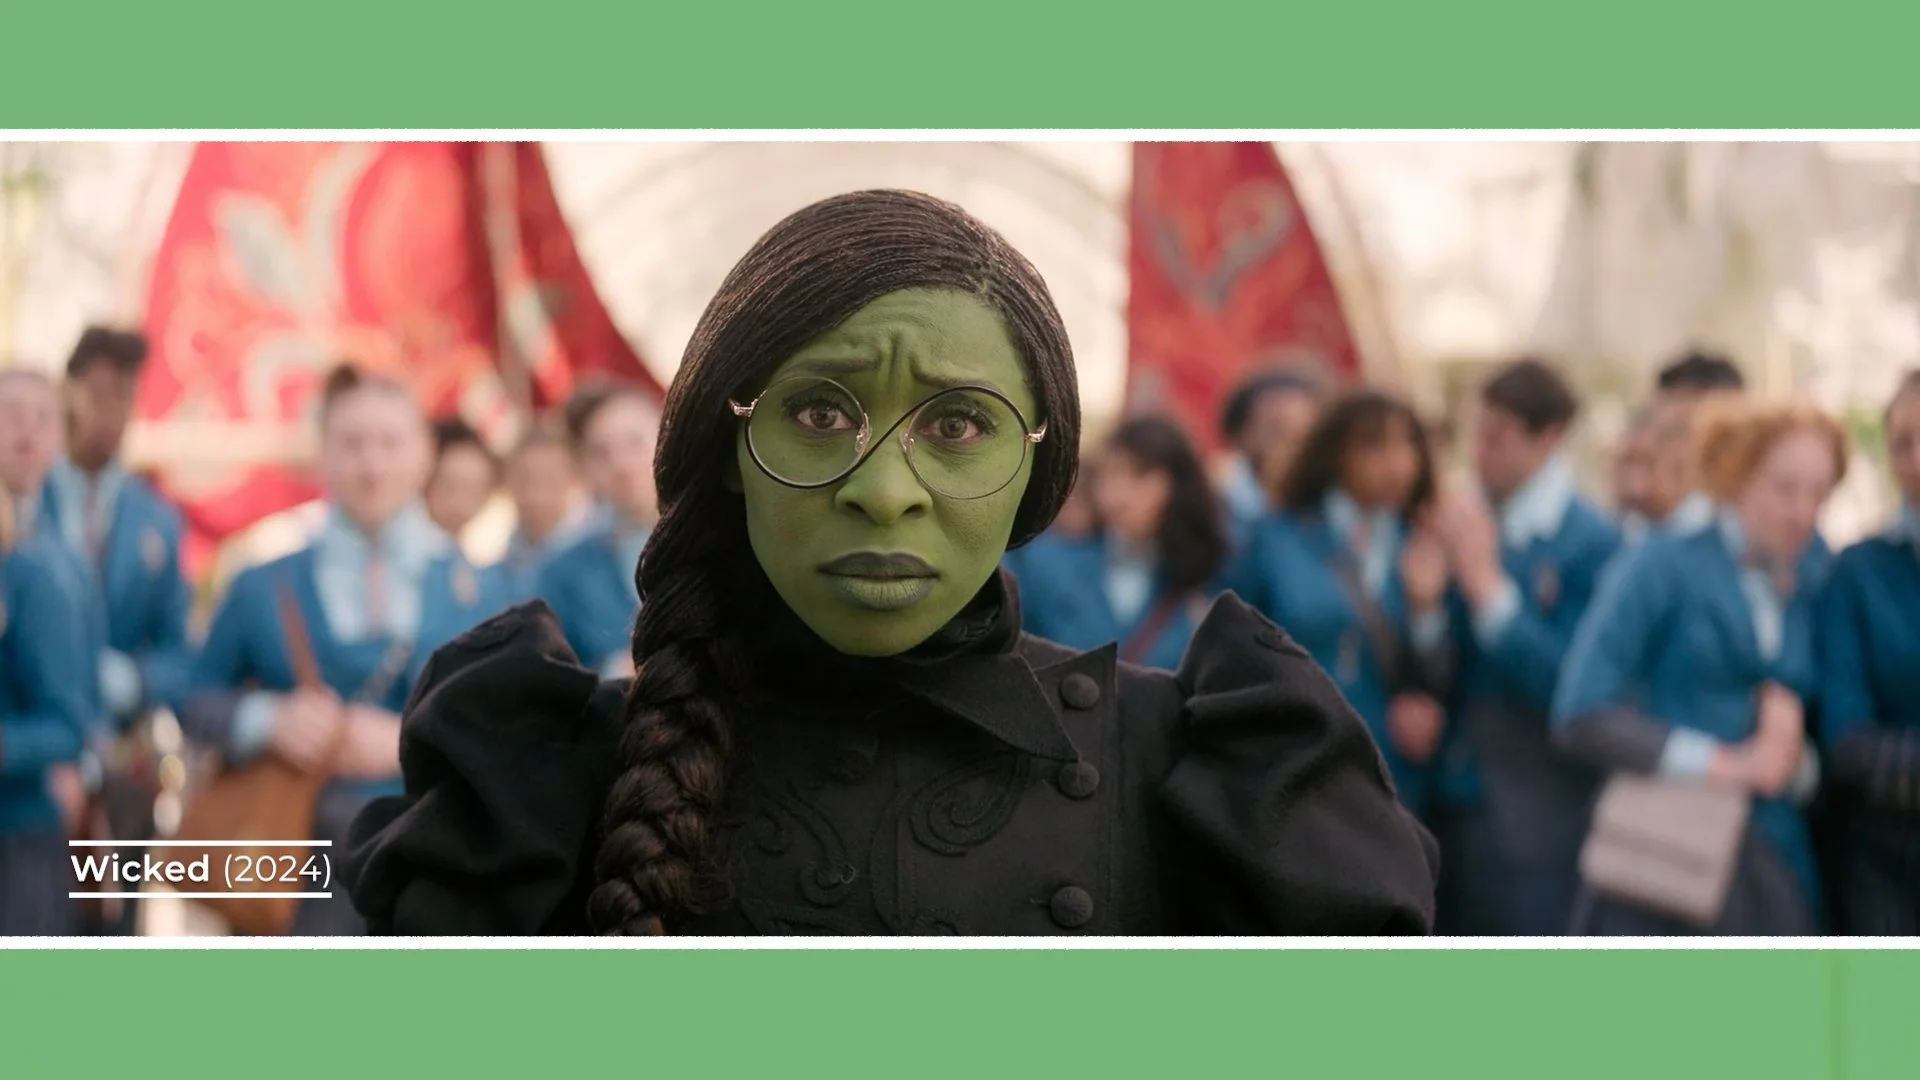
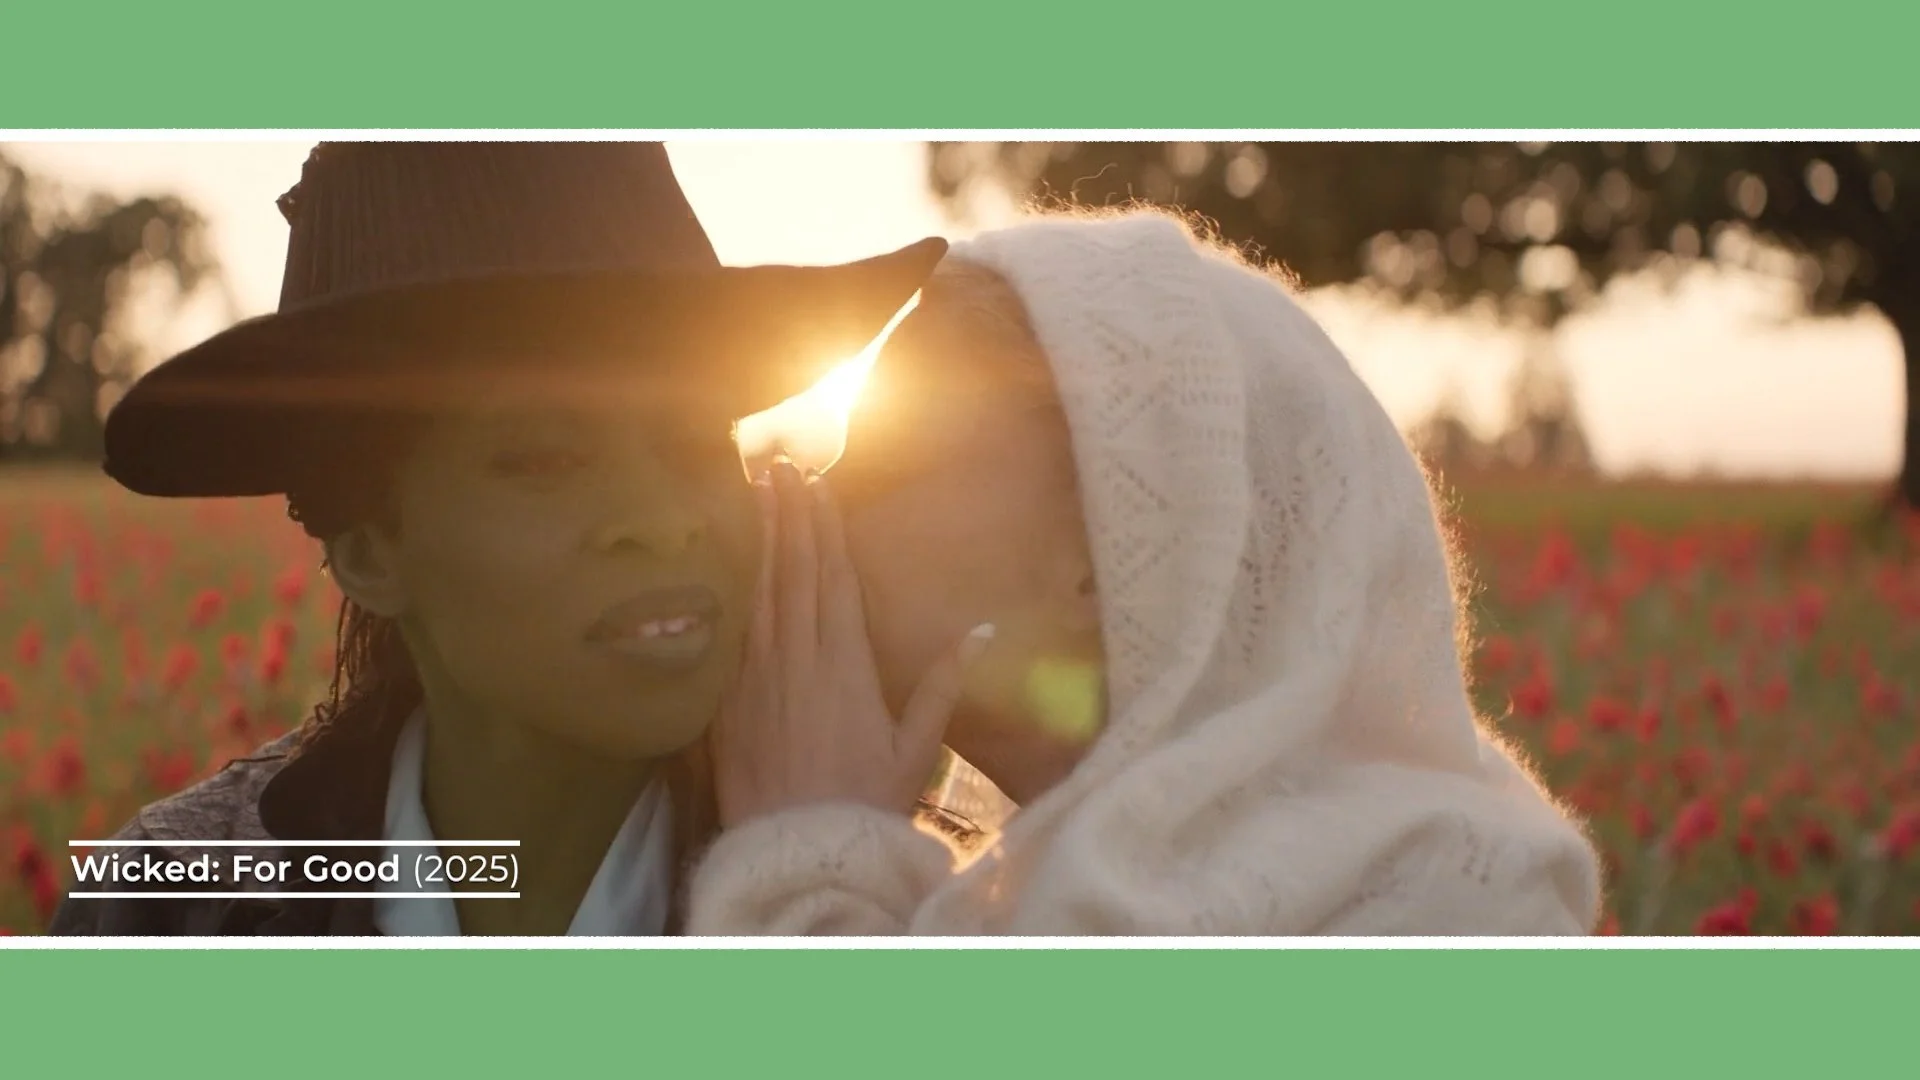
These emotional associations extend beyond framing into colour. For example, in one of the penultimate songs in Wicked, she used a cool and warm colour palette, which she felt had specific emotional connections and significance to the characters.
“We use two colours. We use a moonlight colour which is this blue which is the colour of Glinda and Elphaba’s love. And then we also use orange flame. Orange is the colour of Elphaba’s transformation.” - Alice Brooks
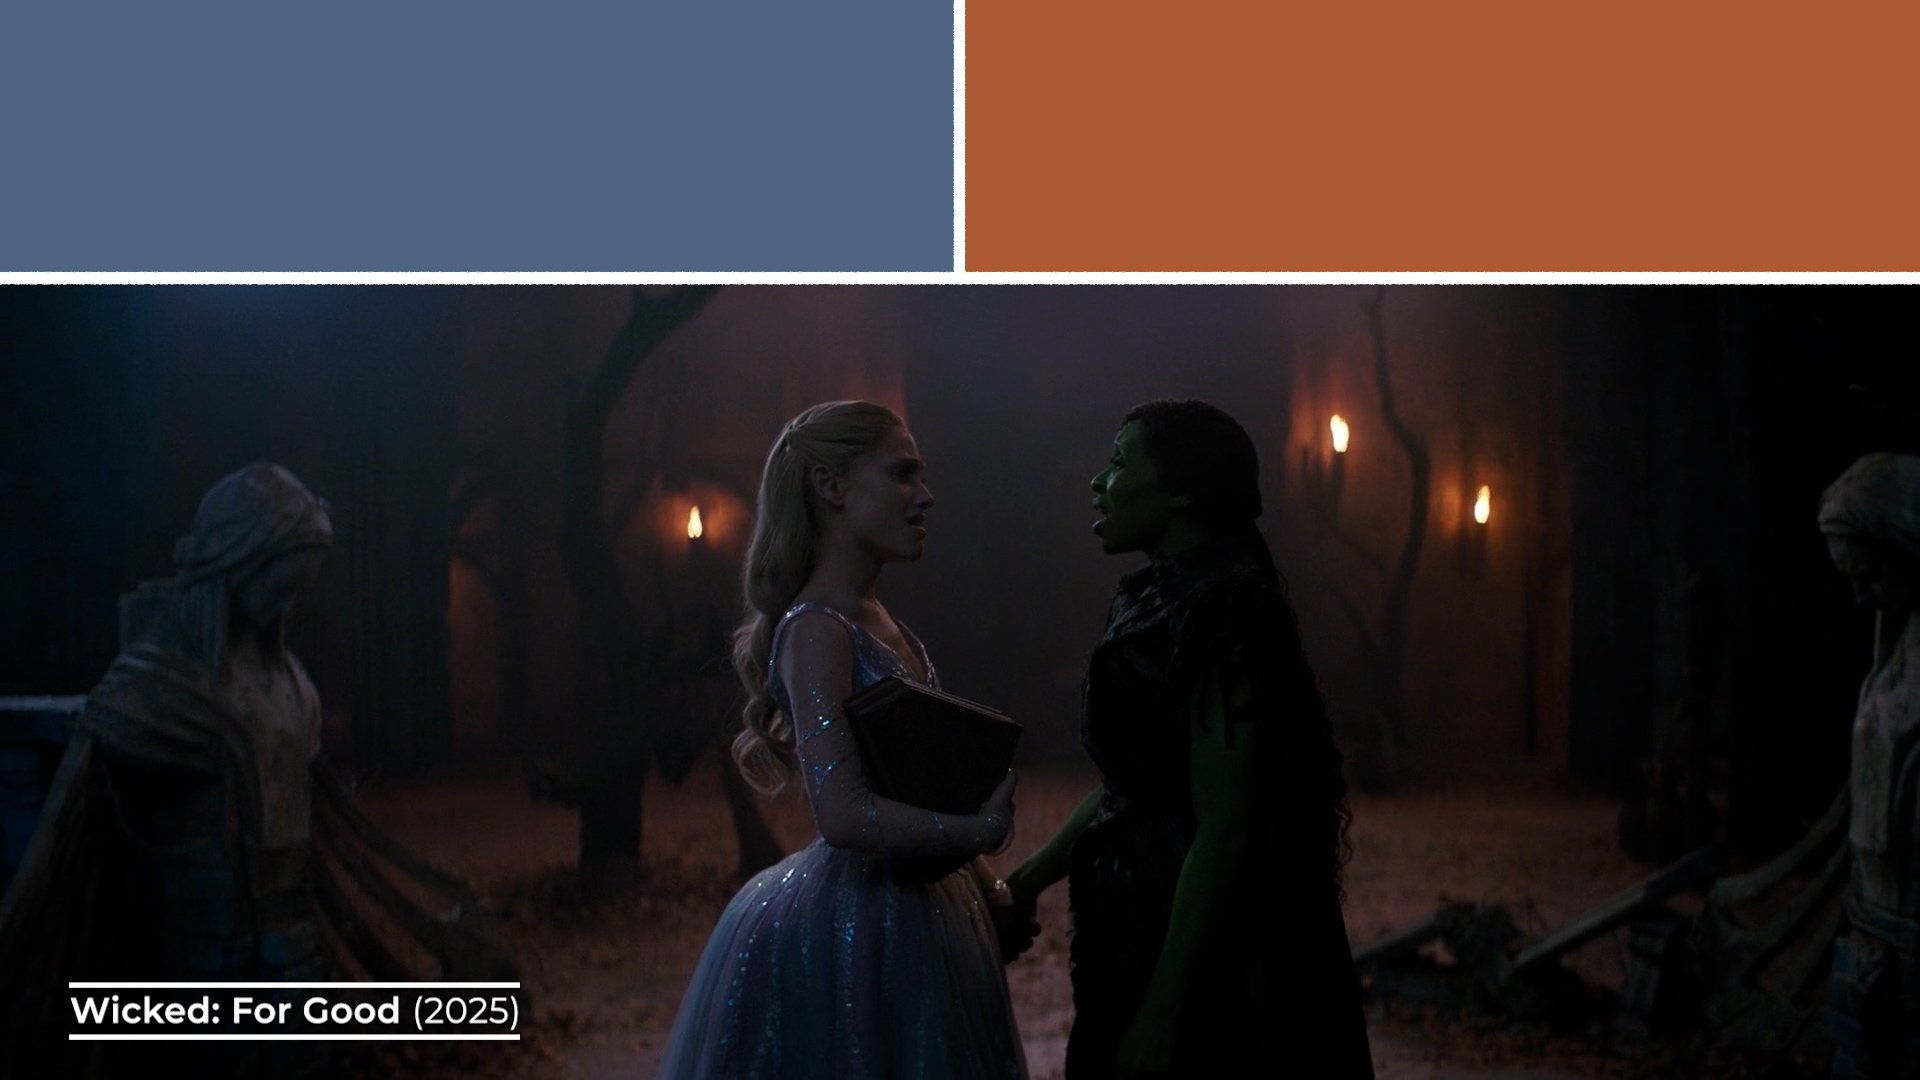
In Wicked, colour becomes a storytelling device. Beyond the overarching soft pastel rainbow palette of Oz, individual scenes are distilled into specific tonal identities. The luminance of the palette also often enforces the emotional tone. Sometimes it’s bright, airy, whimsical and happy, while other scenes play out in darker, cooler, more mournful tones.
Similarly, In the Heights carries a warm, yellow and red brick, sun-bounced glow that reflects both the place it’s set in, as well as the warmer, joyful tone of the story.
Maintaining the continuity of these palettes isn’t easy, it can be a logistical and creative challenge, especially on the Wicked franchise films, which were shot in a single block of simultaneous filming. Maintaining continuity of evolving looks across two different movies and 17 soundstages at three different studios around London required precision.
To manage this, she borrowed a technique from animation: the colour script.
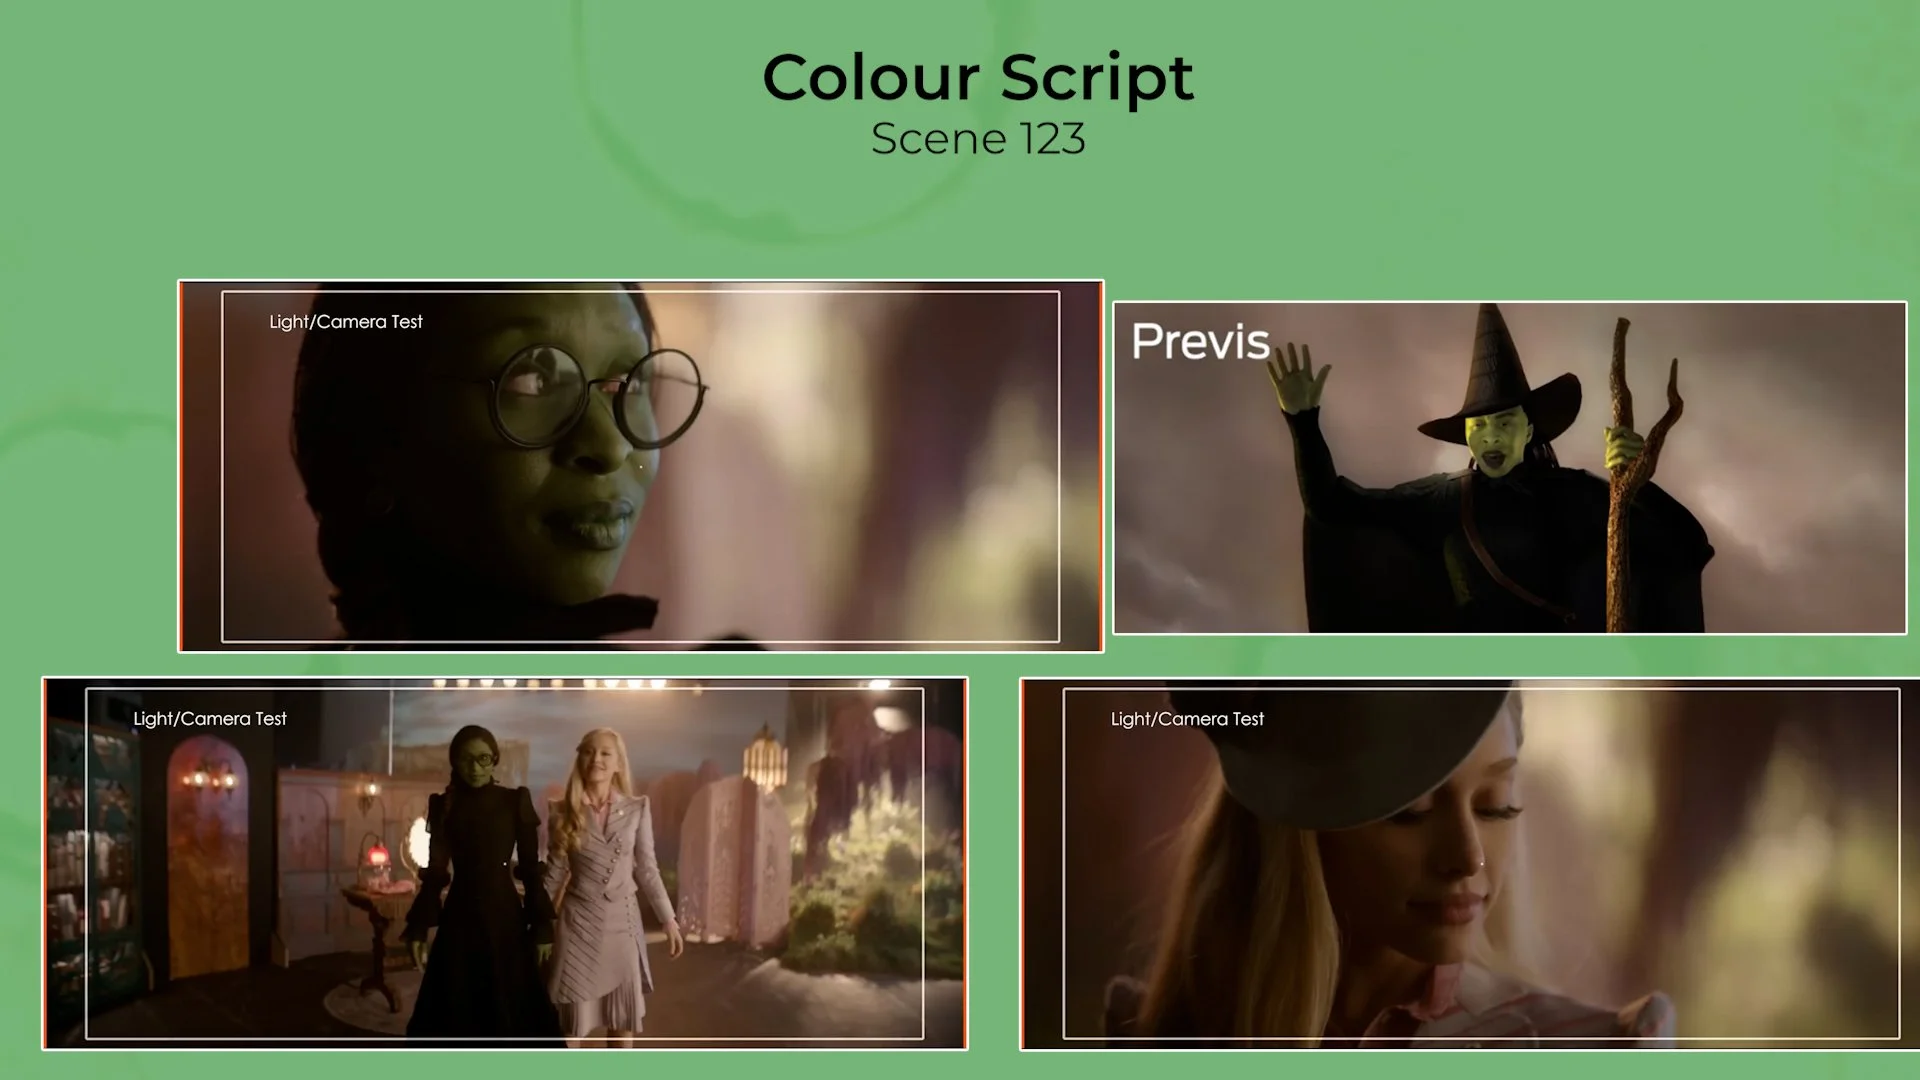
For each scene, she compiled reference imagery, from still photographs of light studies, concept art or early test shoots. Like a moodboard. She then distilled each scene down to a single representative frame. These images acted as visual anchors for colour, contrast and tone.
Placed together on a wall, they formed a visual roadmap of the entire film. Stepping back allowed her to see an overview of the emotional rhythm of the movie as a wash of colour, ensuring the palette evolved cohesively as locations, time and mood shifted in the story.
GEAR
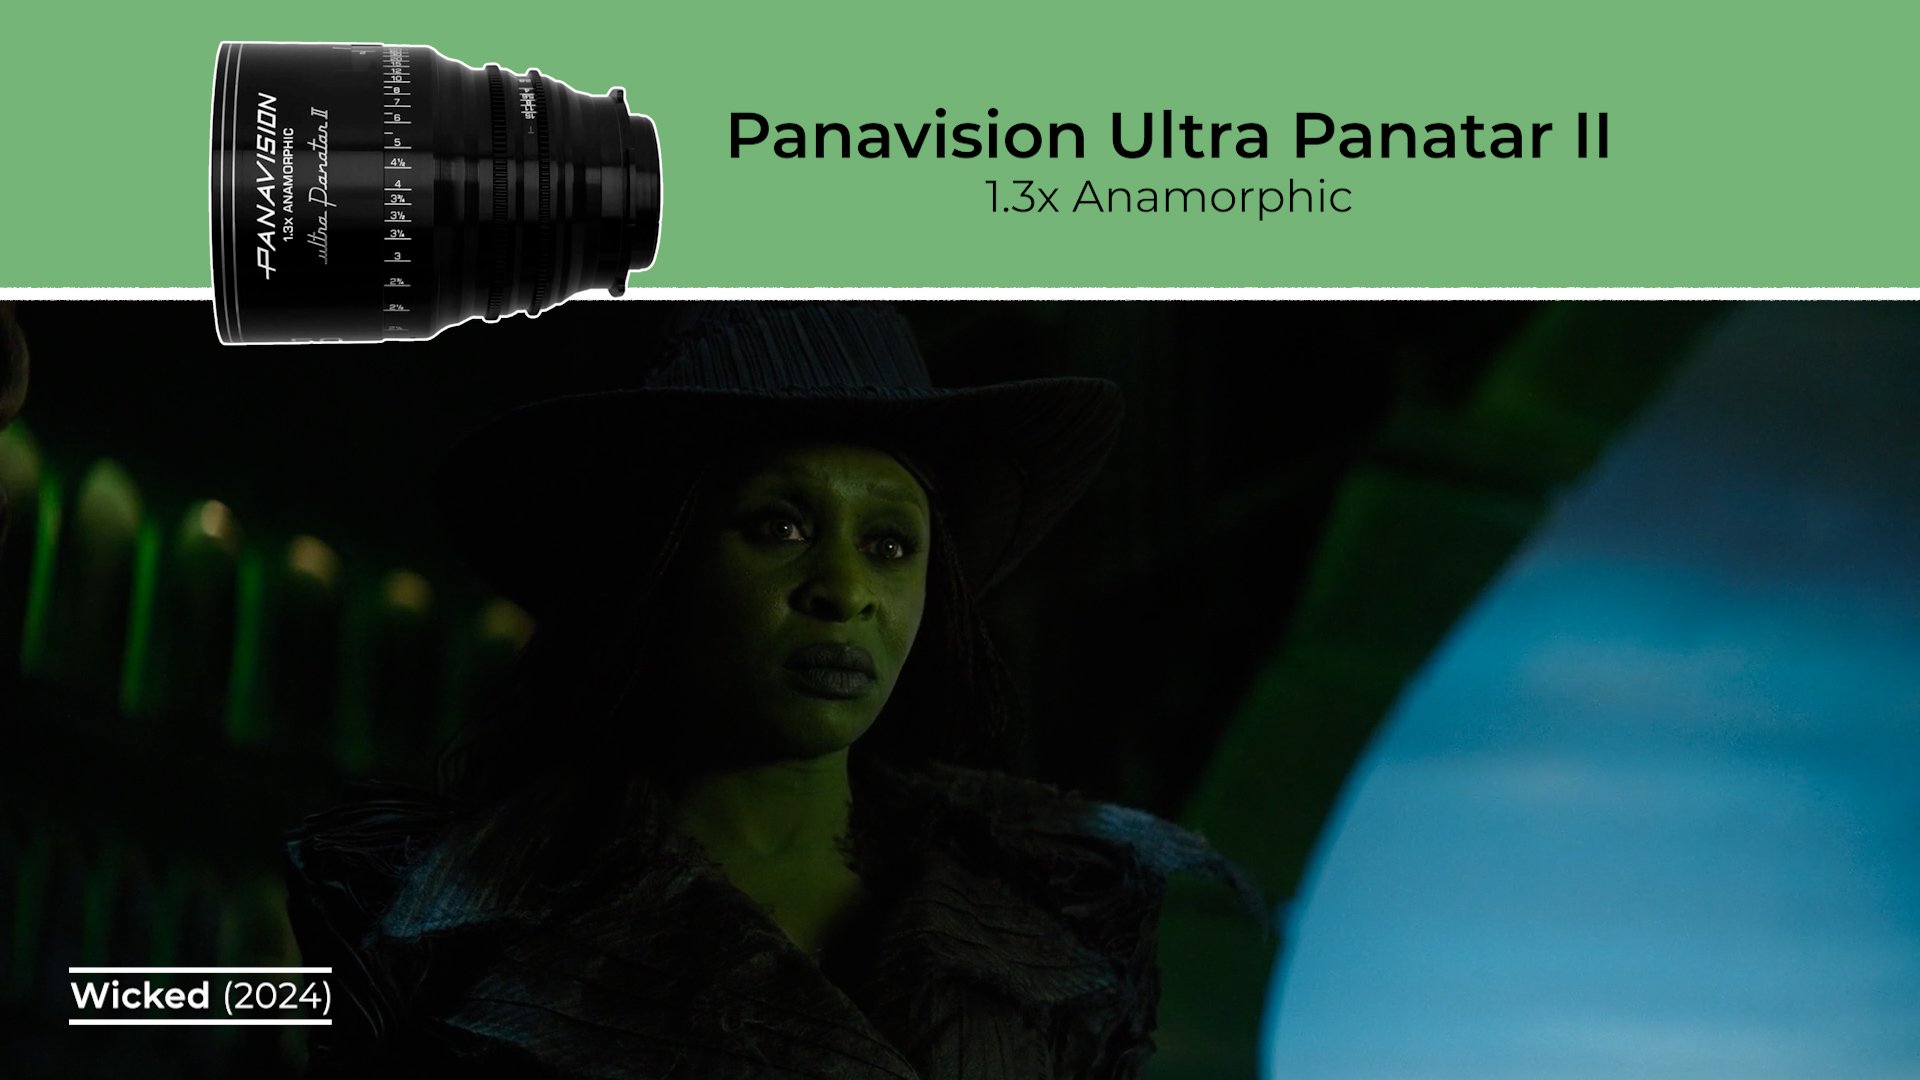
A defining component of Brooks’ recent cinematography is her love of anamorphic lenses - particularly those from Panavision.
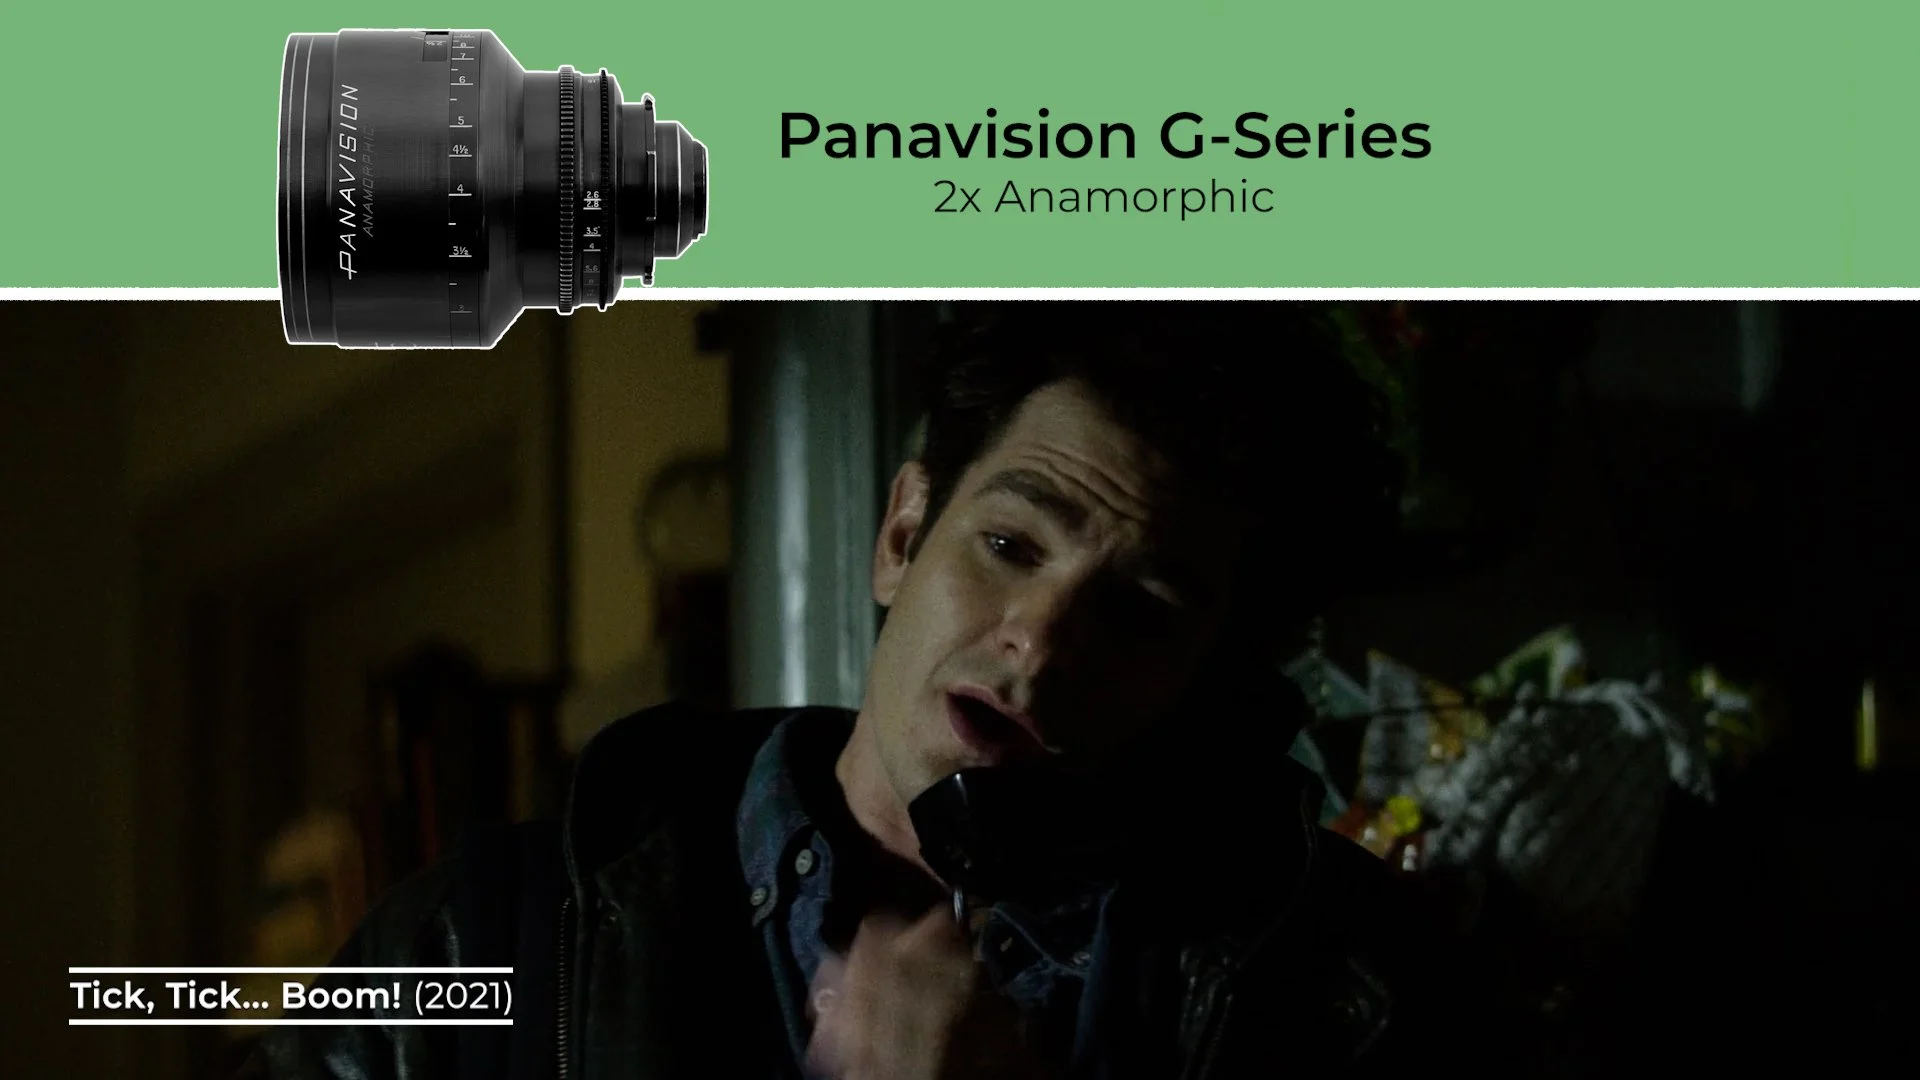
While she has used spherical lenses in her previous work, she often gravitates toward 2x anamorphic glass. Such as Panavision’s G-Series anamorphics, which she has used on multiple projects, and more recently the 1.3x squeeze Ultra Panatar II which were designed specifically for Wicked.
Anamorphic lenses expand the horizontal axis of the frame, allowing for larger ensemble compositions, ideal for giving scope to large crowds in musicals, while also creating a distinctive separation between foreground and background to emphasise those emotional close ups.
Brooks is especially drawn to their texture.
“I wear contact lenses and I do have an astigmatism. The first two hours of a day I don't put in my contacts and I love not being able to see things crisp. And I love the softness on the edges. I guess that’s what we did, which was create the way I wanted to see, and John Chu wanted to see Oz, with these lenses.” - Alice Brooks
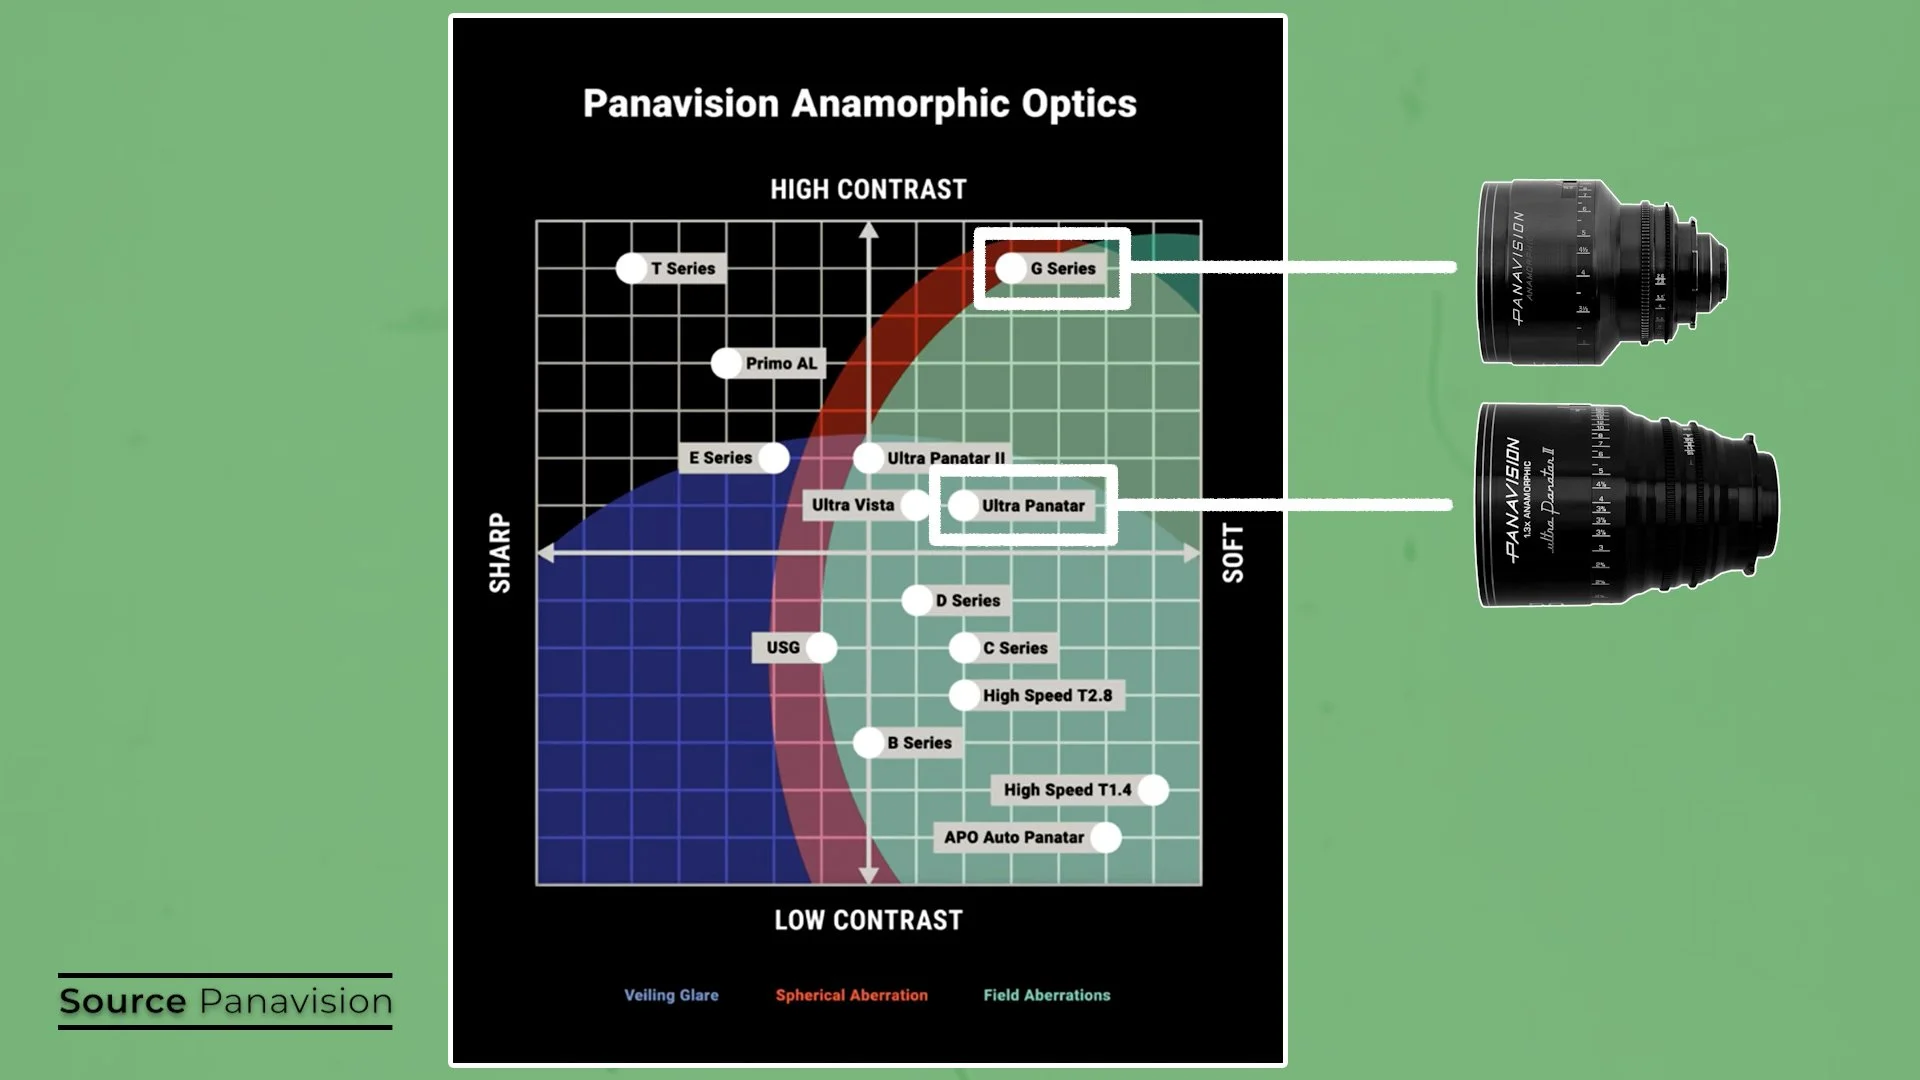
If you look at this chart of Panavision lenses, it’s clear that she prefers anamorphics that combine higher contrast with a more gentle edge softness. The G-Series, which are partially modelled on the older C-Series, but with updated coatings and mechanics offer this look.
For Tick, Tick, Boom she worked with in-house lens guru Dan Sasaki to customise a G-Series set, creating an “artistic” version which she could use for the apartment interiors. These lenses introduced more pronounced sagittal astigmatism - a soft smearing of focus that falls-off toward the edges of the frame. This subtly pulls the viewer’s eye toward the sharper centre sweet spot, where her characters are often placed, resolving images with a subtle tunnel vision effect.
On Wicked, she used 1.3x Ultra Panatar lenses across both films to maintain continuity. Again, Sasaki customised them, this time creating different coloured warmer, amber flares instead of the typical blue. This warm shift better suited the tone they were after and, not having a blue flare prevented clashes with the many greens in the palette.
This set also introduced more of a 2x-style distortion and fall-off, steering the 1.3x lenses away from a cleaner, spherical look. Shooting these lenses wide open at T/2.8 helped get the most out of these optical characteristics.
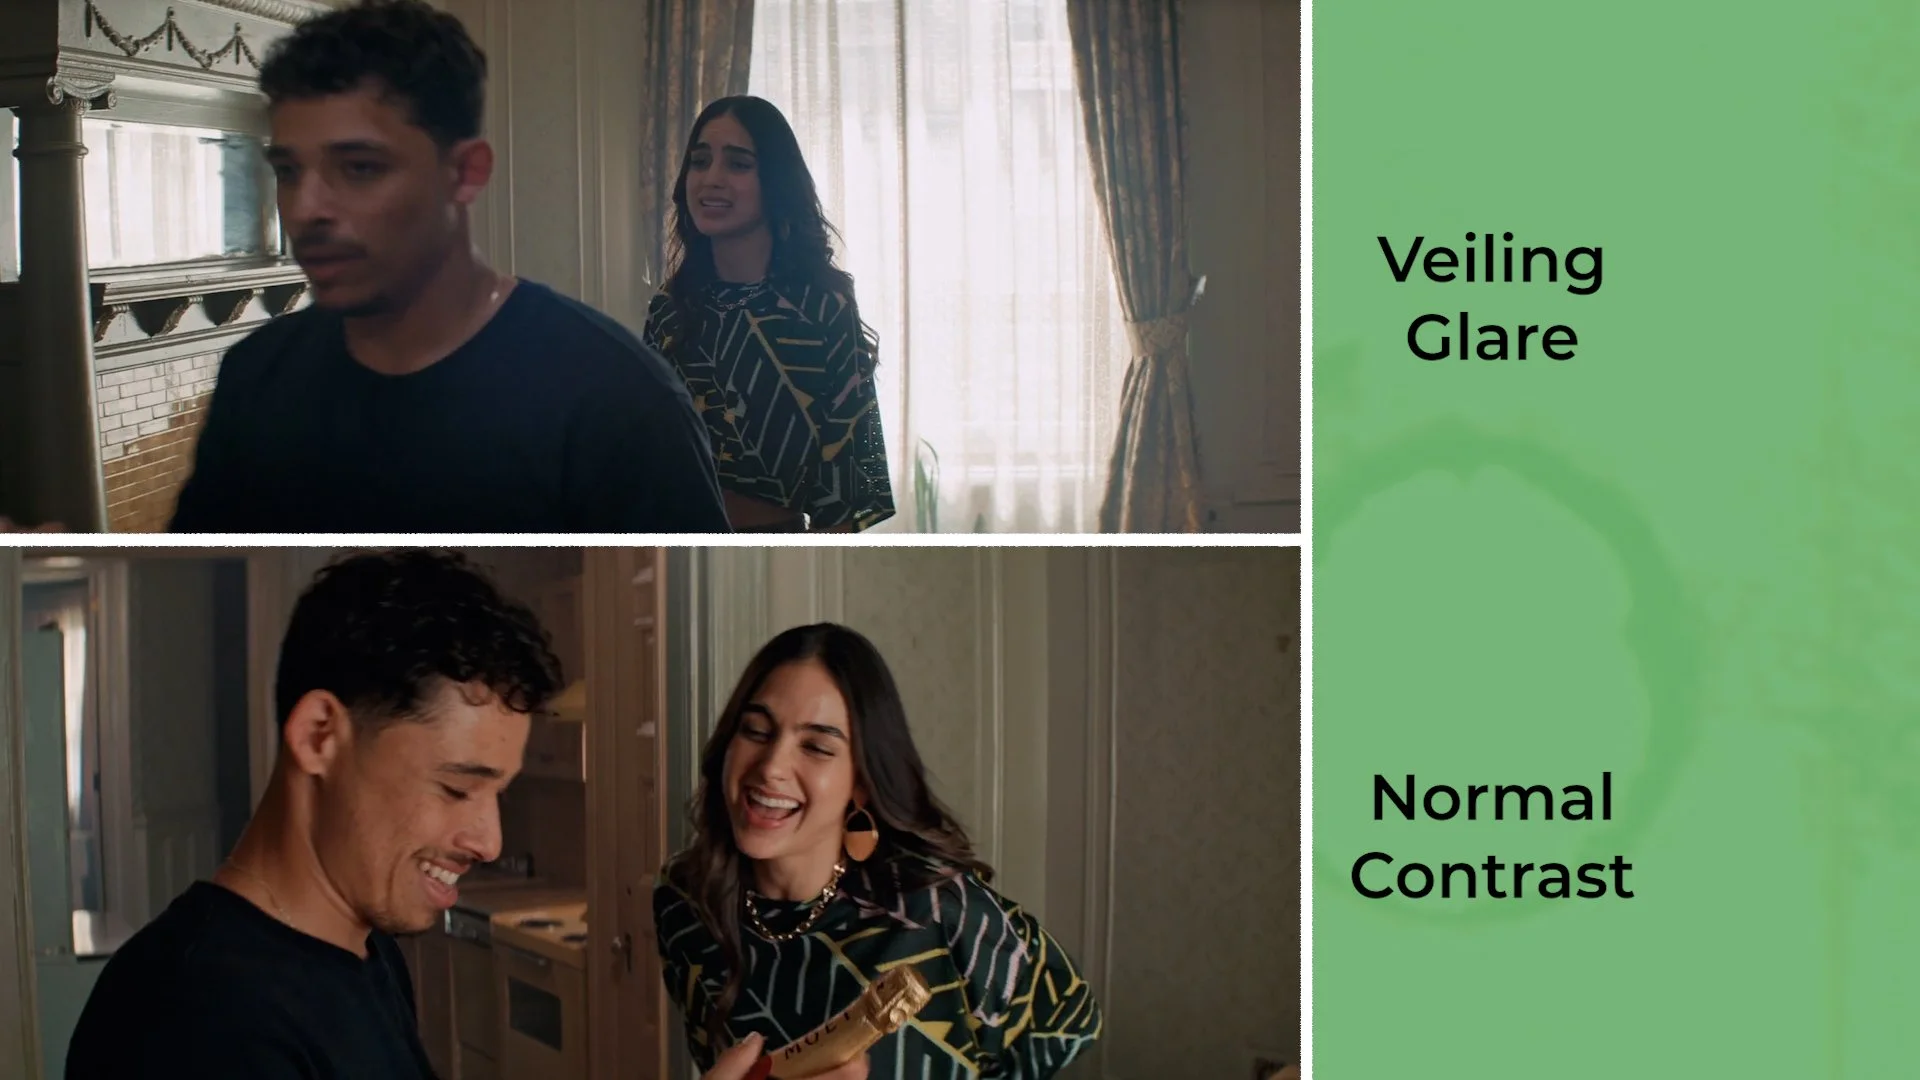
Beyond flares, which are caused by shafts of hard light hitting the lens directly and reflecting around the glass, she frequently employs a veiling glare. This is where light enters the lens less directly and scatters inside it to lift the black levels and introduce a soft haze. Highlights glow and gently bleed into shadows, enhancing the dreamy quality.
To further emphasise this softness, she often uses ¼ Glimmerglass diffusion filters.
She typically exposes scenes on the brighter side and is happy letting highlights, like bright windows or backgrounds in full sun, sit at the high end of the curve or even clip a bit from overexposure. This blowing out is softened by those diffusion filters or that veiling glare we mentioned.
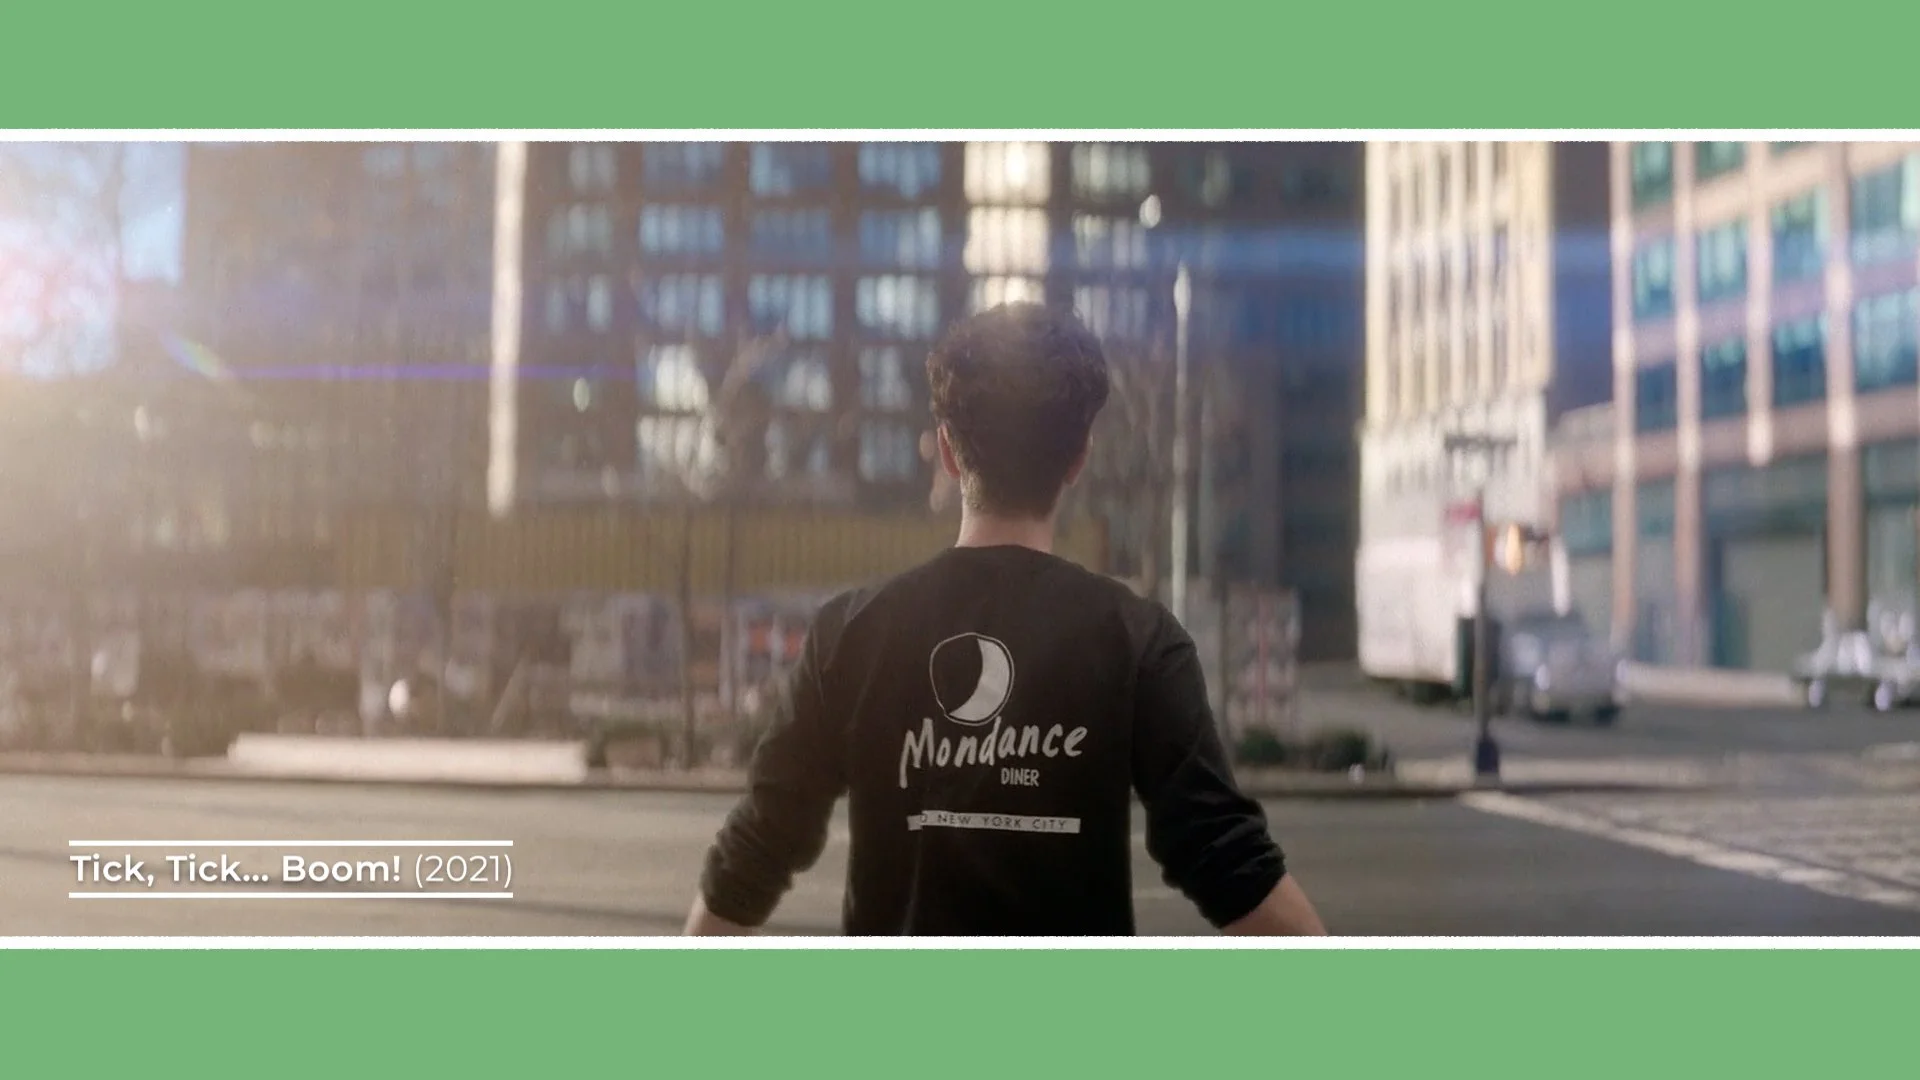
Brooks typically pairs these lenses with digital cinema cameras, such as the large-format Alexa 65 on Wicked or the Panavised Red Monstro, the Millennium DXL2 on Home Before Dark, In the Heights and Tick, Tick, Boom - capturing high-resolution negatives that still retain a gentle, textured finish.
Lighting large-scale musicals demands both theatricality and precision.
She integrates practical lights directly into production design wherever possible. Whether that means rigging film sources onto the soundstage set, using fluorescents in a shop or using tungsten or RGB tinted stage lights.
When shooting in a studio, or for exteriors, she’s used large sources to mimic or add to the sunlight, backlighting characters with dino lights, T12s or 20K mole beam projectors rigged to studio ceilings or high in the sky from cranes.
To provide a soft, colour-adjustable ambient illumination that covers large areas of space inside studio sets, her team rigged Quantum IIs, which are 4x4 soft LED sources, overhead, softening the light even more by sending it through magic cloth diffusion textiles.
For another scene she used the same concept by shining LED panel sources like the Quantum IIs and Skypanel S60s through resin set walls from the production design team, which also acted like a diffusion layer.
Her team connects all the lights to a dimmer board, which allows her to do subtle lighting cues during takes, gently shifting intensity or colour temperature mid-performance as you would on a stage production.
The result is a world that feels alive and expressive yet is still soft, intimate and emotionally dialed into the story.
CONCLUSION
Alice Brooks’ cinematography demonstrates that spectacle and intimacy aren’t opposites.
Through anamorphic compositions, emotionally coded colour palettes, customised optics and soft, expressive lighting, she crafts musicals that feel both grand in scale and deeply personal.

Understanding Anamorphic: 1.3x vs 1.5x vs 2x
There’s something undeniably cinematic about anamorphic. But, to understand these lenses properly, we need to look beyond the flares and into something more fundamental: field of view and squeeze factor.
INTRODUCTION
There’s something undeniably cinematic about anamorphic.
The flares, the oval bokeh, the expansive, panoramic frame. It’s a look that has become synonymous with big-screen storytelling - from classic Hollywood epics to modern blockbusters.
But beneath the aesthetic lies a practical optical mechanism that quite literally reshapes the way the camera sees.
To understand anamorphic properly, we need to look beyond the flares and into something more fundamental: field of view and squeeze factor.
WHAT ARE ANAMORPHIC LENSES
At their core, anamorphic lenses bend light in a very specific way.
Unlike normal spherical lenses, which render an image evenly at 1:1 across both axes, anamorphic lenses compress, or squeeze, the horizontal width of an image so that it can be recorded onto a narrower sensor or, originally, a frame of 35mm film.

After this squeezed image has been shot it is then desqueezed in post-production, restoring it to its correctly intended proportions - typically resulting in an expansive native aspect ratio such as 2.39:1 - which is what we call a widescreen or anamorphic aspect ratio.

Optically, anamorphic lenses are constructed from a base lens, like a 50mm, which is then paired with cylindrical anamorphic elements - positioned at either the front or rear.
Front-mounted anamorphics are usually more desirable as the cylindrical components exaggerate the classic anamorphic character and look. Whereas rear-mounted anamorphics often take an existing spherical lens and ‘anamorphise’ it, with an adapter at the rear, which stretches the image vertically, rather than squeezing it.
This typically gets rid of the kind of bokeh and flares that anamorphic is known for, reduces the aperture and increases the effective focal length, like a teleconverter. For this reason rear anamorphics have mainly been used on long zoom lenses when filmmakers need a stretched widescreen image and a longer focal length than can be found in front anamorphic prime sets.

There is a key difference in how anamorphic lenses affect field of view.
An anamorphic lens maintains the same vertical field of view of its stated focal length but expands the horizontal field of view due to its squeeze factor.
For example, a 50mm 2x anamorphic lens gives you the same vertical field of view of a 50mm spherical lens, but a wider horizontal field of view roughly equivalent to a 25mm spherical lens.
So instead of using a wider lens and cropping the top and bottom to create a widescreen aspect ratio, as is done with spherical lenses, anamorphic expands the frame sideways, while maintaining a longer focal length.
Anamorphic focal lengths therefore tend not to go as wide as spherical primes. While spherical sets will often include 18mm lenses, anamorphic primes typically start around 28mm or 35mm.
This is why anamorphic works so well for landscapes, group compositions, or scenes that benefit from using the entire width of the frame.

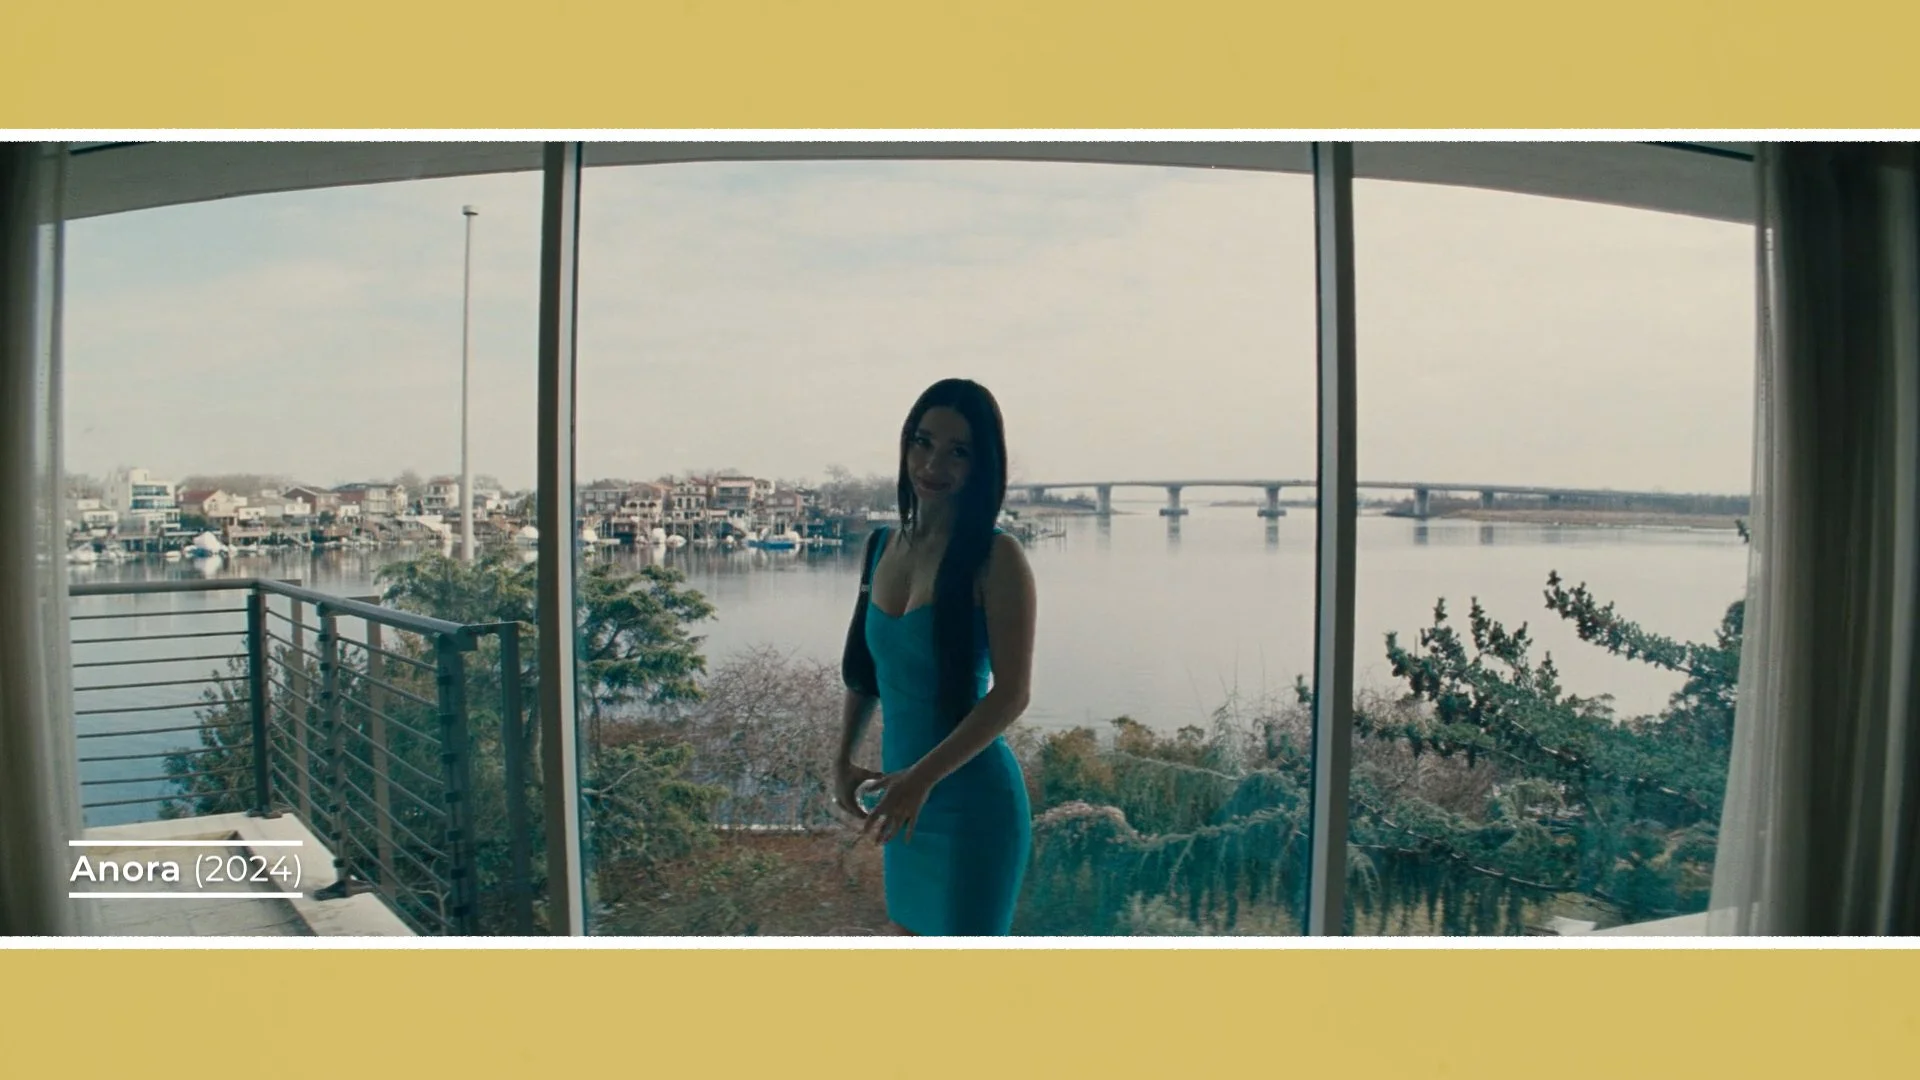
However, it also changes how we frame people. Because it’s so wide, close-ups often contain more negative space on either side of the subject, with less headroom because adding more vertical space only exaggerates the horizontal emptiness.
The width doesn’t come from shorter focal lengths - it comes from the squeeze.
ANAMORPHIC FEATURES
Anamorphic lenses were originally developed for a technical reason: resolution.
In the era of 35mm film, widescreen images captured with spherical lenses required cropping the top and bottom of the frame to achieve a 2.39:1 aspect ratio - meaning only around 50% of the negative area was actually being used.

Anamorphic lenses solved this by optically squeezing a wide image horizontally so that it filled the entire 4:3 film frame. When projected and desqueezed, 100% of the negative contributed to the final widescreen image.

The result was improved image quality, greater vertical resolution and reduced film grain.
However, in the digital era, resolution is determined by pixel count and sensor design. Since many modern digital sensors are wider in shape than 4:3, spherical lenses capturing in native widescreen formats may actually use more total pixels than an anamorphic image that is later desqueezed with the sides cropped off.
Such as the Red Raptor’s 8K sensor. Which records a 2.40:1 ratio from spherical lenses and uses 8192x3456 pixels, whereas anamorphic lenses that record a 6:5 area of the sensor to get the same aspect ratio yields 5184x4320 native pixels.

On top of that, anamorphic lenses contain additional cylindrical glass elements, which often reduce the overall sharpness compared to high-performance spherical lenses.
So today, the reason for wanting to shoot with anamorphic lenses is usually not about wanting the most highly resolved image at all, it’s more about embracing the optical imperfections, look and character of anamorphic.
Such as, oval bokeh, created by the horizontal compression of out-of-focus highlights. Horizontal lens flares, that stretch the streaks of light.

Edge and barrel distortion, that bends the outsides of the image, especially on wider focal lengths. And focus falloff where sharpness gently degrades away from the centre of the frame.
Much of this optical personality and how pronounced these traits look is directly influenced by one key variable: squeeze factor.
SQUEEZE FACTORS
The squeeze factor determines how much the image is compressed horizontally.
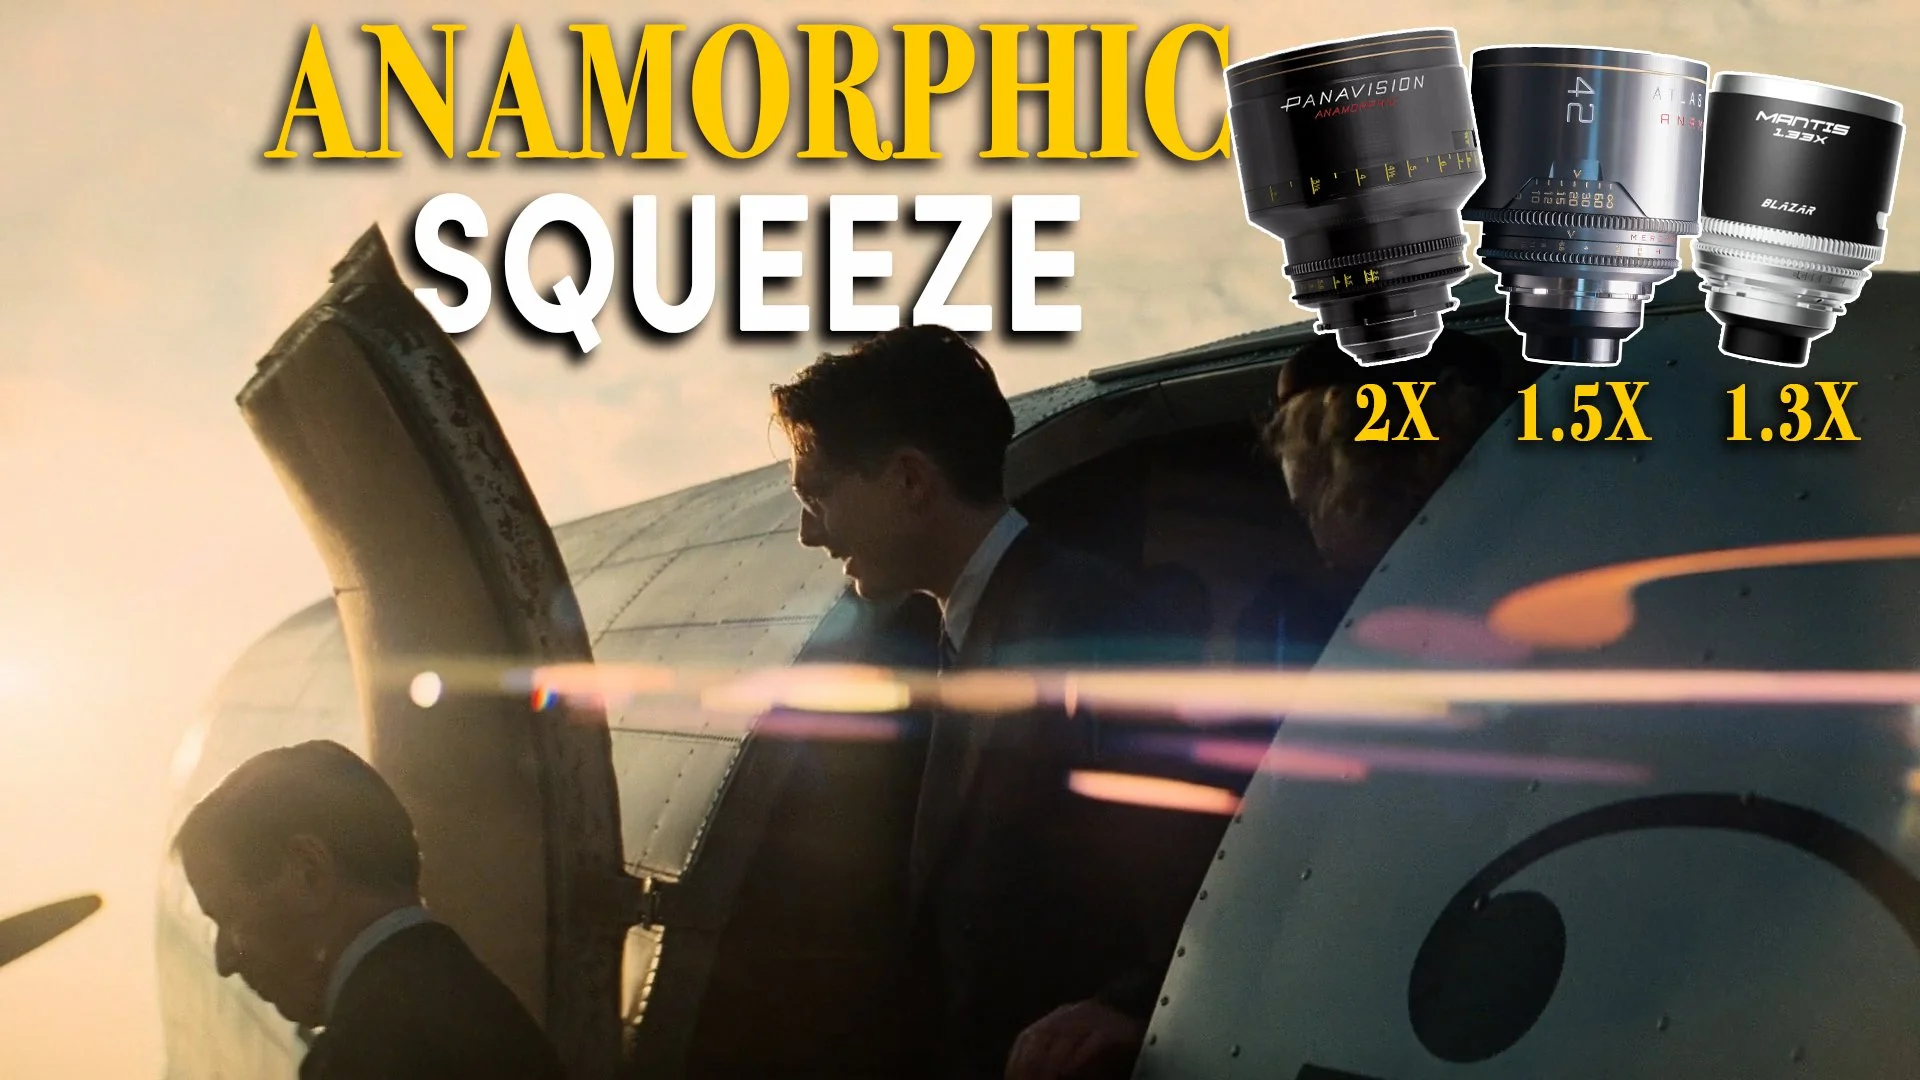
Common anamorphic squeeze factors include 1.3x, 1.5x and 2x.
Whatever squeeze you shoot with must be matched by an equivalent desqueeze, both for on-set monitoring and in post-production. So, a 1.5x anamorphic lens requires a 1.5x desqueeze in post to bring the image back to its correct proportions.
2X
The 2x squeeze is the traditional, classic anamorphic format.

Because 2x squeeze is the professional benchmark, every pro digital cinema camera should be able to desqueeze this image in camera for purposes of correctly monitoring the footage on set.
2x lenses compress the image more aggressively. They produce the most pronounced anamorphic characteristics with stronger oval bokeh, horizontal flares and greater edge distortion.
Straight lines near the edges of the frame shot on these lenses can visibly warp or bend.
On productions involving visual effects, this distortion becomes a technical consideration. VFX supervisors will often request distortion charts be shot at a gear check for every focal length used. These grid patterns allow software to measure how much each lens bends the image so that any CGI elements can be distorted the same amount to match seamlessly.
Examples of 2x anamorphic lenses include Cooke Anamorphics, Hawk V-Lites, Kowas, Panavision’s G-, C- and E-Series, Arri/Zeiss Master Anamorphics, and Atlas Orion lenses.
This is the boldest, most recognisable anamorphic look.
1.5X
The 1.5x squeeze factor is a more recent development - mainly designed around modern 16:9 digital sensors.

Rather than adapting a 4:3 or 5:6 capture area, these lenses expand a 16:9 image to roughly 2.66:1 when fully desqueezed - which may require slight cropping on the sides to reach the standard 2.39:1 delivery ratio.
Because the squeeze is less extreme, the optical artefacts are also more subtle.
Slightly rounder bokeh and slightly less distortion.
These 1.5x lenses are often aimed at owner-operators or smaller productions rather than large rental houses. Due to this, some professional cinema cameras may not be able to do a 1.5x squeeze for monitoring, instead requiring you to use a specific monitor that can desqueeze the output by 1.5x.
These 1.5x lenses usually offer a much more cost effective option than the more expensive 2x glass. And are a great way of still getting an anamorphic look on an indie budget.
Examples include the Blazar Remus, Laowa Nanomorphs, Technovision 1.5x lenses, and Atlas Mercury anamorphics.
Panavision also has a very niche set of 1.44x Auto Panatar Anamorphics, which can be used to convert the native 1.66:1 aspect ratio of 16mm film into a 2.39:1 aspect ratio once desqueezed - such as was done on Red Rocket.
In a similar range to 1.5x, Panavision also has the new Ultra Vista anamorphics, with their 1.6x squeeze factor. These are specifically designed to cover modern, full-frame digital sensors, such as the Arri Alexa LF, and extract a native widescreen aspect ratio without needing to do too much side cropping and therefore losing resolution.
They offer a balance - retaining anamorphic width and covering more of 16:9 digital sensors - while softening some of the more aggressive characteristics of 2x glass.
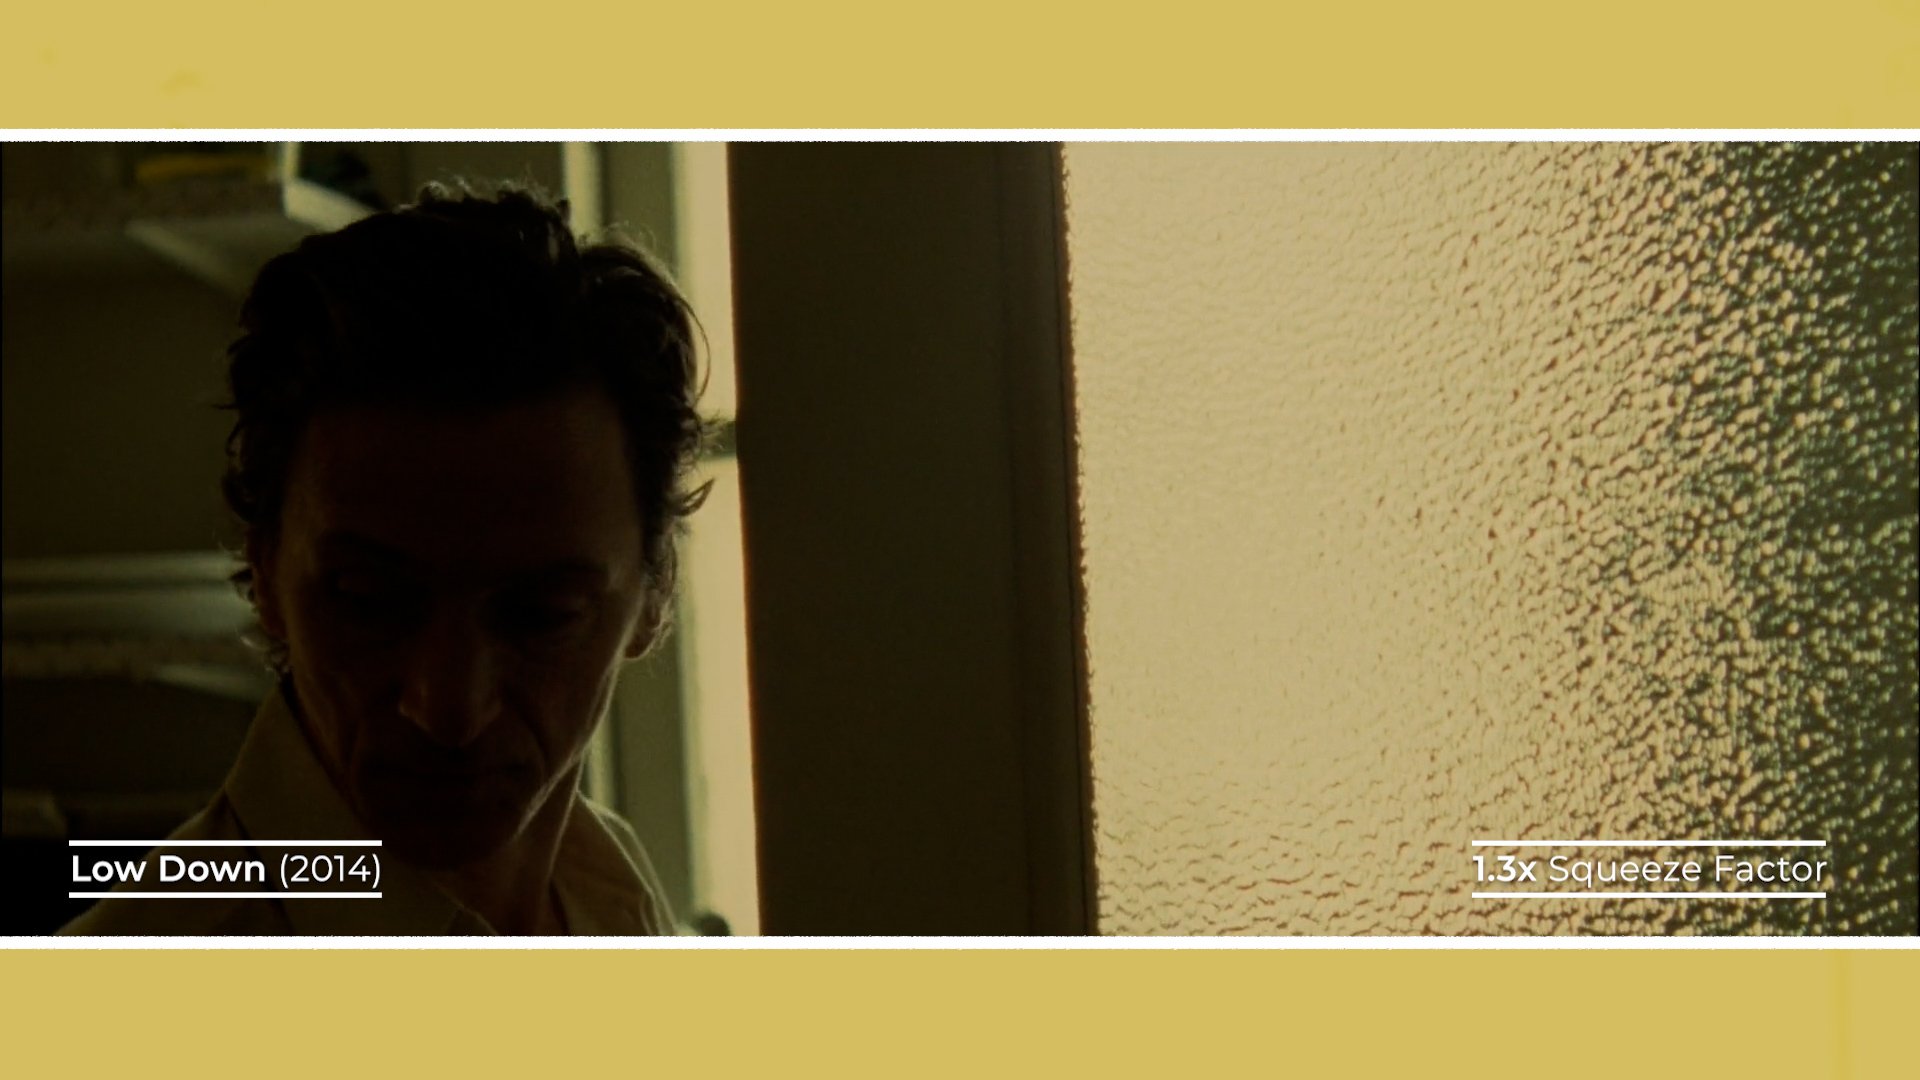
1.3X
The 1.3x squeeze factor was famously used back in the day for the very specific and niche Ultra Panavision 70 large format. When applied to a 5-perf 65mm negative, it produced an excessively wide projected aspect ratio of 2.76:1.

In the digital era, 1.3x lenses, like 1.5x, are often designed specifically for 16:9 or 17:9 sensors - producing a 2.39:1 image with minimal cropping.
Because the squeeze is mild, the look is even more subtle. The image retains much of a spherical cleanliness, with a touch of anamorphic character and an added horizontal breadth.
Examples include Ultra Panavision 70, Panavision Ultra Panatar I & II lenses, and the full-frame Blazar Mantis.
Like the 16mm Auto Panatars, Hawk also makes S16 V-Lites with a 1.3x squeeze factor which extract a widescreen ratio from 16mm film, to create a more textured and tactile anamorphic look.
CONCLUSION
Anamorphic isn’t just about flares or nostalgia. It’s about how the lens reshapes space.
By compressing and then expanding the image, anamorphic lenses alter horizontal field of view, optical character, and composition itself.
And whether you choose 2x for bold distortion, 1.5x for balance, or 1.3x for subtlety - the squeeze factor ultimately determines how distorted and how much of a larger than life look and dimensionality you want to achieve.

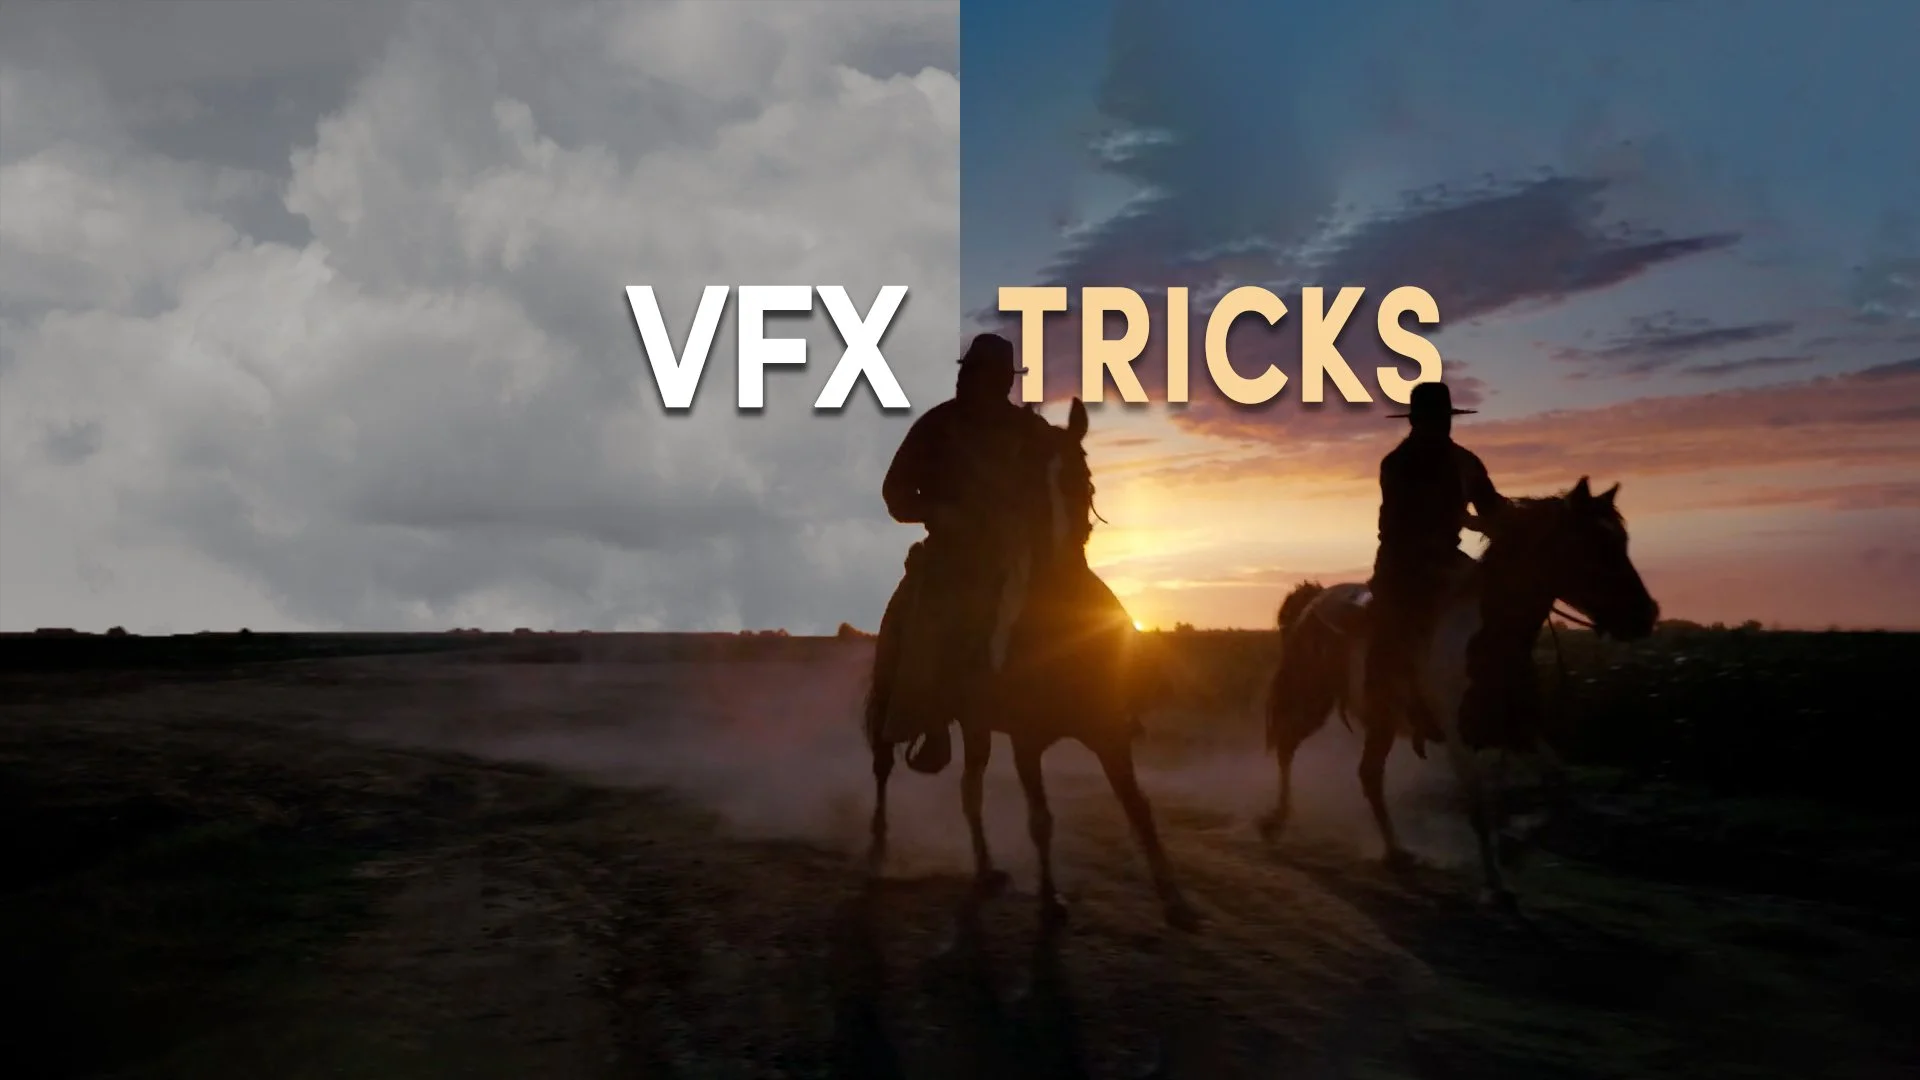
5 VFX Tricks Used By Filmmakers
Some of the most widely used visual effects work is often completely invisible. Let's look at five cases where digital tools aren’t a compromise, but a more efficient and effective solution than going fully practical.
INTRODUCTION
There’s a certain prestige attached to “practical filmmaking”. Real locations. Real effects. Cameras capturing real things.
But the truth is, for certain shots and ideas practical filmmaking can actually be, well, impractical.
There’s a common misconception that CGI is only used for big, impossible, spectacle-heavy moments. Explosions, creatures, or entire cities that feel obviously artificial. But in reality, some of the most widely used visual effects work is often completely invisible.
As someone who largely works on independent or locally funded productions, small doses of VFX are still a regular occurrence. Not because the films are trying to look bigger than they are but because, in many cases, VFX is simply the smarter, cheaper, and more practical option.
What follows are five cases where digital tools aren’t a compromise, but a more efficient and effective solution than going fully practical.
1 - CHROMA KEY
One of the biggest hidden costs in filmmaking is securing the space which the story takes place in.
This involves paying for privately owned locations or securing permits from the local government for filming in public spaces.
This adds up quickly.

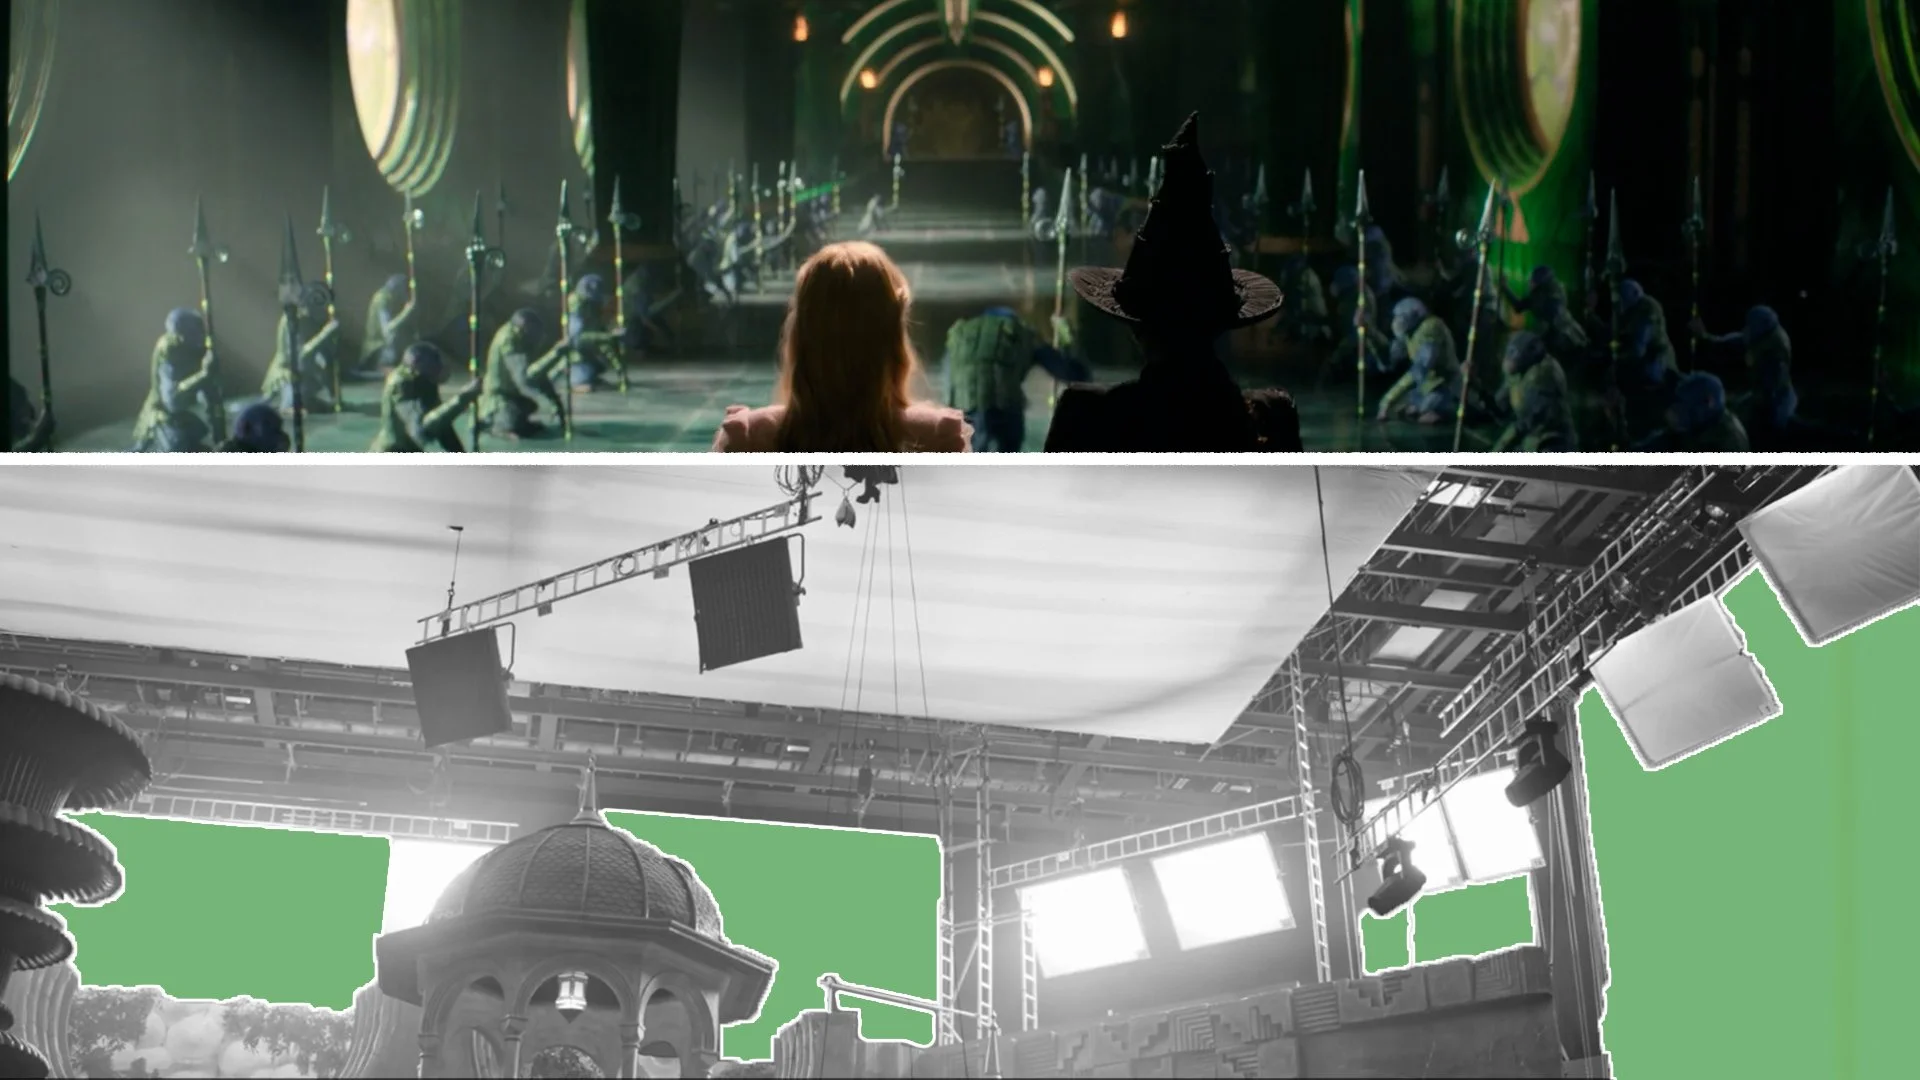
In some cases, it’s cheaper or more practical to shoot a controlled foreground element and extend or replace the background environment digitally. A basic and relatively low cost example of this is shooting on a soundstage, or even a real world location, and placing green or blue screens outside each window.
These can later be chroma keyed, which removes that specific shade of green or blue from the shot, creating a transparent gap that can be replaced with a new background by a visual effects artist.
This technique has been used by many filmmakers who desire complete control, such as by Michael Haneke, or David Fincher.
Chroma Key can also be used to replace backgrounds for safety or practicality reasons, such as shooting an actor against a green screen, and replacing the background to make it look like they are riding a motorbike, or replacing an airplane window in a soundstage.
At the high end, this technique can be used to invisibly and complexly construct entire locations from scratch. Such as in After The Hunt, which had to get around setting the film at Yale University, but without actually being able to film at the real world location. Instead, they shot footage of sets on a different continent at Shepperton Studios in England.

They used the same idea of having foreground footage of sets which could be shot with the actors, but placed large chroma screens in the background of the shots, which could later be keyed out and replaced with a visual effects background based on Yale.
2 - SCREEN REPLACEMENT
Screen replacements are a relatively cheap, quick and common form of visual effects - and a clear example of VFX being more practical than practical filmmaking. If you ever see a TV, phone, or computer monitor on screen nowadays there’s a pretty good chance that what you’re viewing has been digitally manipulated.
That’s because if you shoot screens for real, you lock yourself into a single version of the content. The timing of what plays on screen, the design, interface, the animation, all of it, needs to be finalised before the camera ever rolls. This is often not possible, as the on screen content may need to be filmed or designed at a later stage.
If filming practically you also have to make sure that the brightness of the screen is exactly exposed and aligned with your lighting - which could become an issue if shooting a bright exterior where the sun’s rays overpower the screen’s brightness.
With VFX, none of that pressure exists.
Often the same chroma key technique we just discussed is used, by saving a green or blue photo, and making it fullscreen on the device. Then keying that colour out in post and replacing it with the desired video, photo or on screen content.

The downside to this is that the screen might cast a green or blue light onto the surrounding elements, like the hand, which may become difficult to correct in post.
An alternative is to use another solid colour like a white background, which gives a more realistic light source.
If the screen or camera will move then it might be useful to add some tracking marks on the screen, either on the image or with little bits of tape, that software can latch onto to figure out and track how the screen moves.
Another good idea is to get a plate shot with the screen turned off. That way, VFX artists can use the natural reflections and textures from the screen and overlay it on top of the on screen layer to make the screen feel more realistic.
3 - CLEAN UPS
Clean-ups, or painting objects out, are one of the quiet workhorses of modern filmmaking. This process involves digitally removing or fixing unwanted elements in the frame - dolly tracks on the floor, a camera reflection in a mirror, or wall details like light switches and power sockets that draw too much attention.
Smaller objects can often be removed with simple brush tools that sample the pixels surrounding the object, not unlike how objects are painted out in Photoshop.
Another fast and cost-effective approach is filming a plate shot. This involves locking the camera off in a fixed position, capturing the main action first, and then removing all moving elements from the frame.
Once the set is clear, ideally including anything you intend to remove later, additional footage of the empty space is recorded. These “clean plates” give VFX artists the ability to seamlessly erase unwanted details in post by replacing the part of the shot that you want to remove in the main take with the same part of the frame in the clean plate.
Plates can also be used to control lighting. For example, I’ve used this technique when shooting wide shots during the final moments of dusk. By capturing a clean plate earlier, when the sky was still a rich blue, and later compositing it into the best performance take filmed later once the dusk sky had disappeared.

The final shot combines the ideal sky with the strongest action in the lower part of the frame.
Plates can also be used to control window exposure and preserve highlights. By filming the main action inside, then capturing a separate plate with reduced exposure so the windows aren’t blown out, both elements can later be combined in post to create a balanced final image.
4 - WEATHER EFFECTS
Weather is an expensive and difficult element to control practically, requiring specialist SFX crews, extensive setups, and constant adjustment throughout the shooting day.

Rain towers, fog or haze tubes that are laid on the floor, and snow machines can be effective in controlled environments, but in wide exterior shots these effects can be disrupted by wind, or be a challenge to maintain the continuity of the effect evenly across each frame.
Digital weather effects offer a more flexible and economical solution. These can be from stock video assets, or created in software tools such as Blender or Houdini. Rain, snow, mist, and atmospheric haze can be added in post-production with precise control over density, direction, and intensity, allowing the effect to be matched across shots and adjusted to support continuity and mood. This approach allows filmmakers to shape the atmosphere deliberately.
David Fincher frequently uses this technique to create specific weather at specific moments in the story entirely digitally. Instead of chasing weather during production, the environment is refined calmly and precisely in post.
5 - SKY REPLACEMENT
Ever notice how films seem to have an endless supply of perfectly timed sunsets and dramatic cloud formations? Sometimes those skies are captured for real. But often, they’re subtly enhanced or entirely replaced in post-production.

Sky replacement is exactly what it sounds like: removing the sky from a shot and replacing it with a different one. This might be to add more texture and depth with clouds, push a scene toward a warmer golden hour look, or maintain continuity when weather conditions change between takes or shooting days. A flat, overcast sky might be technically accurate, but swapping it for something more expressive can better support the mood and visual rhythm of a scene.
The process is usually done using high-resolution still photographs or footage of skies, either shot by the filmmakers themselves or sourced from stock libraries. In locked-off shots, the sky can be isolated and replaced relatively easily.

If the camera is moving, tracking data can be applied so the new sky follows the camera’s motion naturally. A small adjustment that hopefully nudges an image closer to the version that best serves the story, without the audience ever noticing the hand that shaped it.
Another trick, which is more often done by a colourist with grading software than VFX, is adding a gradient. Rather than having an entirely consistent colour, this layer creates a transition from a deeper, more saturated colour at the top to a lighter, less saturated colour at the horizon.
It simulates the natural light falloff in the sky and mimics the effect of either a hard or a soft physical graduated neutral density filter which would be placed in front of the lens and were more frequently used in the days before this digital post production tool.
CONCLUSION
Practical filmmaking isn’t going away. Real locations, light, and performances remain the foundation of cinema and the reference point for effective visual effects.
But practical doesn’t always mean cheaper or better. In many cases, VFX doesn’t replace reality - it quietly supports it, solving logistical problems, and perfecting images for directors, while remaining completely hidden.
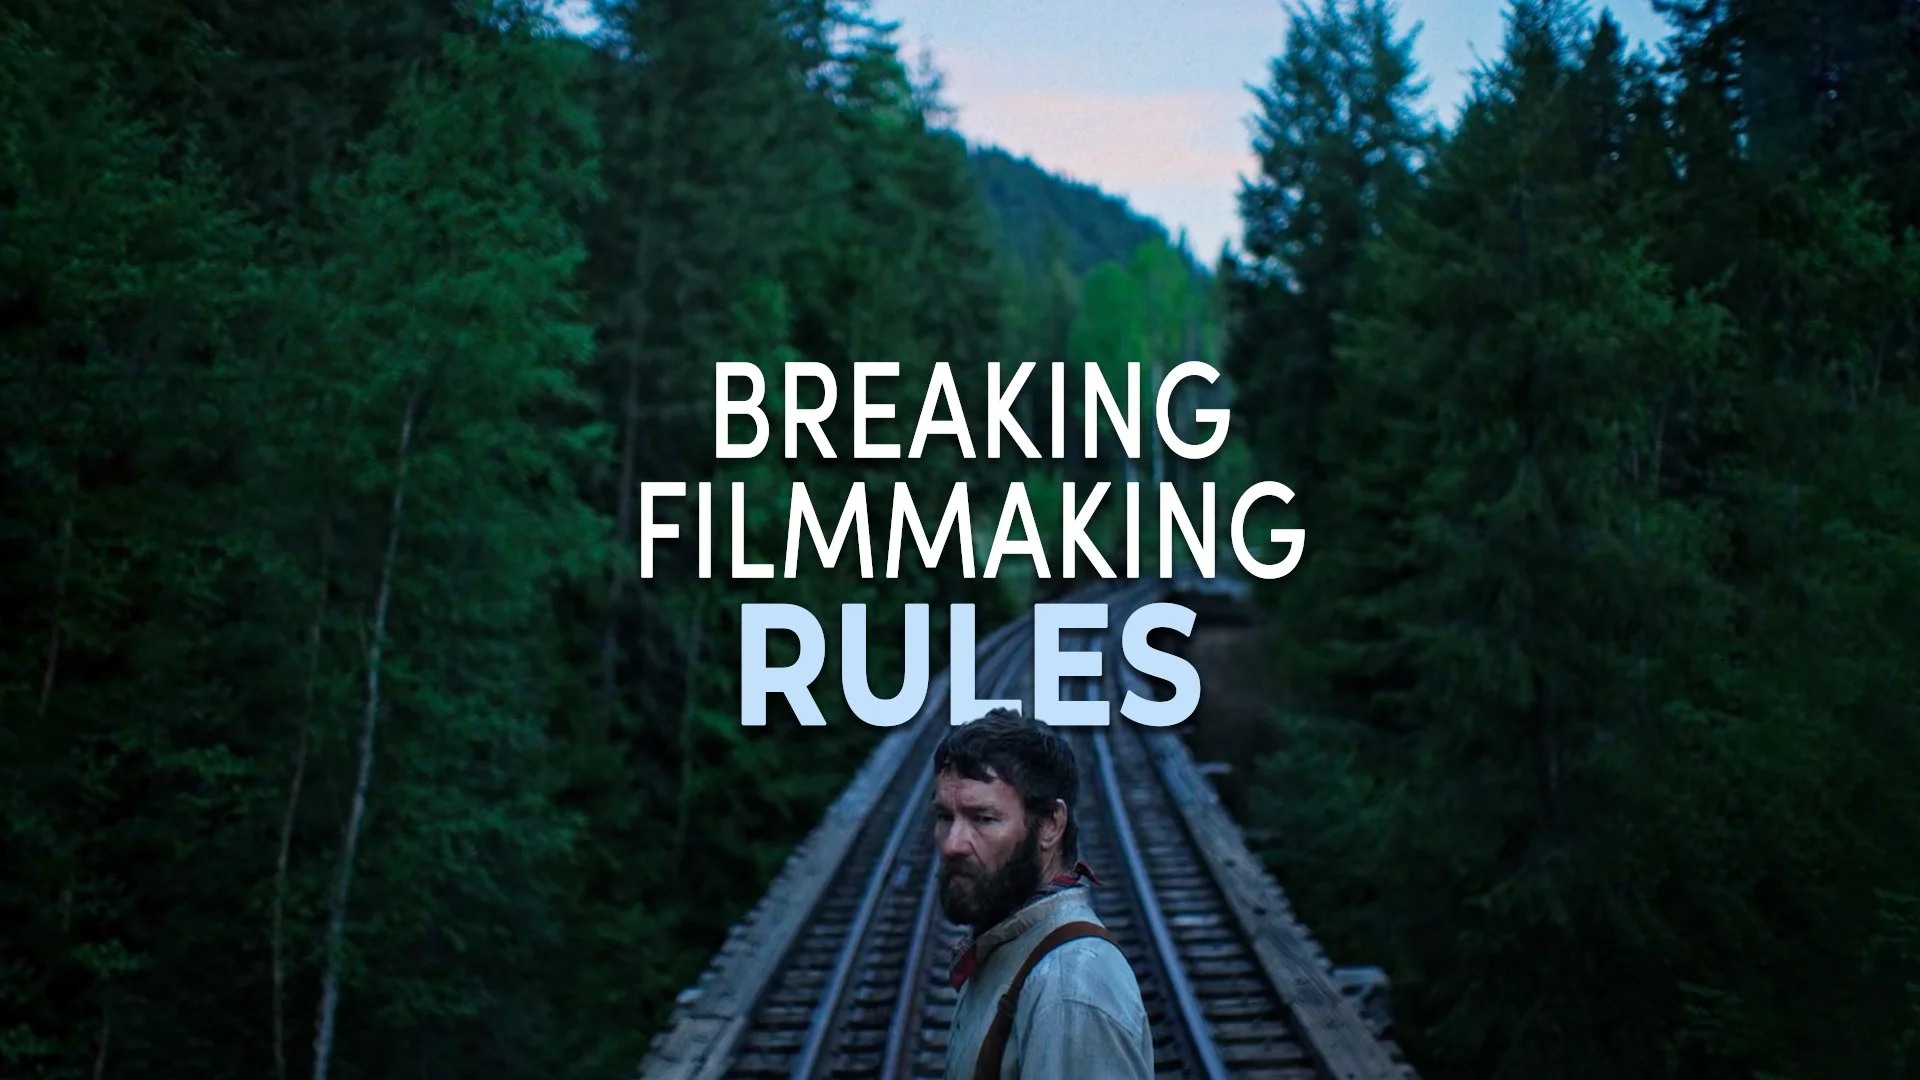
5 Filmmaking Rules That Can Be Broken
Today, we’ll look at 5 commonly taught filmmaking 'rules', why they aren’t as absolute as they’re often presented, and when and why it can make sense to break them.

INTRODUCTION
If you’ve ever taken a filmmaking course, you’ve likely been taught a set of rules, guidelines presented as things to follow, or mistakes to avoid. While these can be helpful for beginners, offering a foundation to build on, they often become a problem when they’re treated as fixed laws rather than flexible tools. Especially when many of the most innovative and influential filmmakers have built their work by deliberately breaking them.
Today, we’ll look at 5 of these commonly taught filmmaking rules, why they aren’t as absolute as they’re often presented, and when and why it can make sense to break them.
1 - DON’T MIX COLOUR TEMPERATURES
White balance is the setting that determines how a camera interprets colour by calibrating itself to a light’s colour temperature, ensuring that white tones appear neutral under different lighting conditions.
The conventional rule is to set your camera’s white balance to match your primary light source, and to avoid mixing lights with different colour temperatures within the same scene.
While this approach can produce a clean and technically accurate image, it can also lead to lighting that feels a bit too neutral and emotionally flat.
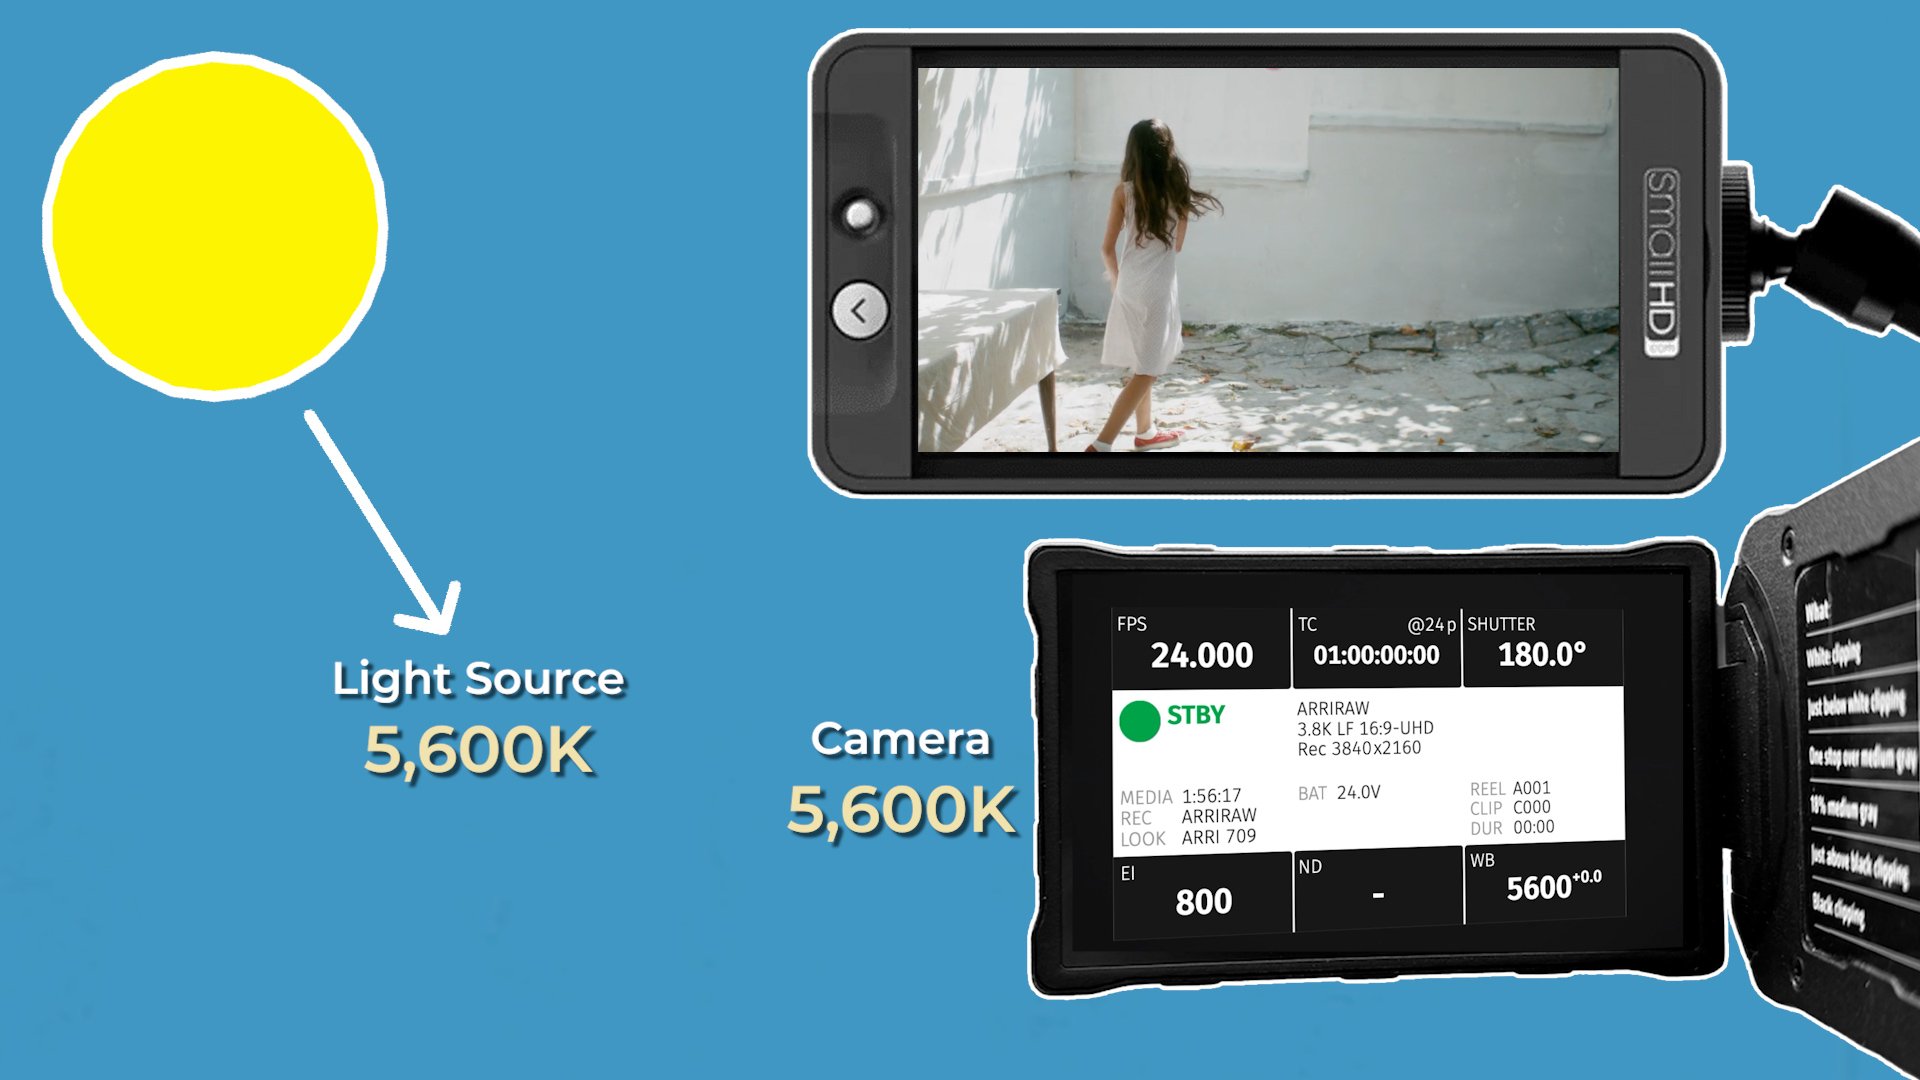
Many filmmakers intentionally break this rule by introducing contrast between warm and cool sources. A common approach is to key a subject with a light that matches the camera’s white balance, say 3,200K, while allowing other sources in the frame to skew cooler, around 5,600K.

This creates a subtle warm-cool colour contrast interplay where the subject has neutral skin tone, but the background light feels cooler. It can be used to make characters stand out from their environment or create more dimensionality by placing different colour sources in the foreground and background.
Another technique is to shift the entire colour balance of the scene to be either cool or warm, such as by lighting with warm sources like tungsten or sodium vapour while setting the camera’s white balance warmer, such as at 5,600K. This more monochromatic lighting style pushes the image toward a specific emotional tone - like a cool sadness.

Another popular technique is to use many different mixed light sources, these may skew green, cool, warm, or to an RGB colour value.
Always matching white balances to the light source can feel realistic, but realism isn’t always the goal. By mixing colour temperatures, filmmakers can suggest heat or cold, comfort or unease, or shape the emotional atmosphere of a scene in a way that neutral lighting simply can’t.
2 - TELEPHOTO LENSES FOR CLOSE UPS
Another commonly taught rule is that wide shots should be captured on wide-angle lenses, while close-ups should always be filmed with telephoto lenses.

This guideline overlooks the fact that focal length isn’t just about magnification - it fundamentally changes how space is represented.

Filmmakers often break this rule for expressive reasons. Telephoto lenses can be used for wider shots, with the camera placed farther from the subject, compressing space and isolating characters from busy or distracting environments, such as a crowded street. This draws the viewer’s attention directly to the subject in a way a wide-angle lens, where everything is in focus, might not.
Or, filmmakers may want to alter the reality of wides by using a telephoto lens to make the background seem closer to the subjects than it is in real life. Such as making landscapes like mountains, or cityscapes appear looming and every present in the story.

Conversely, wide-angle lenses are sometimes used for close-ups by moving the camera closer to the actor.
These lenses expand the background, revealing more of the surrounding environment and grounding the character within it. Or distort the face to create a warped sense of reality, or represent a character’s contorted state of consciousness.

A wide angle lens close-up can also feel more immersive, placing the viewer physically closer to the subject and creating a sense of intimacy or subjectivity that a longer lens may not achieve.
The rules about focal lengths may be suited to practicality or representing reality more realistically from a technical standpoint, but, again, that doesn’t mean that realism in filmmaking is always the goal.
3 - THREE-POINT LIGHTING
Three-point lighting is often taught as the ‘correct way’ to light a scene, built around a key light, a fill light, and a backlight to ensure subjects are clearly visible and evenly modelled.
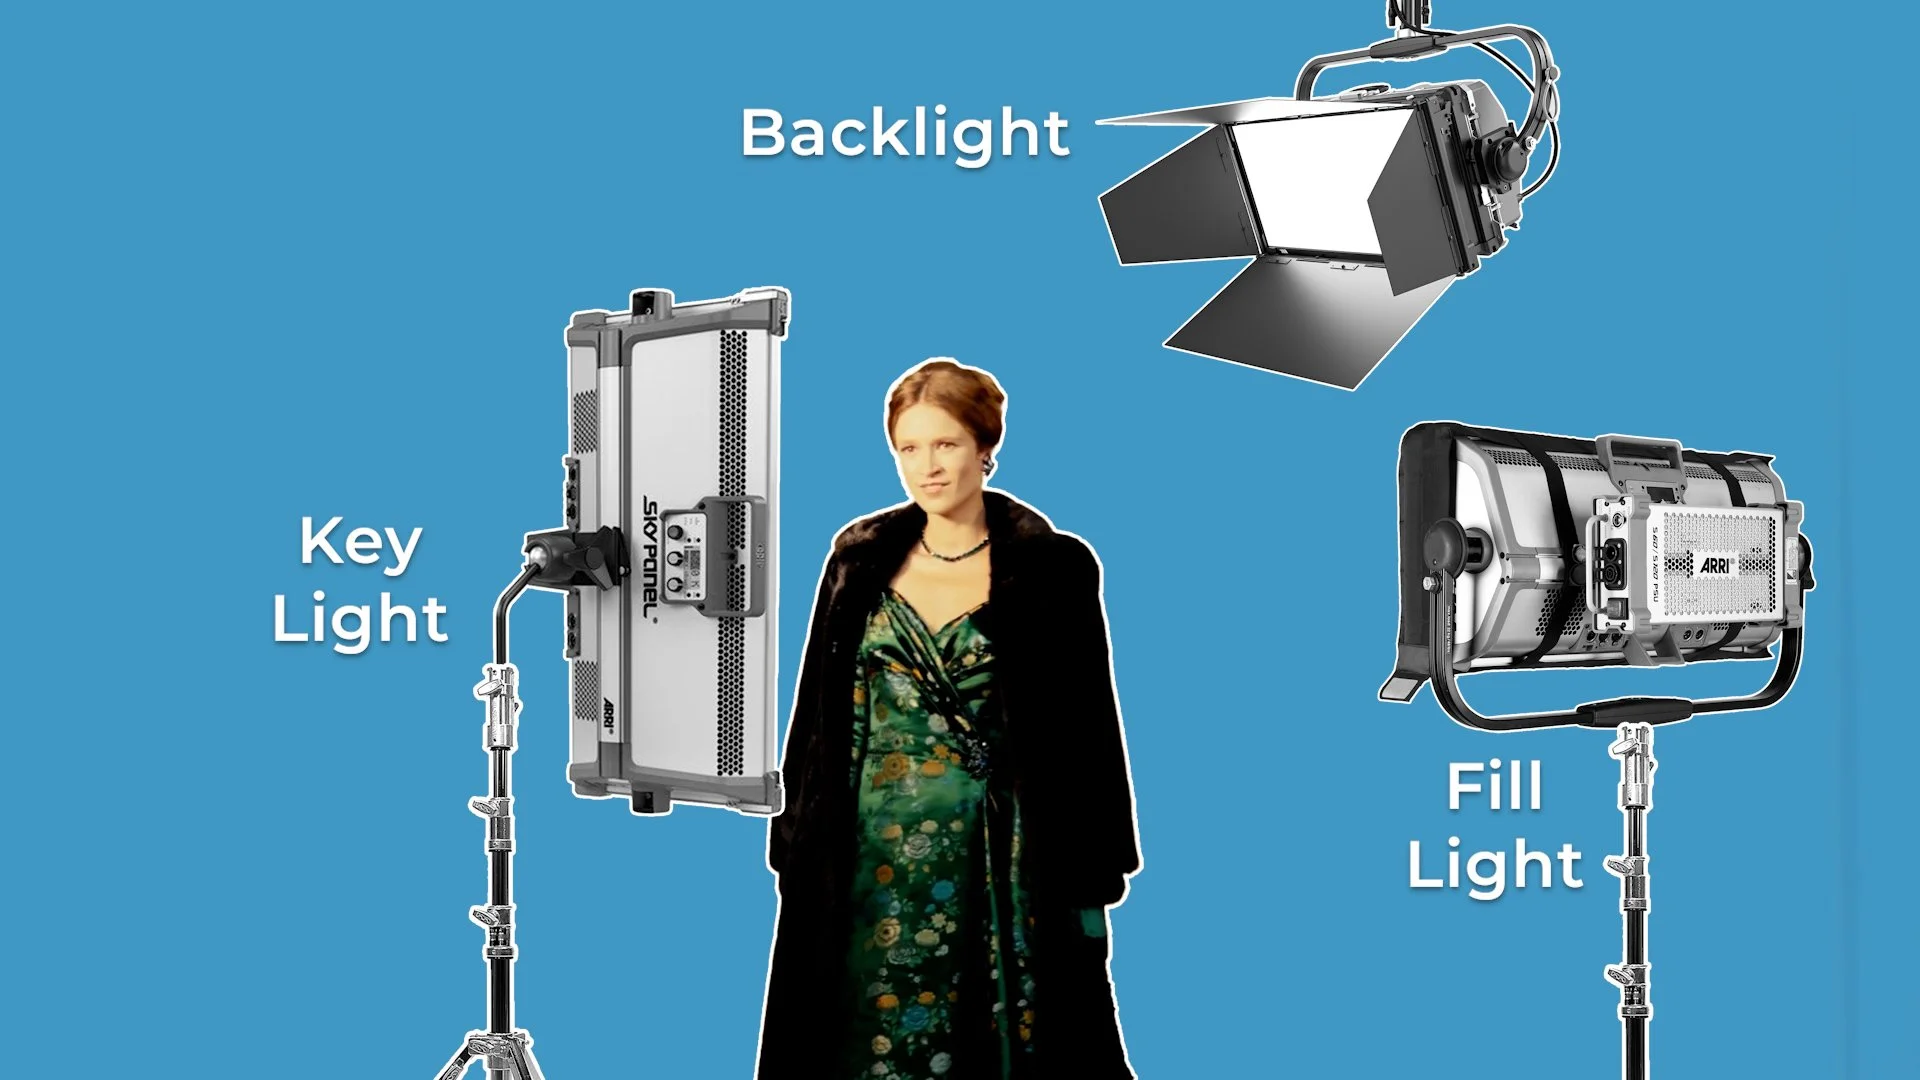
While this setup is a useful teaching tool, it can become limiting when it’s treated as a requirement rather than an option. Not every shot needs to be perfectly illuminated from all sides, and many cinematographers intentionally avoid three-point lighting altogether.
A common alternative is to light a scene with a single dominant source, embracing contrast rather than correcting it. A DP might place that source behind the subject, turning the key light into a backlight and allowing the face to fall into partial shadow or even silhouette.

By choosing not to introduce a fill light, the image gains shape, mystery, and a stronger sense of mood that would be softened by more ‘correct’ illumination.
I’d argue a more useful concept than rigid three-point lighting is what could be called motivated lighting. Instead of starting with a formula, this approach begins with the environment of the scene and asks where light would realistically come from - sunlight shining through a window, a practical lamp on a table, or rays of moonlight.

Film lights are then placed and shaped to support those sources, reinforcing the logic of the space while still allowing for creative control.
In some cases, lighting doesn’t even need to be strictly motivated at all. Certain stories call for heightened, expressive, or even abstract lighting that prioritises emotion over realism.
The key idea is that three-point lighting is just one tool among many. Sometimes one light is all you need. Not every story benefits from having its characters always evenly and perfectly lit.
4 – ALWAYS SHOOT COVERAGE
Another widely taught rule is to always shoot plenty of coverage: multiple angles, wide, medium and close up shot sizes, and safety options, just in case something doesn’t work in the edit.

And in many situations, this approach makes sense. Cutting quickly between angles can clearly communicate action, geography, and information to the audience.
But coverage can also become a default rather than a decision.
Placing limitations on how much coverage you shoot can force clarity. When you know you won’t have endless angles to fall back on, you’re pushed to think more carefully about which shots actually matter, and what perspective best serves the story. Instead of asking “What else should we cover?”, the question becomes “How should we cover this?”
Some very successful movies push boundaries by trying out inventive filmmaking forms that are custom tailored to their story. A film might play out largely in a handful of carefully composed wide shots, creating a detached, objective point of view that observes rather than guides emotion.

Or a sequence might be designed as a single, uninterrupted take, allowing events to unfold in real time and immersing the audience as the camera explores the space alongside the characters.
There’s also a practical reality to consider. Shooting time on set is almost always limited. Fewer setups often means more time to refine performance, blocking, and camera movement within each shot, rather than racing through angles with only one or two takes.
In those cases, the quality of a small number of considered shots can be far more valuable than an abundance of coverage that never quite reaches its full potential, or that gets chopped out in the edit.
5 - 180° DEGREE RULE
The 180-degree rule is a guideline designed to maintain spatial clarity by keeping the camera on one side of an imaginary line that is drawn between characters. By staying on the same side of this axis, screen direction remains consistent, helping the audience understand where characters are positioned in relation to one another.

That said, professional filmmakers can sometimes break this rule by deliberately “jumping the line.” A scene might begin with coverage from one side of the axis, only to cross it later in the dialogue, subtly changing how the space feels. This shift can signal a turning point in the conversation, a change in power dynamics, or an emotional rupture between characters.

Jumping the line can also be used to make the audience feel that something is off. By disrupting spatial continuity, the image introduces a sense of discomfort or unease that mirrors what’s happening beneath the surface of the scene.
Another camera continuity rule that can be broken in an extreme way is called a ‘jump cut’. This is where an edit in time is made while keeping the shot exactly the same - or at a very similar angle and shot size.
These could be used to mirror a character’s mental instability or disassociation, to compress time, or break up the very form of cinema in a disjointed and fractured way.
While the 180-degree rule can be broken, it works best when done sparingly and with intention. Crossing the line without motivation can feel confusing, but when it’s driven by the story, it becomes a powerful expressive tool rather than a mistake.
CONCLUSION
Filmmaking rules exist to solve problems and provide structure, especially when you’re starting out. But they aren’t laws, and they were never meant to replace creative decision-making. Understanding why a rule exists is far more important than following it blindly. When those rules no longer serve the story, the emotion, or the moment, breaking them isn’t a mistake - it may be where the most interesting filmmaking begins.

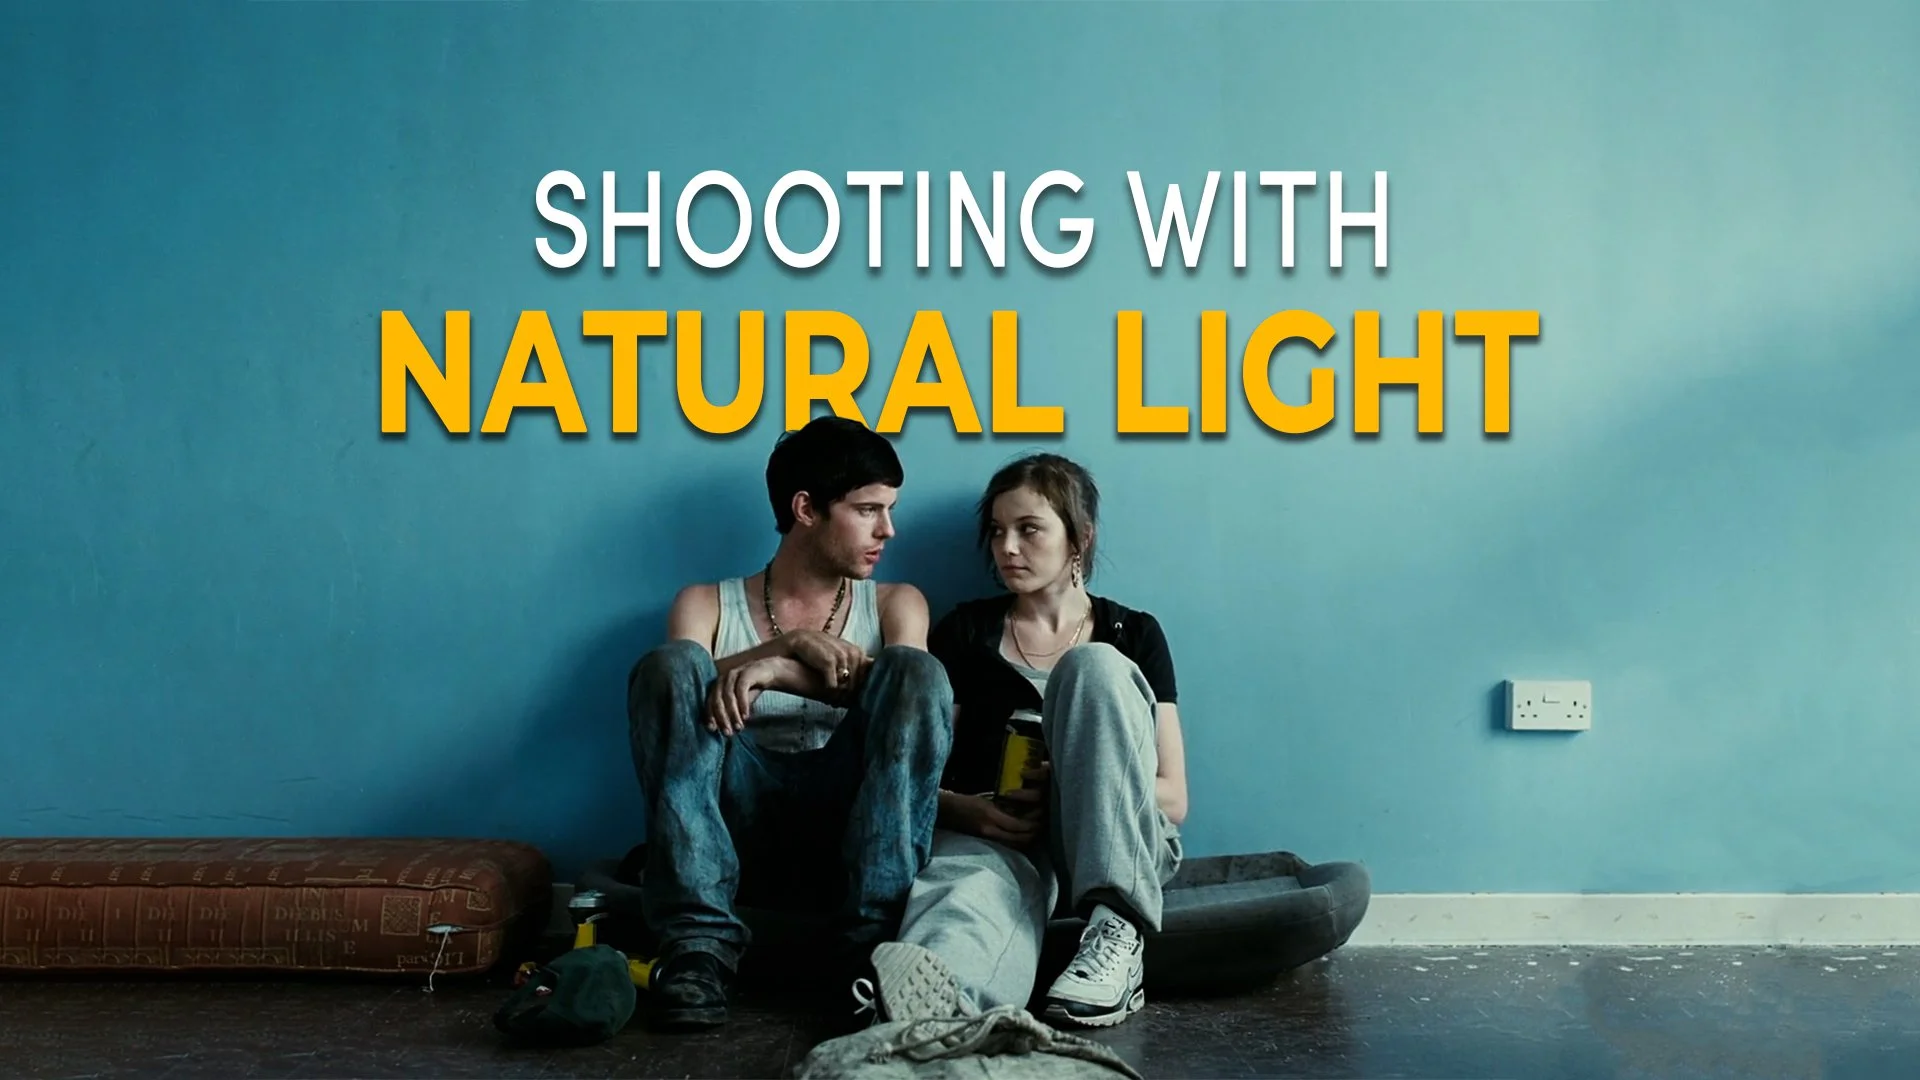
The Myth Of 'Natural Light' In Movies
What we call ‘natural light’ is often carefully designed realism that’s been shaped, planned, controlled, removed, or rebuilt to feel believable. In this video, we’re going to break down the myth of natural lighting in movies, by looking at some examples of how filmmakers create this look, and why images that may feel ‘natural’ are actually often carefully constructed.
INTRODUCTION
Films are often praised for their natural lighting, images that feel honest, unforced, as if the camera simply happened to be there when life unfolded. But that doesn’t mean that what you’re seeing is actually 100% reality.
What we call ‘natural’ is often carefully designed realism. Light that’s been shaped, planned, controlled, removed, and rebuilt to feel believable. Sunlight softened to suggest overcast weather. Shadows deepened to add shape. Exposure carefully managed so highlights never clip and faces never disappear.

In this video, we’re going to break down the myth of natural lighting in movies, by looking at some examples of how filmmakers create this look, and why images that may feel ‘real’, ‘in the moment’ or ‘natural’ are actually often carefully constructed.
WHAT IS NATURAL LIGHTING?
In cinema, natural lighting is less a technical approach than an emotional contract with the audience. It refers to lighting that appears to come from believable, everyday sources, like windows, overcast skies, table lamps or candles. This category of lighting avoids obvious stylisation or theatrical contrast and colour and is motivated by its real world setting.

It stands in contrast to more historically stylised lighting techniques like moody, low key, chiaroscuro, film noir hard light, or studio style three-point lighting, where actors are always perfectly and brightly illuminated by a key, fill and backlight.
Natural lighting on the other hand is informed by how the light would really look in a location. This kind of naturalism is often used in dramas or documentaries to signal authenticity and moral seriousness, inviting the viewer to feel like an observer rather than a spectator.
FILMMAKERS WHO USE NATURAL LIGHTING
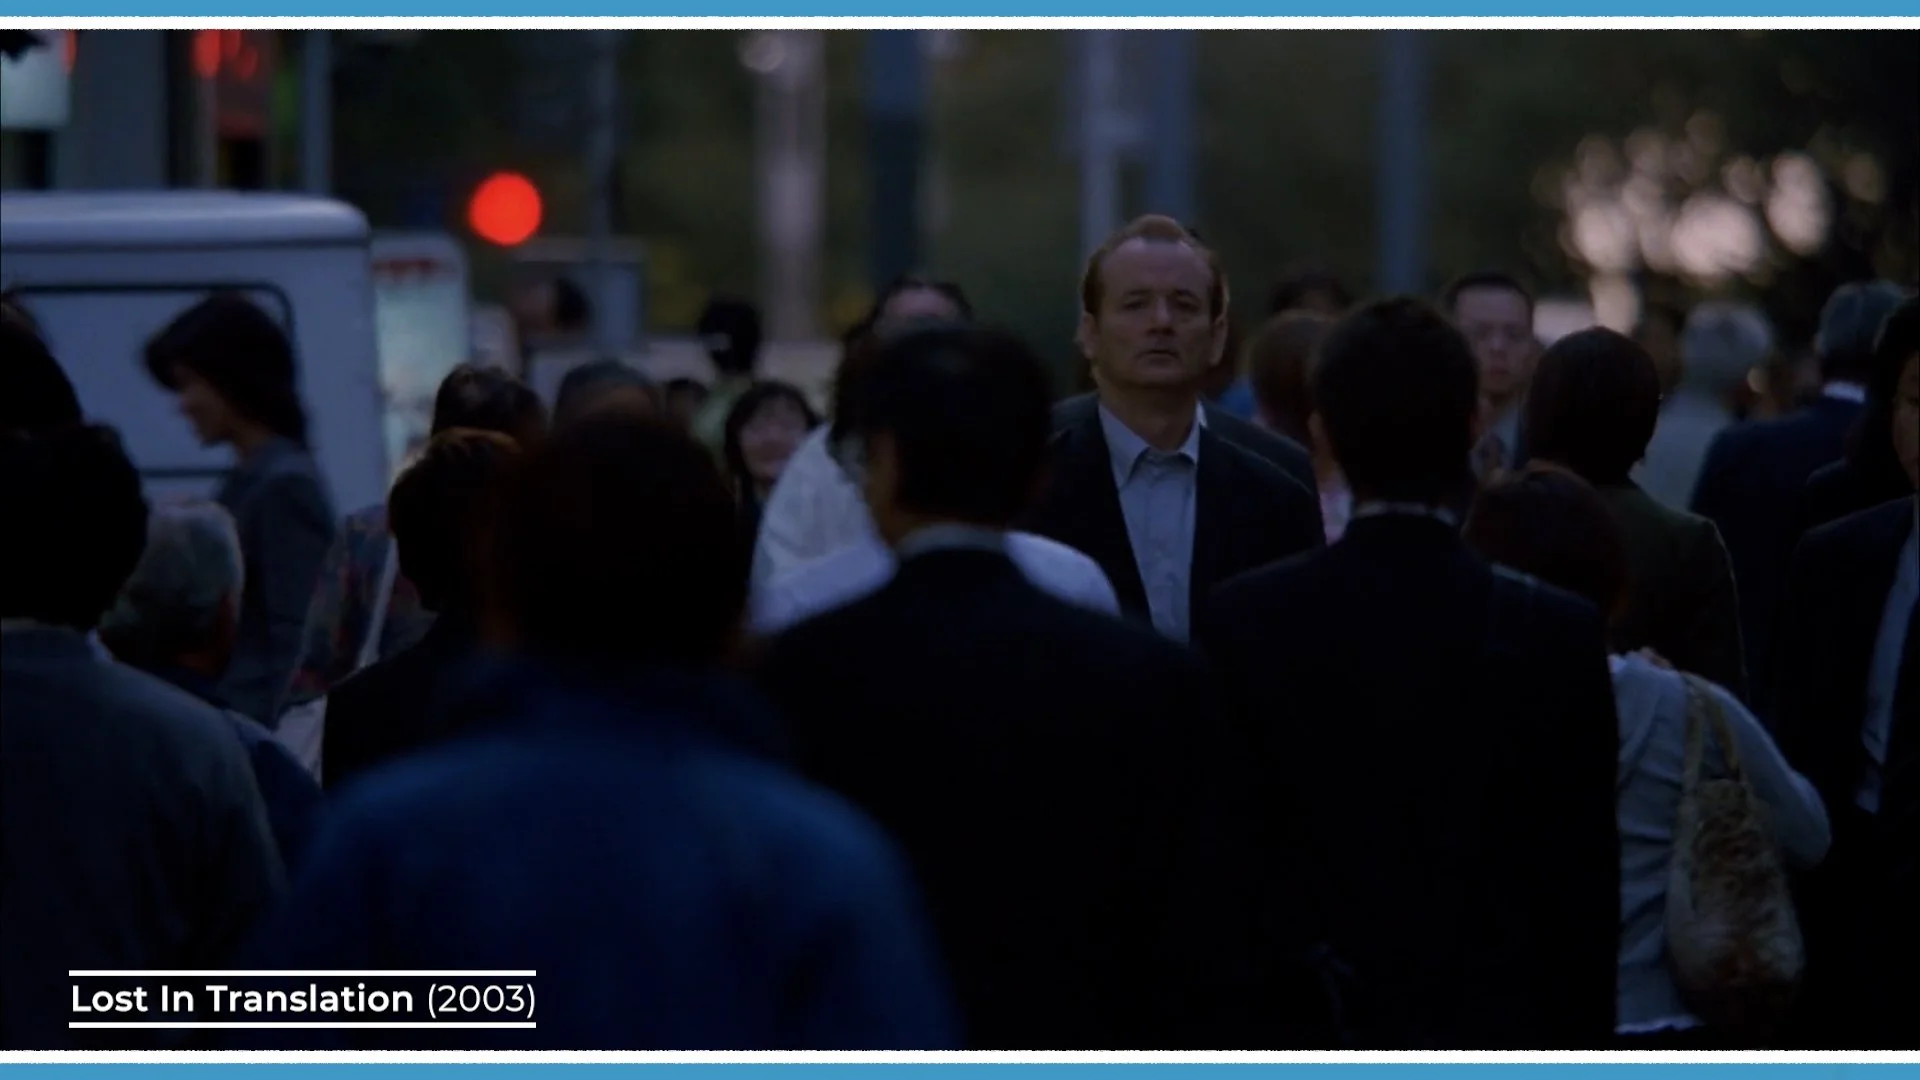
Filmmakers like Ken Loach use restrained, unobtrusive lighting to ground their stories in social reality, creating images that feel real.
Jean-Marc Vallée often pairs naturalistic light with handheld camerawork to produce a sense of intimacy and emotional immediacy, while Andrea Arnold uses available light to place us uncomfortably close to her characters’ inner lives.

Even Michael Haneke, whose framing is rigorously controlled, employs neutral, subtle lighting which is actually meticulously artificially designed to strip scenes of aesthetic comfort, forcing the audience to confront events without emotional cushioning.
In most of these cases, natural lighting isn’t only about realism for its own sake - it’s a stylistic and practical tool, designed to suspend audience disbelief, build closeness and relatability to characters and their world, and create the illusion that what we’re watching isn’t a movie, but reality unfolding.
Let’s break down a few examples from these filmmakers, to show how and why they use natural light.
KEN LOACH
One of the most acclaimed directors who is known for his social realist stories is Ken Loach. Robbie Ryan, who has often worked as his cinematographer, described how Loach gets a fear as soon as he sees a light stand placed on the set.
This is partly due to his love for a naturalistic lighting look, with softly lit bouncing backlight, and partly for an important practical reason. Because many, if not most, of his cast is often made up of non-professional actors, he likes to remove as many of the technical barriers as he can by minimising film equipment, to put his actors at ease and extract truthful performances.
In fact, he and Robbie Ryan even like to shoot on longer focal lengths, from around 50mm to 135mm, with the camera further away - so it isn’t right in the face of the actors.
However, don’t let the lack of light stands or gear on the floor let you think that these beautifully lit films are entirely illuminated by natural sun.
For interiors, Ryan usually rigs lights out of shot on the ceiling - such as this scene in which a bank of DMG SL1 LEDs were rigged above the actors to give them more exposure. And then pushing light from the outside through the location’s windows with HMIs to give shape and direction to the light.

Positioning characters to be side-on or with their backs facing the windows, to give them an edge or backlight, rather than a flatter front light.
This gave them a natural light look, the ability to turn the camera in any direction without seeing lights or stands, and removed lighting gear from the set which may impede the actors eyeline, distract, or place more pressure on the non-professional cast.
If you look at most of the day exterior scenes, you’ll notice that although these truly use available natural light from the sun, the actors are carefully positioned, in the same way that they are in the interiors, so that the sun gives them a more visually flattering sidelight or backlight.
ANDREA ARNOLD
Andrea Arnold is another director whose films view the world through a naturalistic lens. Interestingly, like with Ken Loach, the person behind this lens is also Robbie Ryan.
Arnold’s films often feel raw and immediate, but that sense of realism is carefully engineered, especially in the way daylight is used. In her mid-day exterior scenes, characters are almost always positioned with the sun either behind them or hitting them from the side, allowing the camera to face into the light rather than away from it.

Backlight creates a soft edge around faces and bodies, and side light creates more contrast on one side of the face, avoiding the harsh flatness that direct frontal light would produce. So although characters aren’t explicitly lit by film lights, the natural lighting is still controlled by the way in which the characters are positioned in the shot.
The same idea applies to interiors, by placing characters either side on, or in front of natural sources like windows - giving them a back or a side light.

She also strongly prioritises shooting at dusk, which is referred to as shooting in the blue. To do this, they will orient the camera toward the part of the sky where the sun has just set. This direction holds ambient light in the sky for longer, bathing the scene in a cool, diffused glow that feels both natural and emotionally charged.
If the sun sets in the west, the camera looks west; turning east, away from the residual light, would cause the sky to collapse into darkness far more quickly.

The result is a lighting approach that feels spontaneous and observational, yet is built on precise timing, orientation, and restraint. Like Loach’s work, Arnold’s naturalism isn’t about accepting whatever light happens to be there - it’s about positioning characters, camera, and schedule so that reality appears natural, even as it’s being quietly sculpted.
JEAN-MARC VALLÉE
Jean-Marc Vallée is another filmmaker closely associated with naturalistic realism, and like Andrea Arnold, he also embraces shooting in the blue. But Vallée’s approach pushes the idea of natural lighting even further, most notably in Dallas Buyers Club, a film shot with almost no traditional supplemental film lighting.

A key part of making this possible was technological. Vallée and his team shot on the original Arri Alexa, a camera with enough dynamic range to hold detail in deep shadows while still preserving bright highlights. This allowed scenes to exist closer to the actual light levels of real environments without collapsing into underexposure or clipped highlights.
But the absence of lighting gear on set didn’t mean the lighting was left to chance. Dallas Buyers Club relied heavily on extensive location scouting and meticulous scheduling in preproduction. Rather than finding locations and then lighting them to look cinematic, Vallée chose locations that already contained expressive, motivated light - such as night-time alleyways illuminated by practical street lamps - and designed scenes around those existing conditions.
Lens choice also played a crucial role. The film was shot on Zeiss Super Speeds, with their extremely fast T/1.3 aperture, allowing the camera to gather far more light in low-level environments. This made it possible to expose night interiors and exteriors using only practical sources, maintaining a raw, unpolished look while avoiding underexposure.
Inside interiors, Vallée and his DP often relied on practicals, light sources that are part of the set environment and that can be seen in the shot, such as table lamps, overhead fluorescents, neon signage or festoon bulbs.
This light was sometimes subtly shaped and manipulated, such as by pointing lamps downward and bouncing light off tables, which then reflected soft fill back onto actors’ faces. It’s a simple technique, but one that quietly softens light, making it more flattering.

Like Loach and Arnold, Vallée also frequently staged scenes near windows, carefully timed to the sun’s position so characters would receive gentle side light rather than flat frontal illumination.
And even in a production famous for using almost no film lighting, some tools were still employed when needed - such as bounces that reflected sunlight back in through windows - to lift exposure inside.
MICHAEL HANEKE
Michael Haneke’s approach to naturalism is perhaps the most controlled of all - so much so that Amour wasn’t even shot in a real apartment, but almost entirely on a soundstage, without a single ray of natural sunlight.
Working with cinematographer Darius Khondji, Haneke recreated the illusion of natural light through meticulous design rather than real locations, bouncing massive 20K film lights through windows to mimic soft, natural sunlight and carefully placed practicals inside the apartment that could illuminate characters or parts of the set.
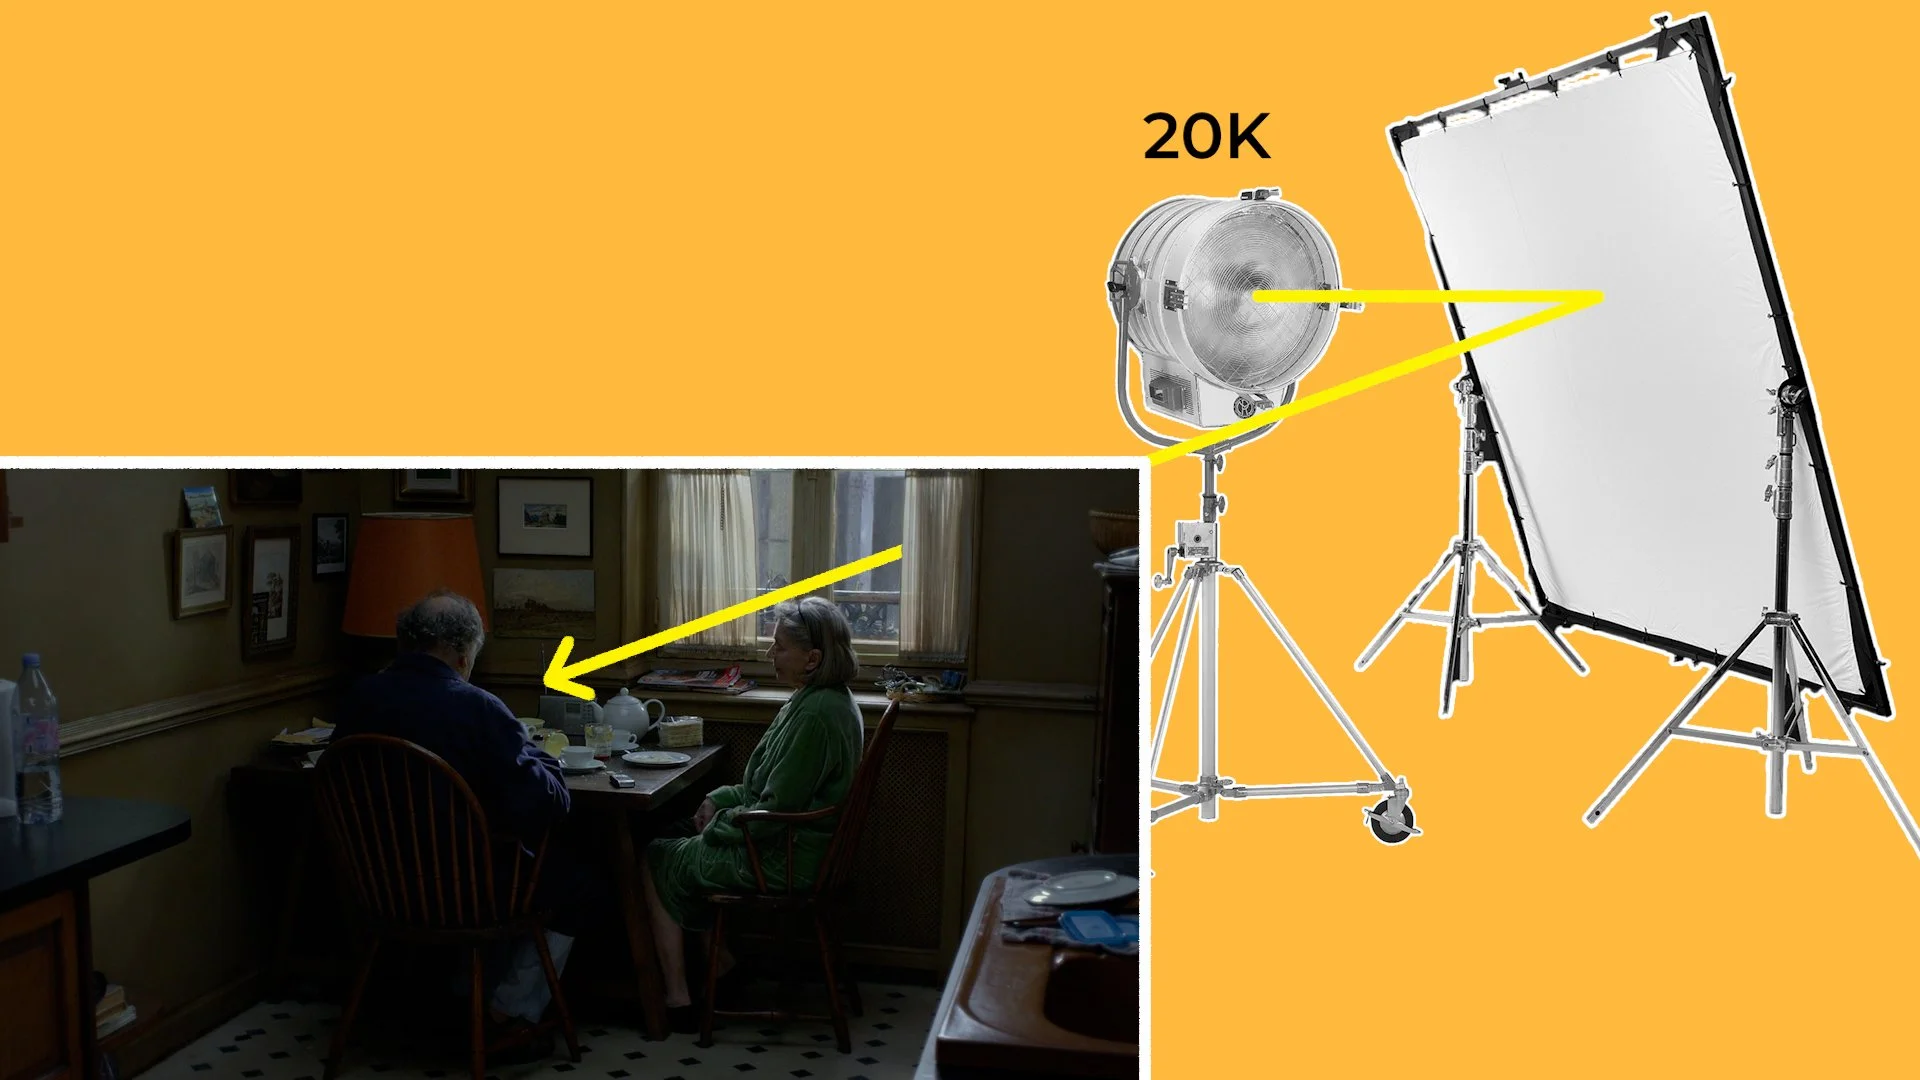
While spacelights and bounced Lekos were used inside the apartment to maintain a believable, soft ambient level without calling attention to the lighting itself.
Haneke was obsessive about continuity - not just of exposure, but of time, season, and emotional rhythm. The film was shot largely in chronological order, with sunlight carefully adjusted to reflect the passing days and months - and greenscreens outside each window which could later be digitally replaced with whatever background and weather was desired.
Sometimes this was softer, dimmer, cooler, overcast winter light. Other times it was harder, warmer, brighter summer rays.

Shooting in a studio with artificial lighting meant that they could carefully control and shift the light as needed - without needing to work around what the real sunlight or weather was doing outside which would be the case if they shot on a real location.
Showing that once again, although the light may look natural it is in fact highly controlled and actually completely artificial. Serving a feeling of realism that is less about spontaneity and more about precision.
CONCLUSION
In the end, natural lighting in cinema isn’t about refusing control - it’s about disguising it. What feels spontaneous or observational on screen is often the result of careful planning, precise timing, and deliberate manipulation of light, all in service of creating images that feel truthful and emotionally grounded.
These films remind us that realism in cinema isn’t found in simply pointing a camera at reality, but in shaping light just enough that it disappears, allowing the story and the characters to feel real.
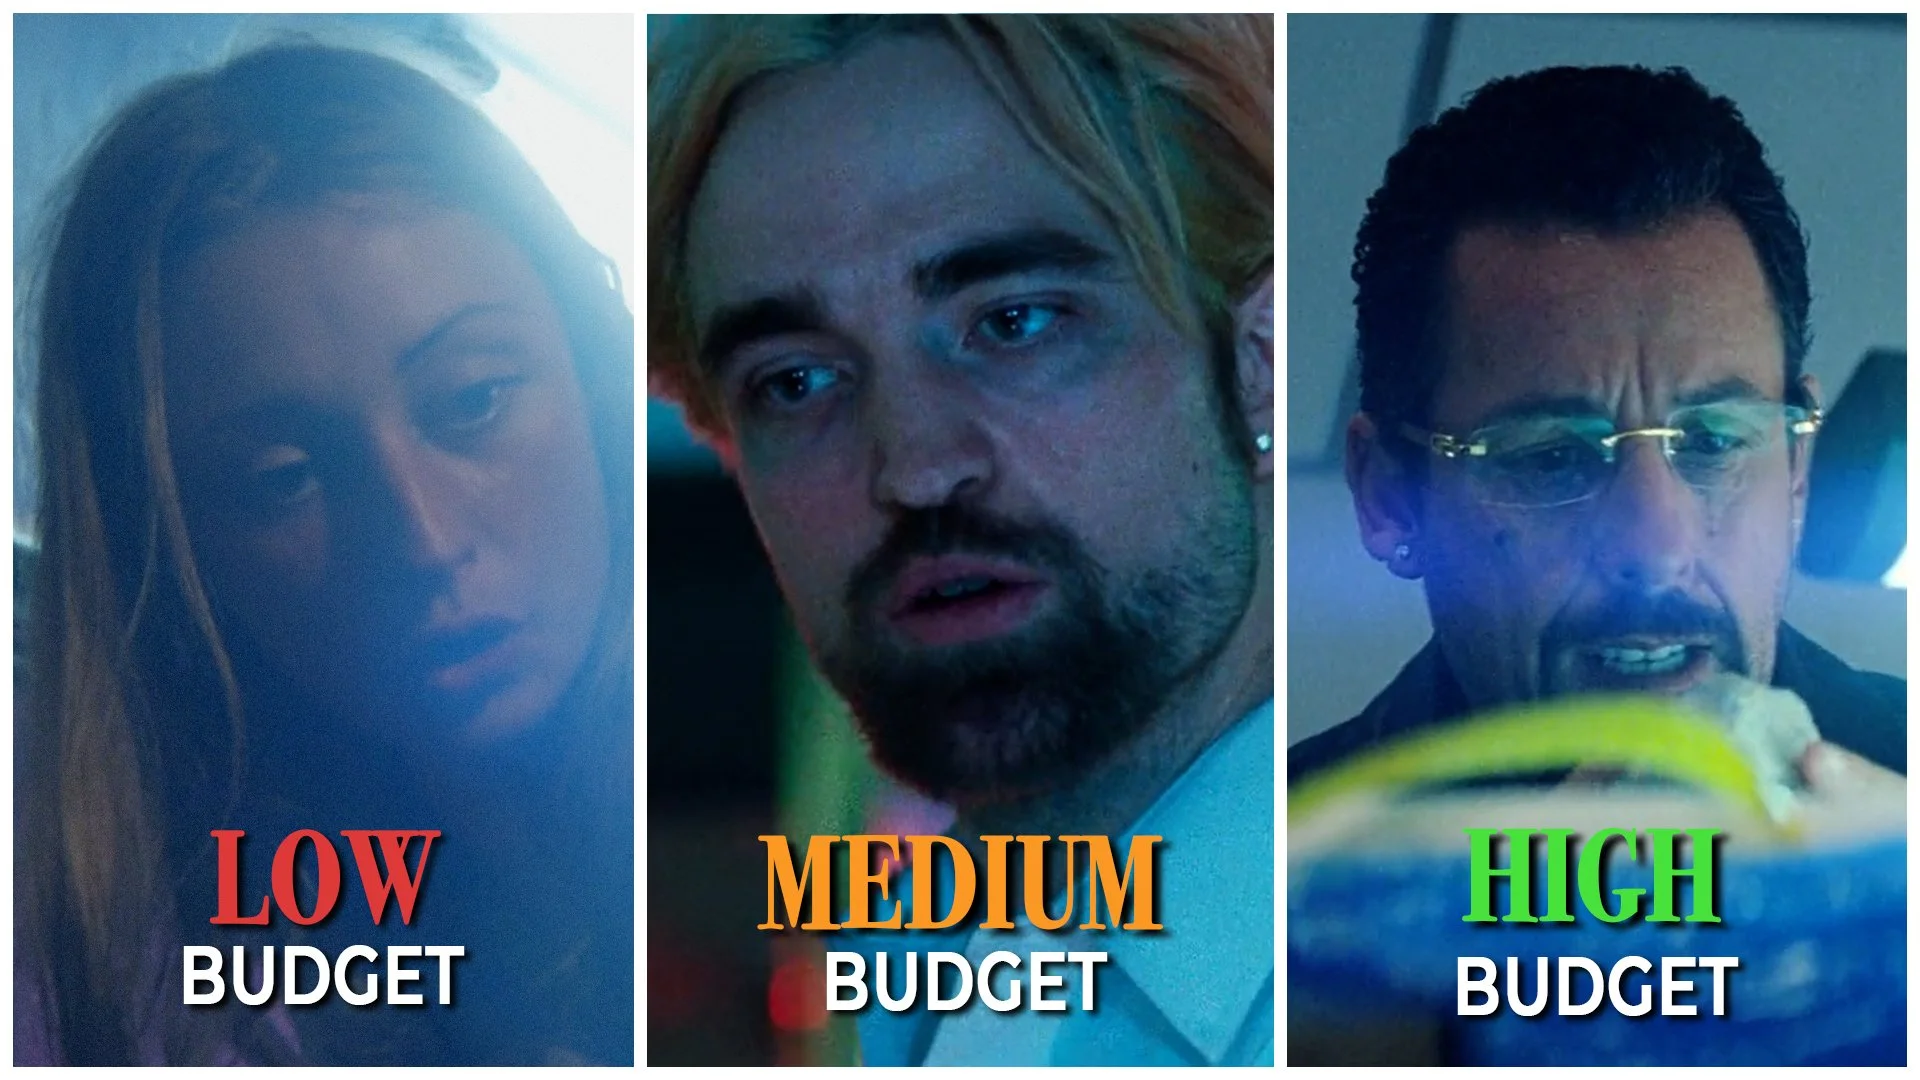
How The Safdies Shoot A Film At 3 Budget Levels
In this video, we’ll look at how the Safdie Brothers made the lower budget 'Heaven Knows What', the medium budget 'Good Time', and the higher budget 'Uncut Gems' - examining what aspects of their filmmaking changed as the budgets grew, and what remained fundamentally the same.

INTRODUCTION
Josh and Benny Safdie are independent filmmakers with a filmmaking language that’s instantly recognisable: abrasive sound design, telephoto lenses, real locations, and stories driven by panic, desperation, and momentum.
Across their work, they return to characters trapped by bad decisions, narratives unfolding at breakneck speed, and urban environments that feel hostile and claustrophobic.
In this video, we’ll look at how the Safdie Brothers made the lower budget Heaven Knows What, the medium budget Good Time, and the higher budget Uncut Gems - examining what aspects of their filmmaking changed as the budgets grew, and what remained fundamentally the same.
HEAVEN KNOWS WHAT – LOW BUDGET
Heaven Knows What represents the Safdie Brothers at arguably their most stripped-back and uncompromising.

The film is based on the real-life experiences of Arielle Holmes who also stars as a fictionalised version of herself. Josh Safdie first met her on the street while doing research in the diamond district for a bigger movie they wanted to make later called Uncut Gems. After first meeting to potentially cast her as a shop assistant in Uncut Gems, he later realised there was another, more autobiographical film to be made about her life.
“I started to commission Arie to write about her life. She blew me away with these writings which were so immediate and so cinematic.” - Josh Safdie
The brothers then adapted this into a story formed for the screen which depicted: homeless youth, a romantic relationship, addiction, and street life in New York City.
The budget for the film, which came from the production company Iconaclast, was fairly bare bones, and the production reflected this at every level.
The Safdies shot almost entirely on real locations, using non professional actors and available light wherever possible. The crew was minimal, the gear footprint relatively small, and the approach was highly reactive. Scenes feel like captured reality rather than being staged, with the camera often struggling to keep up with the characters.

The Safdies enlisted DP Sean Price Williams to shoot the film.
“We talked about the movie being an opera of long lens. We always looked at the movie as an opera and wanted to do as much as we could to combat a documentary vibe. So no handheld. We shot the whole movie on tripods.” - Josh Safdie
Shooting in this way was perhaps a bit counter intuitive. As standard practice would be to create more of a vérité documentary style realism with a handheld run and gun aesthetic.
Instead they treated the situation almost like filming a wildlife show, by placing the camera very far away from the actors where they wouldn’t be noticeable, in public spaces on the other side of the street, and using extremely telephoto lenses with focal lengths up to an insane 2,400mm.

The only time the camera wasn’t on a tripod was for a few select Steadicam tracking shots, which moved with the characters and were also skillfully captured with a telephoto lens.
They maximised the number of shots in these public scenes, and covered the perhaps less accurately repeatable performances of the non-professional actors, by shooting with 2 cameras at a time.

This gave lots of foreground crossing through the frame, a compressed, tight, invasive, voyeuristic perspective and to get a feeling and energy of real people on the street reacting to what they thought were real situations rather than performed ones.
To me this long lens viewpoint also visually supports how caught up and focused the characters are on their own world and experiences. We care less about the outside world and more about the heightened individual emotions of the characters.
They shot digitally on a Sony F3 in HD on a flat S-log colour profile - with a desaturated look applied in the grade. They also placed diffusion filters in front of the lens to give the footage its soft, hazy look.

“We are so far away from the subject with the camera but with the sound you want the exact opposite. You want to be right up there with them. You don't want to feel as if you’re listening from far away. You want to feel as if you’re right in the middle of the action.” - Benny Safdie
This technique that they found on Heaven Knows What of balancing a far away, but tight visual perspective, with an intimate dialogue mix and dark, frenetic synth soundtrack became the backbone of their directorial style - and is a large part of what supports the chaotic, tense, heightened nature of the performances and story.
At this budget level, the Safdies leaned entirely into their strengths: realism, performance, and urgency. The lack of money forced them to abandon traditional coverage, elaborate lighting setups, or controlled environments, resulting in a film that feels dangerously alive.
GOOD TIME – MEDIUM BUDGET
With Good Time, the Safdie Brothers stepped into a more conventional independent film budget - but without abandoning their core aesthetic.
The increased budget, perhaps aided by casting Robert Pattinson in the starring role, allowed for a more structured production while still maintaining their raw energy. They were able to have a larger crew, legally secured shooting locations and execute more technically complex sequences.

Although the budget was larger, between an estimated $2 - $4 million, it was still very low considering the amount of locations and action sequences outlined in the script.
Once again, the starting point for the film came from the character - rather than the story and plot being the inception. They built Pattinson’s character by coming up with an extensive backstory, and drawing from emails he and Benny would exchange as if they were in character.
The Safdies also began leaning more heavily into genre. Good Time is structured as a one-night explosion of action, borrowing from crime thrillers and exploitation cinema, but filtered through their signature chaos and realism.
Although they had more resources to work with, they stuck with a similar independently minded low budget mindset when shooting.
“For the New World Mall we were able to get that location and secure that location. But we shot it as if we were stealing the shot. We still set up the cameras as if we were going to steal it when we ran in - so if we get caught we at least have the two shots. The cops were looking at us like ‘Why are you moving around so surreptitiously? You have the location.” - Josh Safdie

Again they worked with Sean Price Williams and again they used the same telephoto lens approach.
Like on Heaven Knows What they used an A and a B camera to maximise coverage.
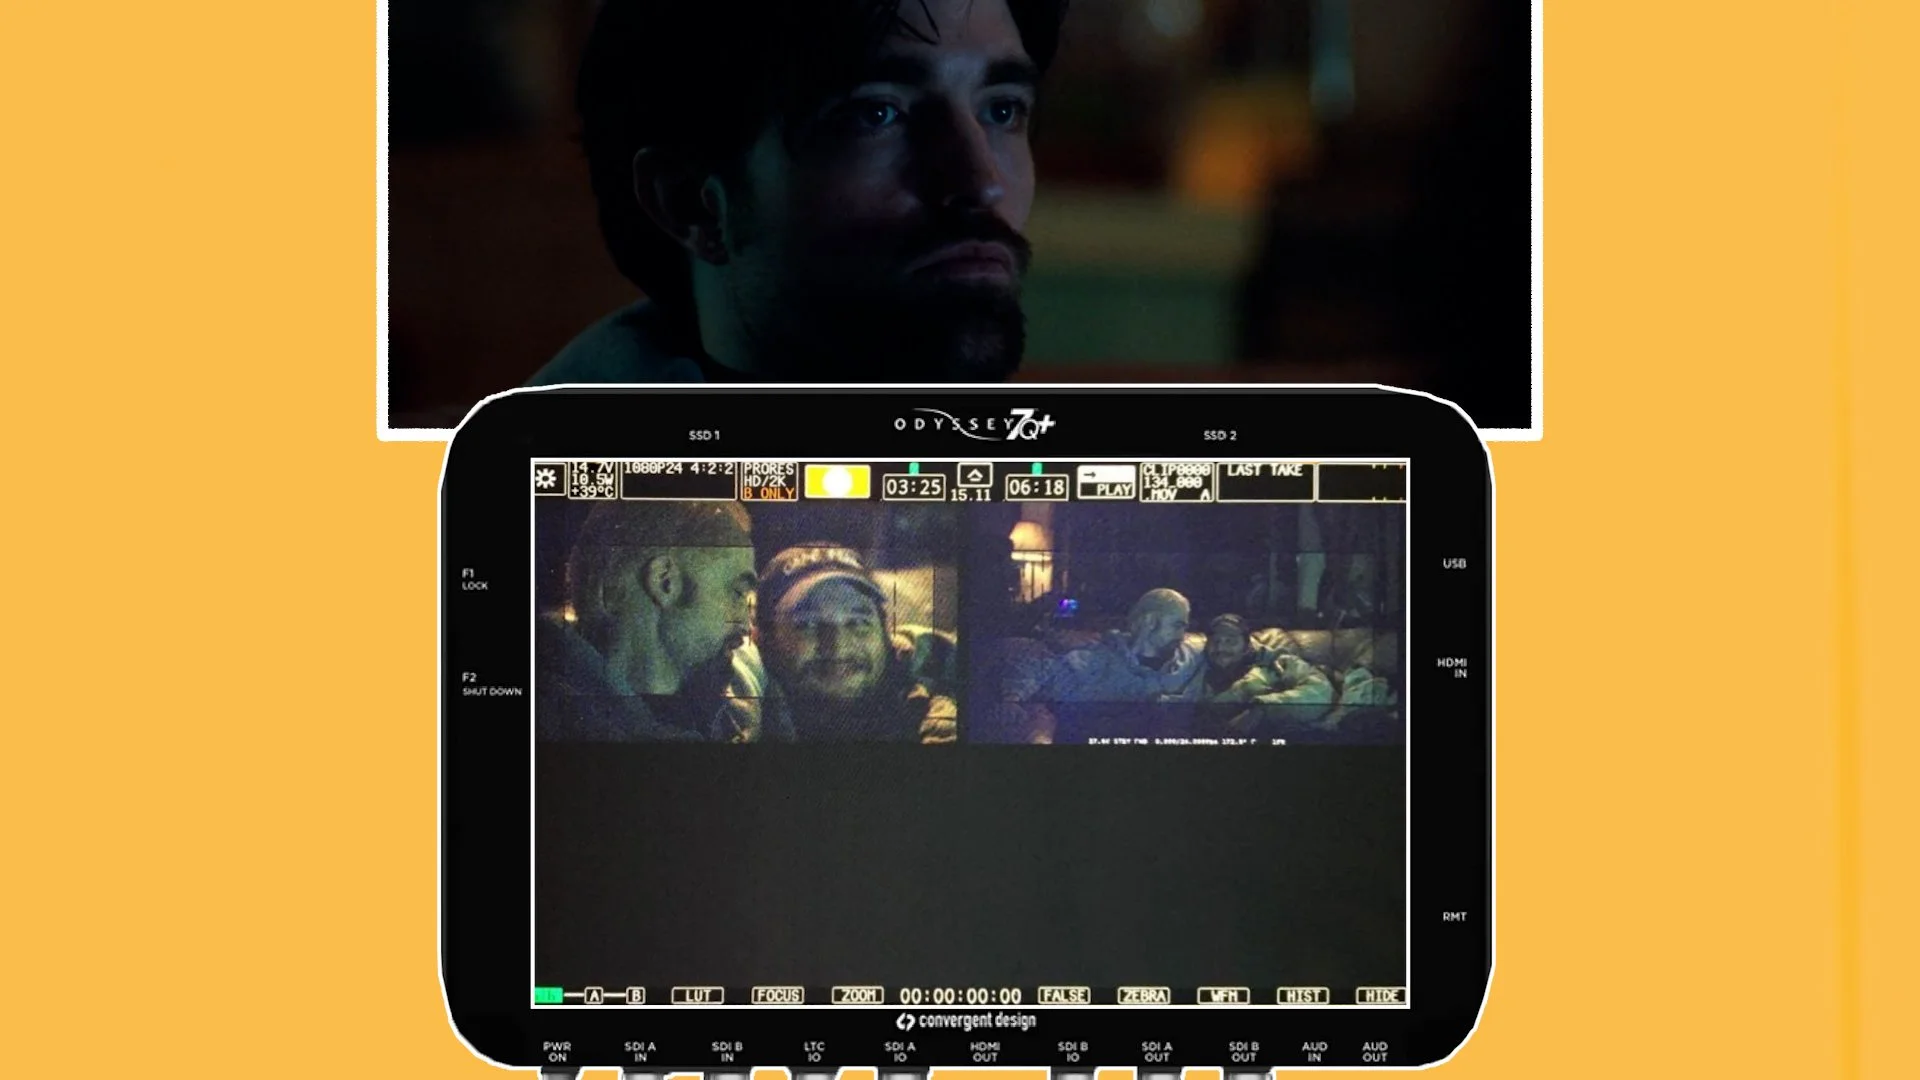
With close framing that compressed space and isolated characters within crowded environments.
Often shooting from fixed positions on tripods with super long Canon zoom lenses. This look was paired with an alive and breathing handheld camera with Zeiss Superspeed primes. Or an occasional Steadicam shot.
At T/1.3 these fast primes, which let more light into the camera, aided them in exposing many of the darkly lit night time sequences.

This time, instead of using digital cameras, the slightly boosted budget allowed them to shoot on film.
They decided to shoot 2-perf 35mm. This was done for a few reasons.
“With 35mm 2-perf we’re already degrading it a bit. Because if you shoot 35mm clean, after everything has gone through all the post processes, it’s so clean that it looks like you could’ve shot it on 4K or something. We like to try and maintain texture. So we did the 2-perf thing. Also it was for cost reasons.” - Sean Price Williams
Rather than the standard, taller 4-perf 35mm, 2-perf exposes frames with less height - which, when shot with spherical lenses, gives it an aspect ratio close to widescreen 2.39:1.
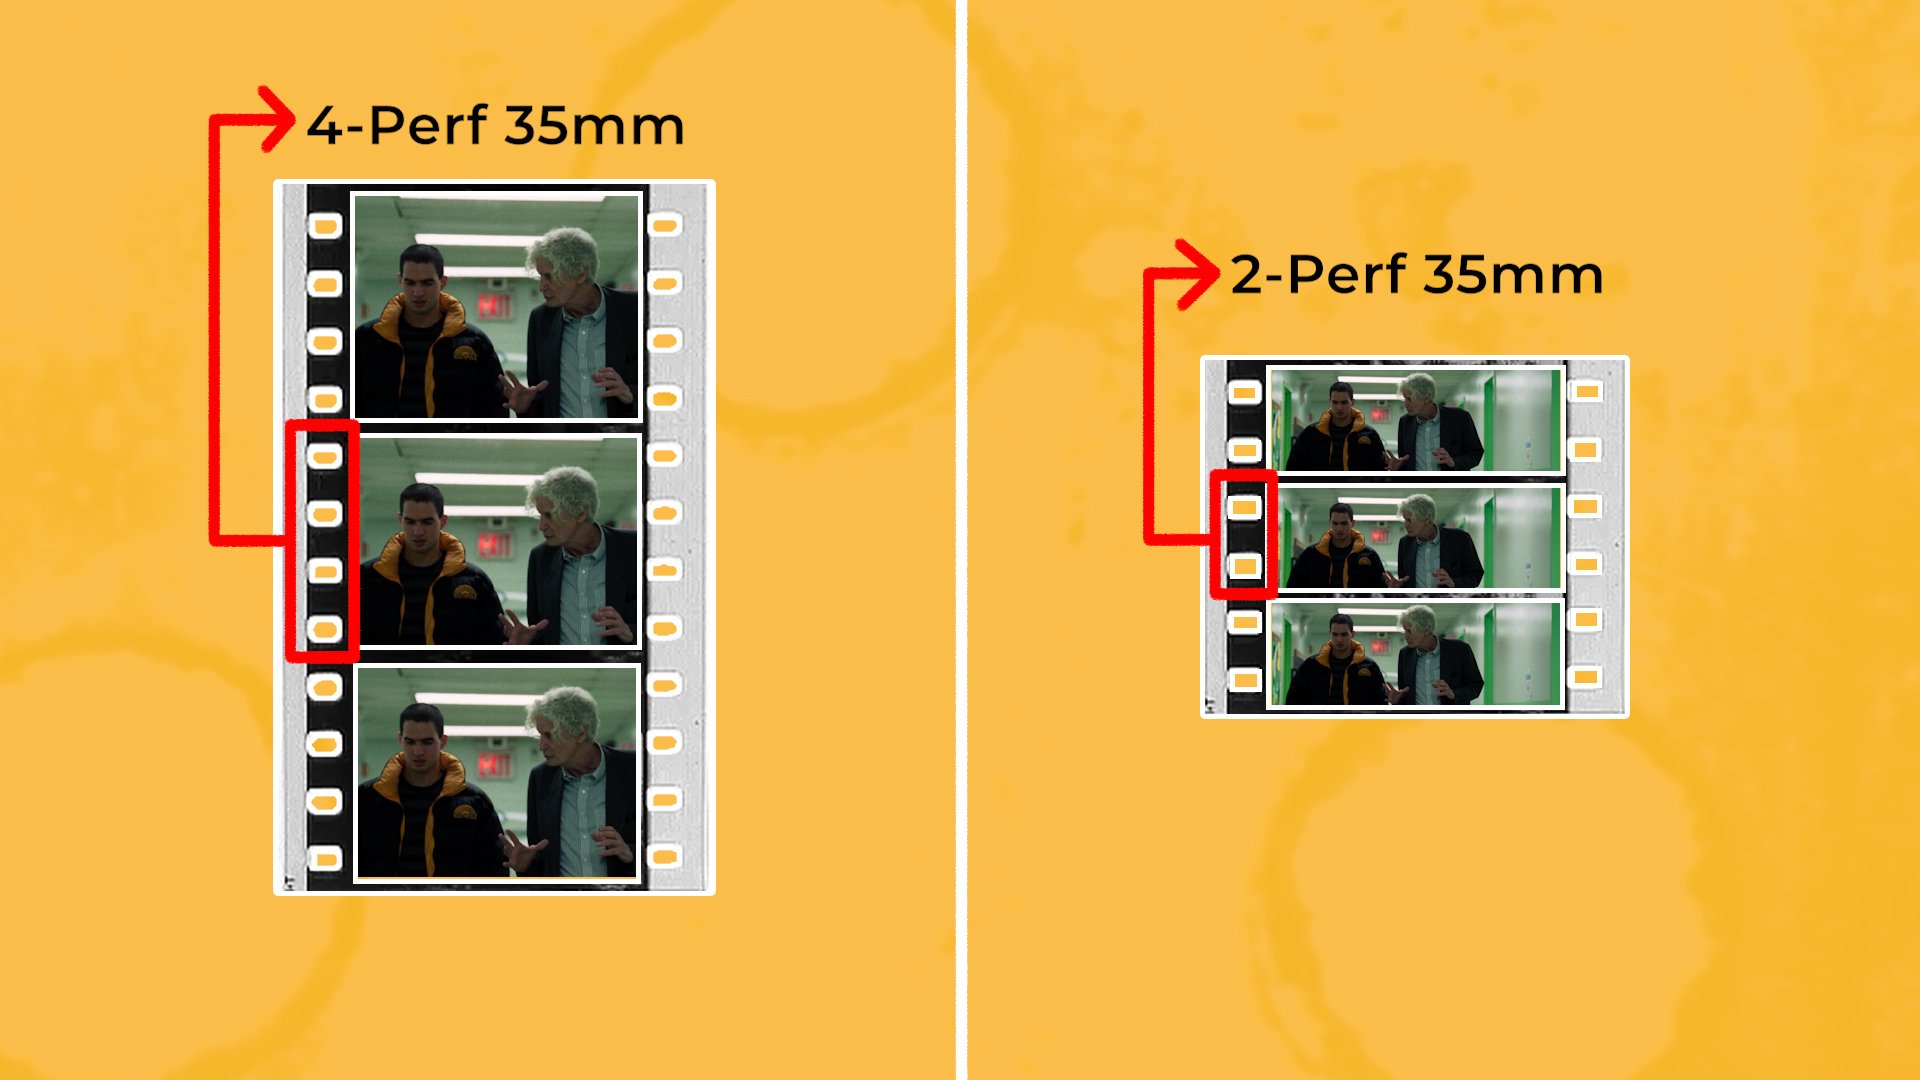
Because the surface area of the negative is smaller, it also means the film grain is more noticeable. With a more gritty texture somewhere between 16mm film and 35mm anamorphic.
Lastly, because it uses half the surface area of 4-perf, it is twice as cost effective. With less needing to be spent on purchasing film and developing it.
Unlike Heaven Knows What, Good Time uses light more expressively. He combined the real world neon signage, sodium vapour streetlights, and harsh fluorescents with RGB LED SkyPanels that his team set up. These saturated colours dominated the palette, creating a heightened, almost surreal nighttime atmosphere that visually added to the story’s chaos.

The additional budget allowed for set pieces that would have been impossible earlier: escapes, police chases, and more controlled stunt work. However, these moments are still shot in a way that feels frantic and unstable, often denying the audience clear spatial orientation.
Good Time feels like a bridge film - combining the raw aesthetic of their early work with the narrative propulsion and technical ambition of a larger production.
UNCUT GEMS – HIGHER BUDGET
After many years, that first film that Josh Safdie was researching in the diamond district before they shot Heaven Knows What, called Uncut Gems, finally entered production.
“10 Years ago when we set out to start this project, we wrote the first draft 10 years ago, one of 160 drafts, a couple of things never changed. One, Howard’s fate. The general plot of this basketball player with this gemstone was kind of always there, in that shape. And it never was a diamond.” - Josh Safdie
With a larger cast and more famous faces, it represents the Safdie Brothers operating at their largest scale while still resisting traditional Hollywood polish.
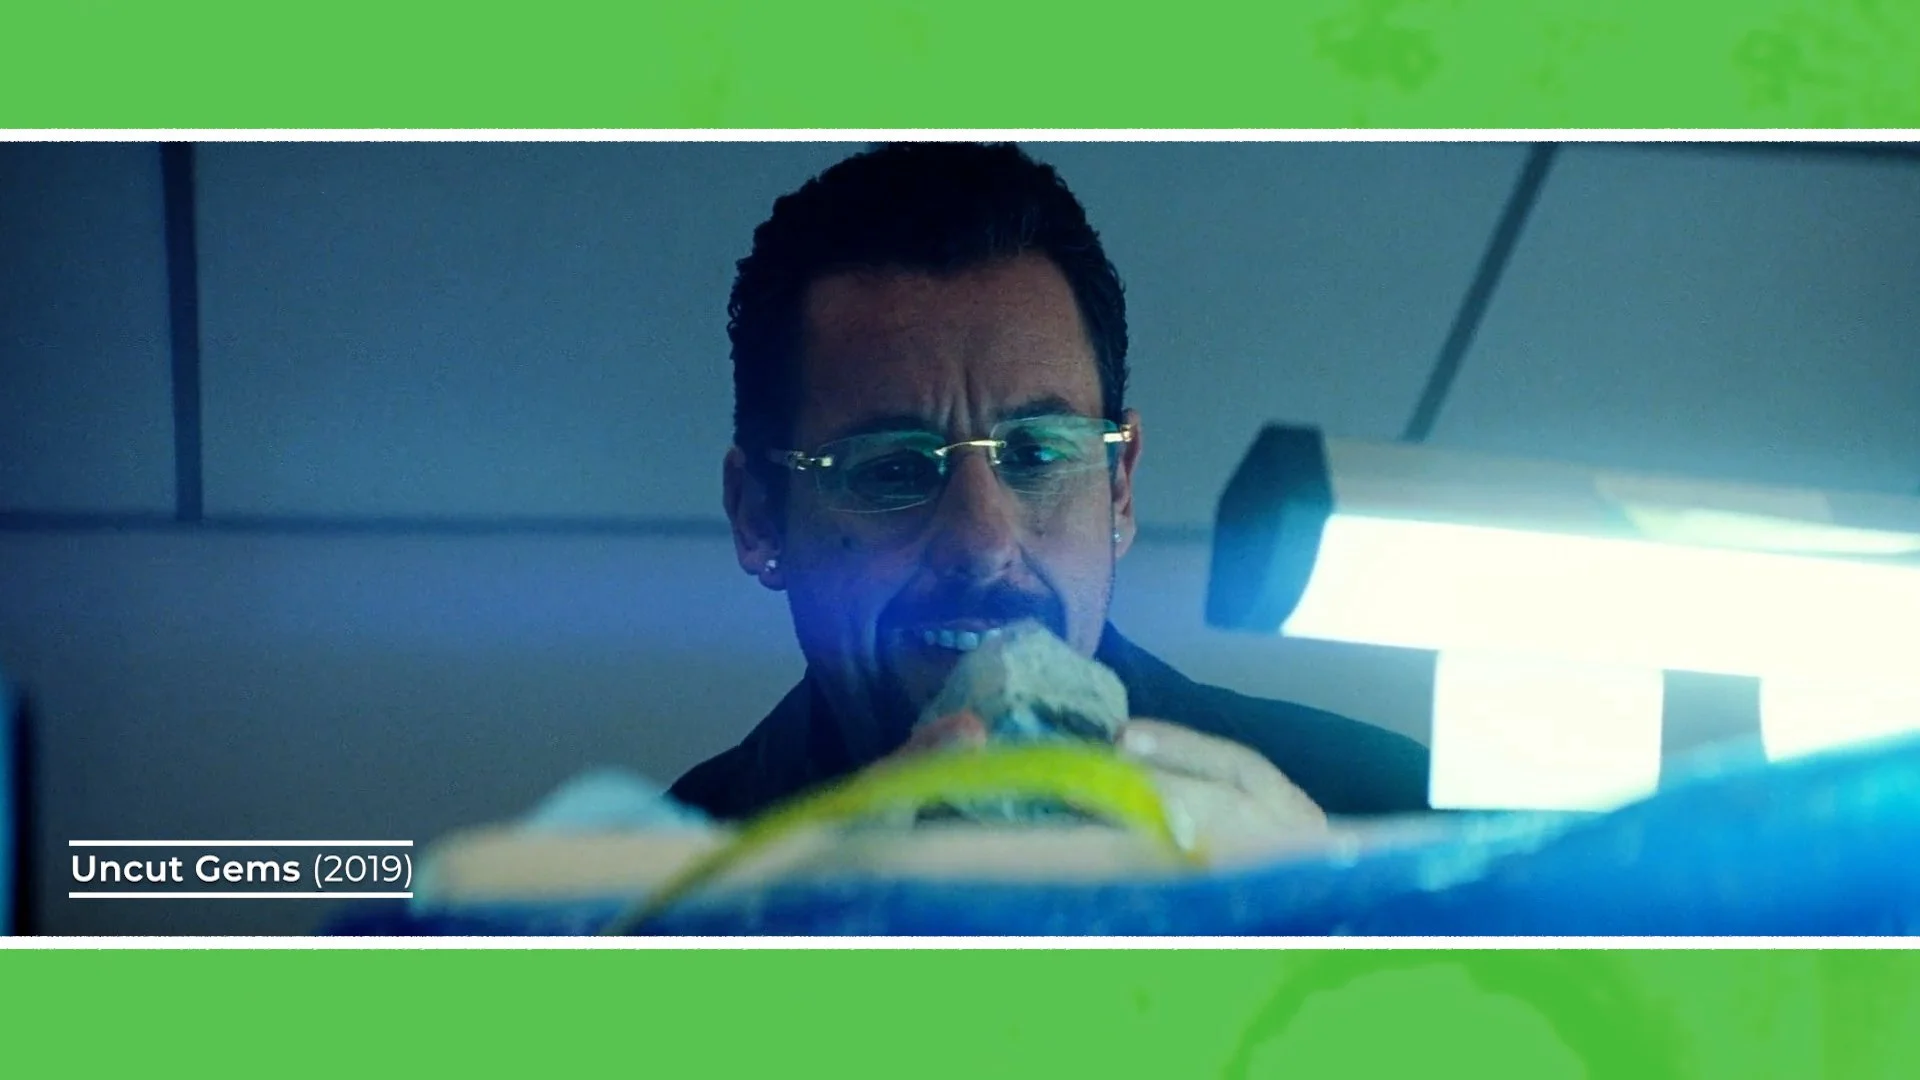
The film is far more expansive in scope, featuring numerous locations, set pieces and elaborate crowd scenes. Yet, despite the budget increase, the Safdies refused to smooth out their style.
Shot again on Kodak 500T 35mm, this time by famed DP Darius Khondji, the movie embraces a similar abrasive visual approach.
However, this time using a slightly more mobile camera that often glides along on a Steadicam rather than being stuck in one place on a tripod.
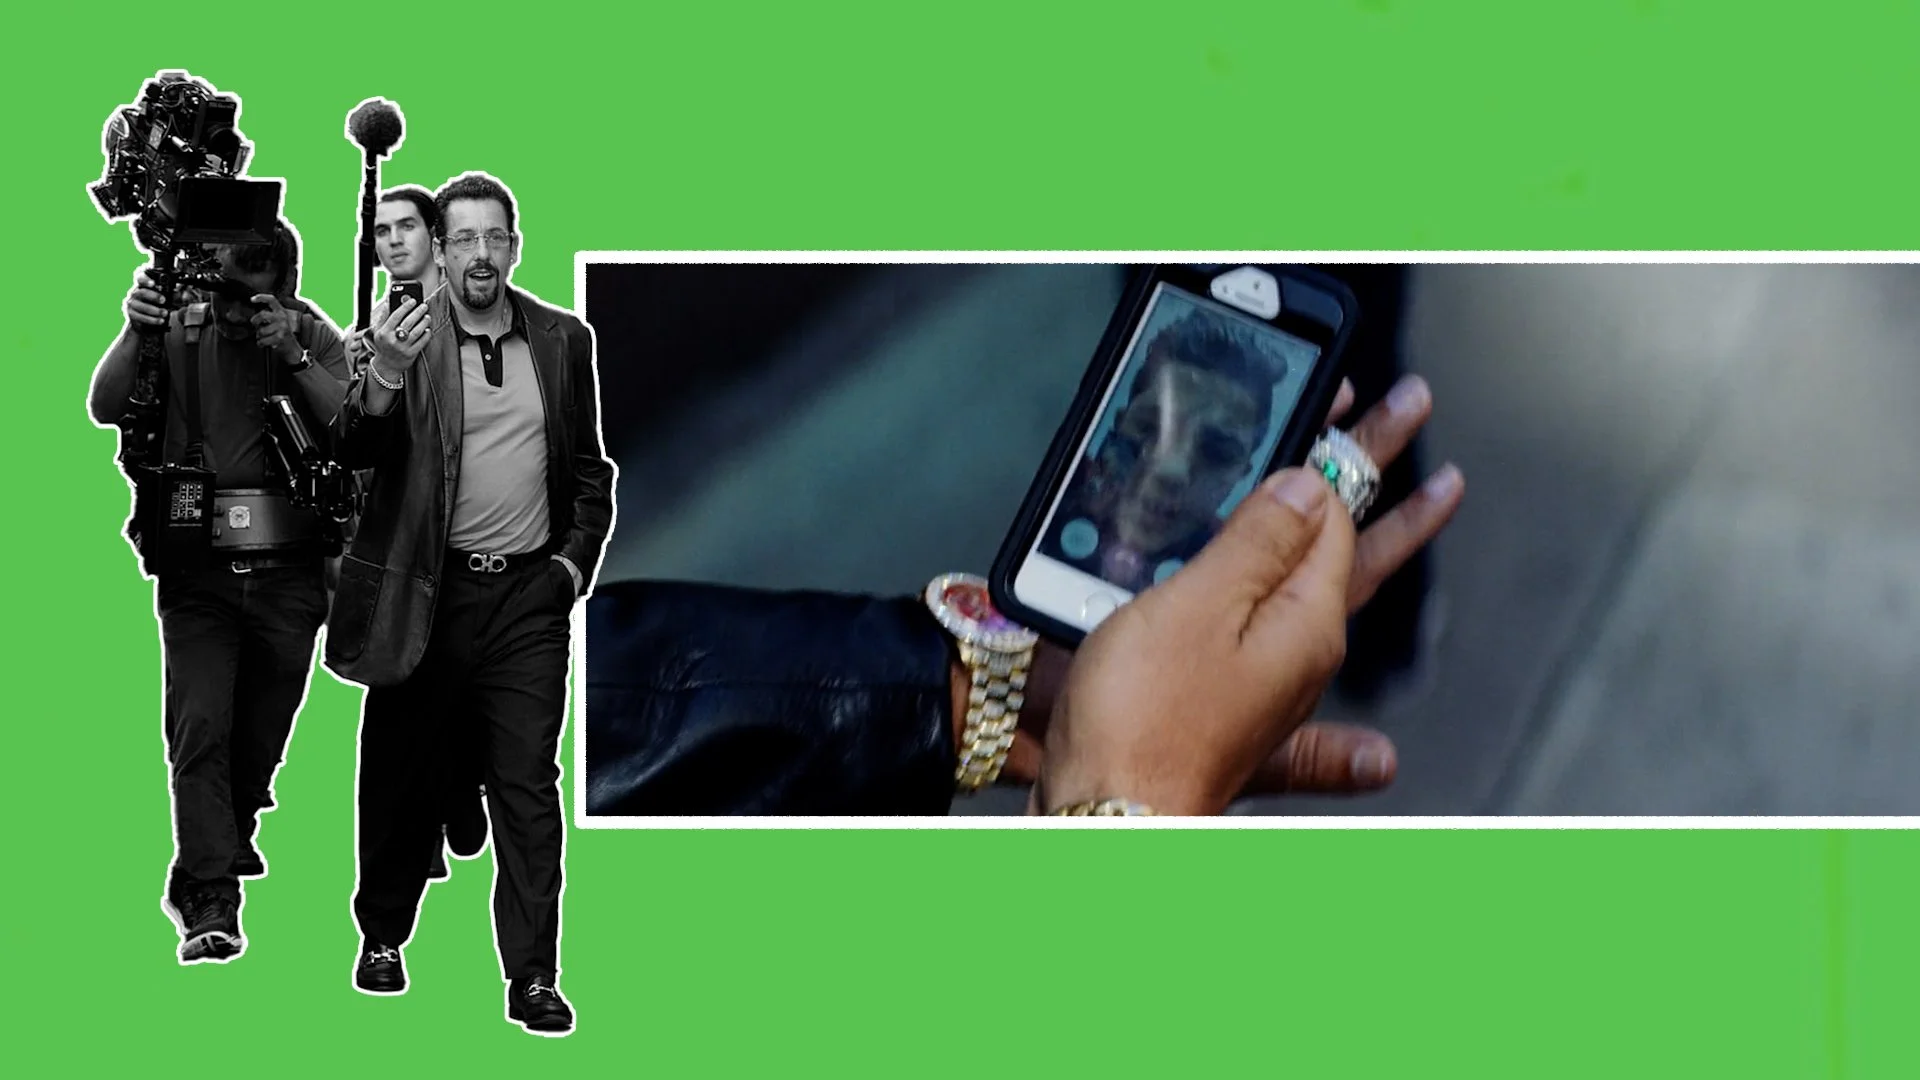
They elevated their camera package by choosing to film in 4-perf anamorphic, rather than 2-perf spherical. This format gave the filmmakers a larger than life dimensionality which they felt was especially necessary for Adam Sandler’s close ups. The more expensive 4-perf anamorphic also came with a cleaner, tighter grain structure.
So, to get back a little more film grain, they decided to push process the film for one stop over the whole movie.
This is a technique where you intentionally underexpose film (by metering the 500ASA film at 1,000ASA) and then overdevelop it in the lab for longer than usual to compensate.
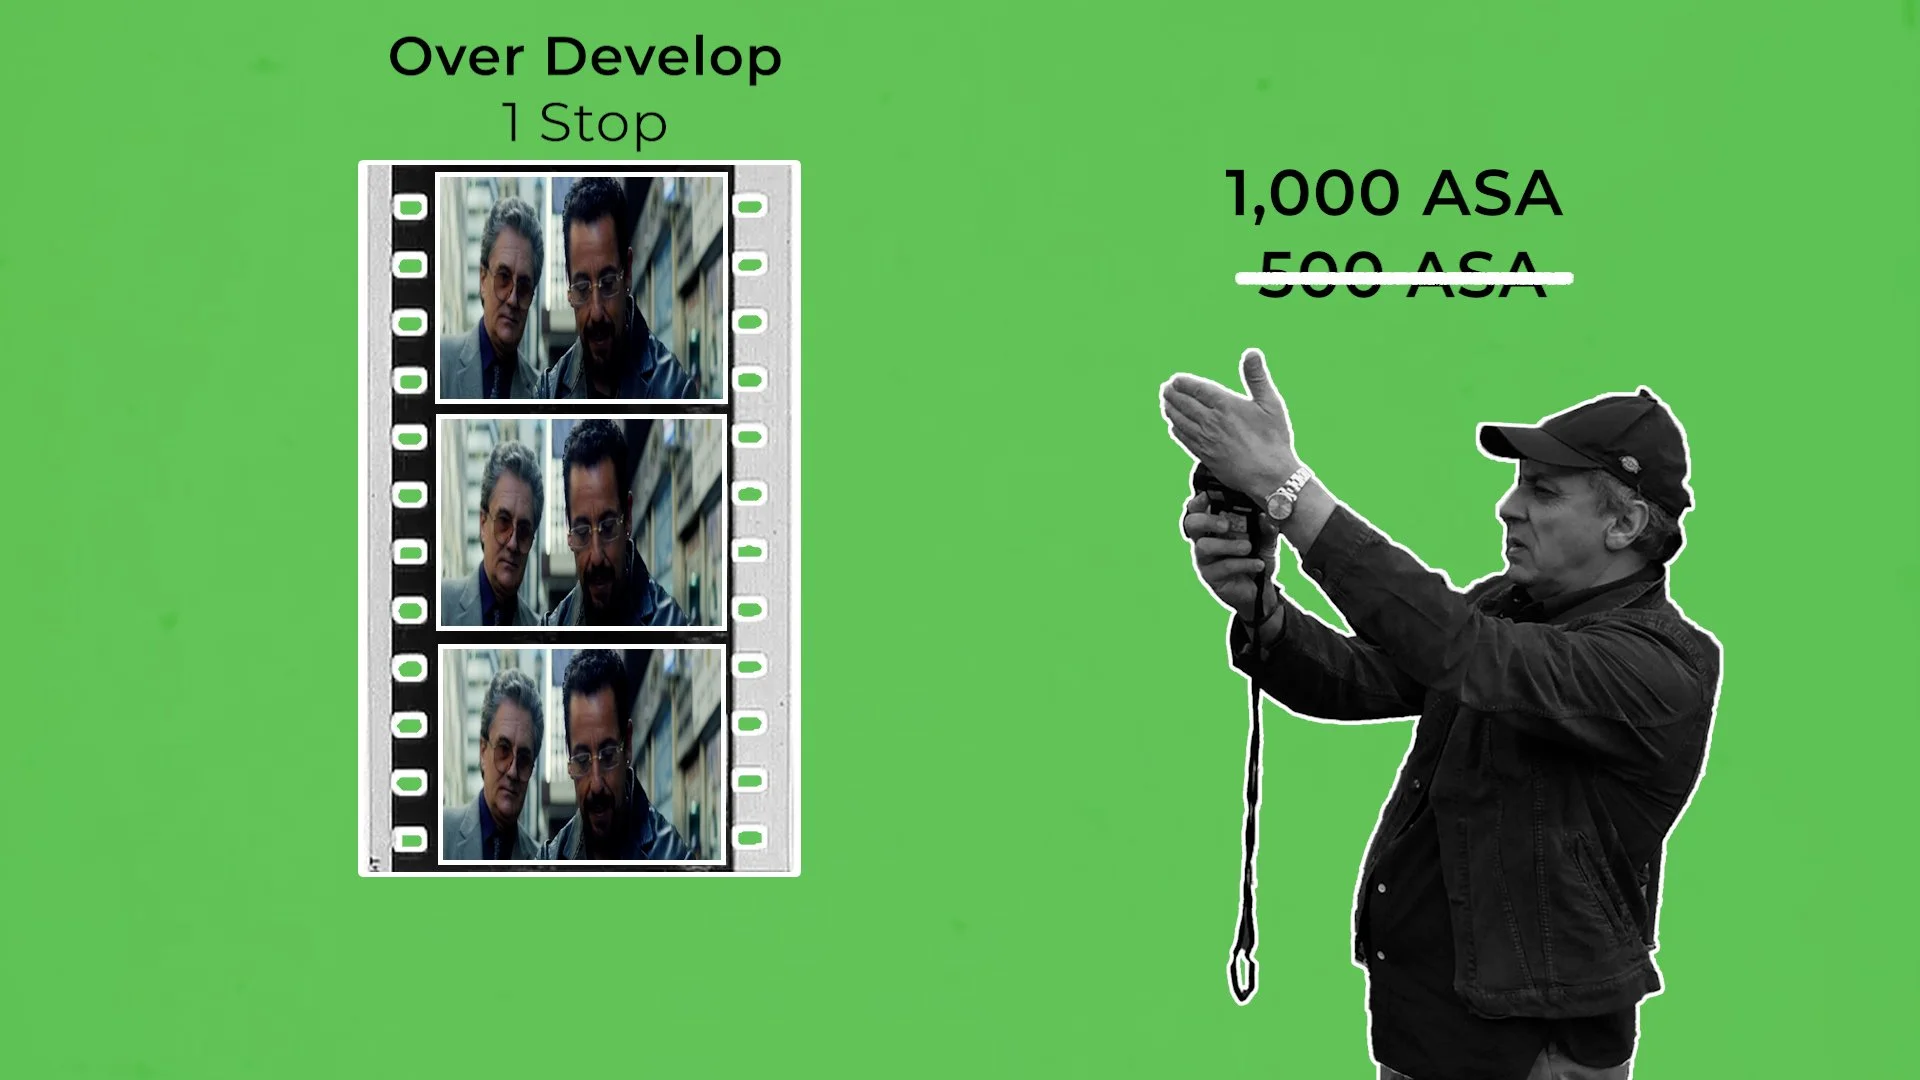
Again they went with long lenses. This time C-Series anamorphics from Panavision which included 180mm, 250mm and 360mm focal lengths, as well as telephoto zooms.
The long lenses compressed space, made backgrounds feel oppressive, and like characters are constantly boxed in by their environments - which added to the tension.
Lighting is perhaps a little more controlled than in Good Time, but still intentionally harsh and mainly done with practical lights that can be seen in the shot. Jewellery stores are flooded with artificial light and garish colour, RGB light pulses in clubs, work is done under vivid cyan practicals, and dark night exteriors buzz with colour and noise.

The camera remains restless, often hovering inches from faces, refusing the audience relief. The editing is aggressive, with overlapping dialogue and relentless pacing pushing the film toward sensory overload.
Where the budget truly shows is in logistics rather than style: closing streets, getting cameos from celebrities, staging major basketball games, coordinating large crowds, and executing complex sequences with precision - all while maintaining the illusion of chaos.
CONCLUSION
The Safdie Brothers are filmmakers who have maintained a remarkably consistent creative philosophy across every budget level. With street casting, telephoto lenses, intimate dialogue and chaotic plots.
At low budgets, limitations pushed them toward radical realism and raw intimacy. At medium budgets, they embraced genre while refining their visual language. At higher budgets, they expanded scale and complexity without losing the tension, chaos, and discomfort that define their work.
Rather than using increased budgets to smooth out rough edges, the Safdies use money to intensify their ideas - making their films louder, denser, and more overwhelming.

Why the New IMAX Camera Matters for Filmmakers
With the upcoming release of The Odyssey, the relationship between Christopher Nolan and IMAX deepens once again, driven by the arrival of the first newly designed IMAX camera since the late 90s.
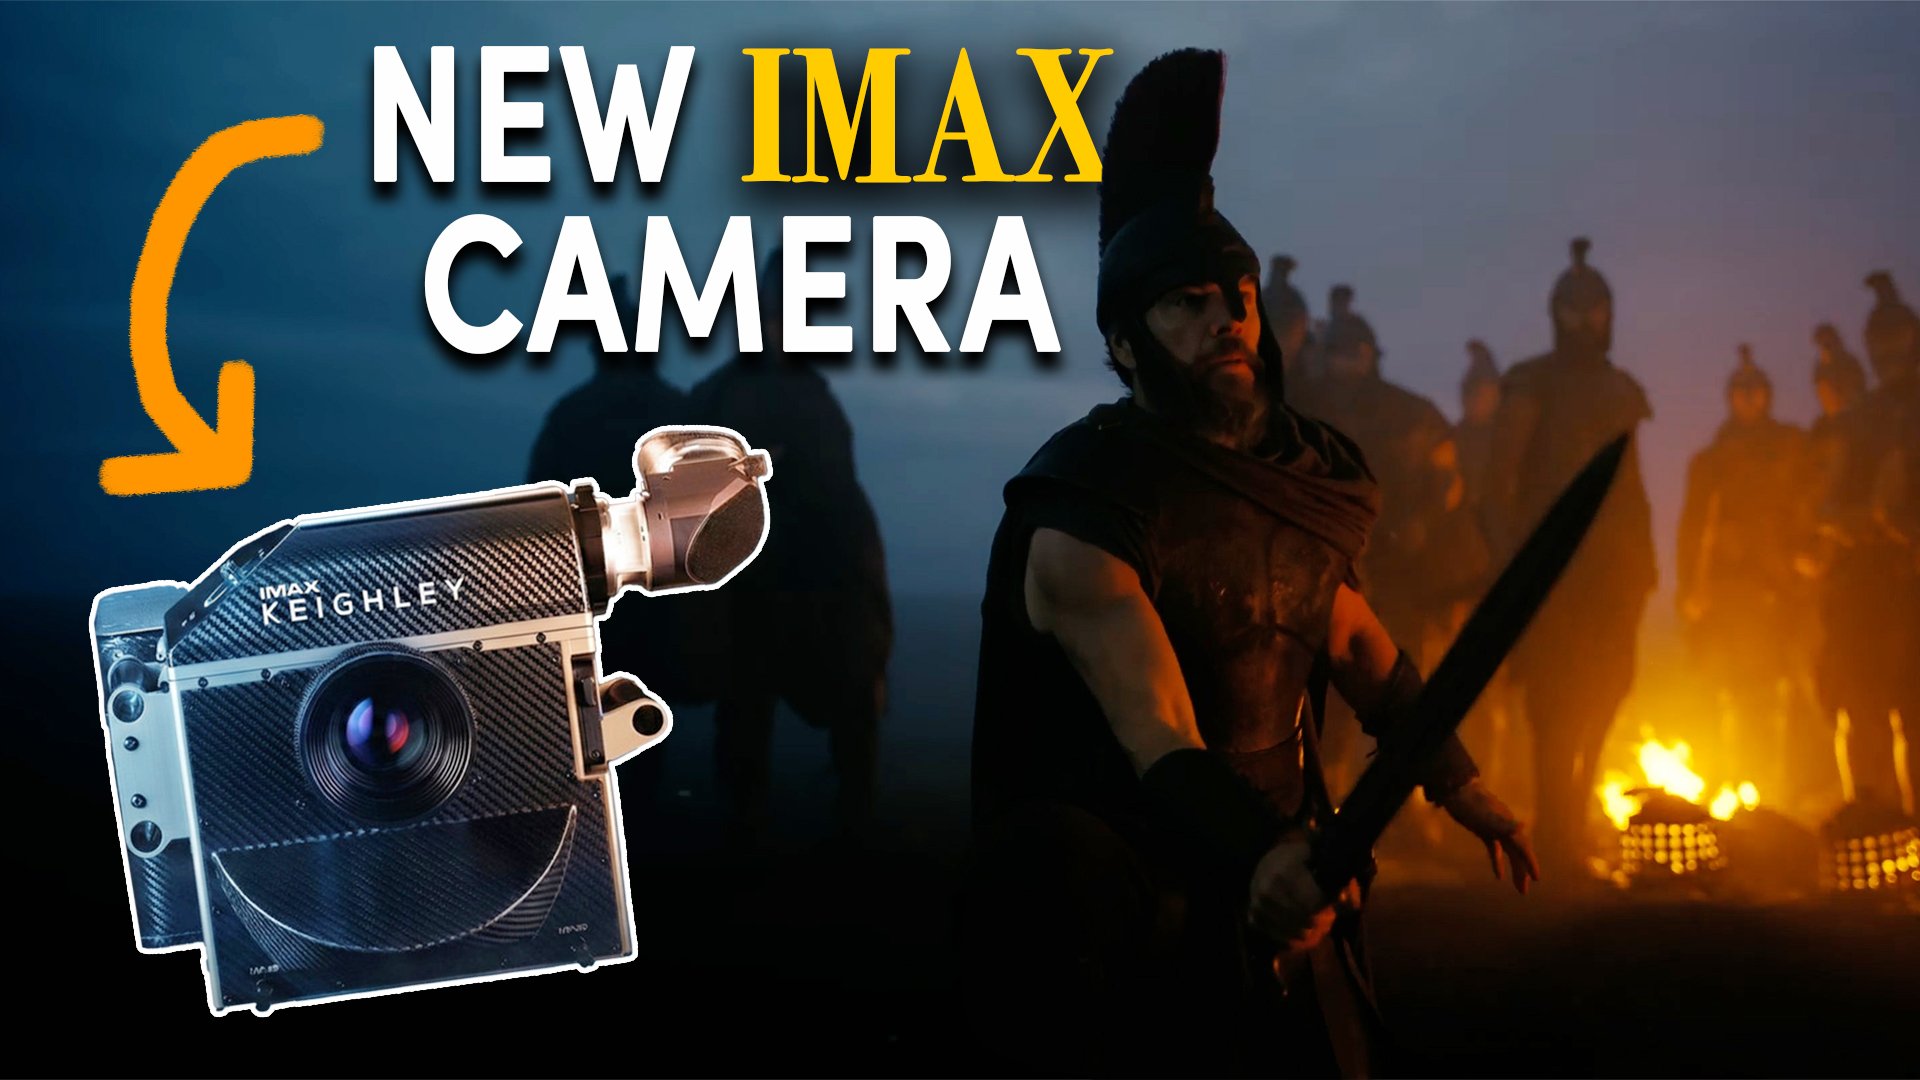
INTRODUCTION
When you hear the word IMAX, one filmmaker almost inevitably comes to mind: Christopher Nolan. For close to two decades, Nolan has pushed IMAX further than anyone else - championing it as the premium format for capturing blockbuster spectacles. With the upcoming release of The Odyssey, that relationship deepens once again, driven by the arrival of the first newly designed IMAX camera in decades - since the late 90s.
On paper, it’s another technical leap forward which unlocks not only hardware changes but, more importantly, an entirely new way of using this epic film format. In this video, we’ll break down how the camera body has changed, why it matters for the future of large-format filmmaking, and how an innovation designed to silence a camera may quietly unlock the most significant creative shift IMAX has ever seen.
IMAX KEIGHLEY
This new camera is named the Keighley in honour of Imax Chief Quality Officers David and Patricia Keighley, whose decades-long commitment to technical excellence, exhibition integrity, and uncompromising quality standards helped define IMAX as a cinematic format rather than just a screen size.
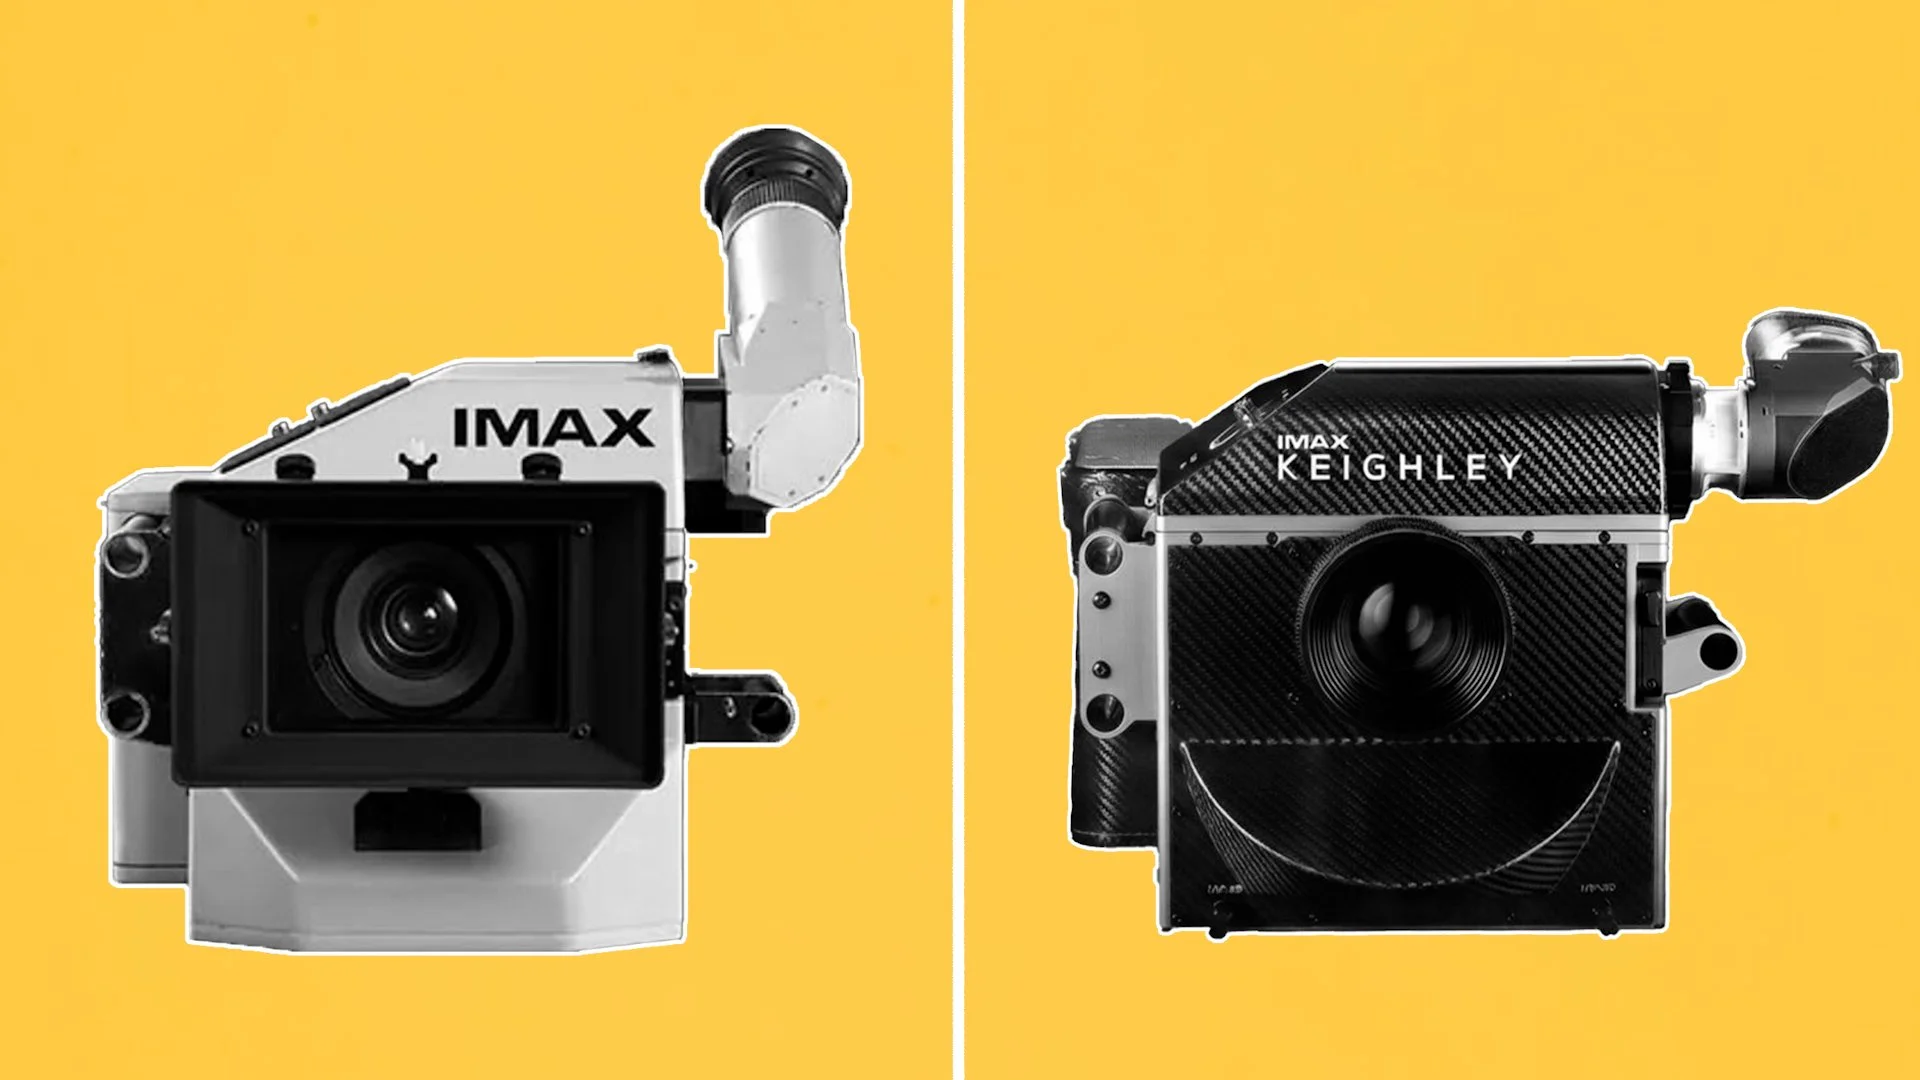
When we talk about camera upgrades, image quality is usually the first thing that comes to mind. But with IMAX, the footage itself is already defined by the format: massive 15-perforation, 65mm film.
Because of that, changes to the camera body don’t meaningfully alter image quality as the look is dictated entirely by the Kodak film stock running through it. Although they do mention that film exposure on the new camera should be a bit more even and stable.
Almost all of the upgrades are either technical or ergonomic in nature, focused not on improving the image, but on expanding the way the IMAX camera is used and how easy it is to do so.
WEIGHT
At first glance it’s easy to see that Imax cameras are incredibly large, cumbersome and heavy - as I’m sure Hoyte van Hoytema, and his lower back, can both vouch for.
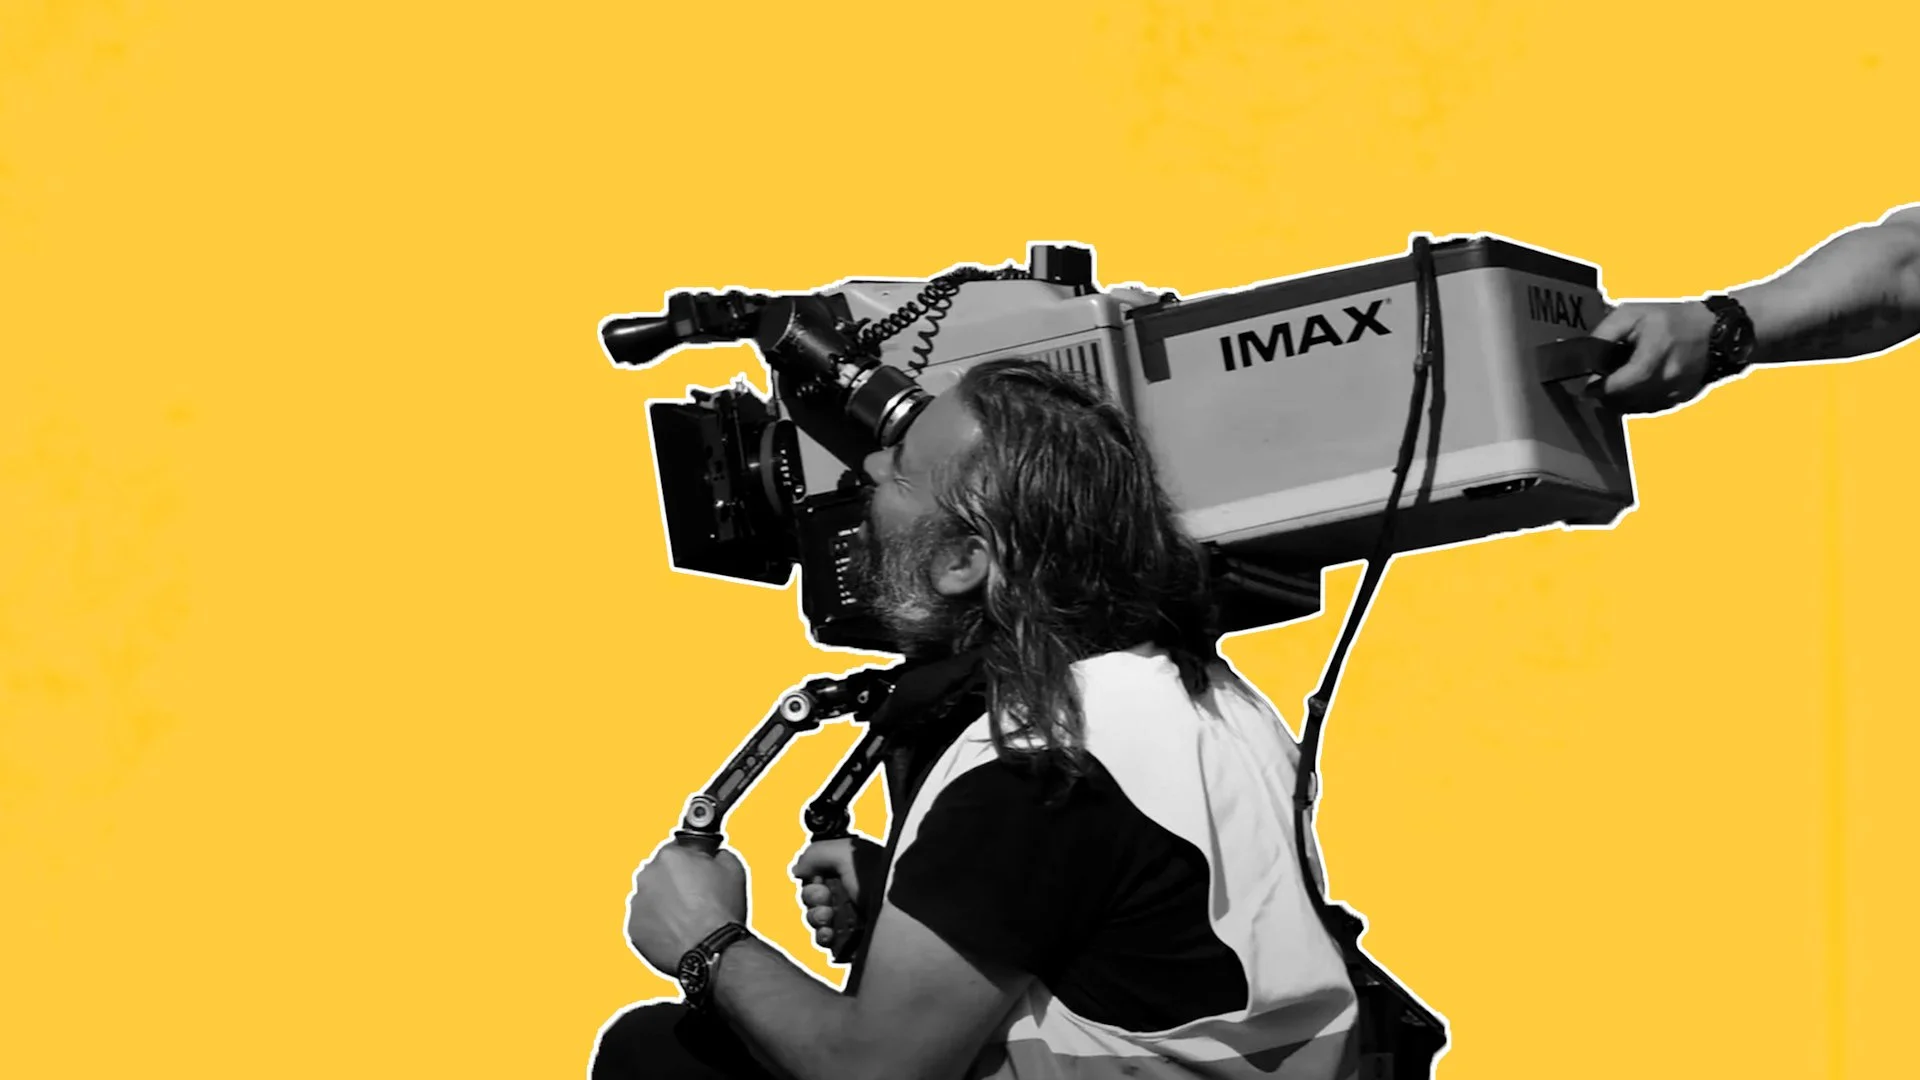
With all the camera accessories added and a 1,000 foot roll of film loaded, the camera weighs around 25 kgs or 55 lbs. The new Keighley camera body, although the form may look largely the same, tries to make this weight more bearable by using lighter weight carbon fibre.
“It’s made out of mostly composite materials. Carbon fibre honeycomb sandwich panels. The same stuff that Formula 1 is made out of, and titanium, the same stuff that jet fighters are actually made out of.”
- Milos Popovic, Imax Principal Engineer, The Wall Street Journal
VIDEO TAP
Another crucial upgrade is the new video tap. Unlike digital cameras, which provide an exact live preview of what the sensor is capturing, film cameras don’t have a native way to show the recorded image. They expose light onto film, which then has to be sent to a lab and processed before it can be viewed.
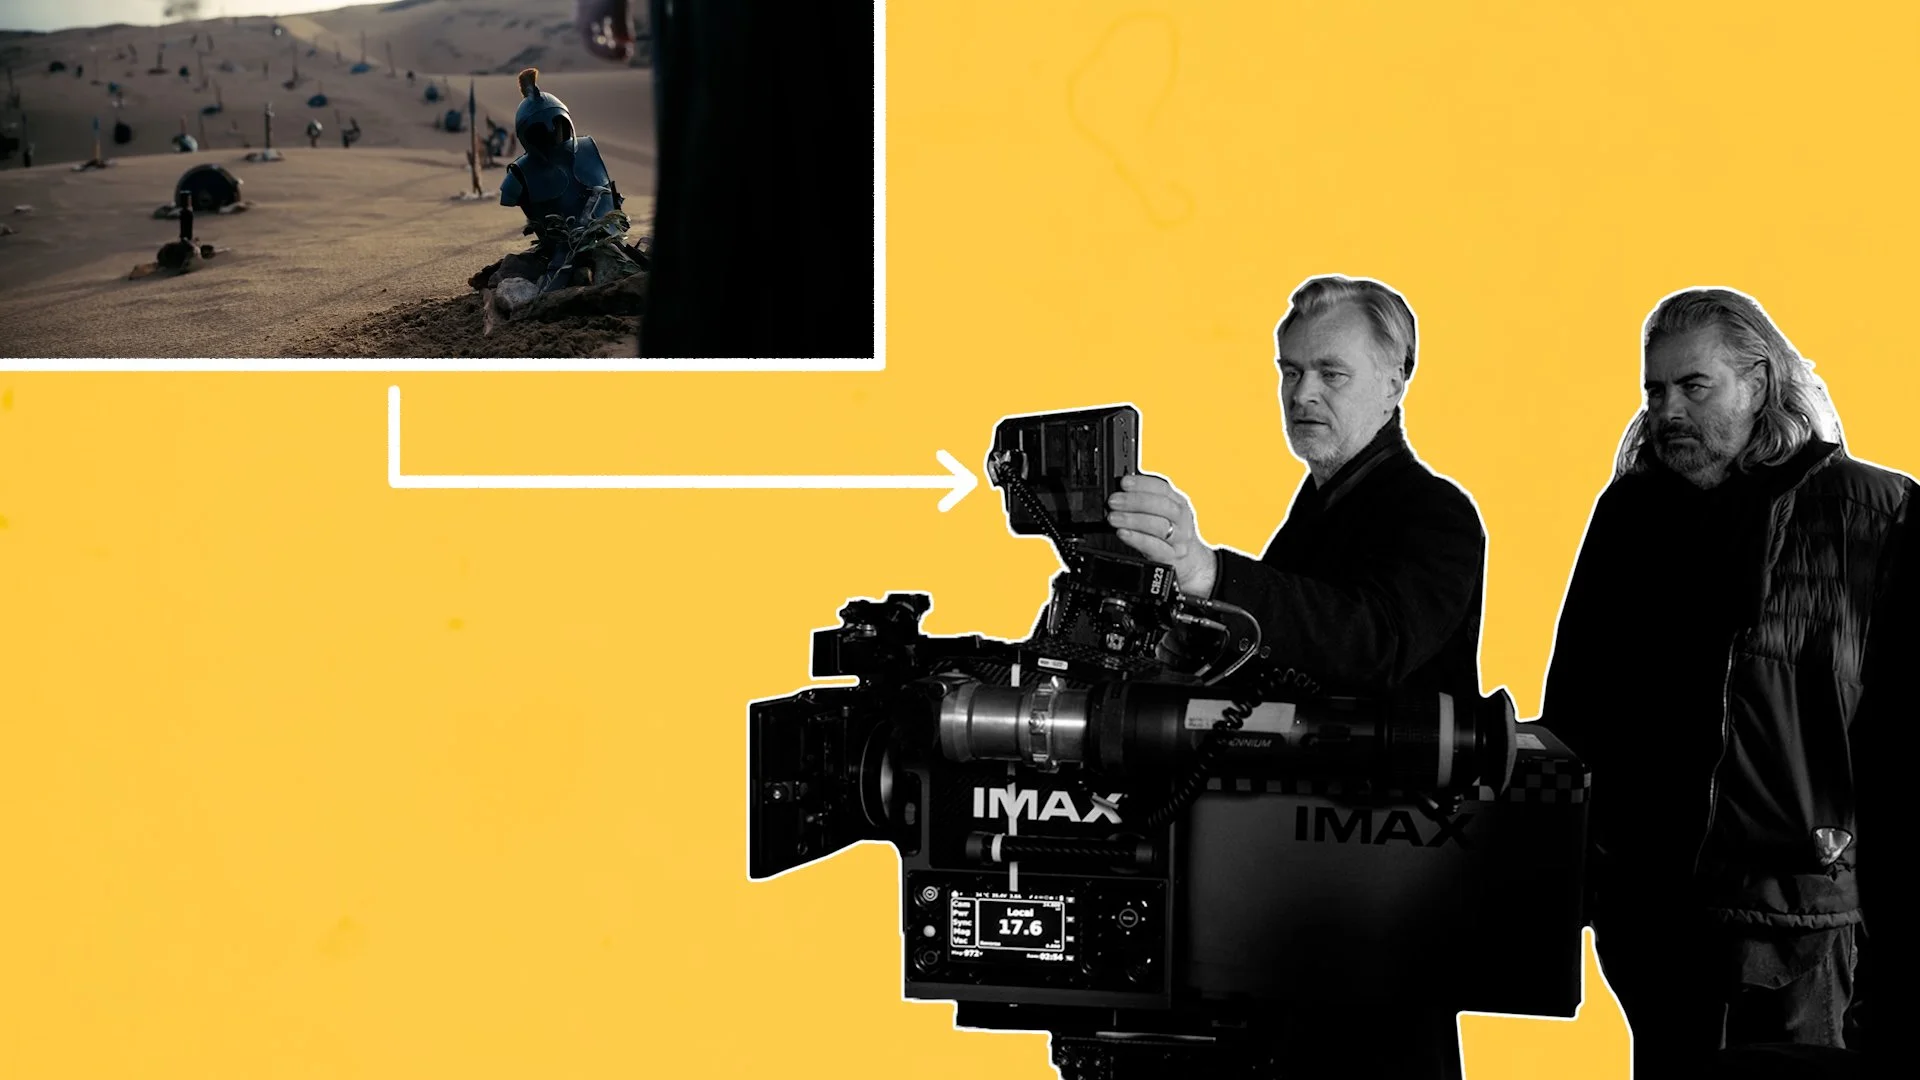
To bridge that gap, film cameras rely on a video tap - a system that offers an approximation of the final image. On the new IMAX camera, this takes the form of a small 4K UHD sensor built into the optical viewfinder, sending a signal out through an SDI port. External monitors or wireless transmitters can then be connected, giving the crew a clean, detailed live image of what the camera is seeing.
“There are attachments to the camera that can now take the 4K UHD tap out of the viewfinder and go into the cloud so people can see stuff either on set or on their iPads instantaneously and at a much higher quality than ever before. Film cameras never had that capability.” - Bruce Markoe, Imax Senior Vice President, SMPTE
Visual frame-line guides can now be overlaid on the SDI output as well, helping crews accurately compose for different or multiple aspect ratios and exhibition formats. Such as the native 1.43:1 or 1.90:1 that will be seen in Imax cinemas, as well as a widescreen 2.40:1 frame that may be displayed in regular cinemas or on streaming services.
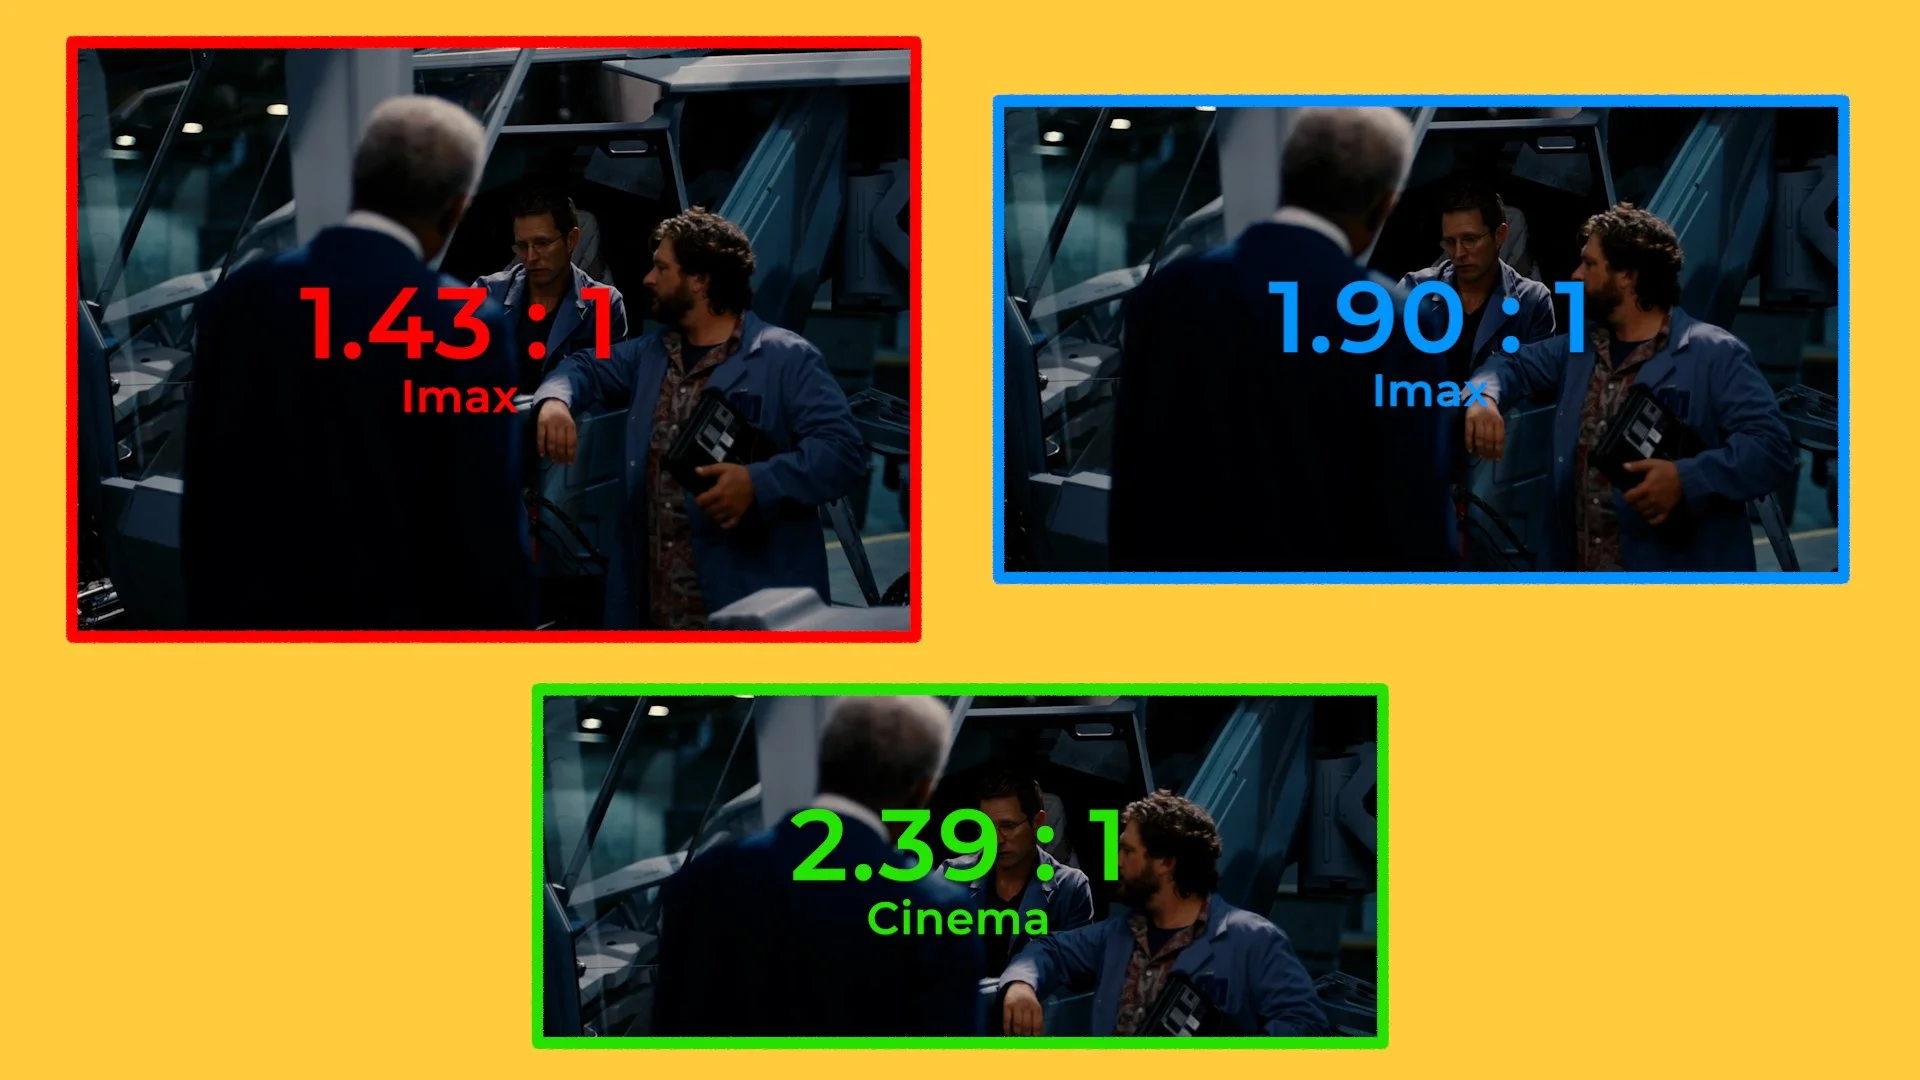
This 4K feed can also be recorded and reviewed as dailies, allowing filmmakers to watch back takes without waiting for the film to be developed and scanned at the lab.
The Keighley update also introduces metadata capture, meaning camera information can be displayed and passed along for both on-set monitoring and editorial workflows - bringing IMAX film production closer to the experience of modern digital cinema cameras.
This is a major leap forward from the original 1990s-era IMAX cameras, whose low-resolution video taps could only suggest basic framing, offering little clarity when it came to focus, exposure, or colour.
On Oppenheimer and other previous Nolan Imax productions, cinematographer Hoyte Van Hoytema often refrained from using Steadicam or cranes with remote heads for just this reason, the eyepiece was far superior to the old video tap system. With a 4K video tap this issue is now fixed.
“I love looking through the viewfinder. That’s one of the reasons why we wouldn’t go necessarily on a Steadicam or on a stabilised head because the moment you do that you prohibit yourself from looking through a viewfinder, you’re reliant on a video system. When you shoot a format like Imax it’s very important that you keep checking through a viewfinder because the video quality is very low-fi and very low res.” - Hoyte van Hoytema, Director of Photography, Variety
VIEWFINDER
The Keighley IMAX also features a newly designed optical viewfinder developed with Panavision. When shooting on film, a bright eyepiece is essential, and this new finder delivers a noticeably clearer, more comfortable viewing experience.
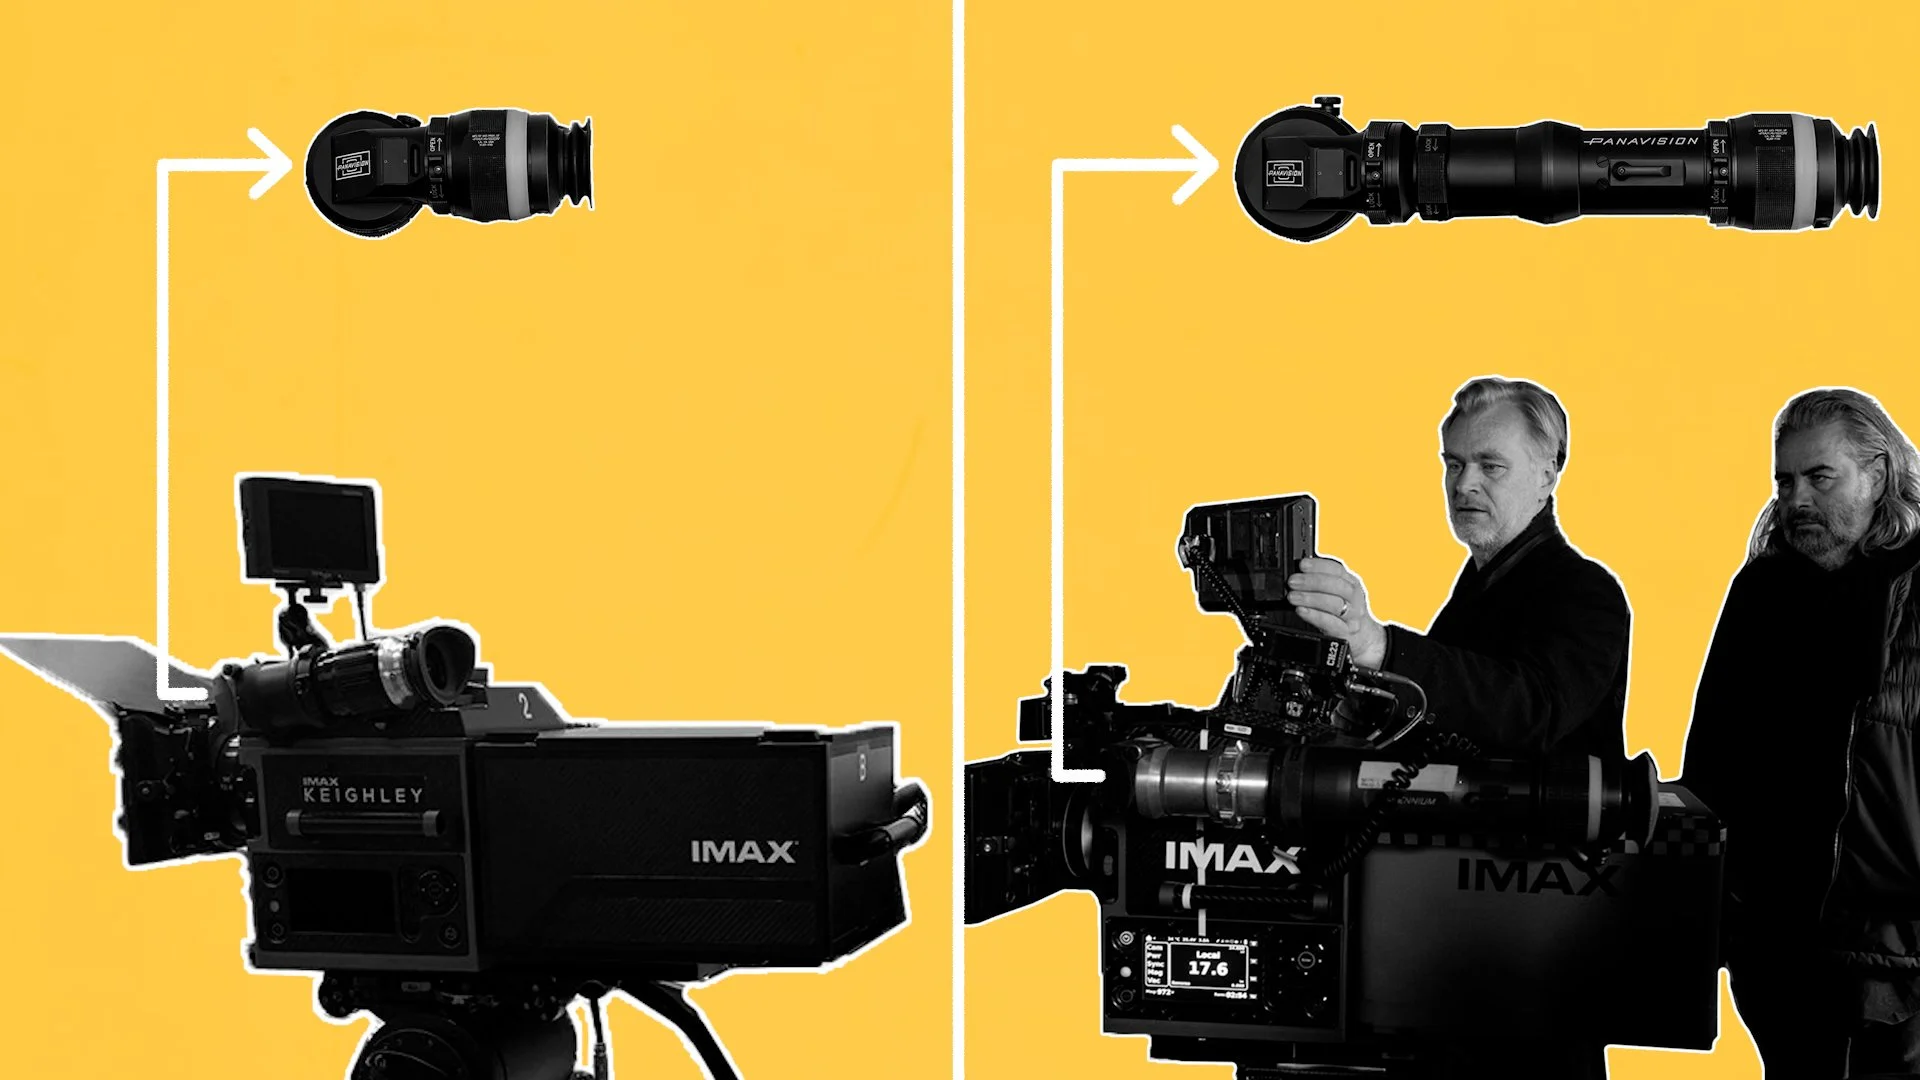
Behind-the-scenes images reveal two configurations: a shorter eyepiece for handheld, where the operator is close to the camera body, and an extended eyepiece intended for studio setups, where the camera is mounted on a dolly and the cinematographer is positioned on a seat with the camera lower and further away.
PORTS
Prototype images of the camera body show what appear to be three SDI video ports, two 2-pin power ports - for use with accessories like focus motors or transmitters, and a dedicated power input for a block battery, signalling a far more flexible and production-ready hardware design.
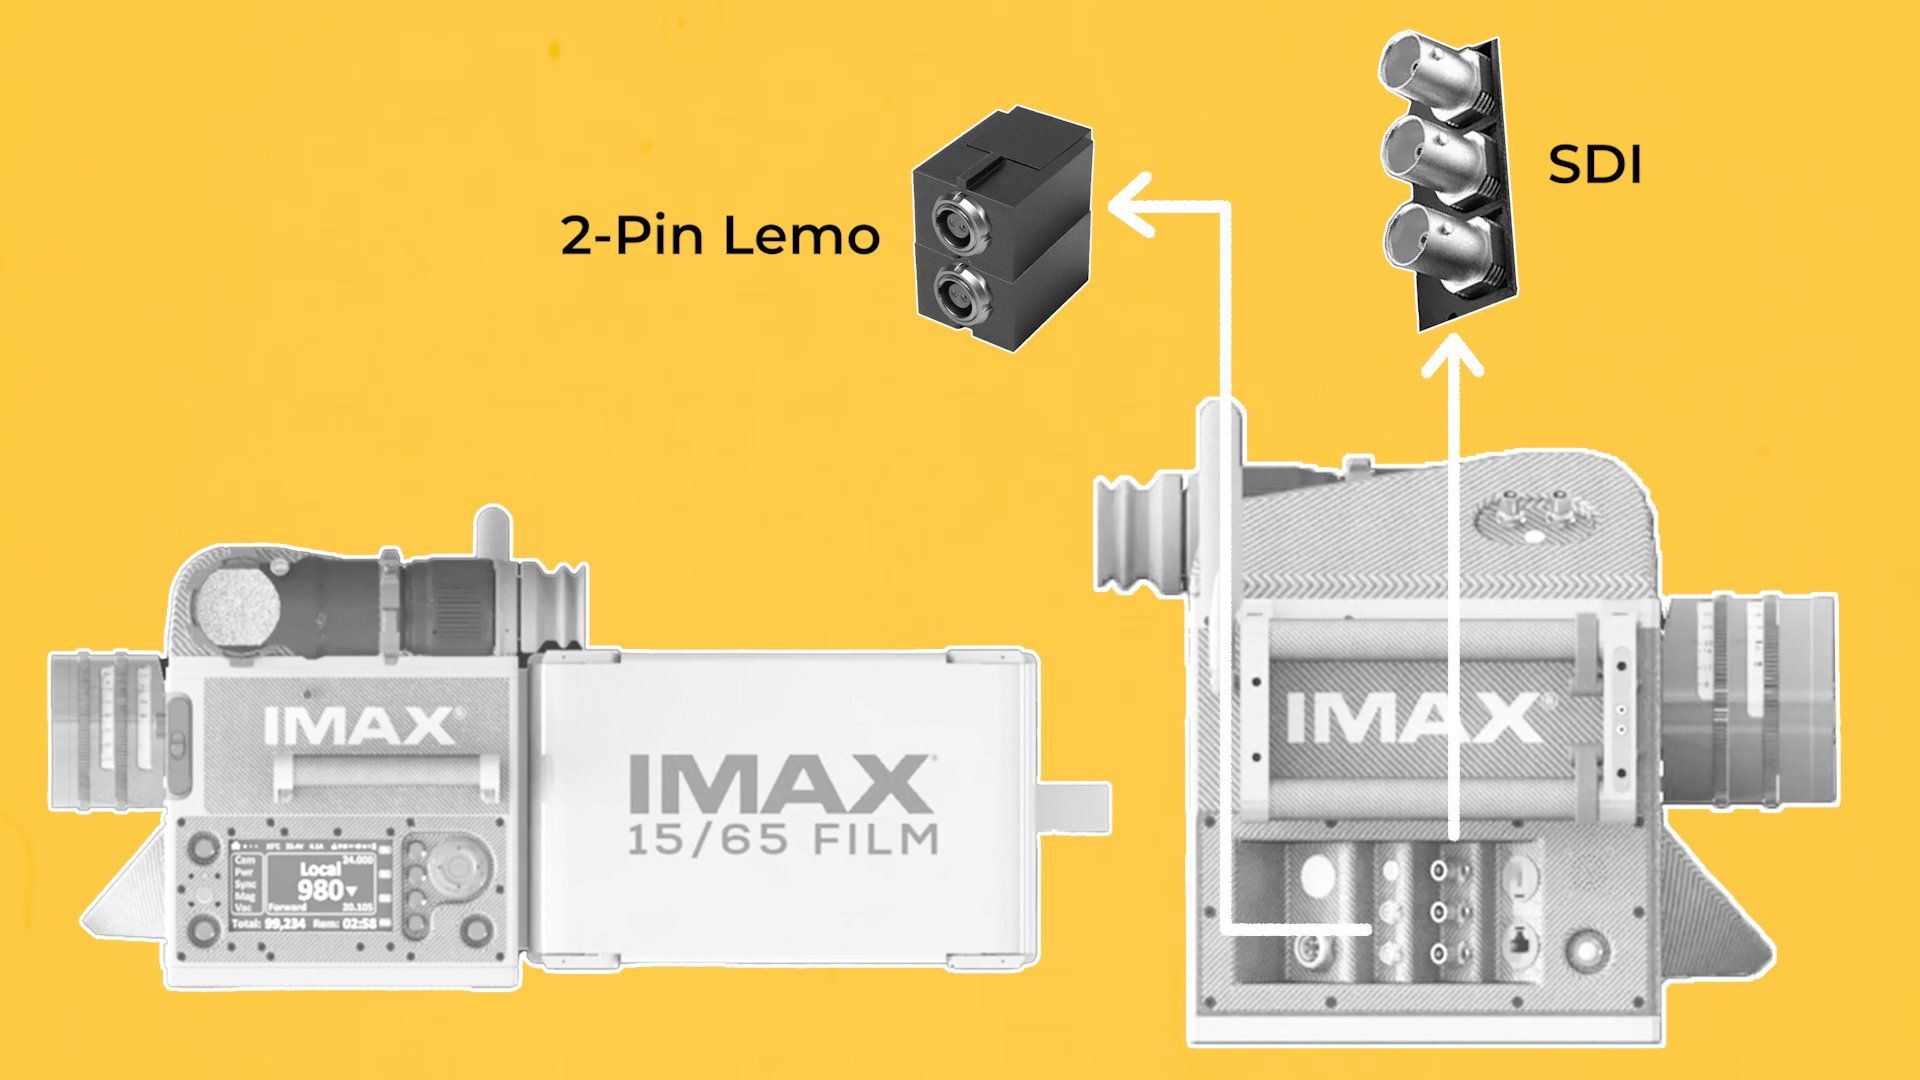
MENU DISPLAY
The redesign also comes with an updated digital menu and 5-inch display. Rather than a minimal, purely mechanical readout, like the older models, the display presents clear, production-relevant information at a glance. Along the top of the menu, battery voltage is shown which lets ACs know when a battery change is needed. In the top right, the frame rate is clearly displayed - in this case, 24 FPS.
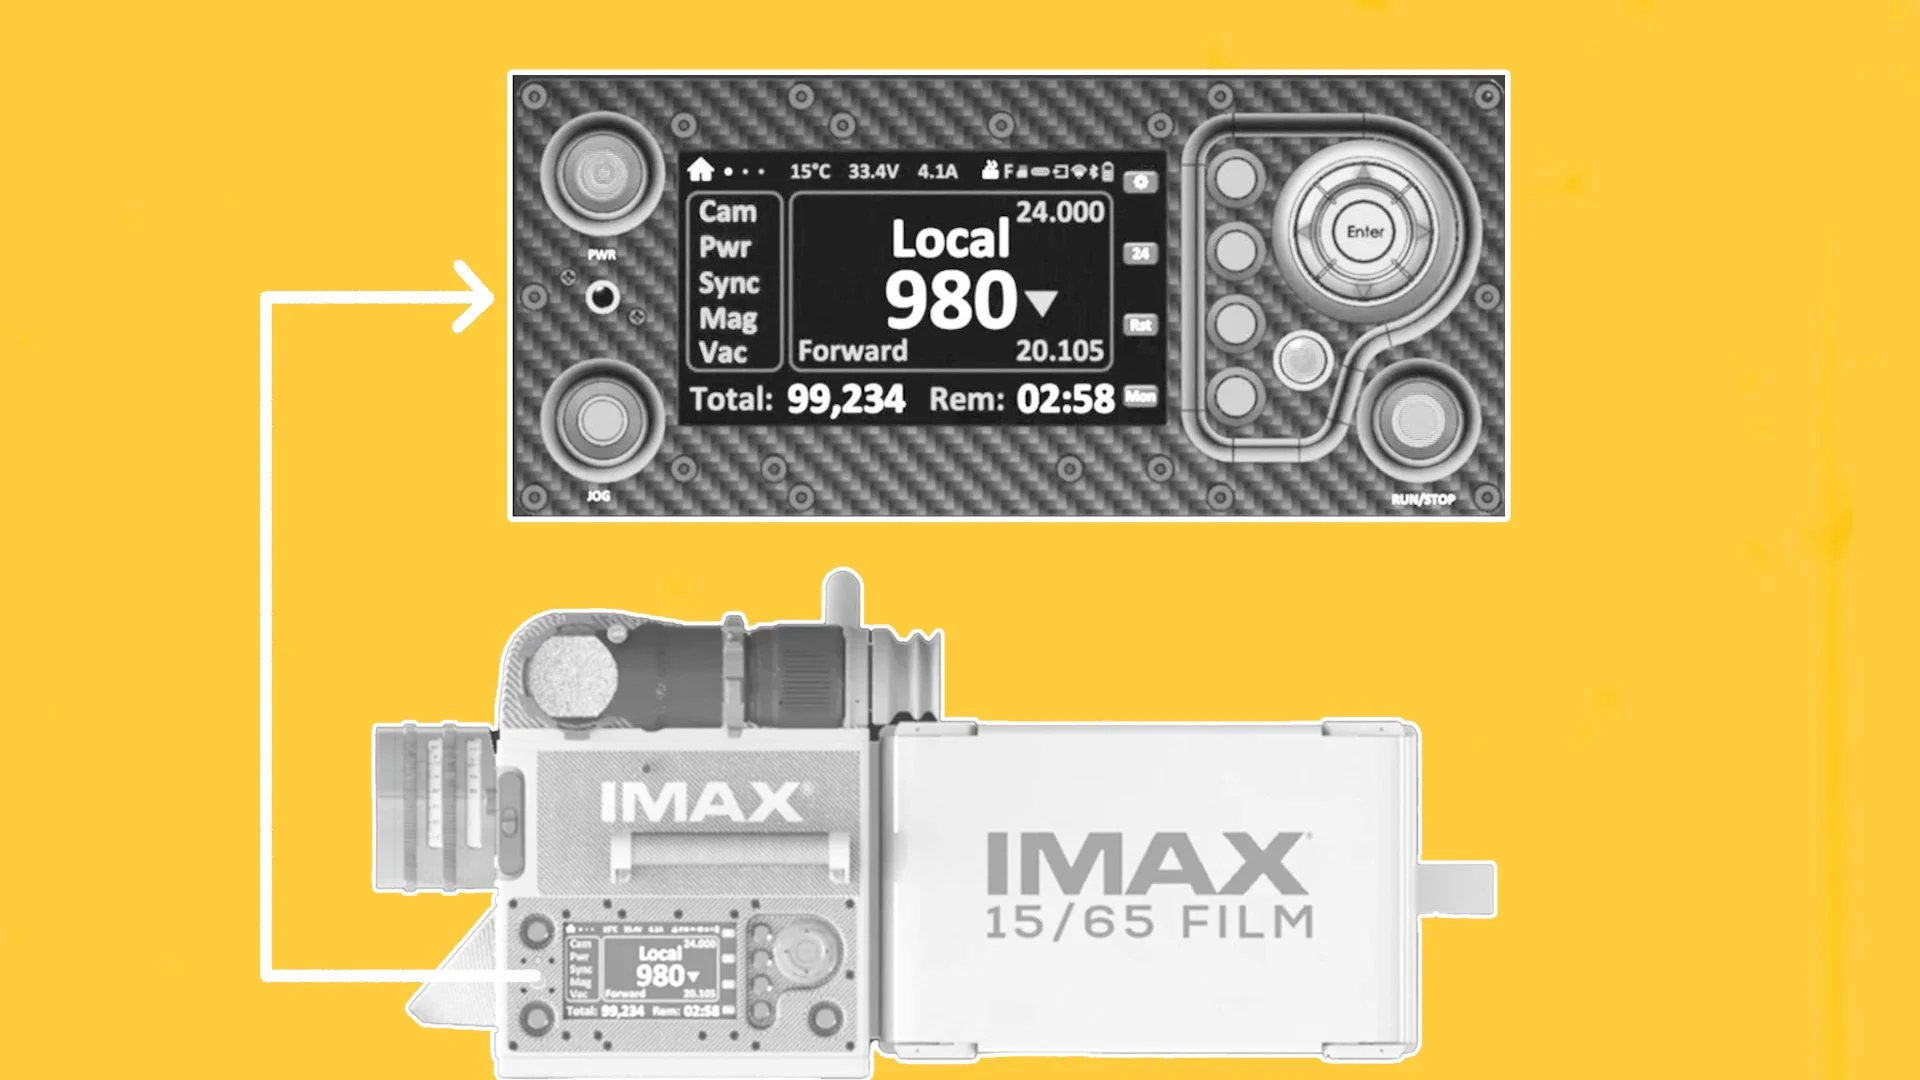
The menu has a comprehensive film management readout. “Local” appears to indicate how much film remains in the magazine yet to be shot. Shown here as 980 feet out of a 1,000-foot roll.
“Forward” likely displays how much film has already been exposed from that roll - in this case 20 feet, which is probably the leader of unusable film which is exposed when loaded into the magazine.
The system also tracks the total footage in feet shot across the entire project. Perhaps the most useful addition is the estimated remaining run time of the current magazine before the unexposed film runs out and the camera needs to be reloaded with a new one. Here it sits at 2 minutes, 58 seconds, roughly the recording time per 1,000-foot roll.
For camera assistants, this is a super useful feature, allowing them to anticipate reloads with precision rather than instinct.
SYNC SOUND
But the most significant breakthrough doesn’t come from the image at all - it comes from sound. Historically, the greatest limitation of IMAX cameras has been their noise: the deafening whirr of 15-perf 65mm film racing through the camera body made recording usable sync dialogue on location nearly impossible. As a result, IMAX was traditionally reserved for action, spectacle, or wide shots where dialogue could be avoided or replaced later.
The new Keighley IMAX reportedly reduces camera noise by roughly 30%. It is also compatible with a purpose-built blimp system - a large acoustic housing that dramatically dampens the sound of the camera movement.
Together, these changes allow the notoriously loud IMAX camera to capture clean, synchronised dialogue on set. This is why The Odyssey will become the first ever feature shot entirely on 15-perf IMAX, including all dialogue scenes.
The trade-off, however, is an ergonomic one. Once blimped, the camera becomes enormous - closer to the hulking Technicolor cameras of early cinema - practical only on a dolly and exceptionally difficult to transport to remote exterior locations - of which The Odyssey had many.
CONCLUSION
The Keighley IMAX doesn’t reinvent the format’s image - it removes the barriers around how that image can be captured. By addressing weight, usability, monitoring, and most critically sound, IMAX has quietly transformed a specialised spectacle camera into a far more flexible storytelling tool for making A-tier blockbusters.
With it now being possible to use them for capturing everything from the largest of set pieces to capturing intimate moments of dialogue.
Understanding Focal Length In Cinematography
When you watch a movie you’re looking through a lens that has a specific viewpoint, a specific way of interpreting depth, scale, and distance. And that viewpoint, expressed as a focal length, affects everything.

INTRODUCTION
When you watch a movie, you’re not just looking through a camera, you’re looking through a lens that has a specific viewpoint, a specific way of interpreting depth, scale, and distance. And that viewpoint, expressed as a focal length, affects everything.
Today, we’re going to explore what focal length actually is, how it works, how different formats can change the field of view, how focal lengths shape emotion, and most importantly how filmmakers can use lenses as creative tools.
WHAT IS FOCAL LENGTH?
At its core, focal length is a measurement for each lens, usually written in millimetres, that affects how wide the image feels, how compressed or expanded the space is, and how connected, or distant, the audience feels from the characters.

Inside every lens are glass elements that bend and converge light. When these elements bring incoming light rays to a point of focus, that point has a physical distance from the sensor.
Focal length is therefore calculated as the distance between the optical centre of a lens and the camera’s sensor or film plane when the image is in focus on objects far away at infinity.
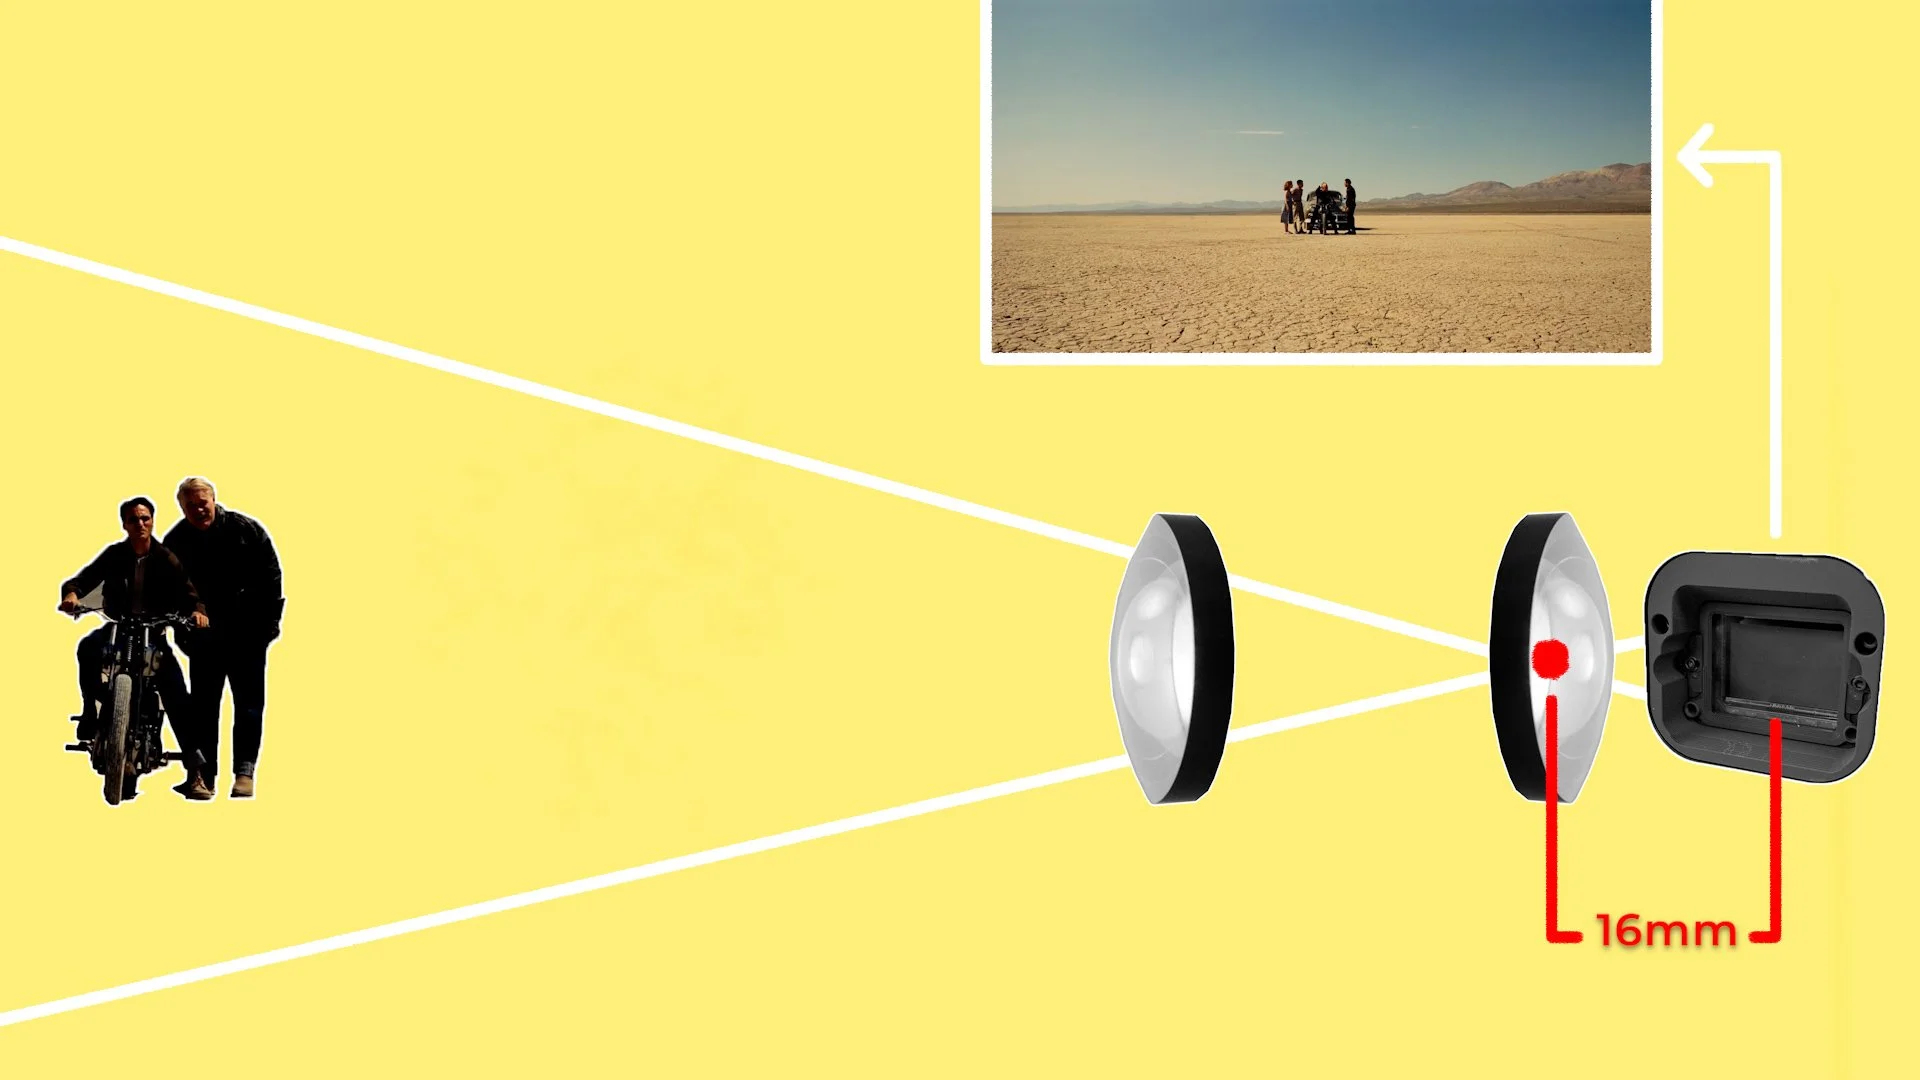

A shorter focal length, such as 16mm, bends light more strongly, producing a wider field of view. While a longer focal length, like a 100mm, bends light less, producing a narrower field of view.
This physical behaviour becomes the foundation for the visual language of wide angle, normal, and telephoto lenses.
WIDE ANGLE LENSES
Wide angle lenses, all the way from a 6mm fish eye, to 18mm, 24mm, or 25mm focal lengths, capture more of the environment with a wide field of view. They stretch space, exaggerate distance, and make movement across the frame feel more dynamic and easier to track by a camera operator.
When the camera is placed physically closer to the subject, such as when getting a close up, wide lenses create a sense of immediacy. Faces feel more intimate, the world feels larger, and motion feels alive.
However, because of how these wide lenses bend light, it may also start to distort spaces or people’s faces in an unnatural, exaggerated way, especially as the lens gets closer to the subject.
MEDIUM LENSES
Lenses around 35mm to 50mm sit in a sweet spot that feels natural and what we call a medium, normal or standard focal length. They don’t distort space too much like wide angle lenses do, nor do they compress it too heavily like telephoto glass does.
A 35mm gives a slightly wider, more energetic perspective, while a 50mm often feels clean, honest, and somewhere around what we associate with the natural field of view of how our eyes see the world.
Filmmakers often use these focal lengths when they want the audience to feel like an observer rather than a participant, on wide angle lenses, or a voyeur, on telephoto lenses.
TELEPHOTO LENSES
Telephoto lenses, such as 75mm, 100mm, 135mm all the way to 200mm zooms and beyond, compress space and offer a much tighter field of view. This means that to get a similar width to the frame of a wide angle or medium lens, you’ll need to move the camera much further away from the subject.
Not only does this make the footage feel more voyeuristic, but it also establishes a more voyeuristic relationship between the person on screen and the camera operator.
This spatial relationship may not always be desirable, such as when filming a sit down interview, where you may want the person asking the questions to be closer to the subject and able to empathise and interact with them more personally and casually, rather than shouting from across the other side of the room behind a telephoto lens.
Objects captured by telephoto lenses appear closer together. So backgrounds can be made to seem much nearer to characters than they are in reality. This can be used for moments of action or to make dangerous objects or animals appear like they are right next to the actor.
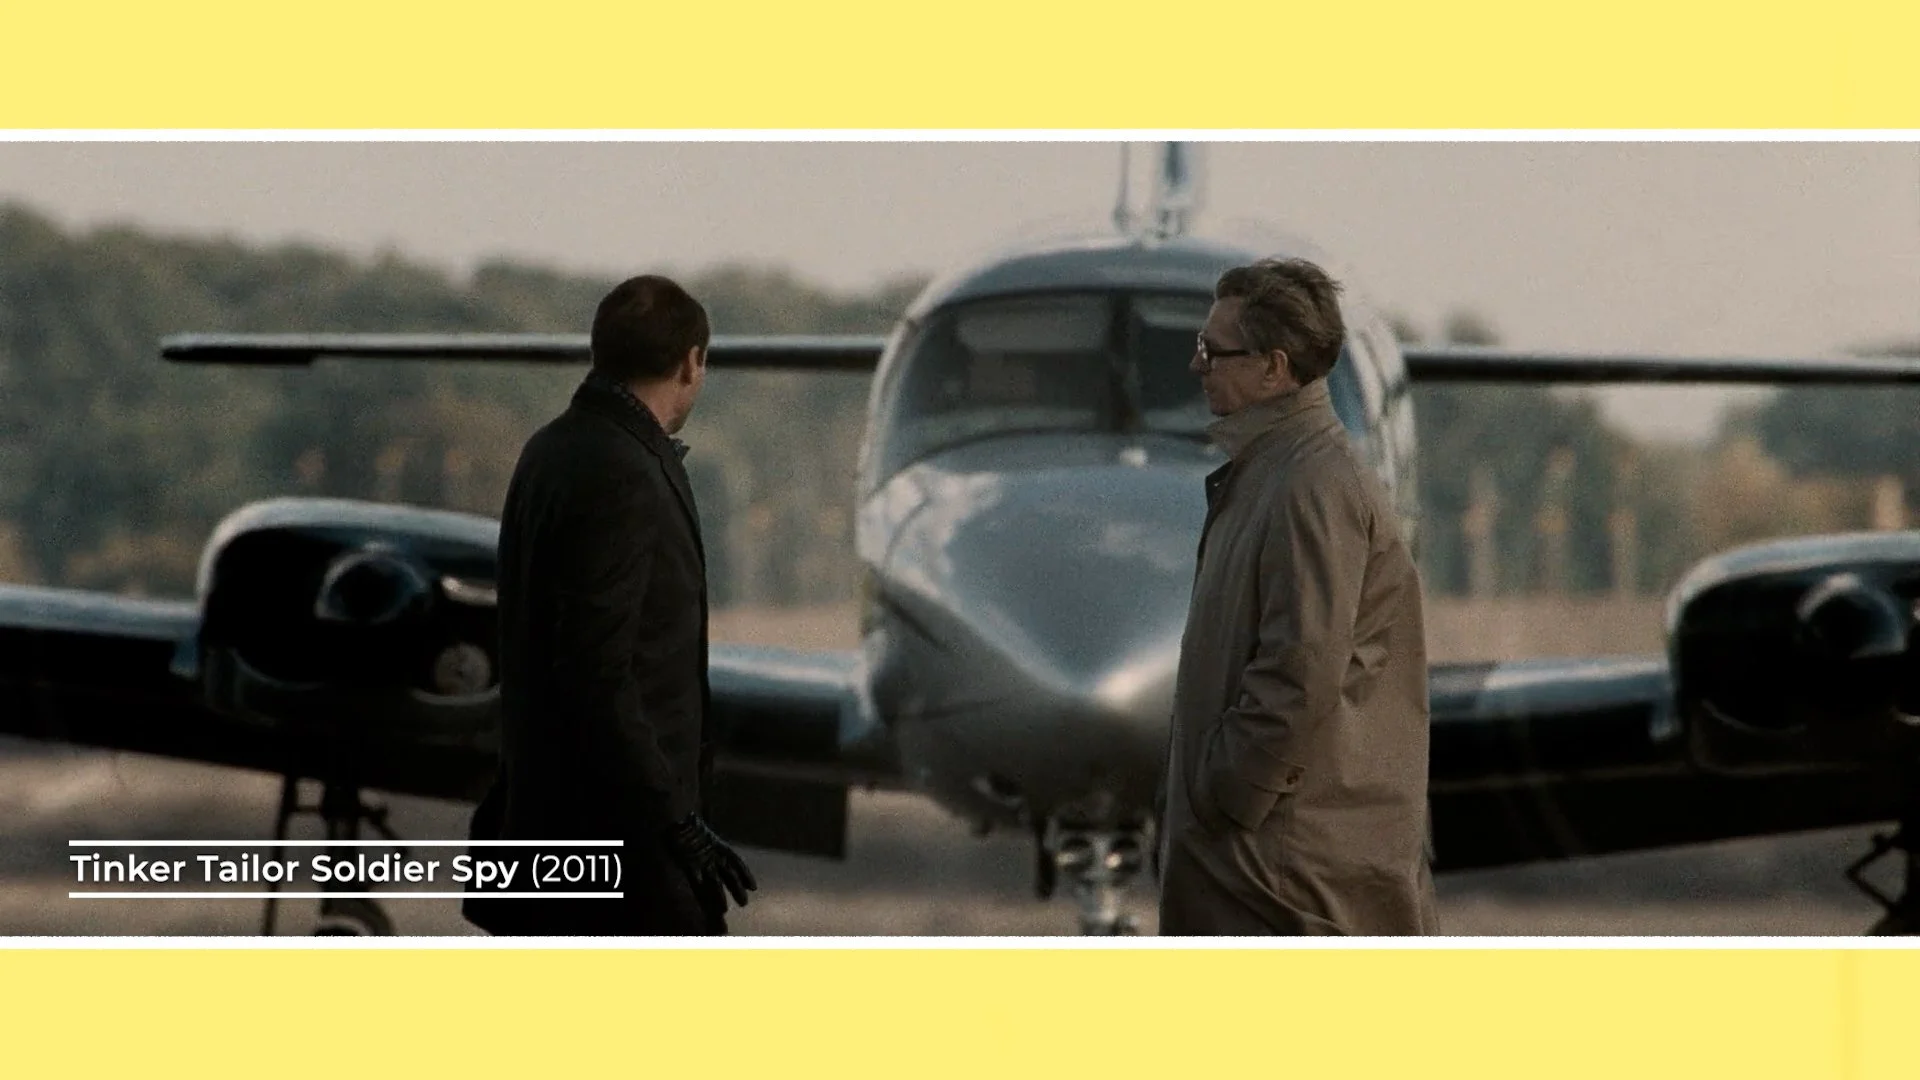
Backgrounds blur into soft washes of colour, and characters feel isolated from their surroundings.
These lenses flatten depth, slow down the feeling of movement, and often create a sense of tension or emotional distance.
Focal lengths come with another practical effect. The longer the lens is, the shallower depth of field it will have. Therefore, wide angle lenses will have a less blurry background, and be much easier and more forgiving to pull focus on and keep the subject sharp. Telephoto lenses will have a much softer, more out of focus background, and are much trickier for 1st ACs to accurately keep moving subjects sharply in focus.
CREATIVE USES OF FOCAL LENGTHS
Focal length isn’t only about technical behaviour. It’s a creative choice that can be used by filmmakers to subtly support and add to the visual storytelling.
Emmanuel Lubezki is famous for his extreme use of wide-angle lenses. Often for directors like Alfonso Cuarón, Terrence Malick and Alejandro González Iñárritu. In films like The Revenant, Children Of Men, and The Tree Of Life, he often uses 12mm, 14mm, or 18mm lenses which yield an incredibly wide field of view which often leads to faces distorting when framed for close ups.
Because of this extra width, camera bumps and shakes will be less prominent and noticeable - which makes these wider lenses better for smoother, less shaky handheld footage.
By seeing more of the background, the world becomes a character. You sense the cold, the terrain, the vastness, or the cityscape. The camera can move intimately close to actors while still preserving context - partly because of the expanded view and partly because wider lenses have a deeper depth of field where the background will be less blurry and soft and still distinguishable. Wide lenses dissolve the barrier between the audience and the scene, creating an almost first-person feeling.
The purpose isn’t just to go wide. It’s to bring the viewer into the environment and make the footage feel more immersive and subjective.
This technique is certainly not bound to one cinematographer, and has been used early on by directors like Orson Welles, Stanley Kubrick, or later, by Wong Kar-Wai, to visually exaggerate and distort faces, spaces, motion and emotion.
Moving a little tighter to more medium focal lengths like a 35mm or a 50mm - we have filmmakers who prefer to photograph in more of an objective and natural style.
Yasujirō Ozu famously preferred the 50mm lens and would use it almost exclusively in most of his movies. To him, it was the closest approximation of how humans perceive the world: simple, respectful, and honest.
He didn’t want to impose perspective onto the audience. Instead, he wanted the camera to observe, quietly and truthfully, as life unfolded.
A 35mm has been used to create a similar naturalistic window into the world in films like Call Me By Your Name, or a similar 40mm lens on Son Of Saul.
On the furthest end, the Safdie Brothers have mainly used long telephoto lenses for a completely different emotional effect: from 75mm to 360mm anamorphics or even a ridiculously long Canon 50-1000mm zoom.
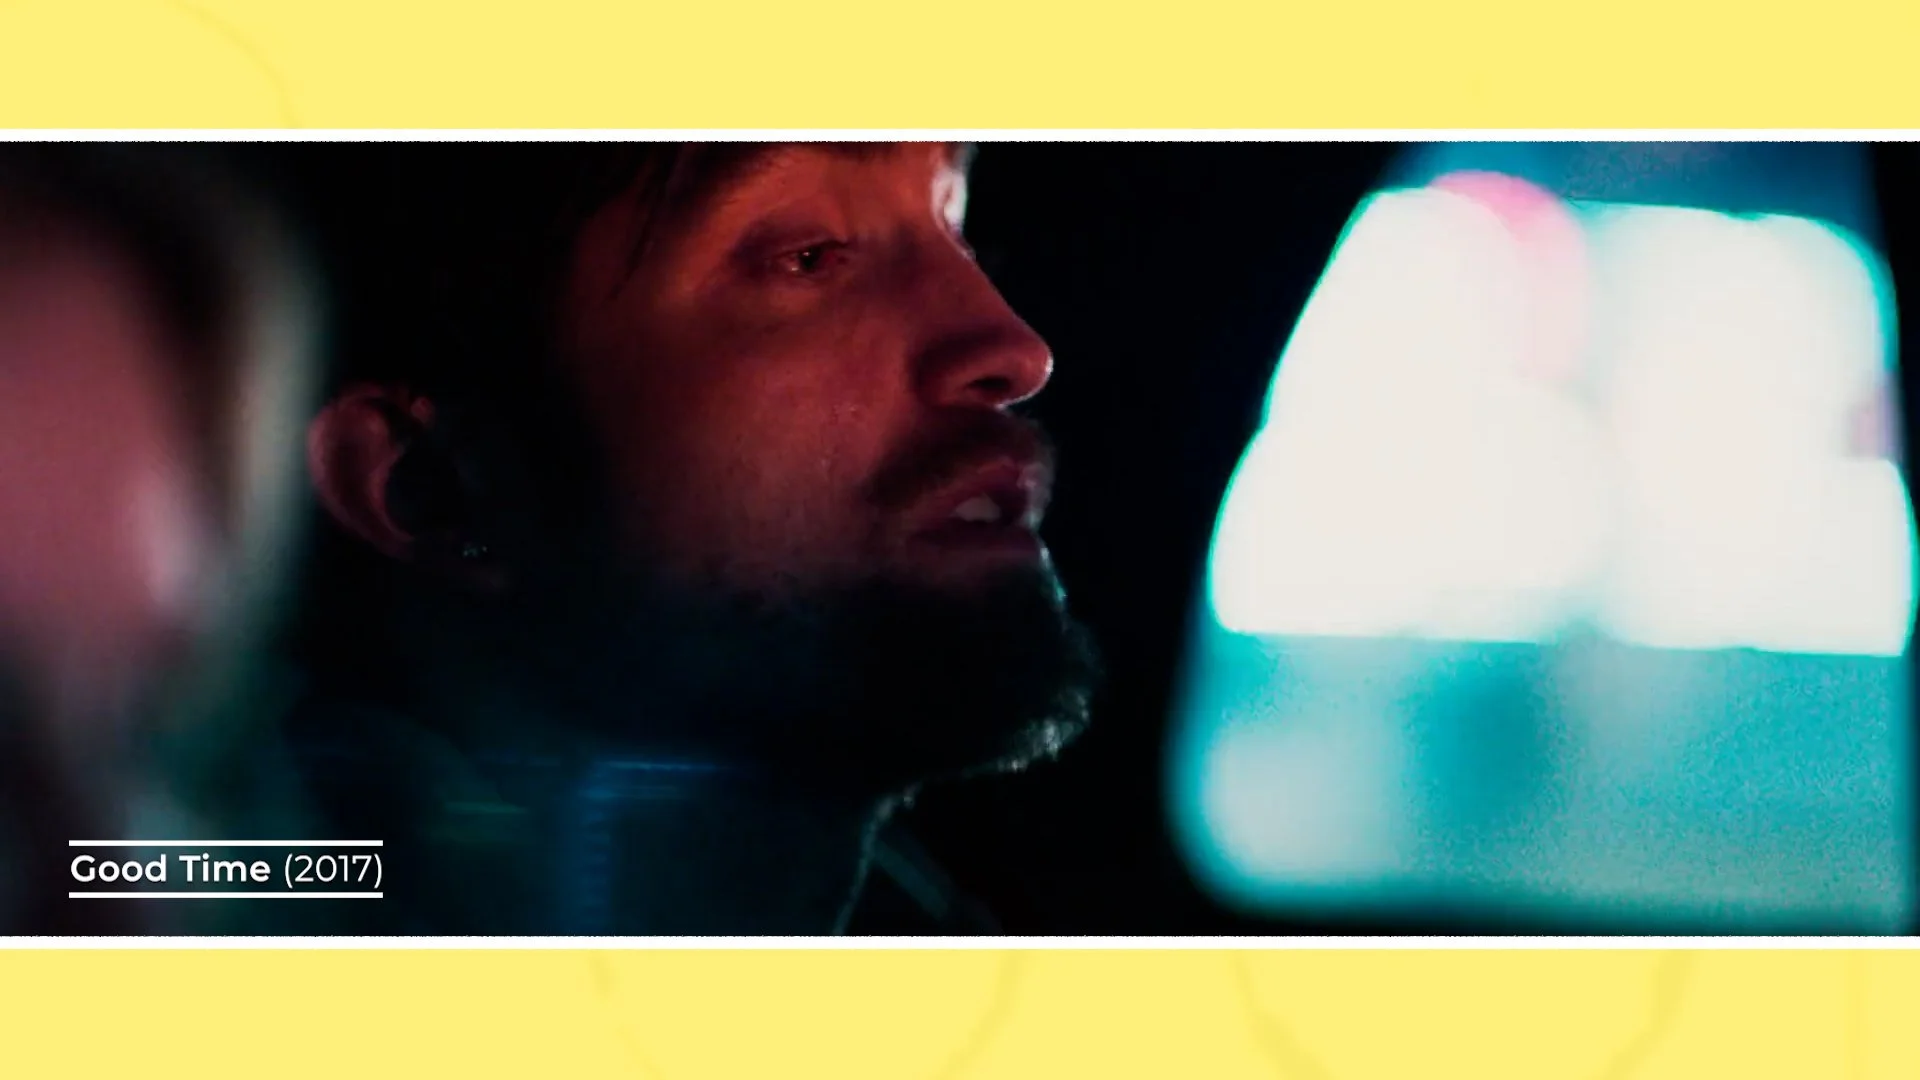
In films like Good Time, Heaven Knows What, or Uncut Gems telephoto glass creates a compressed, chaotic, almost claustrophobic world.
Characters feel boxed in. Backgrounds crowd them from all sides and are blurred so that the characters are the sole focus.
This tension becomes part of the storytelling, and feeds into the traits of the characters and fast paced trajectory of the plots. Every shot feels like it’s vibrating with nervous energy.
Michael Mann is another director who consistently uses telephoto lenses, especially in urban environments in action thrillers like Heat or Collateral. Often favouring a 75mm or longer.
These lenses compress and isolate characters and create a visually tense, voyeuristic filmmaking language which creates a feeling of surveillance, alienation, and existential pressure. Making his characters appear trapped inside dense urban grids, like they are always being watched and moving through hostile spaces.
FORMATS & FOCAL LENGTHS
A final note is that the same focal length can yield a different wider, or tighter field of view when they are used on cameras with different format sensors or film gauges.
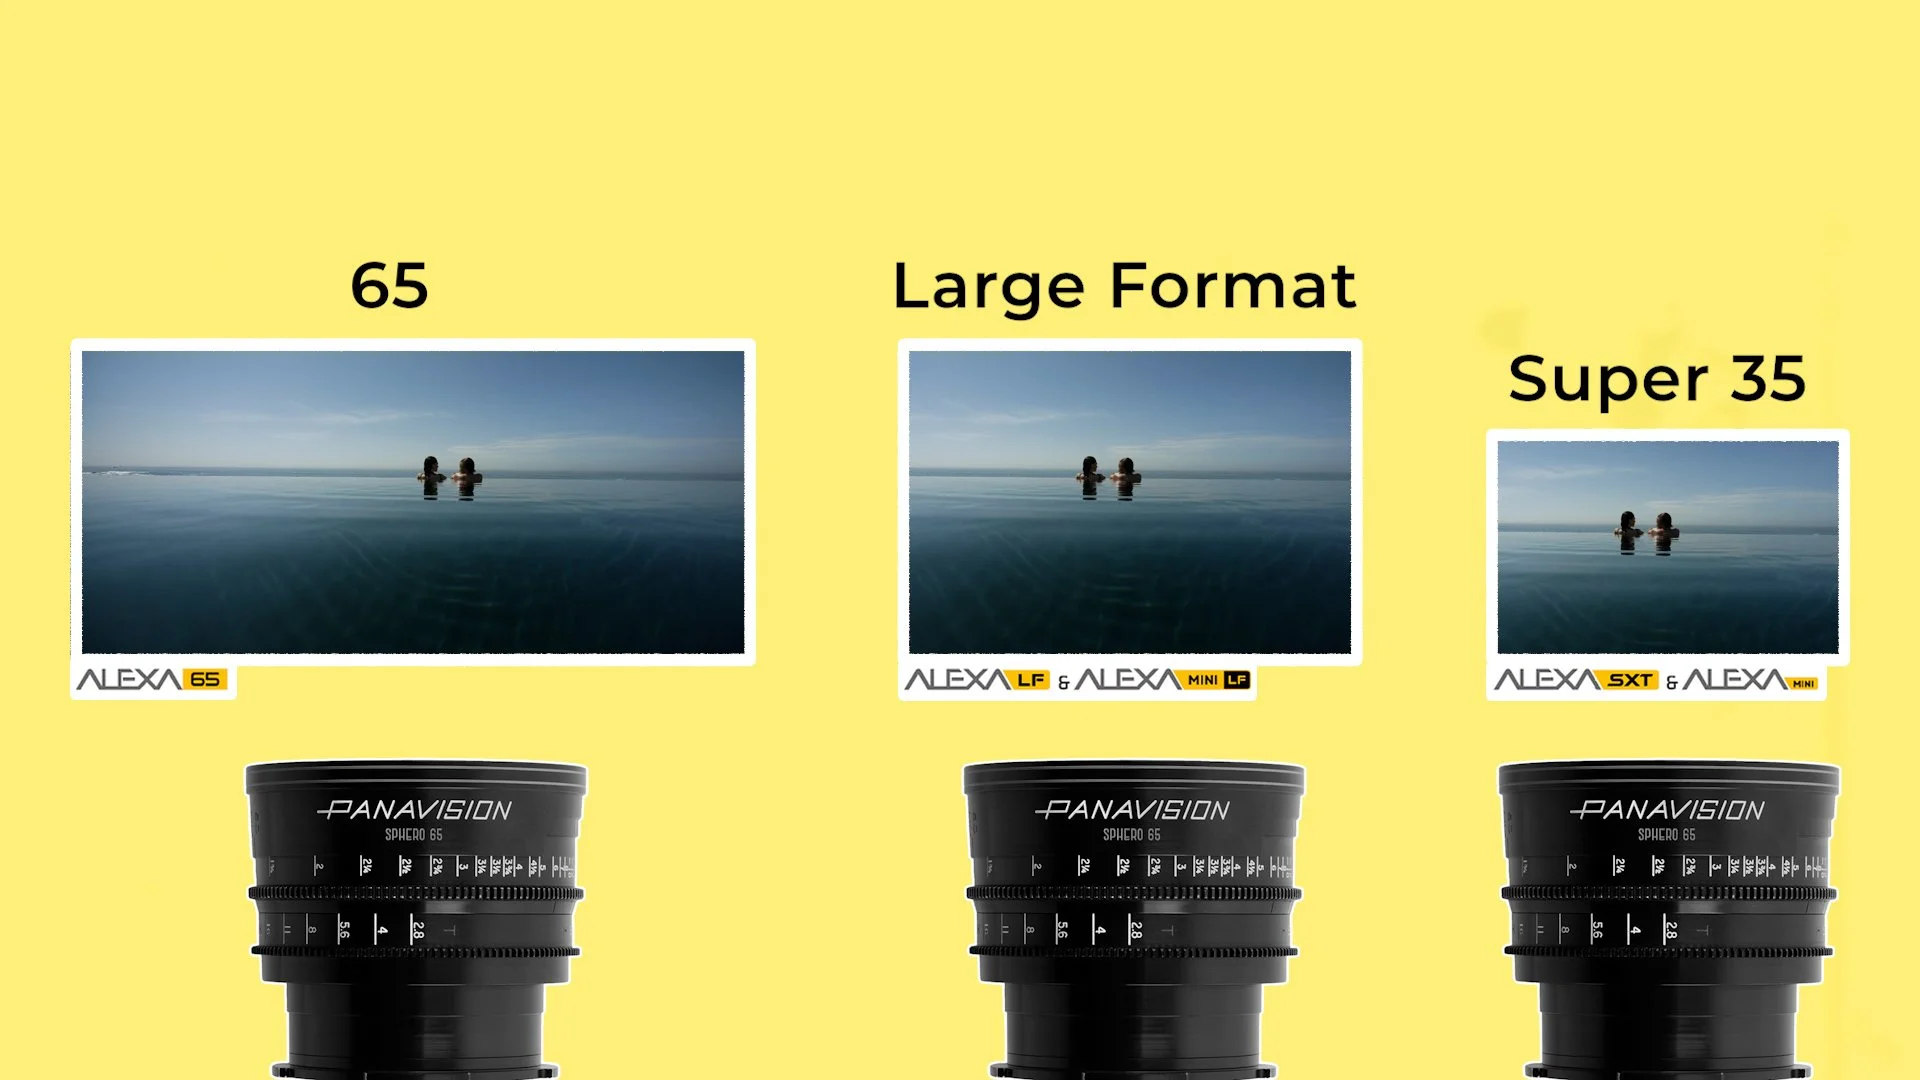
Super 35, whether on film or with cameras like the Alexa Mini or 35, is the traditional cinema standard. This format is usually what cinematographers have in mind when they think about the field of view of a focal length.
In comparison, 16mm film or similar sized sensors have a relatively small image area. Lenses therefore appear longer and images more cropped in. This gives 16mm its signature tight, intimate, energetic feel.
Full frame digital and large-format film captures a much bigger image area. Lenses therefore appear wider on these sensors. This format gives footage a sweeping, spacious feel with a very shallow depth of field, and portraits that have a sense of scale.
The focal lengths of the lenses themselves don’t change when they are put on different cameras, however smaller or larger sensors will just reveal more or less of the lenses field of view.
So, a 35mm focal length on a Super 35 camera will have approximately the same field of view as a 25mm lens on a 16mm camera, which should also be similar to a 50mm lens on a full frame sensor.
CONCLUSION
Filmmakers choose focal lengths not just to capture images, but to create unspoken meaning, to shape perspective, to draw the viewer in or push them away, to make characters feel vulnerable or powerful, connected or isolated.
The more deeply you understand focal length, the more you realise that every shot carries an emotional weight determined not just by what you point the camera at but by how you choose to see it.
What Is VistaVision?
Despite its vintage roots, VistaVision has quietly re-entered the modern filmmaking landscape through an influx of new movies shot on this 35mm film format. What is it, why did it disappear, and why is it suddenly popular again?

INTRODUCTION
Many, many decades before full frame cameras became all the rage, VistaVision emerged as the original, old school, magical, large format option. Influencing everything from camera design to the way modern cinematographers think about resolution and texture.
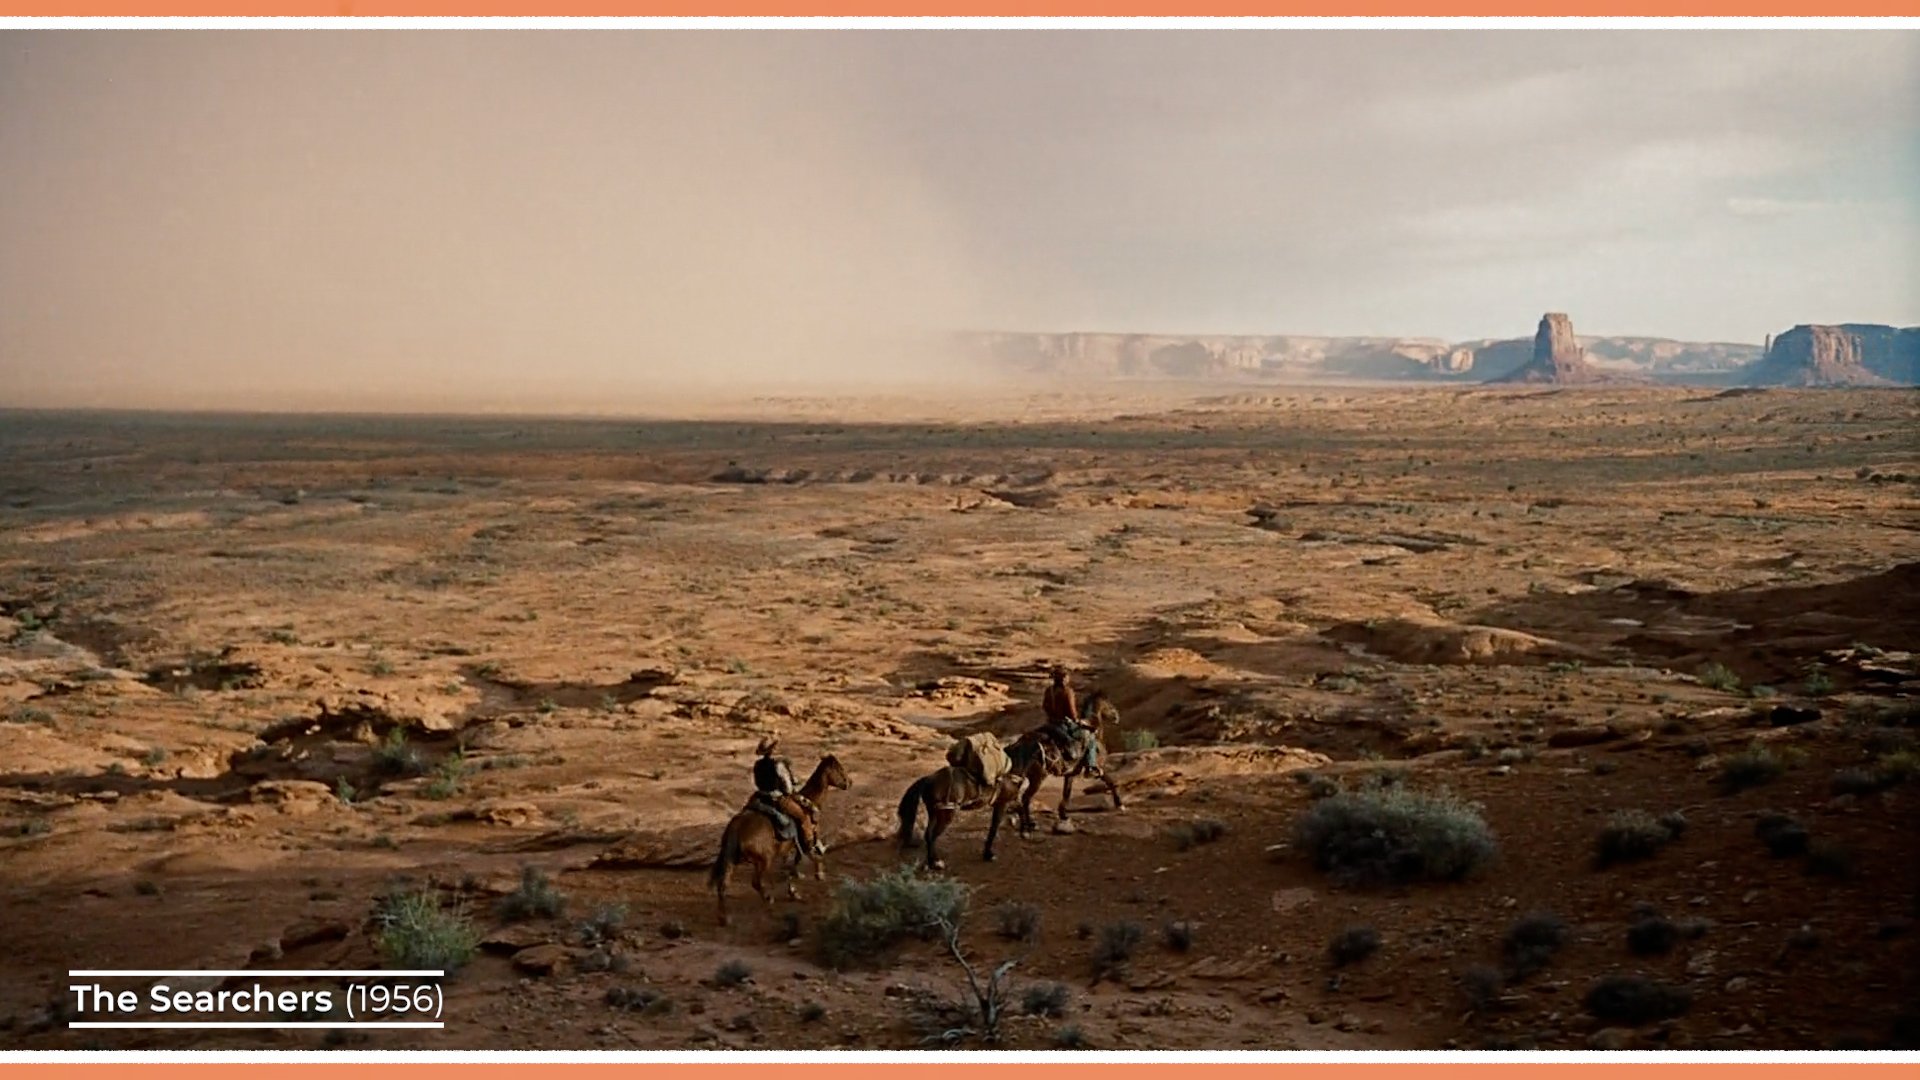
But despite its vintage roots, VistaVision has quietly re-entered the modern filmmaking landscape through an influx of new movies shot on this 35mm film format.
So in this video, we’re going to look at what VistaVision actually is, why it disappeared, and why it’s suddenly everywhere again.
HISTORY OF VISTA VISION
VistaVision was introduced by Paramount in the 1950s as a premium theatrical exhibition format.
At the time, Hollywood was in a technological arms race with movie studios experimenting with wider, sharper, more immersive 35mm images - on formats like Cinemascope which used anamorphic lenses to get a wider aspect ratio.
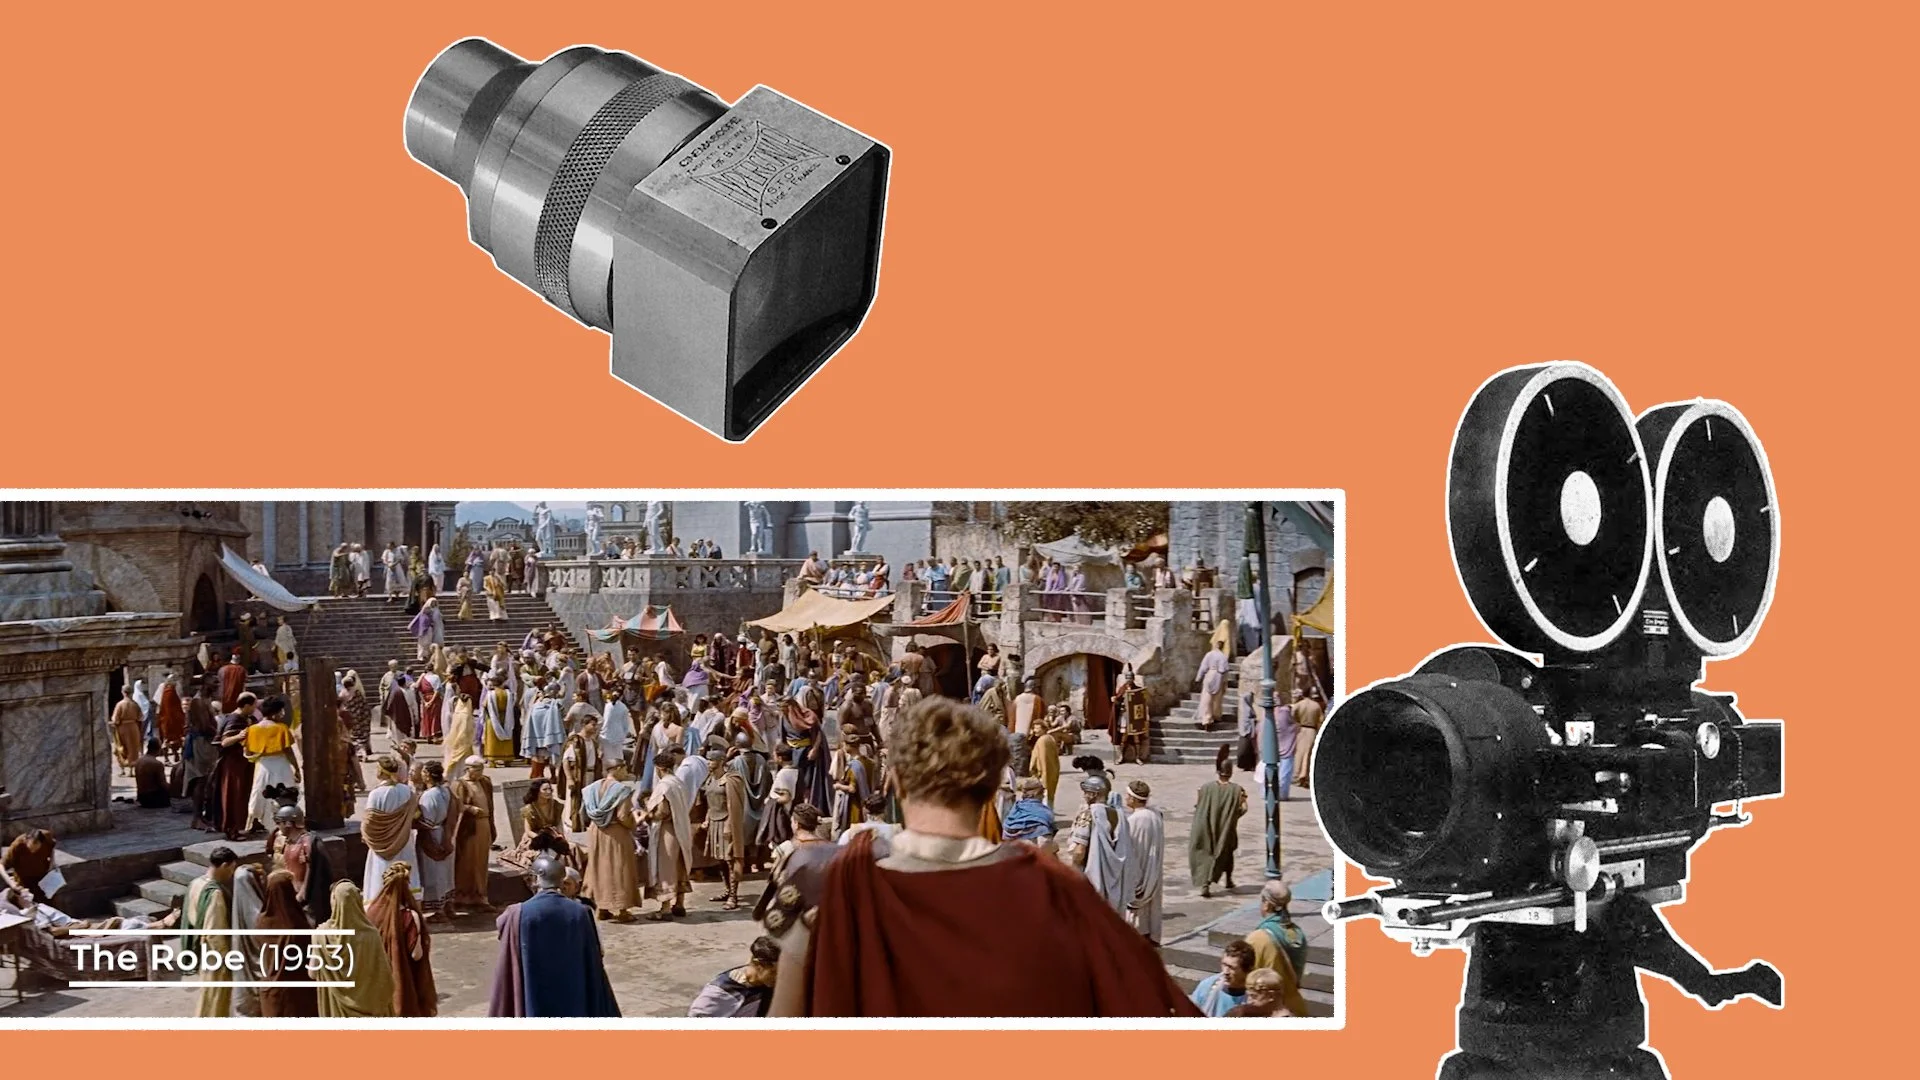
They hoped these new formats would pull audiences back into cinemas, after attendance massively declined with the invention of home viewing on TVs.
For a while, VistaVision delivered that larger than life, enticing visual experience with higher resolution, wider field of view images. Films such as Vertigo, The Ten Commandments, North By Northwest and The Searchers made full use of the format’s clarity.
But as the ’60s and ’70s arrived, VistaVision’s popularity declined. New widescreen formats, cost pressures, and the success of anamorphic 35mm meant that VistaVision workflows became too expensive and too cumbersome for most productions. And so, the format faded away.
However, I think cinema technology is kind of like fashion in that preferences for different technical gear often goes through cycles. And, much in the same way that TV in the 50s challenged cinema’s dominance, I’d argue that so too has the recent rise of streaming services forced studios and filmmakers to seek out larger than life exhibition formats and viewing experiences like Imax, or VistaVision to try to draw audiences back to the cinemas.
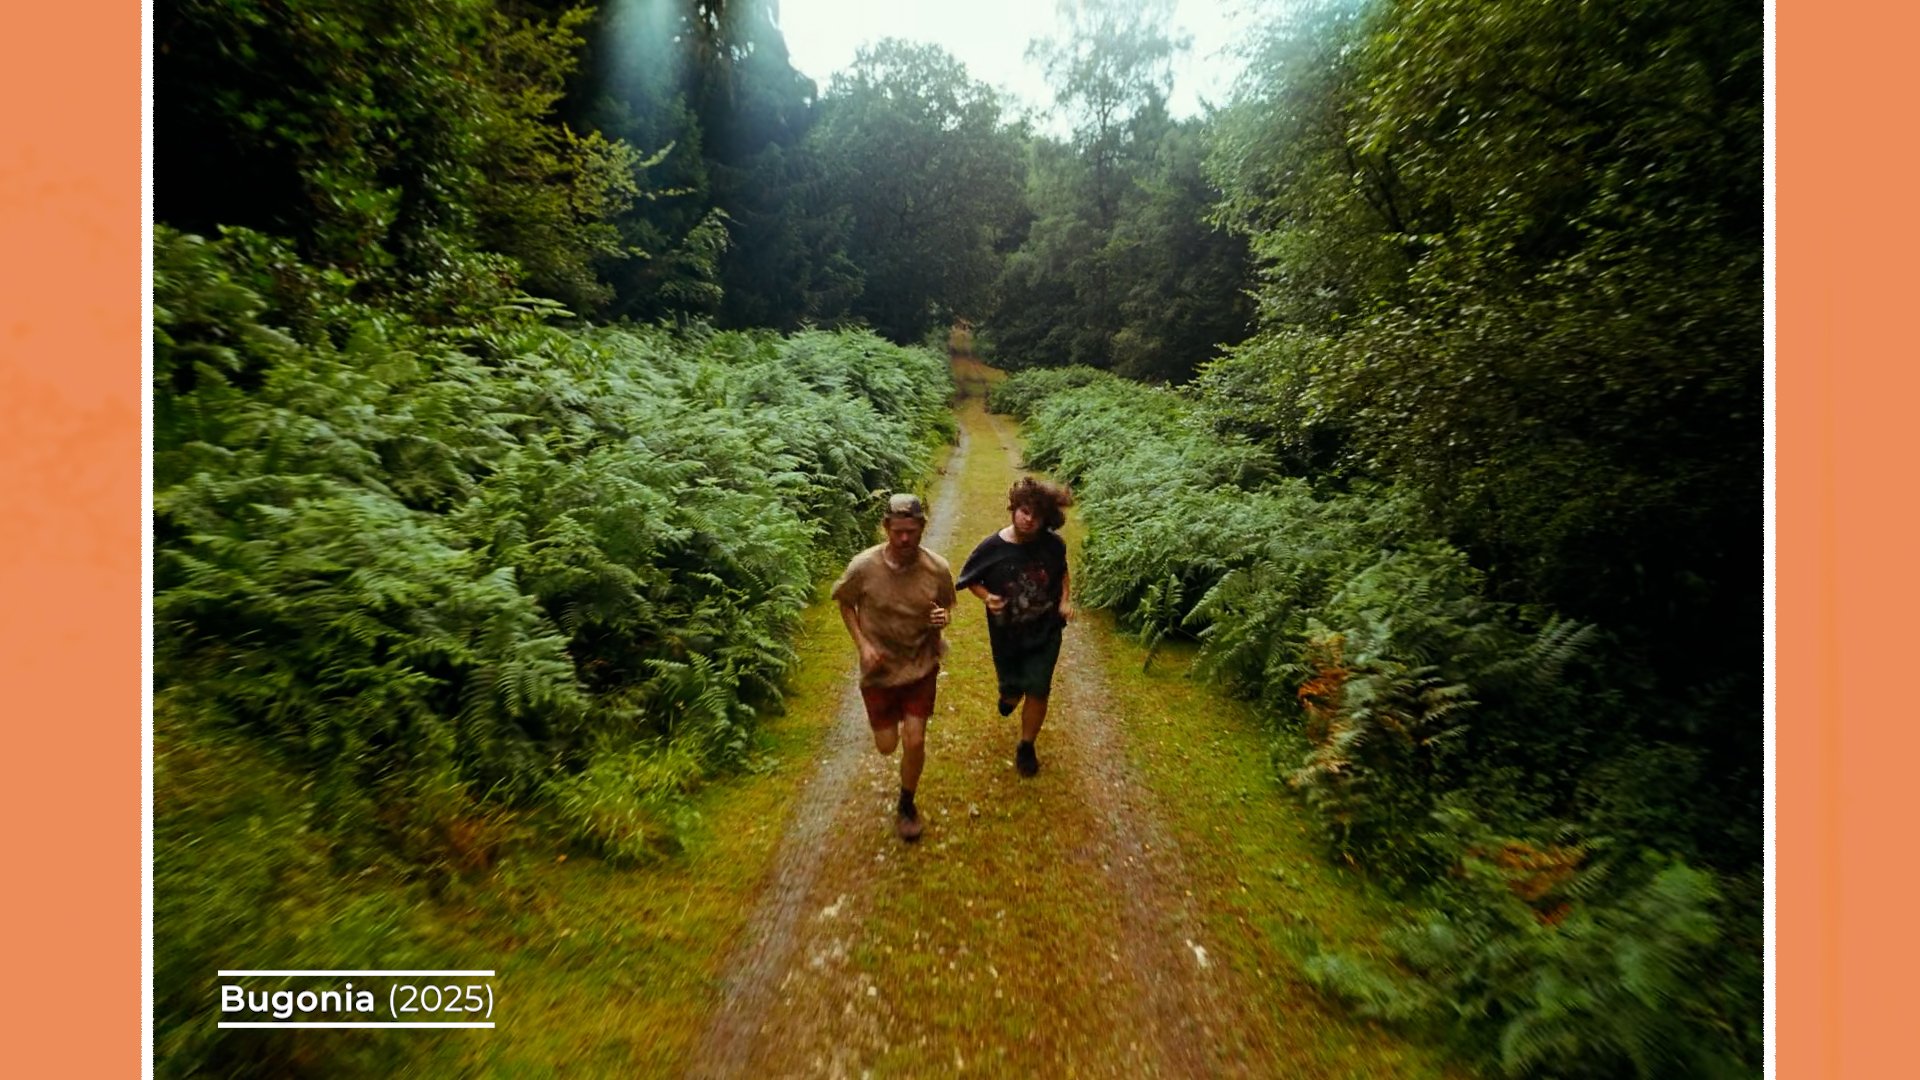
From 2024, VistaVision saw a small but meaningful resurgence. Films like The Brutalist, One Battle After Another, and Bugonia embraced it as a deliberate creative choice that provides those tactile qualities and large-format characteristics that are unique to VistaVision.
WHAT IS VISTA VISION
But why is VistaVision different and how does it technically work?
In order to understand this larger film format we first need to know how regular 35mm film capture works.
Normal 35mm cameras store film stock in what’s called a magazine. When the camera rolls, the unexposed film exits the mag, and passes vertically through a film gate where each frame is captured, before the exposed film is then stored once again in the magazine. The regular Super 35 format captures each image in a frame that is 4 sprockets or perfs tall.
VistaVision uses the same 35mm film, but captures each frame in a different way.
Instead of running the film vertically through the gate, it moves across the film plane horizontally. By feeding the film sideways, VistaVision is able to capture frames that are eight perforations long, which is roughly double the size of a standard Super 35 frame.
This is why VistaVision cameras look so distinctive. The film magazines are rotated 90 degrees compared to a typical 35mm camera, so that the magazine sits horizontally, feeding the film laterally across the gate.
That’s the essence of VistaVision: the same 35mm film - just used in a different orientation to maximize the negative size.
VISUAL CHARACTERISTICS
The appeal of VistaVision isn’t just technical: it’s mainly due to the visual traits it comes with.
Because the negative size is physically larger than Super 35, more information is captured over a bigger area. This means that VistaVision offers exceptionally good clarity, detail and a highly resolved image.
Because of this high resolution, which helps with special effects, it was used as a specialist camera to shoot miniatures, such as on Star Wars, many decades before high resolution digital cameras were a thing.
When this high fidelity film image is scanned or projected the grain structure will appear tighter and less apparent due to the increased image area. Even high-speed stocks filmed in low light situations will have a slightly cleaner texture than Super35.
A secondary effect of this larger negative is that it yields a naturally wider field of view at equivalent focal lengths. For example, if you shoot a frame on a 50mm lens with a VistaVision camera and with a Super35 camera and place them next to each other, the Super35 frame will be about 1.5x narrower than the larger format image.
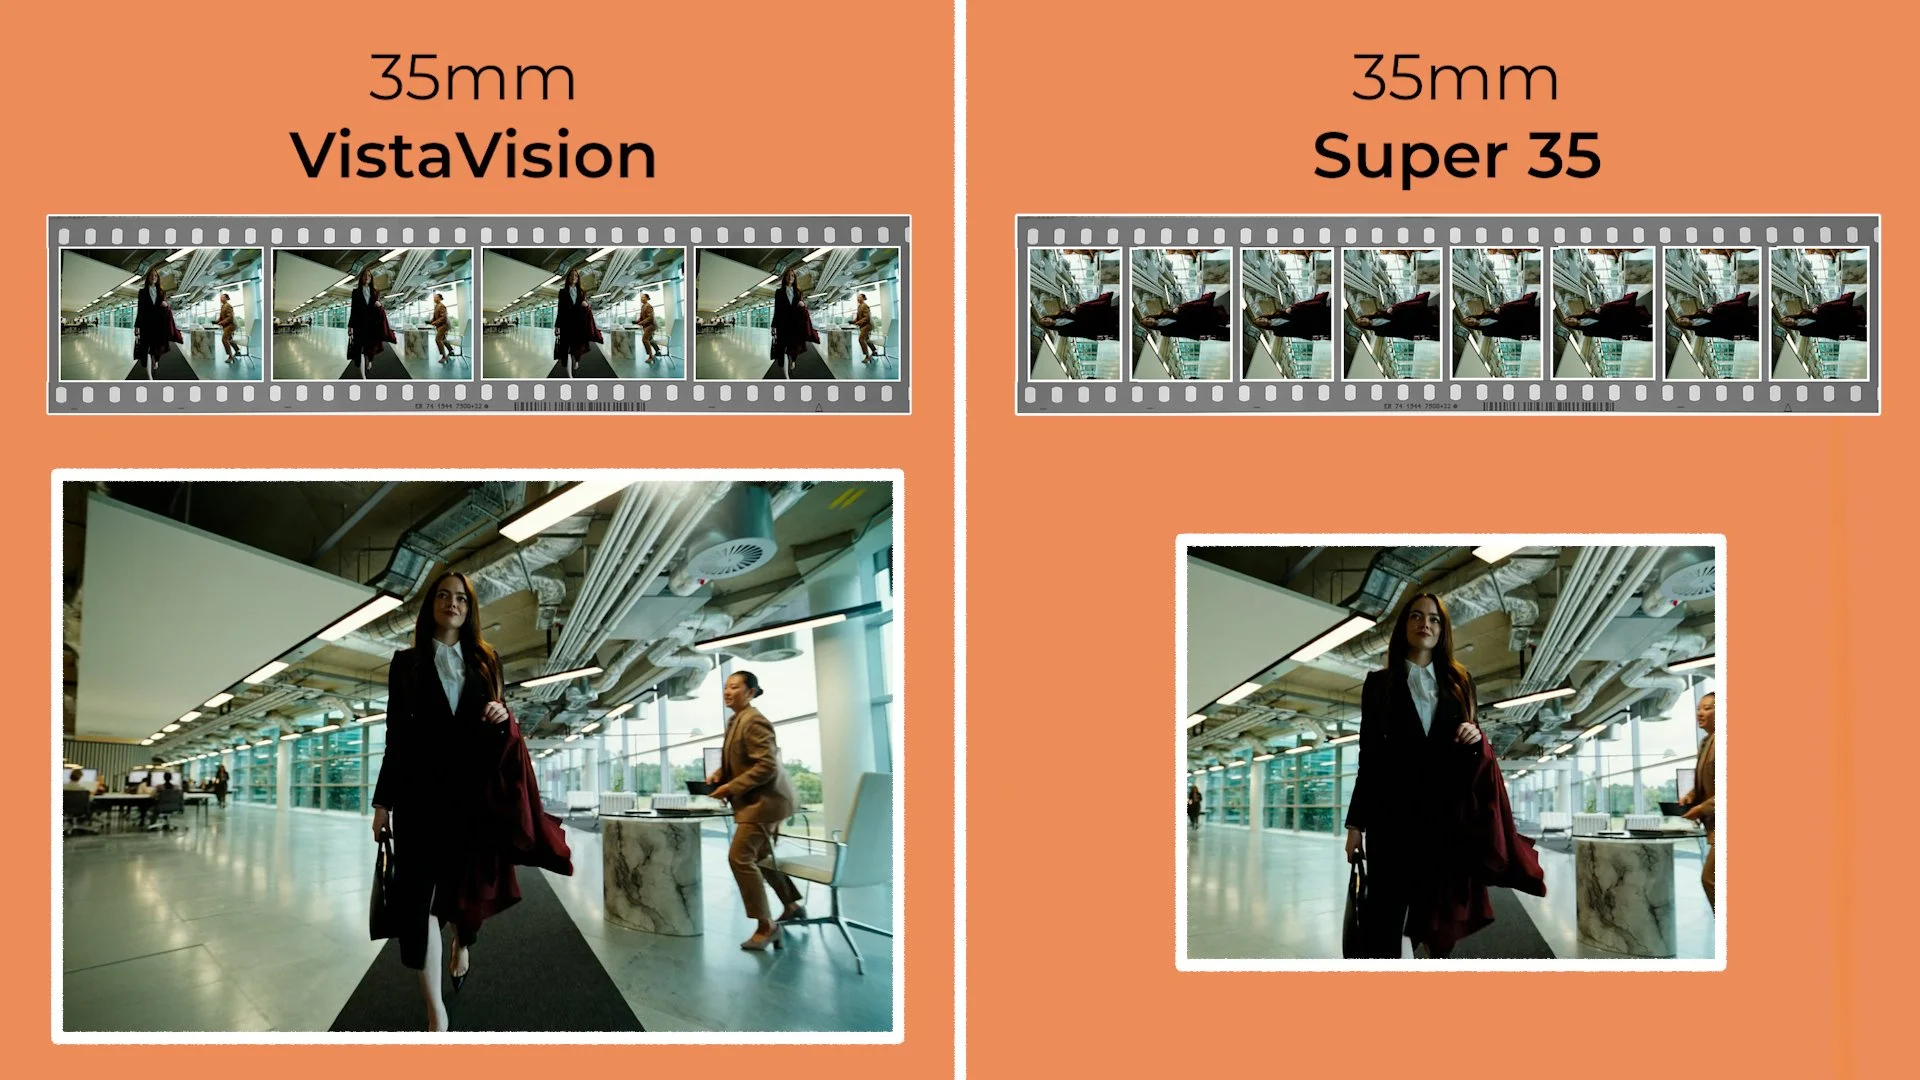
Practically this means that you can shoot on slightly longer focal length lenses and still maintain an expansive perspective, while getting the added benefit of a shallower depth of field, even in wide shots. Which many find to be quite a cinematic look.
Or, if you put a wide angle lens on a VistaVision camera, then it’ll expand the space even more. That’s part of why this format feels so immersive and dimensional.
Like a 35mm stills camera, the native VistaVision frame is closer to 1.5:1 or 3:2. Which is a slightly squarer frame with more height. Historically it was often cropped or optically printed to widescreen ratios like 1.85:1. Although occasionally some movies, like the recent Bugonia, decided to stick to the original 1.5:1 ratio of the negative.
Modern productions shooting VistaVision which will be finished with a digital post production workflow can choose almost any delivery aspect ratio while retaining the format’s inherent resolution advantages.
PRACTICAL CONSIDERATIONS
For all its beauty, VistaVision comes with trade-offs.
VistaVision cameras are big - much larger than standard 35mm motion picture camera bodies. Their horizontal magazines add bulk, and the film transport mechanism requires space.
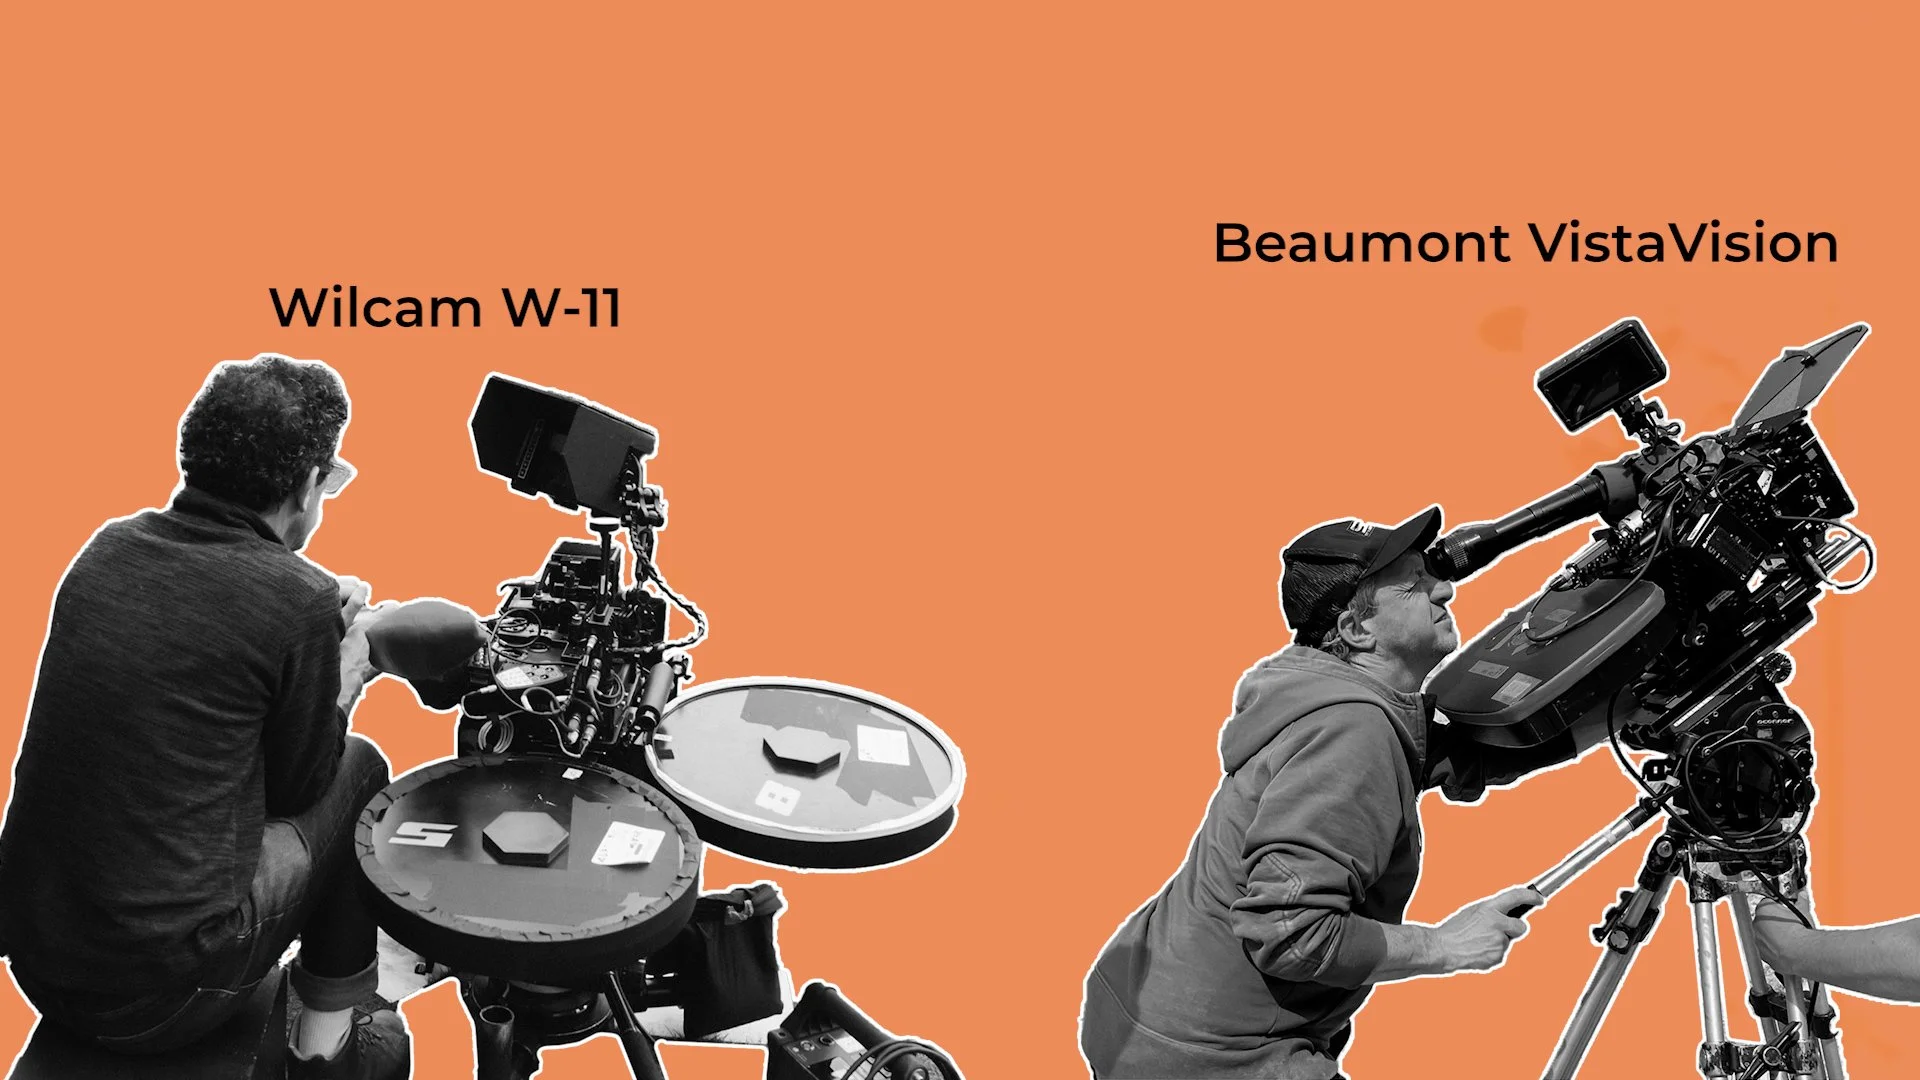
There are a couple different types of these old VistaVision cameras - like the Wilcam W-11. This camera is especially large and heavy, which means they are basically only designed to be used on a camera platform like a dolly or on a tripod.
One reason for the W-11’s bulk is that it's blimped. This means that when the motors run the film through the camera it is quiet enough to still record sync sound dialogue.
There is another slightly smaller and lighter VistaVision camera made by Beaumont. Although it’s a bit smaller than the Wilcam it’s still pretty enormous by modern digital cinema camera standards.
It is technically possible to shoot handheld or mount these Beaumont cameras to other grip rigs like a stabilised head or a car rig, yet their large size still makes it pretty impractical and challenging to do so.
A trade off for this smaller form factor is that these cameras are excessively loud, which makes it difficult if not impossible to record usable sound for dialogue scenes - especially indoors.
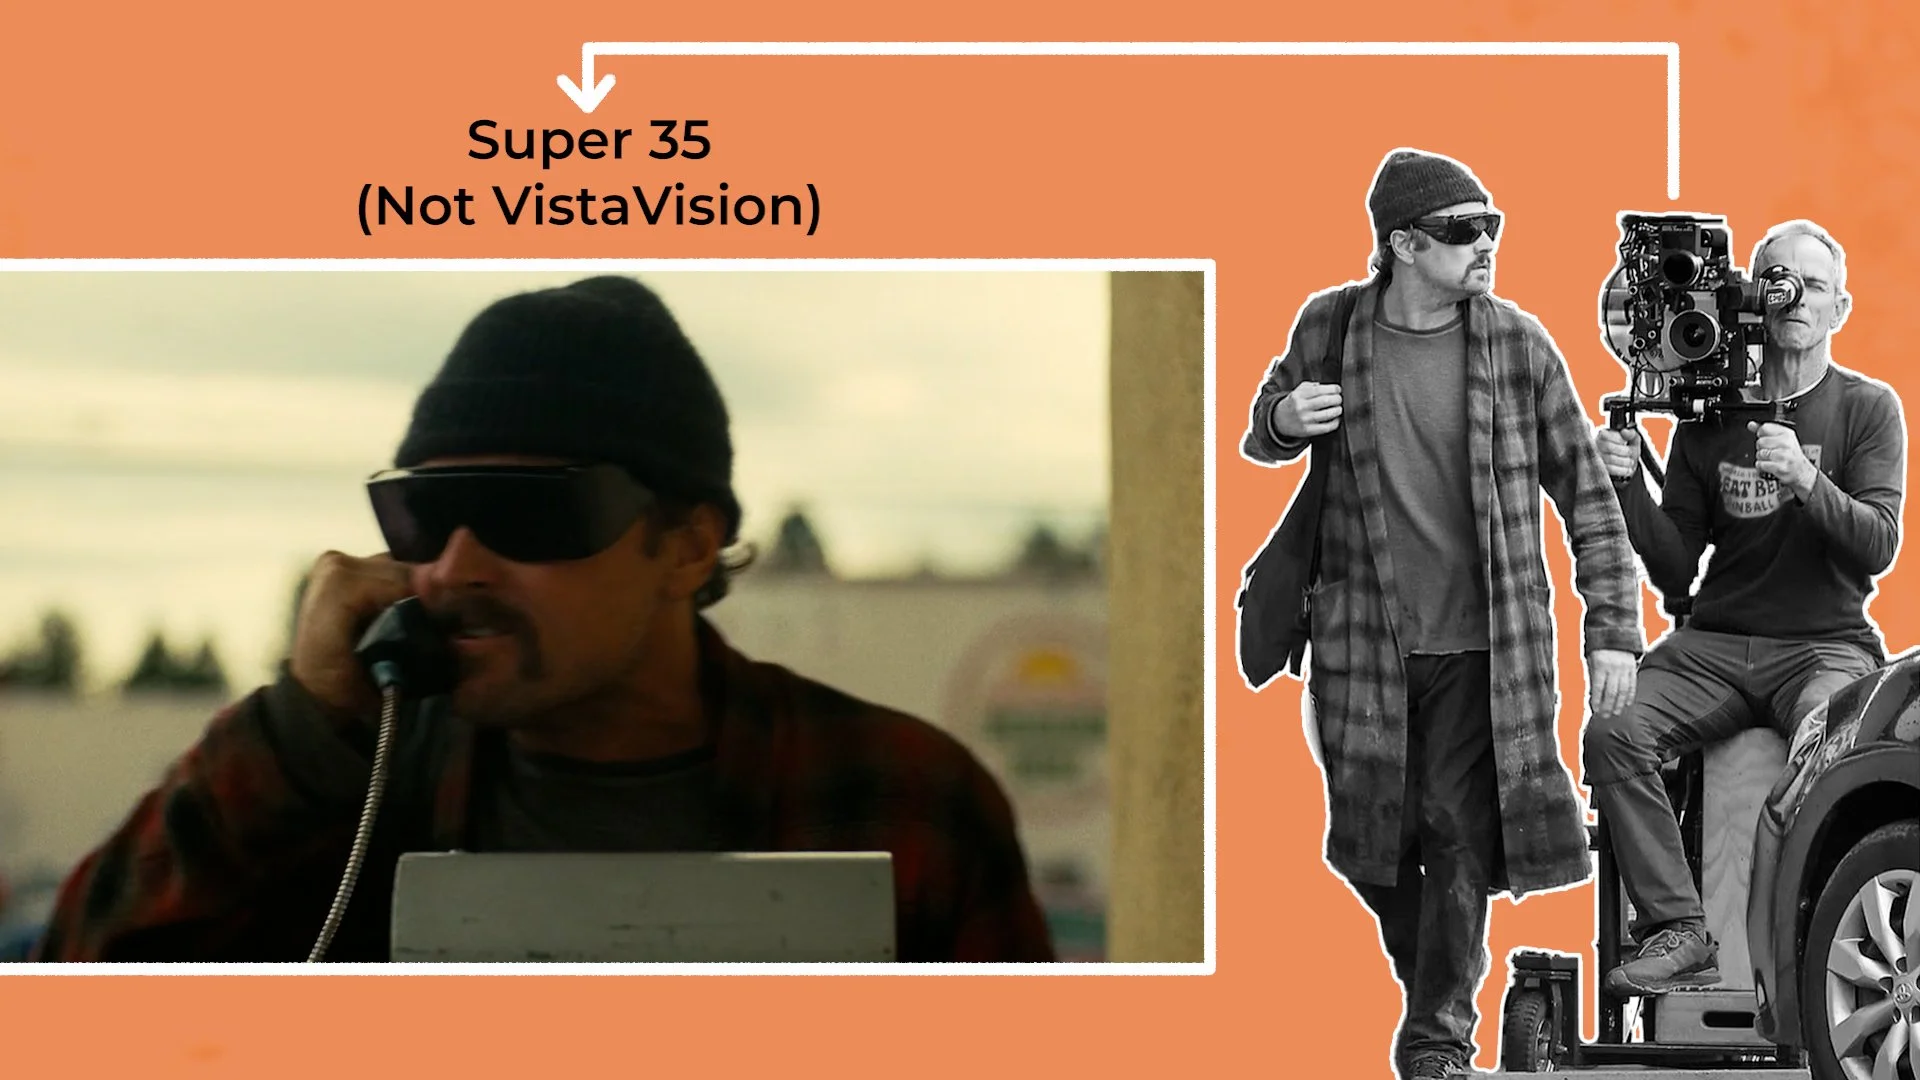
Another practical downside, which cinematographer Robbie Ryan spoke about, is these old cameras tend to get jams from time to time where the 1,000 feet of 35mm film flying through the camera gets stuck. If this happens it means the take will have to be aborted and started again.
The larger frame means standard Super 35mm lenses will not cover the VistaVision image area without vignetting. Cinematographers have far fewer lens options to choose as they are forced to select from glass which has sufficient coverage, often pulling from specialized large-format or vintage glass sets.
On top of tracking down the lenses, the rarity of these VistaVision cameras themselves can make them very tricky to source. Their age also means most of these cameras don’t have modern features like a good video tap - which means directors and DPs may not be able to view a clear image of what they will shoot on a monitor.
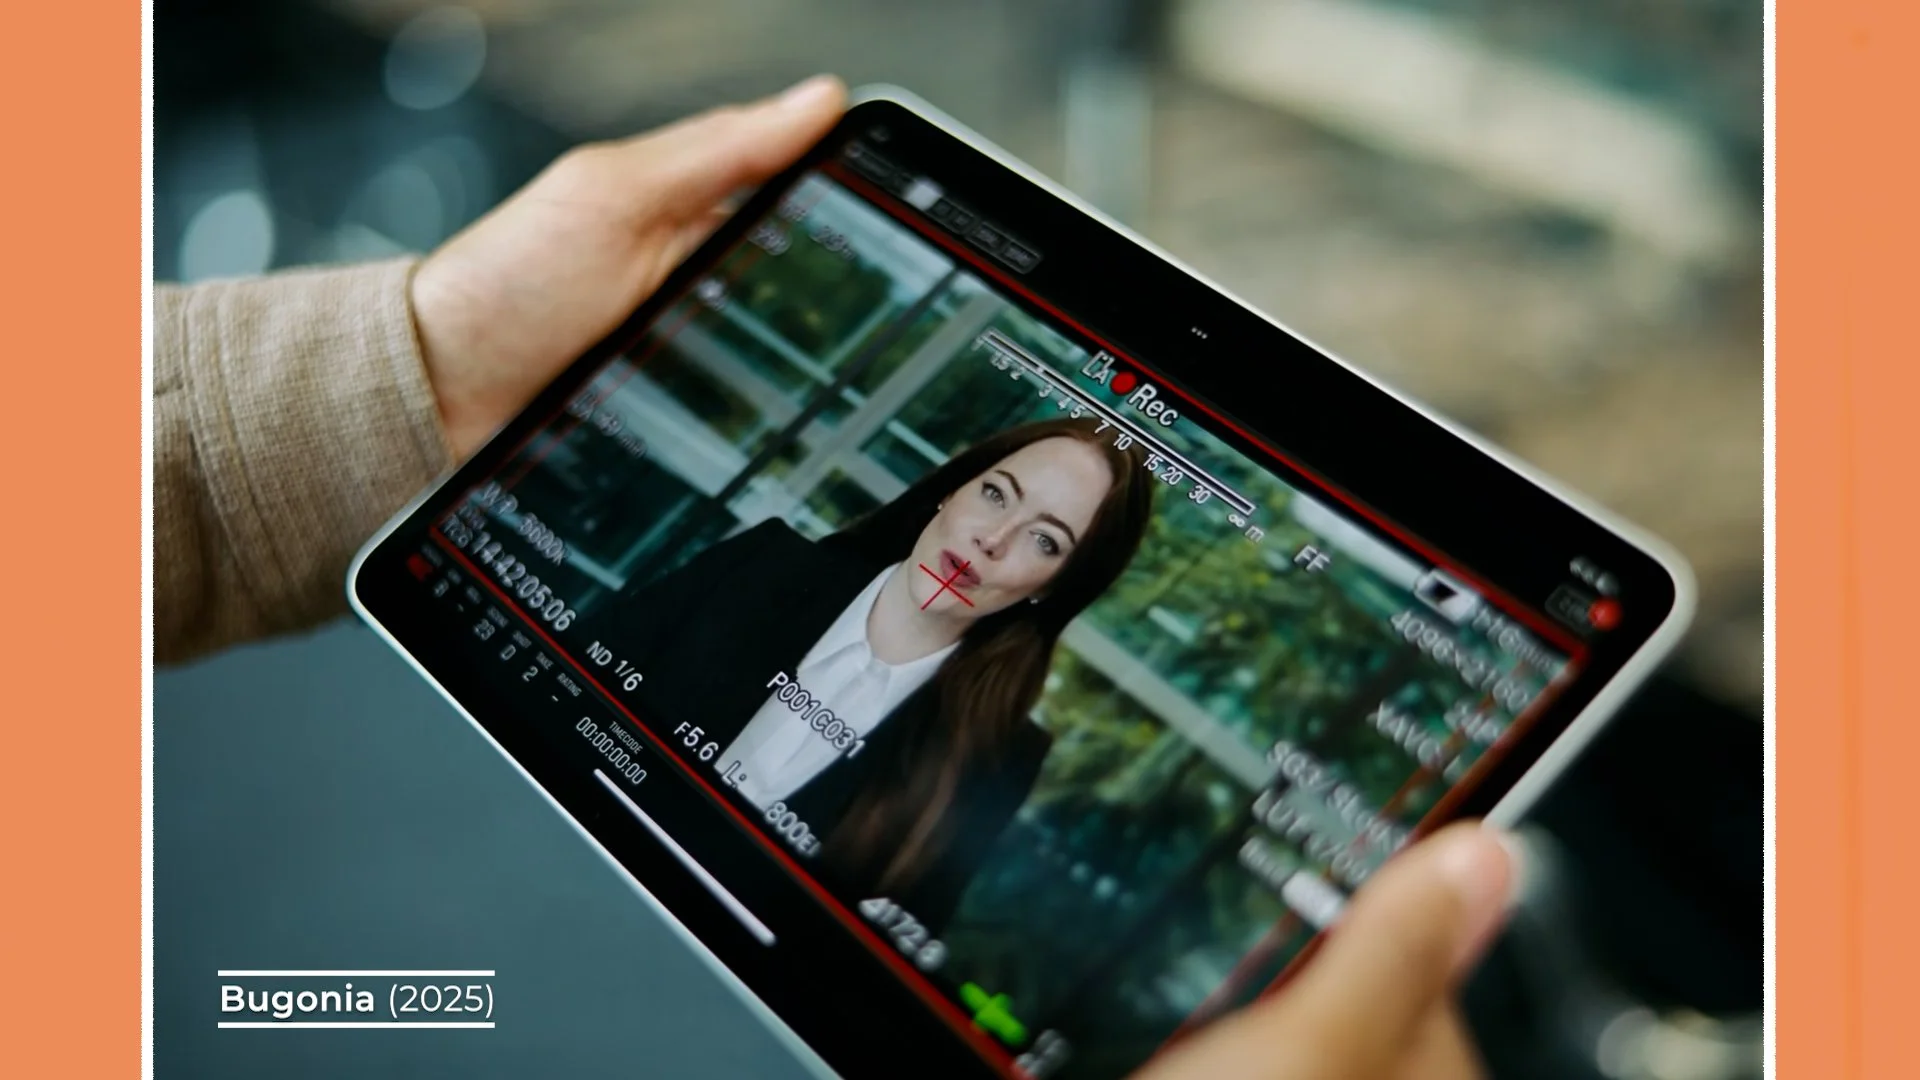
Because the VistaVision negative is twice as large, you burn through 35mm film stock at double the rate. Every take costs more and every reload is more frequent and the length of the takes you can shoot with one magazine is shorter. The budget implications can therefore be a serious consideration.
CONCLUSION
VistaVision sits at a fascinating intersection of old and new - born from mid-century innovation, abandoned for decades, and now rediscovered by modern filmmakers searching for a specific kind of cinematic texture.
It’s a reminder that film technology isn’t a straight line of progress but a series of cycles, with each generation finding new meaning in old tools. And as long as filmmakers continue exploring the expressive potential of the format, VistaVision will remain a powerful - if niche - option for creating images that feel both timeless and unmistakably tactile.

Cinematography Style: Dan Laustsen
In this video, we’re going to break down the visual language cinematographer Dan Laustsen often returns to - in his work with bold, imaginative directors like Guillermo del Toro and Chad Stahelski - and explore the technical film gear that he uses to do so.
INTRODUCTION
Dan Laustsen’s cinematography feels less like a collection of images and more like an atmosphere you step into. His work blends precision with a kind of dreamlike intensity, using bold, expressive colour palettes: rich greens, steel blue, deep ambers, and vivid contrasts that carve shape and emotion into every frame.
Paired with his preference for wider focal length lenses, which pull the viewer deeper into the environment, his images gain a sweeping, immersive quality. In this video, we’re going to break down the visual language Laustsen returns to and explore the technical film gear that he uses to do so.
BACKGROUND
Dan Laustsen’s path into filmmaking began in the 70s when he trained at the National Film School of Denmark and quickly found his footing shooting early projects with directors like Søren Kragh-Jacobsen. These films helped shape his instinct for strong visual storytelling through images that were expressive, stylised, and driven by atmosphere rather than strict realism.
As his career expanded beyond Denmark, he became known for collaborating with international directors who embraced bold, imaginative worlds, most notably Guillermo del Toro and Chad Stahelski.

Across these partnerships, Laustsen often gravitated toward elevated genre filmmaking - like action, fantasy, sci-fi or horror - where heightened visuals were expected. It’s in these spaces that his signature style thrives: rich colour, dramatic contrast, and a painterly sensibility that transforms fantastical stories into something operatic.
VISUAL STYLE
Perhaps the element in his work which most strongly stands out, is his expressive use of colour palettes. Nowhere is this more obvious than in his collaborations with Guillermo del Toro.
“Guillermo and me, we agree about the way that we like to make movies. We like the strong colours. We really love, as everyone can see, we love steel blue. We love that colour so much and we think it’s so good with the contrast with the amber and the red.”
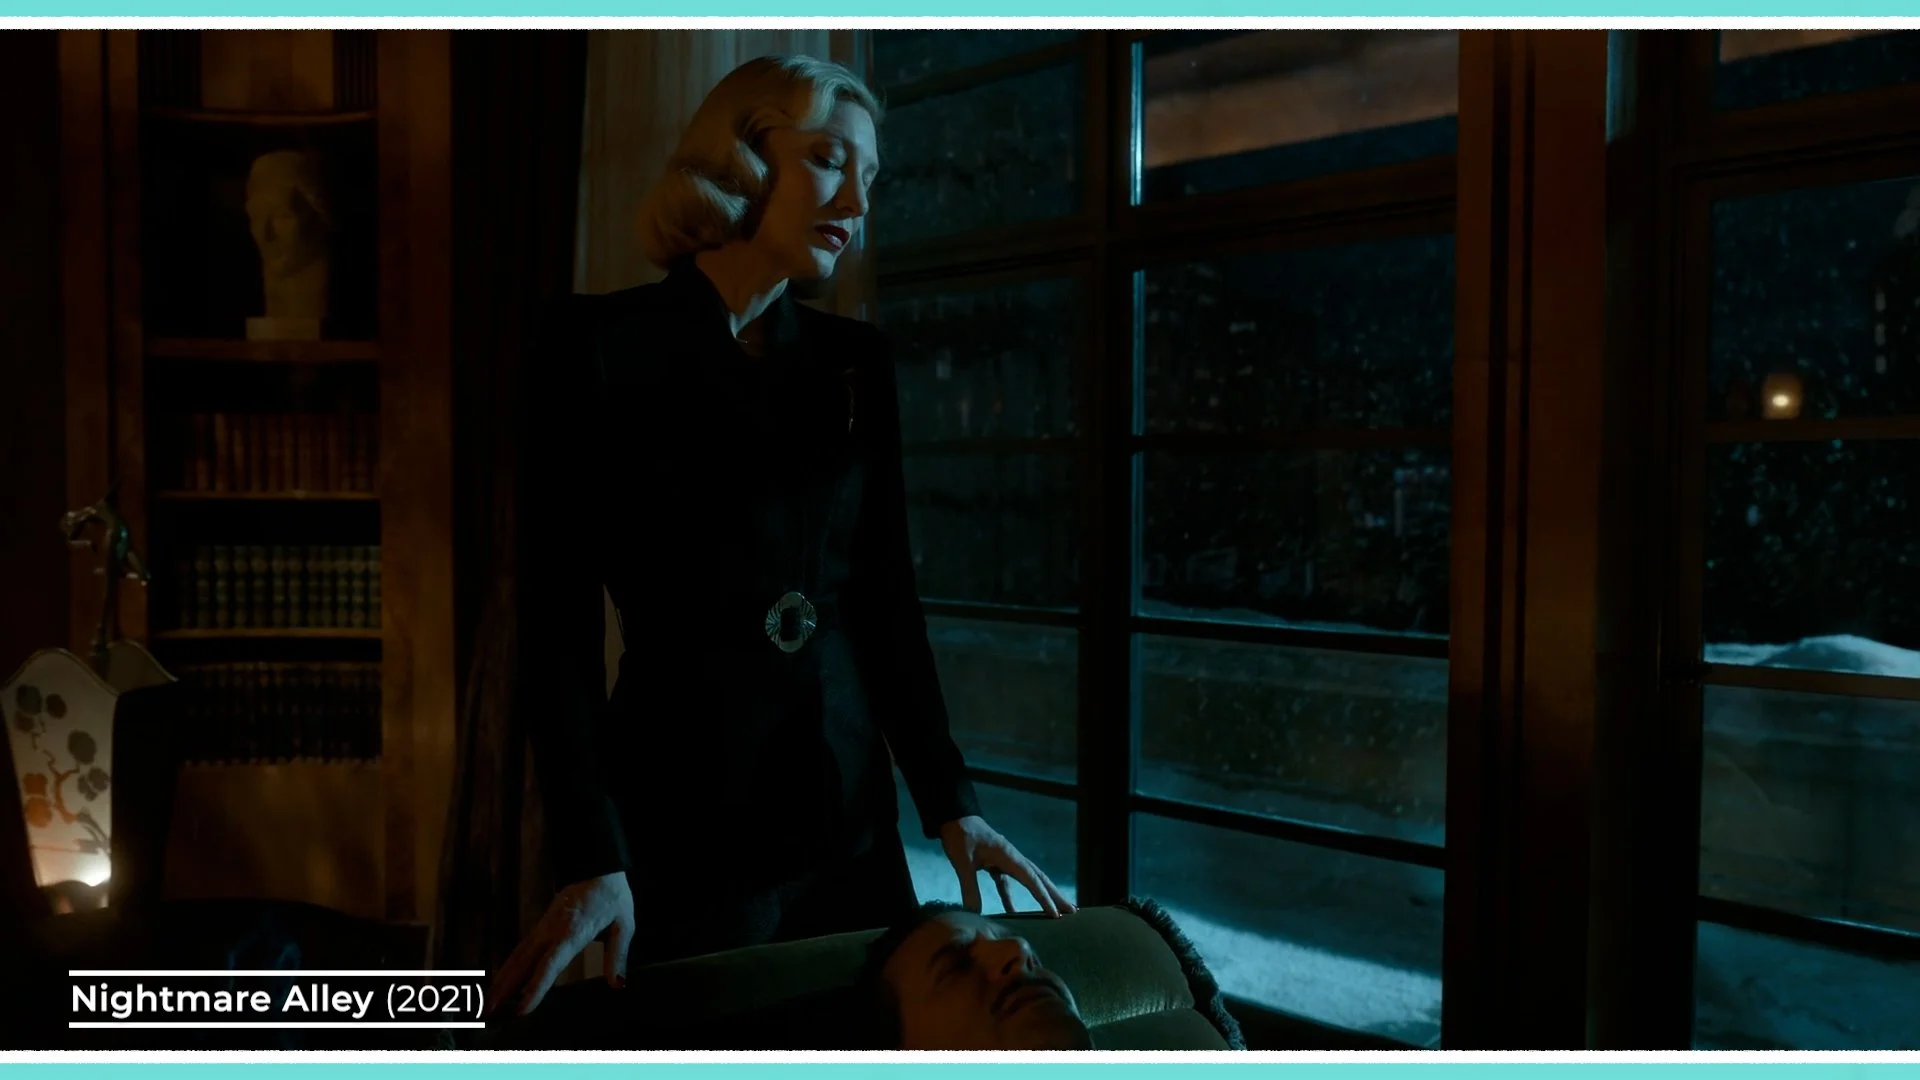
This preference isn’t arbitrary, it’s grounded in one of the most fundamental principles of colour theory: complementary colours. On the colour wheel, blue and orange sit directly opposite each other, meaning they create the strongest natural contrast when placed together in the same frame.
This contrast isn’t just visually striking; it helps guide the viewer’s eye, define depth, and create an emotional tone that feels both heightened, fantastical and harmonious.
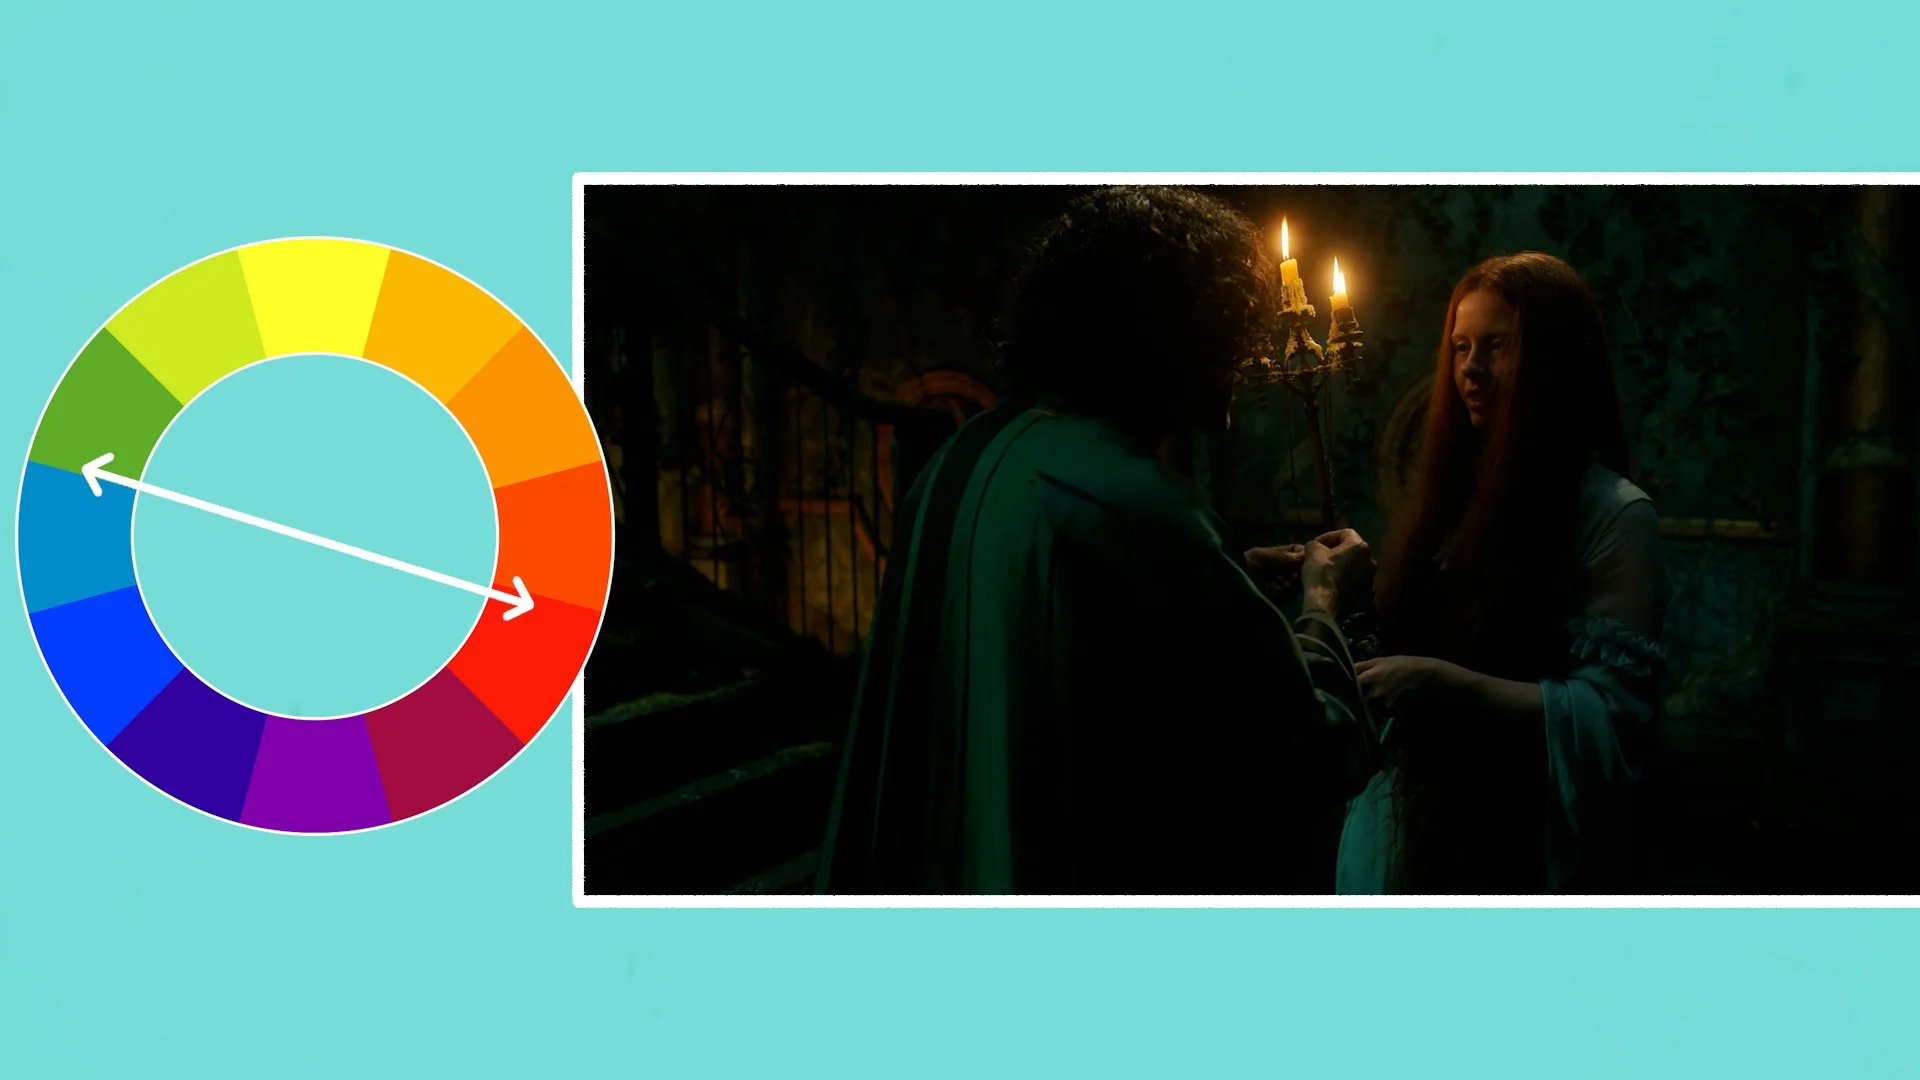
Laustsen uses this steel blue and amber palette often in his work, through a very deliberate approach to lighting. He often washes the majority of the environment in a cool steel-blue ambience, establishing a moody base layer that shapes the world and its atmosphere.
Then, cutting through that coolness, he introduces warm accents, such as pockets of amber or red from practicals like candles, lanterns, or lamps. These warmer sources illuminate key details, separate subjects from their surroundings, and bring a sense of visual rhythm - so that the colour in the frame doesn’t feel too monochromatic.
The push-and-pull between the dominant blue-green and the strategically placed warm highlights creates a pleasing colour separation, making the image feel both dimensional and emotionally charged.
Although Laustsen sees himself as a technician who is there to support the vision of the director, there are often some stylistic similarities to the films he shoots which extend beyond the lighting palette.
For many films that he works on, the camera takes on an almost third person, omniscient perspective, which represents the filmmaker guiding the audience’s eye around the space.

He does this by using a wider field of view which sees more of the set, rather than shooting everything in tight close ups with a shallow depth of field. This wider frame then often glides around the set, floating through the space, or following subjects like a wandering, observing, all knowing eye.
“I think that is the goal or the key. To shoot it wide and beautiful. As wide as we can.”
Whether capturing fluid, moving action sequences like in the John Wick films, or slowly tracking the walk of characters in the various Del Toro movies, he likes the camera to have lots of width and to be dynamic.
GEAR
When it comes to gear, Laustsen consistently chooses tools that support his expressive, stylised approach to cinematography. His lighting setups rarely aim for strict naturalism; instead, they embrace a heightened, almost theatrical quality.
A signature example of this is his use of strong, warm, single-source lighting. While these lights might be motivated by elements of real life, like a window catching late-day sun, their intensity, hardness, and direction often go far beyond what real sunlight would produce.

He frequently relies on large tungsten units like T24 or T12 fresnel spotlights or multi-bank fixtures like Dino lights. These have a warm colour balance, which becomes even warmer when he places ¼ CTS gels in front of them, and can be used to punch hard, sculptural beams into a room, or even to add or shape light outside into a strong beam such as simulating the sun rising.
The light will usually follow a single source approach, lighting actors from only one side and not using a counter fill light on the other side, so that the contrast remains high and the shadows are crisp and black.

He usually avoids placing film lights inside interiors, preferring to light through windows and with practicals, as it frees up the actors and the camera to move anywhere within the space that they’d like without needing to avoid capturing gear in the shot.
To create the warm, cool palettes in interiors or for night scenes that we mentioned before he’ll usually use LED sources, like Creamsource Vortex8s or Skypanel S60 or S360s, as they are easier to control and dim.
These lights will either get programmed with a specific RGB Steel Blue colour value, or he’ll do it the old school way with gels. For this method he’ll dial the lights in to a 3,200K temperature. A Lee #117 Steel Blue gel will then be added to the front of them. He’ll then set the white balance of his camera to 3,200K which will give scenes this pale, green tinted wash.
Next, he’ll fill in the warmer accents either with 2,800K light, or with other warm practical sources.
A method he loves to follow is to always pre-light spaces. In other words, he’ll explain the lighting setup to his gaffer or provide lighting diagrams. These will then be set up before the main technical unit and the director arrives on set to shoot.
Laustsen also shapes his images in-camera through filtration. He often uses a ¼ Pro-Mist diffusion filter, placed behind the lens, rather than the common method of mounting the filters to the front of the lens with a mattebox. This helps to avoid ghosting or filter reflections being captured while still blooming highlights just enough to soften the digital edge. This diffusion helps maintain that painterly quality without sacrificing clarity.
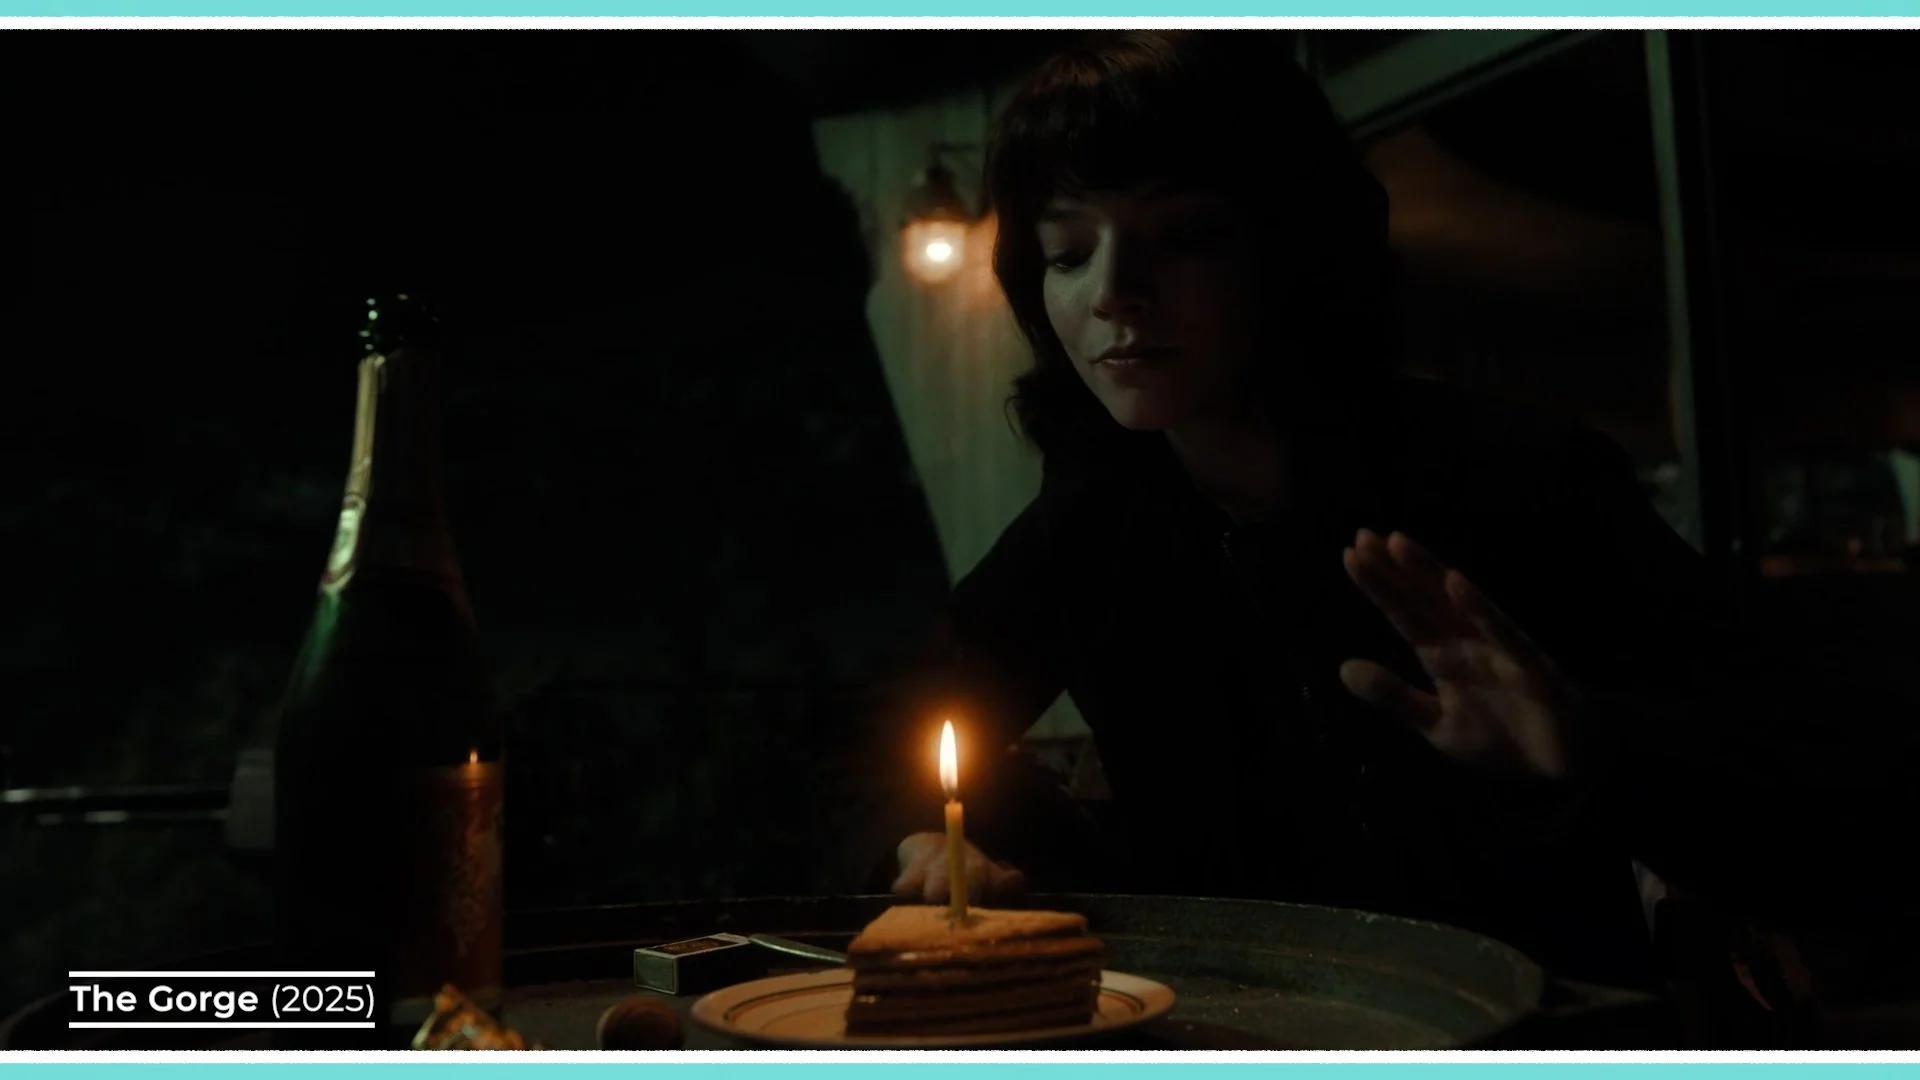
Lens choice plays a central role too. Laustsen gravitates toward wide-angle lenses, usually around a 24mm, 25mm or 27mm focal length, which allows him to see more of the environment when framing characters and maintain that wide, immersive look.
He’s fond of sharp lenses like the spherical large format Leitz Thalia primes, or the Super 35 Zeiss Master Primes, or crisper anamorphics like Arri ALFAs or Master Anamorphics.
Although he of course shot his earlier work on film, in recent years he’s enjoyed working with various Arri digital cinema cameras. Pairing these wider lenses with large format cameras, like the Alexa 65 or Alexa LF, gives him a grander field of view while still preserving shallow depth of field when needed. It’s a combination that expands the set and exposes the audience to more of the location.

“Nightmare Alley we shot half of the movie 65 and the rest of it on an LF camera because the Steadicam operator could not carry a 65. So this time I said to my Steadicam Operator, ‘We have to do it all the way through.’”
If the camera is not floating around on a Steadicam it’s usually moving in another way, such as on a Scorpio or Techno30 telescoping crane. His team can set down the base of this technocrane and then use the extendable arm to move the camera anywhere within the space, jibbing up or down, swinging it side to side, or wirelessly panning the stabilised remote head left or right.

This, along with other tools like a dolly or even a Spidercam allow him to execute that smooth, gliding movement that feels almost omniscient. Whether following high pace action or drifting through intricate sets, the camera often becomes a floating observer that is precise, controlled, and dynamic.
Together,this use of stylised lighting, bold colour, wide lenses, large format sensors, diffusion, and dynamic camera movement, form the technical backbone of Laustsen’s unmistakable visual style and help him to bring the director’s fantastical, thrilling, or frightful stories to life.
CONCLUSION
Dan Laustsen’s cinematography stands as a reminder that images don’t always need to realistically or naturalistically tell stories. They can also be expressive, intentional, and emotionally charged.
Whether he’s illuminating a fantastical world, shaping tension in a horror sequence, or guiding the audience through intricate action, his work shows how technical choices can assist directors to elevate storytelling far beyond the literal. And for cinematographers, his approach offers a valuable lesson: embrace the tools, understand the craft, and don’t be afraid to let the image become a world of its own.

The Imperfect Cinematography Of Paul Thomas Anderson
The photography in acclaimed director Paul Thomas Anderson's films feels alive: not because it’s perfect, but because it’s honest. In this video, we’ll look at five different techniques that he uses in his films to build emotion not through perfection, but through presence.

INTRODUCTION
The photography in acclaimed director Paul Thomas Anderson's films feels alive: not because it’s perfect, but because it’s honest. His camera moves with a kind of quiet confidence, gliding through space in long, unbroken takes that observe rather than dictate. Shot on film, often in the anamorphic format, his images carry a texture and depth that mirror the imperfections of real life.
Over the years he’s worked with different DPs, from most of his work which was shot by Robert Elswit, to The Master photographed by Mihai Mălaimare Jr., and his recent collaborations with Michael Bauman. Throughout these different relationships certain stylistic trademarks persist.
In this video, we’ll look at five different techniques that he uses in his films to build emotion not through perfection, but through presence.
1 - LONG TRACKING SHOTS
If you had to narrow down all the filmmakers which influenced Paul Thomas Anderon’s approach into a single director, especially in his earlier work, it would be Robert Altman.

“I think what happens is that it’s in my DNA. It’s that I grew up watching those movies. It’s just informed me and informed how I want to tell stories. I learned from that and hopefully can bring something new.”
One of the visual traits of both directors is not overly chopping up their edits with quick cuts to multiple shots and angles, but rather filming more considered master shots, which often track the actions of a character, and letting those breathe in drawn out takes.
More often than not they keep their films dynamic, like their characters to be moving and for the camera to track that movement by following them.
Whereas Altman would often create frame movement by zooming the lens, Paul Thomas Anderson and his team usually used two different tools to film these long tracking shots: either a Steadicam or a dolly and lots of track.

A Steadicam mounts the camera directly to an operator via a vest with an arm and a gimbal-like stabilisation system. It gives footage a smooth, floating, fluid motion and allows the camera to move anywhere that a person is able to walk.
He’s used this for long takes, where the camera navigates through doorways, turns corners, or moves around various characters.
Because Steadicams are strapped directly onto the body the movement can come with little bumps, vibrations and small imperfections. Rather than removing these imperfections from his recent work with post production stabilisation software, he opts to keep it in. This makes the camera language feel alive, living and breathing, with a subtle handmade quality to it - something which is felt in most of his work.
Sometimes he’ll play out large portions of scenes in one, long Steadicam take. Or combine it with another technique like a crane step off, where the Steadicam op, starts on a crane platform, which then jibs down to the ground, and gives them a chance to step off the platform and continue with the rest of the take on foot.
Dolly movement on the other hand tends to be a bit smoother. A dolly is a heavy camera platform with wheels which can be pushed along tracks. Unlike a Steadicam, which can move anywhere that the operator can walk, a dolly on tracks usually sticks to one straight axis of movement.

Although there are also curved dolly tracks for doing a circular or semi circular movement.
PTA’s dolly tracking shots often follow characters as they walk or run, alongside a straight line of track.
For more stationary scenes when characters are seated he’s also used a dolly to do push ins on them, moving closer and getting inside their heads.
2 - FILM FORMATS
One thread that runs through all the movies that he’s directed is that they have all been shot on film, rather than digital cinema cameras.

Of the 10 feature films he’s made, 6 were made with a widescreen aspect ratio, while the remaining 4 used a taller frame. The size of the frame that he uses to present these worlds on screen has shifted over time, with his first 5 movies using a 2.39:1 aspect ratio, and most of his later work presented in 1.85:1.

Not only is he fond of the widescreen aspect ratio, but more specifically he likes shooting in the 4-perf 35mm anamorphic format with C and E-series Panavision anamorphic lenses.
These lenses squeeze the image horizontally by a factor of 2 to fit each frame onto a piece of film that is 4 perforations tall. This creates a higher resolution but distorted frame. This image is later desqueezed by a factor of 2 to get it back to its original proportions, which gives it its widescreen aspect ratio.

This anamorphic format also comes with additional characteristics, like more stretched, oval shaped bokeh, horizontal flares which the vintage Panavision lenses render in blue, and more distortion and focus falloff around the edges of the frame.
On the other hand much of his more recent work uses spherical lenses and either the Super 35 format, large format 5-perf 65mm film (in The Master), or 35mm VistaVision on his most recent One Battle After Another.
Spherical lenses create footage without an exaggerated squeeze factor, which renders images more truly, with less distortion, rounded bokeh and a squarer frame.
3 - INTIMATE FRAMING
One of the most distinctive aspects of Paul Thomas Anderson’s cinematography is how he shifts between observational wides and intimate close ups within a single sequence. His wide shots often feel detached, almost documentary-like.

When shooting in the anamorphic format he’ll often use a wider focal length for this, like a 40mm anamorphic lens, that bends the edges of the frame with distortion. This allows the viewer to observe characters in their environment to see how they occupy space and how that space defines them. But when the emotion of a scene peaks, Anderson moves in close, often with a slightly more telephoto lens, such as a 75mm, letting faces fill the frame and gestures carry weight.
This push and pull between distance and closeness reflects the emotional rhythms of his storytelling. A wide shot might hold a moment in tension, giving characters room to breathe, while a sudden close-up collapses that space, drawing us directly into their internal world.

In The Master, for instance, the switch between wide compositions, which even includes a fisheye lens shot, and tight, centered portraits of the characters, some of which were shot on a 300mm telephoto lens, creates an almost hypnotic intimacy.
4 - NATURAL, IMPERFECT LIGHTING
Paul Thomas Anderson’s approach to lighting has always leaned toward naturalism and imperfection. He’s comfortable letting the highlights from windows or even in daylight exteriors blow out, for practical bulbs to clip, and the shadows to fall away into darkness. This goes against the conventions of trying to preserve the dynamic range of what the camera captures to maintain detail in both the shadows and highlights.

Like the little vibrations and bumps in camera motion, this lighting philosophy gives his films a tactile, lived-in quality - like the images haven’t been overworked or overconstructed.
Working with cinematographers like Robert Elswit, Anderson often lights scenes using available or practical light sources like windows, candles, photographic lights, or table lamps, enhancing them subtly rather than replacing them with totally artificial setups.

Early in his career, Anderson and Elswit frequently used hard light, perhaps inspired again by some of those Robert Altman movies he grew up watching. You can see hard shadows from actors cast against walls.
Another aspect of imperfection comes from the occasional lapse in lighting continuity between shots. In There Will Be Blood, the famous oil fire sequence transitions between shots at night which were filmed after sunset lit by flames, to later shots filmed at dusk with a blue sky. There’s a similar lapse in continuity in a chase scene in his most recent work. Rather than being a negative, it’s another one of those little imperfections which gives the film its hand constructed feeling, by focusing on the chaos in the story rather than technical perfection.
5 - PRACTICAL FILMING
One of the most important visual aspects that gives his films their scope and sense of reality, is that he pretty much only uses real world, practical locations. He never builds sets on soundstages, well, unless the location in the script is a soundstage.

He also favors in-camera effects and practical setups over CGI, grounding even the most cinematic moments in reality. From that oil fire that we already mentioned which was shot with real flames erupting from a full-scale rig, to car crashes, stunts or confrontations. By capturing things for real, they feel real.
This preference for the tangible gives his images a sense of weight. Explosions, accidents, and even simple moments like a curtain billowing or dust hanging in the air are real phenomena happening in front of the lens. Combined with his other photographic techniques, it results in an image that feels textured, imperfect, and human - that can’t quite be replicated through digital trickery.
CONCLUSION
Paul Thomas Anderson’s cinematography is a study in controlled imperfection. His long, fluid camera moves, choice to shoot on film, clipping natural light, and his preference for practical locations and effects all point toward the same idea: that truth in cinema doesn’t come from precision, but from presence.
He builds emotion not by polishing every frame, but by allowing each one to breathe. In a time where so much of filmmaking is about control, Anderson’s images remind us that, just like in the work of his cinematic influences, beauty often lies in what’s unpredictable, fleeting, and imperfect.

How A Filmmaker’s Palette Shapes Tone
Filmmakers have three powerful colour tools at their disposal: production design, lighting, and colour grading. Each plays a distinct but interconnected role in controlling the emotional and visual tone of a story.

INTRODUCTION
If you look at footage of a scene lit by cool light and then one lit by warm light, how does each frame make you feel?
Does the whiter CCT light feel higher in clarity, more clinical, professional and emotionally distant, while in comparison the warmer light feels more comfortable, cozy and nostalgic?

The reaction each person has to colour may be highly subjective and dependent on the individual, however I think it’s safe to say that colour does have a subtle effect on how we interpret images and how we feel about them.
3 WAYS TO CONTROL COLOUR PALETTE
Filmmakers have three powerful colour tools at their disposal: production design, lighting, and colour grading. Each plays a distinct but interconnected role in controlling the emotional and visual tone of a story.

Production design establishes the foundation through the choice of sets, costumes, and props that introduce colour into the space.
Lighting then determines how those colours are perceived: whether they feel warm and inviting or cold and distant.
Finally, colour grading refines and unifies the image in post-production, determining things like saturation, contrast, and tint to create a cohesive visual identity.
1 - PRODUCTION DESIGN
The reason I list production design first is because it probably has the largest impact on the film’s palette. This is because it’s what is in front of the camera, like the colour of the walls, furniture or the props that performers interact with.
The colour of these sets can be used to support the story. Do The Right Thing positions characters against warm coloured backdrops, like red walls, or interiors full of brown and yellow wooden tones to visually amplify the scorching heat and growing tension in Brooklyn. The warm palette turns temperature into emotion as the environment itself begins to boil over with conflict.

Or, the design can lean totally the other way, in a film like Tár that uses sleek, modern interiors with cool greys, muted blues, and glass surfaces. This palette supports the titular character’s emotional detachment and need for control in a cinematic world drained of warmth and humanity.

Carefully choosing the costumes that characters wear is also an effective and sometimes more cost effective way for filmmakers to control the palette. As the actors and what they wear usually occupy a large amount of screen real estate, and it’s often easier to dress a person than an entire location.
A show that uses wardrobe colour to influence the tone and thematic interpretations of characters quite effectively is Breaking Bad. This is done by giving key characters a costume colour palette which is roughly followed throughout the series.
Walter White often wears shades of green, which perhaps hints at themes and ideas like sickness, from his cancer diagnosis, as well as his growing greed. Whereas his more reckless, dangerous, impulsive and unpredictable partner Jessie, often wears more saturated, abrasive tones, like reds and yellows.

These palettes also extend beyond wardrobe into production design, through the vehicles that they drive.
Skyler, his wife, undergoes a very subtle and gradual change in wardrobe palette throughout the series. Starting out in lighter more relaxing tones, like blue, which transitions to black in later seasons as she starts to learn more about her husband’s dark profession. I’m sure there’s also a metaphor about mourning her past life somewhere in there too.
2 - LIGHTING
Other than what is in front of the camera, another way that cinematographers can shape the colour palette is through lighting.
This is classically done by illuminating scenes with a warmer glow or with a cooler light. They can use a sliding scale of light which measures the CCT colour temperature of sources in Kelvin.

At the warm end there are light sources like candles with a reading of somewhere around 2,000 Kelvin. Or tungsten incandescent sources around 3,200K. This light can feel more romantic, nostalgic or comfortable.
Then there are more neutral 4,300K lights, like fluorescent office tubes, all the way to cooler, 5,600K daylight HMIs, cooler LED sources, or natural light at dusk. Neutral light generally feels a bit more clinical, and appropriate for professional settings like offices, or hospitals, while the cooler we go the more emotionally detached, or even lonely the tone may feel.
Although of course these emotional interpretations are highly reliant on the subject of the story and mindset of the character. Sometimes specific interpretations of colour theory can remain ambiguous and rather create an overall feeling or tone that runs throughout the film as a whole.
For example, Euphoria is lit with vivid palettes which tend to use either lighting on the more extreme sides of the CCT spectrum or colourful RGB light. These support the emotionally elevated states of the teenage characters. Every part of their young adulthood is intensely and passionately experienced in a heightened way.

Similarly, Ballad Of A Small Player was lit with a vivid neon palette that mixed different types of light sources of different colours: from steely, saturated teal, to warm tungsten practicals and real world RGB signage of all colours.
Pushing the lighting into saturated RGB tints and away from the regular CCT spectrum of light, visually supported the explosive, manic, panic induced mindset of the gambling addict protagonist.
Contrast this with the character in I, Daniel Blake, whose plain life, drained of glamour, is depicted though far more realistic, neutral lighting with evenly balanced colour temperatures that don’t push an unnatural spectrum of colour.

3 - GRADING
After filmmakers have dressed their location, lit and shot it, the final step where they can determine the direction of the palette is during the colour grade.
Although the famous tongue in cheek saying goes, ‘just fix it in post’ it’s normally not advised to stretch the look too far beyond what has been recorded. This is because by this stage the palette of the lighting and set are of course burned into the image.
However, there’s certainly still room at this stage to subtly push the look of the colour in different directions.
The Matrix did this by colour timing scenes that took place in the undesirable digital world in the most unappealing colour they could think of. They added a green tint, especially in the mid tones, to all the scenes that took place in the Matrix world and also digitally enhanced the skies to make them more artificial and white, removing blue.

These little tweaks moved the palette in this artificial world away from a real colour space, giving images the feeling that something was slightly off, a bit grimy, unnatural and unpleasant.
Then, when cutting to scenes that took place in the real world, filled with a dark reality, they kept the colour correction and tints neutral, with a subtly cooler, shadow laden look.
Grading software also has other tools beyond adding a colour tint. For example, a key decision during the post production process is deciding on the level of saturation and contrast - which determines how vivid or washed out the colour feels.
We mentioned the lighting of Ballad Of A Small Player, well part of what supports this is how the footage was treated during the grade. They pushed the contrast and saturation to the extreme. This led to highlights clipping, shadows getting crushed and skin tones that were at times overly saturated and right on the edge of breaking apart altogether.

If you bring down the saturation and contrast it loses some of its manic visual tone and tense emotion.
When it comes to grading, a trick that cinematographer Rodrigo Prieto used when working with colourist Yvan Lucas in Baselight grading software is to create different LUTs, looks with different colour, contrast and saturation levels, that were based on actual photochemical filmic techniques.
For example a Technicolor ENR-process look that is contrasty with particularly rich blacks but subdued colors, a look that replicates Kodak film negative printed on Kodak print stock - which has more saturated, natural tones, or a vintage Autochrome look which is less saturated with colours emulationing the early film stock.
They then apply these different looks to different scenes depending on their emotional content and what is happening in the story.
Such as using the more saturated Kodak look for a magical, transcendental moment, then cutting back to reality on the same angle but with a more desaturated look. Or for a pivotal scene wrought with destruction, guilt, shock and confusion, applying the ENR look that is contrasty with heavy shadows but desaturated colors.

Prieto used this same idea on Barbie, using a more saturated, three-strip Technicolor style LUT for more playful scenes in her larger than life, fantastical world, and using a desaturated look with less vibrant colour and skin tones for the more depressing, less spectacular real world which was stripped of magic and joy.
CONCLUSION
Colour isn’t just something we see, it’s something we feel. Whether it’s through the sets and costumes that shape the world in front of the camera, the lighting that determines how those colours come to life, or the final grade that unifies it all, filmmakers use colour as a quiet language of emotion.
A shift from warm to cool light can turn comfort into isolation. A change in wardrobe can track a character’s internal decay. And a subtle tint in the grade can transport us into an entirely different dystopian world.
What’s remarkable is that these changes often work subconsciously, without us being aware that the filmmakers are subtly manipulating how we feel about the story. We don’t have to notice the hue of a wall, the colour of a costume or the tint of a light to feel their effect.
Because when colour is used with intention, it doesn’t just decorate the frame it deepens our connection to the story. And that’s the real power of a film’s palette: to shape not just what we see, but how we experience the world on screen.

Cinematography Style: Philipe Le Sourd
In this episode of Cinematography Style, we’ll explore the visual language of the French DP and the filmmaking gear and techniques he selects to make it happen. Examining how his use of texture, light, and composition creates a cinematic world that’s both romantic, natural and restrained.

INTRODUCTION
In the world of cinematography, Philippe Le Sourd’s images feel like paintings in motion that are elegant, deliberate, and deeply atmospheric. From the soft, desaturated candlelight of The Beguiled to the poetic grandeur of The Grandmaster, his work captures not just how a scene looks, but how it feels.

In this episode of Cinematography Style, we’ll explore the visual language of the French DP and the filmmaking gear and techniques he selects to make it happen. Examining how his use of texture, light, and composition creates a cinematic world that’s both romantic, natural and restrained.
BACKGROUND
Le Sourd has been working as a director of photography since the 90s. While he began his career shooting for French filmmakers in his home country, he has since collaborated with a wide range of international directors. From Ridley Scott to Wong Kar-Wai - which earned him an Academy Award nomination for Best Cinematography - and more recently through his ongoing collaborations with Sofia Coppola.
PHILOSOPHY
Before thinking about the technical side of filmmaking, like camera gear, the first point of departure between a director and a cinematographer is usually to begin building an idea or imagining of the visual language for the film.
This could be a singular visual idea, such as needing the overall palette to feel more neutral or desaturated throughout the movie, or, more often than not, a collection of different visual vocabularies that become a language, like choosing an aspect ratio, a style of lighting, a softer texture to the lensing, an approach to the framing, or a cool-warm palette duality.
Le Sourd acknowledges that the process for developing this visual language changes depending on the director he’s working with.
For his collaborations with Sofia Coppola - the script and underlying emotions that the characters are experiencing are the first points of reference.
“She doesn’t want to have the image too strong compared to the emotion. So, you try to match very closely what could be the emotion and what the format should be for the film.”
They’ll build this look and tone using research, references and camera tests. He’ll start by doing research, such as looking at examples of Civil War imagery on The Beguiled.

They’ll then go over some more specific visual references, which are often from photographers, such as a still from Saul Leiter with a bright, blowing background that influenced the look of Priscilla’s interiors, or the portraits of Julia Margeret Cameron with their washed out tonality of grey which informed The Beguiled.

Based on this idea he’ll then usually conduct more technical gear tests of lenses, cameras and filmstocks to arrive at the look ahead of shooting.
Since Coppola writes her own screenplays, which often means living with the material for years before it is shot, she’ll usually have a broad idea of how to represent each scene, such as whether the camera is further or closer to characters, or whether it plays out in a single shot.
For more complex scenes with a greater number of characters they’ll work together to create a list of shots on set based on the blocking. They like to do this by using a still camera to take photos from different angles during the rehearsal, then decide on which of those shots are needed. Trying to visually simplify things by not overshooting too much coverage.
Other directors, like Ridley Scott, work differently with a more straightforward, production oriented approach and a producer’s eye.
“I don’t think he’s the type of director who has a discussion about the visual language. I think he’s about setting it up, the number of shots and schedule. He will tell you very directly if he likes it or not.”
They didn’t decide on a visual style going in and rather let the film’s design be determined by the locations he selected around the south of France - which built in a large part of the look. With warmer, earthy exteriors lit by natural, dappled light under oak trees.

Working with Wong Kar-Wai presented yet another different collaborative relationship. In a highly unusual working style, they went into production without having a fully written screenplay. Instead, Kar-Wai would work things out as he went along. Writing a few pages based on a character, a location, or a story idea - which Le Sourd would then shoot. The director would then review the rushes and either write a few new pages, or reshoot the scene they had already shot, but this time perhaps with a new narrative idea, a different actor, or with a freshly dressed set.

“It’s really step by step and you never know where you will go. You have no idea. About the script, the cinematography and the actor.”
The challenge of creating the visual language became largely about how to maintain continuity over a production timeline that eventually lasted around 3 years. To create a coherent look he’d keep extensive notes about all the gear he used, and how he set it up and positioned it for each scene. So if he needed to come back to a space he could recreate a look.
In this way, they cobbled The Grandmaster together by slowly adding different segments until they finally reached a product with a complete story.
All of these different approaches for the various directors he worked for meant he needed a range of technical tools and techniques which he could use to create each movie’s visual language.
GEAR
Although as we’ve seen Le Sourd’s work doesn’t fall neatly into one style, but is rather created afresh based on each script and director he works with, there are a few characteristics which he carries through.
He tries to not do too much with the camera by creating a language which is naturalistic, yet is slightly elevated for cinema, with often underexposed, darker lit, shadowy interiors.
I’ve also noticed that the movies he shoots often push one of two looks.

Either, one, a cool and warm colour palette with a good level of filmic saturation. Or, two, a more desaturated look which maintains contrast with large amounts of dark shadow.
This first look can be seen in films like A Good Year, Seven Pounds, The Grandmaster and On The Rocks.
He creates this cool-warm look partly by using lights with different colour temperatures. If we look at a few examples of this lighting style you can see a common theme emerge - most of the palette is cool, with a few accents of warmth.

The first step to this look is shooting with a cool white balance. Since almost all of his work was shot on film, he’d usually select a tungsten balanced film stock for these interiors - such as Kodak 500T.
These stocks have a colour temperature of approximately 3,200K - which is what you could set the camera to if shooting digitally.
Next, he'd use lights to create a level of ambience - which is like an overall soft fill that envelops the location. This is done with cooler light set to somewhere around 4,300K or 5,600K.
He then uses practical sources that can be seen in the shot, like candles or lamps with incandescent bulbs with a warm colour temperature, such as 2,800K. Creating little warm hotspots that offset the cool look and create a colour contrast.

Sometimes, instead of it being a practical, the warmth comes from using a warmer key light on the actors’ faces while keeping the background ambience lit by a cooler source.
With the capabilities of grading software like Baselight, he can combine old school 35mm film capture with new school colour manipulation. Pushing more of a cyan look into the cooler tones.
He also likes pushing a warm look for exteriors - which is probably mostly done in the grade. And, especially in films like The Grandmaster, giving interiors an overall warmer palette, by only lighting with warm, probably tungsten, sources - and removing his cool ambient fill source.
Remember we mentioned he likes shooting camera tests ahead of production. Well, a colour workflow he has used is to give those tests to a colourist, who will then build a custom show LUT. This LUT can be applied to dailies - which Le Sourd views on an iPad on the Copra app. He can use this app to make grading notes or corrections which his colourist can then implement.

The second more desaturated look which I mentioned he’s pushed mainly on his more recent work on period dramas with Sofia Coppola, like The Beguiled and Priscilla.

A technique he likes to use is pull processing film by one stop. This is where you overexpose the film. So if he’s shooting 500T, a 500ASA film, he’ll rate it at 320ASA, a stop brighter.

When the overexposed film is processed it is then underdeveloped in the lab to get it back to its correct exposure. Pull processing is done to retain more detail in the shadows and in the highlights and reduce the film grain. It also decreases the saturation - which created less vibrant colours in The Beguiled.
He created a similar desaturated look on Priscilla - however this was done digitally in post production rather than photochemically.
Le Sourd almost only shoots features on 35mm film - with the one exception being Priscilla - which for budgetary reasons was shot digitally on the Alexa 35. Opting for the more classically traditional Super 35 format over using large format cameras.
Unlike the trend of using wide angle lenses for everything, Le Sourd prefers to select more medium focal length lenses - most commonly a 40mm, 50mm, or 75mm. He also shies away from anamorphic lenses, preferring to shoot with spherical, Super 35 glass and then crop to widescreen aspect ratios if they’re required.

Most of his films are serviced by Panavision, on their spherical prime lenses. From the Primos, to the PVintage, or the Super Speed or Ultra Speeds.
Although on The Grandmaster he selected Cooke S4s and used an Angenieux Optimo zoom for some of the telephoto shots.
CONCLUSION
Le Sourd’s cinematography is a study in restraint: a reminder that visual beauty often lies in what’s left unsaid. Whether working within Coppola’s delicate emotional worlds or Wong Kar-Wai’s improvisational chaos, he adapts his craft to serve story and tone above all else.
His images feel timeless not because of flashy technique, but because of how quietly they observe character and emotion.

How Sofia Coppola Shoots A Film At 3 Budget Levels
Let’s take a look at Lost In Translation ($4 million), Priscilla ($20 million) and Marie Antoinette ($40 million) to see how Sofia Coppola used the resources she had to tell powerful stories about women protagonists framed by desaturated, pastel palettes, a mature restraint, and an almost musical sense of stillness.

INTRODUCTION
Sofia Coppola’s films feel like quiet daydreams. With worlds of isolation, luxury and honest human relationships, captured through a lens of melancholic beauty.
Throughout her career she’s directed films at various budgets, from the indie level, semi-gun and gun Lost In Translation, to the larger scope but time pressed Priscilla, all the way to the luxury-laden high budget Marie Antoinette.
Let’s take a deeper look at each of these three productions to see how Sofia Coppola used the resources she had to tell powerful stories about women protagonists framed by desaturated, pastel palettes, a mature restraint, and an almost musical sense of stillness.

LOST IN TRANSLATION - $4 MILLION
A core component of Coppola’s work is that not only is she a director but also a writer. Having written the screenplays of all of the features that she had directed.
While traveling and spending long stretches in hotels, Sofia Coppola began imagining a story about two lonely Americans adrift in Tokyo - which stood as a microcosm of a relationship.

She wrote the Lost in Translation screenplay over six months: a quiet exploration of disconnection, misunderstanding, the camaraderie between foreigners, fleeting moments of intimacy and everything lost between the lines.
To get the approximately $4 million production budget, Coppola and her team pursued more of an independent model of financing than a studio style one - where a single company buys and owns the film. In this approach, the filmmaker sells distribution rights separately across different international territories, using those presales to finance the film.
Because the film was not controlled by a single studio or U.S. distributor it allowed her more creative control and gave her the final cut.

The relatively low budget allowed them to shoot the short length, approximately 70 page feature script over 27 days. It also meant they had to use a smaller technical crew and a more compact gear package.
Coppola and her DP Lance Acord embraced these technical limitations by adapting a production style characterised by working with the real world environments which are available - rather than trying too hard to construct a world which isn’t real though built sets, or supreme control of lighting.
They felt they could create a visual middleground by embracing a similar approach to other movies with this real world feel like Festen or The Anniversary Party that were shot on the digital video format which was still in its infancy, but elevate this look by instead shooting on 35mm film and subtly supplementing light in these real world environments when needed.
Since their low budget meant it wasn’t possible to lock off large sections of the city, they filmed most of the Tokyo exteriors in a run and gun, semi-documentary style (allegedly without a shooting permit). This allowed them to get incredible shots of the actors walking around at iconic locations like Shibuya crossing - with real people as extras in the background.
To get away with filming in this style they shot handheld with a lightweight 35mm camera, and a skeleton crew of Acrord, Coppola and his 1st AC Mark Williams, pulling on an old school manual follow focus judging distance by eye - without any monitors in sight.

They used two camera bodies on the production - mostly the small 35mm Aaton 35-III which was used for handheld or other scenes, or the larger Moviecam Compact which was needed for close quarter applications like shooting in hotel rooms or bathrooms where the Aaton made too much noise.
He paired these cameras with a set of Zeiss T/1.3 Superspeed primes - mostly shooting on the 35mm focal length, which gave the same perspective as that of a tourist’s point and shoot camera.
They also carried a long Angenieux Optimo zoom for picking actors up in public spaces from far away with the more compressed telephoto lens.
Even for locations which they did have more control over, like the solo hotel room scenes with Johansson, they employed a similar, technically minimalist approach. Only Coppola, Acord and Johansson were allowed in the room - with occasionally the wardrobe, make-up and AC allowed in to check all was going well. Acord would operate and pull focus, often without even rolling sound, to give these scenes a handheld, intimate feel.

Although much of the framing and shot selection was worked out in the space, they did on occasion jot down some notes detailing character movement and shots, especially for sequences which involved more complex movement.
True to this real world approach Acord used lots of natural light. He shot all night exteriors using only the real available mixed light sources in the city, like sodium vapour, neon and lanterns, without adding any additional film lights. To do this he shot night exteriors on Kodak’s high speed, lower contrast 500T film stock 5263. While he used a 320T 5277 stock for daylight scenes or interiors.
The fast Superspeeds allowed him to shoot wide open or at T/2 to have enough light for some of these night exteriors. However, in the more populated and brightly lit areas like Shibuya he’d actually stop down to around T/4 or T/5.6 and underexposed to keep a low contrast, low saturation look.

For some interiors, like the subway or arcade they’d rely mostly on the location’s available fluorescent tube lighting. However, Acord did get his team to supplement the arcade scene with a few 4 foot 4-bank Kino Flos, with cool daylight bulbs.
Or the hotel bar, which was mainly lit by warm practical lamps, supplemented by some added film lanterns that were the same colour temperature.

Instead of cutting and shaping light with large 4x4 floppies, diffusion frames or black flags and lots of c-stands, which may happen on a traditional industry set, his electricians would just use little off-cuts from diffusion gels and black wrap, which they’d rig on the light with croc clips. Which is much faster and leaves a minimal gear footprint.
Coppola was able to pull off this beautiful film on its relatively low budget, by writing a shorter screenplay that focused mainly on two actors, which largely took place in one controllable hotel location. And then shooting most of the exterior scenes which would’ve usually needed more control, permissions and budget, in a run-and-gun style with a skeleton crew, to give the story its feeling of authenticity and scope.
PRISCILLA - $20 MILLION
Lost In Translation’s 70 page script was made for $4 million. So when you hear that Priscilla’s 80 page script was budgeted at $20 million - you may imagine that this would come with much more time and control for Coppola.
However, since it was a period drama, based on IP, with a larger art department and wardrobe scope, they were actually only able to get 30 shoot days out of the budget.

Also, if you factor in inflation that $20 million would be roughly the equivalent of a $12 million budget at the time when Lost In Translation was shot.
Coppola wrote the screenplay about Priscilla Presley’s life between the ages of 15 to 27, based on her memoir Elvis and Me. The film plays out through Priscilla’s eyes and chronicled the ups and downs of navigating a complex relationship - with both its dark and lighter side.
Before production started, she had to cut out 15 pages from the initial script in order to limit shoot days and make the budget work.
Funding was sourced by Italian producer Lorenzo Mieli through the shareholders at Fremantle, under the name of a production company called The Apartment Pictures.
To keep costs down and best utilise the budget they shot in Toronto and built sets on soundstages for the Graceland interiors.
Coppola teamed up with one of her regular cinematographers Phillipe Le Sourd to create the film’s visual tone. They stayed away from recreating iconic historical moments in a photocopy style, and rather created a language that felt like a memory that was specific to the film and Priscilla’s point of view.

A reference that informed this was a backlit, black and white photograph of a woman in silhouette by Saul Leiter. Many frames lean into this look, framing characters against a strong, single source backlight such as a window which blew out with overexposure. This backlight often washed out the shadows and gave images a lower contrast - which Coppola has always been a fan of.
Another budget compromise they had to make was gear related. Le Sourd, who had only ever worked on film, was forced to select a digital cinema camera. He chose an Alexa 35 with Panavision Ultra Speed and Super Speed lenses.

Although they did use little snippets of 16mm 250D stock shot on a Bolex H-16 and Super 8mm 50D or Ektachrome 100D to create period appropriate home video style footage.

Coppola and Le Sourd found ways to push the tone with the cinematography. A long, slow zoom out on an Angenieux HR 25-250mm lens created a sombre feeling of alienation.
They used a handheld camera for emotionally heightened moments.
A shifting orange, red neon lighting from Skypanel S360s and other LEDs inside the room gave the scene a feeling of love, living, blood and hurt.

Overall, Coppola used Priscilla’s budget to tell an intimate portrait of a relationship through the experiences of its protagonist.
The period setting required larger art department set builds and greater scope production design, a larger cast and greater control over technical setups and locations - with no room for run and gun shooting.
MARIE ANTOINETTE - $40 MILLION
In a similar vein to Priscilla, Marie Anoitnette was Coppola’s first big introduction to making a period film about a well known figure in history.
She based the script on the book Marie Antoinette: The Journey by Antonia Fraser - which chronicled her life leading up to the French Revolution. Coppola sought to create an impressionistic interpretation of Marie Antoinette which would let the audience get lost in her luxurious world and imagine what it would be like to experience life in Versailles during that time.

To create this larger than life scale portrayal that was full of visual set pieces, an enormous wardrobe department and meticulous, audacious production design - required a larger budget of approximately $40 million (somewhere around $65 million when adjusted for inflation).
To raise so much capital required backing from one of the big studios: Columbia Pictures.
All it takes is watching the film to see where some of that spend ended up. The film is laden with a large cast and loads of extras all kitted out in truck loads of fabulous wardrobe, set against opulently designed sets and locations which included access to the real Palace of Versailles.

All of this takes lots of planning, crew, resources and time. They were therefore able to shoot from January to April, far longer than the approximately 30 days she had for her other productions.
Again, she worked with DP Lance Acord to develop a visual approach. Coppola didn’t want to fall into the conventions of period filmmaking being dark, cold, and neutral. Instead they wanted to reflect her luxury environment by making it brighter and more pop with a colourful, pastel palette.
Another convention they pushed back against was a widescreen aspect ratio. Instead opting to shoot the film in the taller 1.85:1. This gave frames more height and meant wides could capture more of the architecture and high ceilings.
Lighting these large spaces in a more high-key style required a larger team of technicians and more gear. For example, for day scenes his team built a lighting platform outside the windows, or used crane lifts, and pushed through rows of 12K HMIs. The windowpanels out of the frame were covered with a thick diffusion. This created giant, soft panels of light.

Unlike the electrical team on Lost In Translation who would use natural light, black wrap and offcuts of diffusion, the lighting in Marie Antoinette was much more traditional and larger in scale with a full collection of frames, flags and lights.
For night interiors Acord tried to create a candlelit look using film lights. His team built different strings of bulbs - with either 60 watt or smaller 15 watt bulbs - that had a colour temperature of 2,800K.
Some of these lines were rigged onto or around styrofoam balls, or 4x4 or 8x8 frames with diffusion. They also used rope lights, placed on tables or actors' laps to give soft light from below.

These cast a soft ambient glow across the spaces and gave enough exposure to be able to shoot on the 500T 35mm film stock used for interior and night scenes. This had a slightly softer contrast than the Kodak 250D stock that they used for exteriors which was more vibrant and saturated.
Like on Lost In Translation his camera package consisted of a lightweight Aaton which he paired with an Arricam.
He used old Cooke Speed Panchros from the 50s and 60s which were rehoused by Van Diemen. This vintage glass gave a soft diffusive quality to images - which complemented the pastel look, and lowered the contrast with a veil effect when they were shot against a bright backlight.

CONCLUSION
Ultimately, the size of a film’s budget shapes everything: from the scope of production design, costume and locations, the size and notoriety of the cast, to the crew size and gear choices, and, perhaps most importantly, the time and level of control you have on set.
As Coppola’s work shows, working within those limits isn’t just about money; it’s about adapting your approach to tell the best story with the resources you have.

What A Production Designer Does On Set: Crew Breakdown
In this video, we’ll break down what a Production Designer does on set to bring a film’s visual language to life.
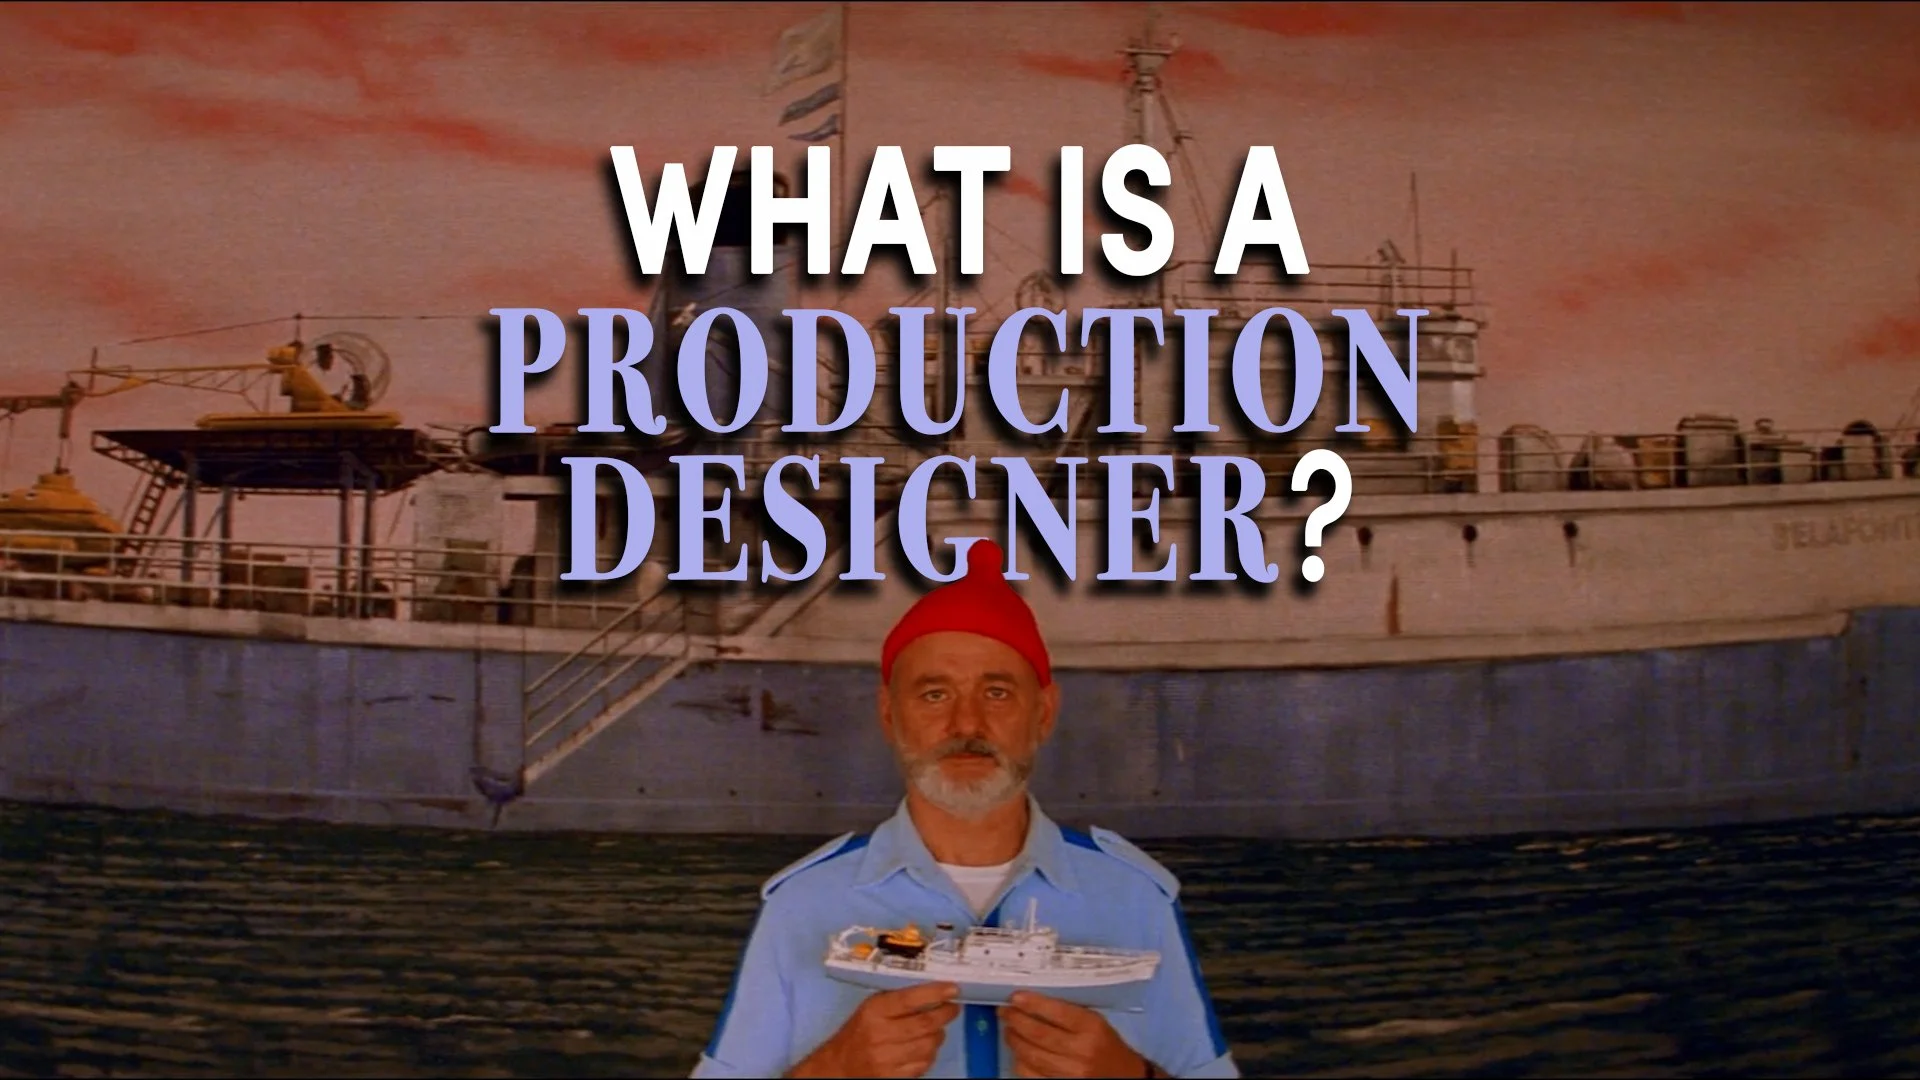
INTRODUCTION
Every frame tells a story. Not just through the actors, lighting, or camera movement, but through the world those elements exist in: the color of the walls, the texture of the furniture, or the objects which actors hold. The look of the space shapes how we feel about the story unfolding before us. Behind that world is one key creative: the Production Designer.

In this video, we’ll break down what a Production Designer actually does on set, how they collaborate with the director and cinematographer to bring a film’s visual language to life, and why their work begins long before the camera ever rolls.
ROLE
Production design is the backbone of what filmmakers call mise-en-scène. The phrase comes from theatre (literally meaning “putting on stage”) and describes everything that appears within the frame and how it’s arranged. For example, how the set or location looks and what objects or props are placed in that space.
It’s the job of the Production Designer to create mise-en-scène which transforms abstract ideas or places described in the script into physical reality, giving the audience something to see and feel.
They do this, as head of the Art Department, by translating the director’s vision, into the film’s tangible shooting environments.
Since there’s an expectation that these sets will be mostly ready to shoot by the time the crew arrives at each location - the Production Designer and their team will need to put in a lot of work in pre-production.
They’ll start by reading the script, researching, talking to the director, cinematographer and costume designer and conceptualising the film’s main environments. Often creating a mood board, sketches, or some kind of pre-visualisation document that depicts the overall style, color palette, and aesthetic influences.

The design required could change vastly depending on the subject matter or tone the director wants. Is the tone of the film whimsical, comedic, light, neat, symmetrical and theatrical, or does the movie need a realistic, darker, neutral, historically accurate set?
Some scenes may want to adhere to a strictly limited colour palette which feels almost cartoonish. Others may want a more tonally subdued or neutral environment, a space which is bright and saturated, or to create a subtle feeling of unease and sickness by dressing in objects which are off green or have a yellow tinge.

Another idea is to lean thematically towards either a warmer, homely space, with wood, warmer colours and softer textures, or create a cooler set, with hard edges and glass, which is more sparsely dressed.
As well as creating a feeling or tone, production design can also be used to more literally inform the audience or tell the story. This could be done by creating a realistic environment of an historically accurate and researched space. Or by adding details which hints at the character’s life, such as a photo of their family, or a placard that signifies their job title.
Often this will be explicitly described in the script, however these ideas may also be put forward by the Designer.

With these concepts in mind they’ll liaise with the production team, the director, location scout, cinematographer and sometimes other crew, to come up with physical spaces which work on an aesthetic, budget and practical level.
This will usually be a real world location, but in some instances may have to be a set built on a soundstage.
The design of the film is usually broken into a couple of elements. One, set design, which is dressing the physical location, such as painting walls or selecting furniture. Two, props, which are key objects on the set integral to the story, or which the actors interact with.
These spaces will then be recced to see whether they are suitable and if so, if there are existing props or dressing in the location which will work, and what kind of dressing will need to be purchased, rented and brought in. Measurements will also be taken to determine what props will fit in the space, or in case special modifications or alternations will need to be done.
Deciding on a shooting location is of course largely determined by its aesthetic appeal, however, Production Designers will also collaborate with cinematographers on its practical merits.
For example, is an interior space large enough to film the wide shot and do the kind of camera moves which are imagined? Can a dolly fit through the doorway and get into the location? Is the location easily accessible for parking technical vehicles and getting gear inside quickly?
The DP will also collaborate with them on lighting. Since practicals, light sources which are part of the set, are such an important part of lighting nowadays, the Production Designer and DP will work together to find a placement for each prac, how they will be powered and determine what kind of source it is or colour temperature it will have - such as an overhead fluorescent, an LED film light built into the walls, or a warm, incandescent bulb in a lampshade.

They may also decide on other lighting decisions, such as whether the windows have curtains which light will come through, and if so what diffusive material is chosen.
The Designer's job may also extend a bit beyond just finding a location and dressing it. For example, they may need to source cars which the actors drive, create the logos of fictional companies, or design practical visual elements which will be displayed on TVs or phones.

ART DEPARTMENT CREW
To set up these various spaces Production Designers will need to manage probably the largest team on the set - the Art Department.
Under the Designer is an Art Director, who sometimes also has assistants. They oversee the overall execution of creating sets - often ahead of shooting - and may work with the Designer on admin tasks like managing the budget.

There is usually also a Standby - whose job it is to be on each set as the production is shooting to make sure all aspects of the production design are kept in place.
With all these people to manage, on large jobs there may be a co-ordinator who organises the team’s schedule, tasks, admin and budget.
There may also be a dedicated previs team - such as storyboard or concept artists.
Some jobs, such as for sets built on soundstages, will require a whole team of construction contractors: from carpenters to painters.
There may be a subsection of the Art Department called the sets department, with decorators, dressers and buyers - that purchase objects and furnish the location. Some exteriors may even call for a greens team - who specialise in landscaping film sets.
Then there is the property department, with the props master and their assistants, who need to acquire, store and make sure all the correct objects are on set at the right time.

For example, if the script describes that a character needs an acoustic guitar then they are responsible for that object being there on the correct shoot day and scene. For certain props they may also co-ordinate with the wardrobe department to determine who needs to provide it.
For jobs with firearms or weapons, an armourer will be required, who usually falls into the property section of the art department.
Acquisition or sourcing of production design elements happens in various ways: objects may exist in the real locations which are selected, some are rented from specialist prop or art houses, purchased from a shop, designed and built from scratch, or may even come from the Designer’s personal collection.
AVERAGE DAY ON SET
An average day on set for a Production Designer is all about supervision, collaboration, and problem-solving.
They usually arrive early to check the day’s sets which should hopefully already have been set up in advance. Making sure everything is dressed and camera-ready. They’ll walk through the set with the art director, double-checking details like prop placement, and continuity from previous scenes, to determine whether things are in the same place as before, or if they need to be moved around a bit to indicate the passage of time.
Throughout the day, they will probably go ahead to dress the next day's shooting locations, while leaving a Standby to manage their set. They will stay in close contact with the director and cinematographer, updating them with photos of newly dressed spaces, and ensuring the visual design aligns with the story and shot composition.
Once the director arrives in the space or after the shot has been lined up, the standby may be required to make tweaks to the design. For example, if a background element is standing out too much they may remove it from the set.
The Standby Art Director may also need to make specific changes based on the camera’s position and the lighting: like tilting a mirror to catch a character’s reflection or moving a plant into a space to populate and cover an otherwise white wall.
Between takes, the Standby is also responsible for restoring the set to its original condition. These resets may mean collaborating with the continuity supervisor, for example making sure that at the beginning of each take the food on each character’s plate, or in their glass remains the same.

They may also have administrative duties to perform, such as doing a budget meeting or reconciliation with the coordinator, to make sure they are on track to not overspend their allotted budget.
CONCLUSION
One of the greatest elements of visual storytelling is its mise-en-scène. The work of a Production Designer plays a massive role in giving a film its world, its texture, and its sense of reality or unreality.
Every wall color, every prop, every carefully chosen detail is a piece of visual storytelling that shapes how we experience the story.
From the earliest concept sketches to the final frame on set, the Production Designer ensures that what we see on screen feels cohesive, intentional, and in tandem with the vision of the director. They’re not just decorating a space - they’re building the emotional and thematic foundation of the film itself.

Cinema Lenses Vs. Photography Lenses
What are some difference between cine and photo lenses?

INTRODUCTION
There’s a world of difference between the price of cinema lenses and those designed for still photography. So, why is it that almost all industry film shoots for series, movies or commercials use these bank breaking pieces of glass over more cost effective consumer options?
Lets go over the practical and aesthetic advantages and disadvantages of cinema versus photography lenses, to determine which is the better choice in which situation.
ERGONOMICS
The biggest immediate difference between photo and cinema lenses are their construction and ergonomics.

On average, cinema lenses are larger, heavier and are specially designed to be compatible with professional cinema camera accessories. For example, they have a sturdy, rounded front lip which clip-on matteboxes can be clamped directly onto.
They also have focus, aperture, and sometimes zoom rings, with geared teeth on the outside of the barrel which can be used to manually adjust these settings.
Cine lenses often come in a consistent size and length across prime lens sets, as well as with a consistent front diameter - which makes it easy to do things like balance it on a gimbal or quickly put on a mattebox with the same sized back when changing lenses.
Modern photo lenses are often designed to change aperture electronically by flicking through a switch on the camera body (although some do come with an additional manual iris ring). They can screw circular filters onto the front thread of the lens rather than using clip-on matteboxes.
FOCUS
Although these technical differences may seem small, the biggest practical effect they have is that photography lenses and cinema lenses are designed to be used in different ways by different sized crews.
Photo lenses are more geared towards solo operators, whereas cinema lenses are manufactured for use with a full camera team consisting of a camera operator, a 1st AC and a camera assistant.

This is because of the different ways that these lenses are designed to focus.
Photography lenses can autofocus when used with compatible cameras - such as mirrorless bodies or certain models geared towards broadcast or entry level cinema use, like the Sony FX series.
They use internal motors to automatically move lens elements, or pieces of glass, until the image is sharp.
Modern mirrorless cameras combine phase detection autofocus and contrast detection systems. Phase detection compares two images - one from the left side and one from the right side of the lens - to determine whether the subject is in front of or behind the focus plane. The motor will then move the elements until the two images align perfectly and the subject is in focus.

While contrast detection analyses the image from the main sensor until it finds the point where contrast (or edge sharpness) is highest - which means the subject is in focus.
Practically these systems are now very accurate, fast and can even be used to track subjects. This makes photography lenses a great tool for gimbal shots, where the focus can automatically latch onto a subject, and where it’s difficult and impractical to do manual focus pulls.
A disadvantage of autofocus is that sometimes these pulls can feel too quick or too electronic and less natural or organic than manual focus pulls. They may also latch onto the wrong thing, for example pulling focus onto a person’s hand when they make a gesture in front of their eyes during an interview.
Cinema lenses solve these issues. 1st ACs will attach a wireless follow focus motor to the rods of a camera and line it up with the gear teeth on the lens. They can then use a handset with a rotatable grip to wirelessly and manually move the motor and focus gear to adjust how far or close the focus plane is.
This puts control into the hands of a creative human being who can determine what is in focus as well as the speed and timing at which the focus moves from one subject to another. For example if you’re after a dreamy in and out focus effect that portrays the discombobulated point of view of a character.

Cinema lenses often have approximately a 200 to 300° focus rotation, compared to around the 90° or less of photo lenses. Being able to rotate the focus ring on cinema lenses more makes it easier to do more incremental and smoother focus pulls - especially useful when throwing focus from one subject to another or gradually bringing a subject into focus.
One main disadvantage to cinema lens focusing is that, because it’s operated by a human - even though it's a very skilled human - they are still capable of making mistakes and not hitting focus perfectly every time.
If you get a focus puller then you’ll also need extra gear: a monitor for the focus puller to judge sharpness, a wireless transmission system to send a video feed to that monitor, a wireless follow focus system, a base support for the camera with rods to mount the focus motor, and d-tap or 2 pin ports and enough battery power to run these accessories.

Not only do these accessories cost money to rent (or buy) but they also make the camera build larger and potentially make it incompatible with certain solo operator rigs such as smaller, prosumer gimbals.
To sum it up then: cinema lenses are better suited to an industry style shooting workflow which has the budget for camera crew and extra cinema gear, while photography lenses are generally used more for documentary, events or other solo shooting situations.
Having said all that, it is still possible to work with cinema lenses as a solo operator and manually pull focus on the barrel or with a manual follow focus - but why would you want to do that?
APERTURE
Now that we’ve covered focus we can move onto the aperture: the hole which can open or close to let more or less light into the camera.
Most photo lenses have click stops. In other words, if you want to open the size of the aperture from f/4 to f/2.8 you’ll have to abruptly change from one to the other.
Cinema lenses however are de-clicked. This means the iris can be gradually opened or closed incrementally, allowing exposure to adjust more slowly and subtly.

The reason this is important to some professional filmmakers is that they may want to do what is called an iris pull. This is where, just like with the wireless follow focus, a motor is attached to the iris ring which can be manually closed or opened.
This can be used to change the stop during the shot to balance exposure without the audience being aware that this setting is being changed. For example, when going from a very bright environment like an exterior location to a very dark environment like an interior or visa versa.
T-STOP VS. F-STOP
Another difference between cinema and photo lenses is how aperture is measured. Photography lenses will do so in f-stops, while cinema lenses use t-stops. Although these measurements are similar they do have a technical difference.

F-stop uses a mathematical formula to calculate approximately how much light will reach the sensor. A t-stop is an actual measurement of how much light is let through, which includes the light which is lost inside the lens through reflections and glass coatings.
This just means that cinema t-stops are more accurate.
Many modern prime lens sets will also have a consistent t-stop across all primes.
Being able to shoot with all the lenses at the same wide open aperture means you can change a lens during a scene without the exposure of any of the shots changing at all and without needing to do any lighting tweaks.
Therefore cinema prime lenses with consistent stops can help you to work faster and more accurately.
ZOOM
So far, we’ve gone over the aperture and focus rings which all cinema prime lenses have, but cinema zooms also come with an additional ring which can be used to change the focal length of the lens.
Photo zooms can do this by turning a section on the barrel of the lens, however they don’t have geared teeth. Cinema zooms can therefore be lined up with a motor and a device that can be attached to the tripod’s panhandle called a Preston Micro Force.
They can use a button to set the speed of the zoom to be consistent: which makes it great for slow zoom push ins during a shot. Unlike photo lenses which are almost impossible to do a consistent speed zoom with by manually turning the barrel.
Cine zooms are parfocal which means the focus distance will remain unchanged even when the lens zooms in or out. Whereas the focus on many photo lenses will shift when you zoom - which means you may start the shot in focus but end out of focus.
Another separating point between cinema and photo zooms is that usually the length of still lenses will elongate as the lens zooms and the elements inside are moved further away. Whereas with cinema zooms this movement happens completely internally, so as not to twist, turn or extend the barrel which may collide with or rotate a mattebox.
IMAGE STABILISATION
An added bonus that comes with many still lenses is they have image stabilisation. This makes it possible to just pop a lens on and shoot run and gun handheld footage on longer focal lengths with a much greater degree of stability. Unlike unstabilised cine lenses which will have more of a shake.
LOOK
A final advantage of cinema glass is their look and colour reproduction. Of course it will depend on the lens which is chosen, but generally cinema lenses will have more consistent optical performance. Their flares will be a bit more cinematic and rounded. This is due to them usually having more iris blades, which makes the opening more circular compared to some photo lenses.
Modern cinema lenses are designed so all prime focal lengths in the same set will render skin tones, contrast, and colour consistently.

Cinema lenses also come with a range of different looks from sharp, crisp, neutral and modern to more painterly, warm, vintage glass. This means filmmakers can choose a cinema lens with the visual characteristics which best suit their project.
The same can be said for many vintage photo lenses, the only difference being that this older glass will come without autofocus. Whereas vintage cinema lenses can still be controlled perfectly well by a focus puller.
Modern cinema glass will create a coherent aesthetic when a movie is shot using different focal lengths. However, this is negligible when using many modern, high quality photo lenses - which should also produce pretty consistent visual performance.
CONCLUSION
Ultimately the choice between whether you shoot on cinema or photo glass comes down to budget, workflow and control.
If you need exceptional optical performance, to control the speed of the focus, zoom speed or do iris pulls during a shot, and you also have the budget, crew and resources to support this choice then choosing a cinema lens makes total sense.
However, if you’re doing a lower budget, solo, run and gun documentary, with a prosumer gimbal, need to move incredibly fast, not be tied down by heavy glass, and want the accuracy of touch screen autofocus, then using a photo lens would be the best choice.
As ever, let your gear selection be guided by your practical environment as well as the kind of content you want to capture.

Full-Frame Vs. Super 35 Cameras
From field of view and depth of field to lens compatibility and noise performance, we’ll explore how each format influences your image, your workflow, and ultimately, your story.

INTRODUCTION
In digital cinematography, sensor size isn’t just a technical detail - it’s a storytelling tool. For decades, Super 35 dominated cinema, shaping the look of everything from intimate documentaries to Hollywood blockbusters.
But in recent years, full-frame - or large format - digital sensors have reshaped the industry. From early prosumer cameras like the Canon 5D MkII to modern cinema workhorses like the Sony Venice and Arri Alexa Mini LF, they’ve opened up new aesthetic possibilities.

So in this video, let’s break down the differences between Super 35 and full-frame sensors. From field of view and depth of field to lens compatibility and noise performance, we’ll explore how each format influences your image, your workflow, and ultimately, your story.
TECHNICAL DIFFERENCES
The reason Super 35 and full-frame cameras look different comes down to sensor size.
Before digital, most films were shot on Super 35. This used 35mm film running vertically through the camera, recording an image area roughly 18mm tall by 24mm wide.

Large format systems like VistaVision, 70mm, or IMAX did exist, but they were niche tools used for only a handful of productions.
So when digital cinema cameras arrived, most manufacturers modeled their sensors on Super 35 dimensions.
Later down the line however, manufacturers started to produce digital cameras primarily designed for still photography, which could also record video.
Unlike 35mm cinema cameras which recorded the image onto vertical strips of film with perforations on either side, still photography 35mm cameras, also called 135, were designed so that the film was flipped horizontally, with sprockets on the top and bottom, to capture frames with a greater surface area of approximately 24mm tall by 36mm wide.

So, when these digital photography cameras which could also record video, such as the Canon 5D MKII, started getting produced they had a 24mmx36mm sized sensor. To differentiate this larger sensor video format from Super35 sensors - it was labelled as ‘full-frame’.
Today, cinema cameras like the Sony Venice, Arri Alexa Mini LF, and Blackmagic Pyxis continue this full-frame tradition, sitting alongside the more traditional Super 35 options.
FIELD OF VIEW
The most obvious difference between the two formats is field of view.
If you put the same lens on both sensors, the full-frame camera captures more of the lens’s image circle, resulting in a wider frame. Super 35, being smaller, crops in, producing a narrower frame.
This “crop factor” is about 1.5x. So, a 35mm lens on Super 35 gives you a field of view closer to a 50mm lens on full-frame. To match framing, you’d need to use a wider lens on Super 35.

For example a 35mm lens on a full frame camera gives approximately the same field of view as a 24mm on Super 35.
So as a very rough rule, Super 35 needs a prime lens about one focal length wider to match a full-frame shot.
But here’s the key: changing focal length doesn’t just change framing - it also changes the look of the image.
DEPTH OF FIELD
Because framing on full-frame often requires longer focal lengths, the result is a shallower depth of field. This means backgrounds fall more out of focus, even in medium or wide shots, creating a stronger sense of separation between subject and background.

On Super 35, you’ll typically use wider lenses for the same framing. Wider lenses have deeper depth of field, so more of the scene remains in focus. This contributes to the classic “filmic” aesthetic of 20th-century cinema.

Full-frame often feels more immersive and dimensional, with compressed backgrounds and a pronounced bokeh. Super 35 feels more traditional, with images that keep characters and environments more evenly balanced in focus.
LENS COMPATIBILITY
Super 35 also has a practical advantage: lens availability.
Because the format has been standard for so long, most cinema lenses - especially vintage glass - were designed to cover Super 35, not full-frame.
Each lens comes with an image circle which is the diameter of the circular cone of light projected by the lens. Most cinema lenses from the past were manufactured with an image circle which was only wide enough to cover the size of Super 35 film or sensors.

Many of these older Super 35 lenses will vignette heavily on full-frame.
Full-frame sensors therefore require lenses with a larger image circle. That means your options are often limited to either modern cinema lenses built for large format, or rehoused stills lenses originally designed for 135 or medium format photography. These can be more expensive and harder to source.
The upside for choosing a Super 35 camera is that full-frame lenses will always cover its sensor. However, Super 35 lenses won’t necessarily cover full-frame cameras.
There’s also a special format that uses a special type of lens called anamorphic. If you want to shoot with anamorphic lenses which produce this widescreen format, then you’ll most likely have to use a Super 35 camera, as most 2x anamorphic lenses are designed to cover this smaller sensor.

There are a few niche lenses for large format with anamorphic squeeze - which year by year are being manufactured more frequently. However, even more so than with spherical glass, with anamorphic the options for large format are still quite limited.
In short, if you’re drawn to the vast world of vintage cinema glass, or anamorphic lenses, then Super 35 offers more choices.
NOISE
Sensor size also impacts low-light performance and noise.
If two sensors have the same resolution, the larger full-frame sensor will usually have bigger pixels. Bigger pixels gather more light, producing a cleaner signal-to-noise ratio.
This translates into full-frame sensors generally having better high-ISO performance in low light conditions, cleaner shadows, and often more usable dynamic range - since you can recover more detail from the shadows without noise overwhelming the image.

Of course it depends on the model of the camera, but as a general rule, full-frame cameras will produce a cleaner image in low light conditions than Super-35 cameras. You’ll usually be able to push the ISO or sensitivity on full-frame cameras higher before noise becomes noticeable. Although, for high end cinema cameras this is negligible.
LOOK
Ultimately, neither format is “better” - they’re just different tools.
If you’re shooting in locations with tight spaces and need a wider field of view then a full-frame camera may be better. Or, if you’re after a greater variety of vintage lenses then Super 35 may be better.
Full-frame offers wide, immersive frames, shallow depth of field, and strong low-light performance. Super 35 delivers a more controlled, classic film look, with a wider variety of lens availability and deep ties to cinematic history.
The choice comes down to story, location, and budget. Do you need the expansive depth and dimensionality of full-frame, or the vintage glass and timeless feel of Super 35?

The Easy Trick For Cinematic Portraits
There is one basic trick which I often like to use when shooting close ups. I like to call it: framing on the shadow side.
INTRODUCTION
Part of what makes cinematography and lighting a difficult thing to learn is that the real world offers a range of different environments and locations. In certain spaces, some techniques may work better than others.
It’s the job of the DP to adapt and be able to light each location they are faced with: adding light to the background here, a brighter keylight in this space, or perhaps a backlit silhouette. Therefore, it can be tricky to give broad, general rules for creating beautiful footage in different situations.
There is however one basic trick which I like to use, which is also often used by many other working cinematographers today. I like to call it: framing on the shadow side.
You can do this in just two steps. Number one you need to decide where you place your key light, and number two position the camera in a specific relation to the subject and the key light. But what is a key light?
POSITIONING THE KEY LIGHT
Well, if you look carefully at the lighting across professionally filmed content, you’ll probably notice that often people are lit to be brighter on one side of their face and darker on the other side of their face.

You can very clearly see this in black and white footage - where the brighter side goes to a whiter tone, while the darker side goes to a shadowy grey or black.
Creating this lighting contrast on faces is done very easily with what is called a ‘key light’. This is the brightest light source which is used by filmmakers to illuminate the subject.
What determines whether faces have this split light and shadow or not is how the key light is positioned.
Imagine that there is a semi circle around the subject. If you place the key light directly in front of the subject at 90 degrees and shine it straight at them, then their whole face will be illuminated and there will be no shadow.
However, if you move the light source around the semi circle until it’s completely profile to the subject at 0 degrees, you’ll see much stronger contrast. Now, half the face will get hit by light, while the other half is masked in shadow, as it's blocked from being hit directly.

The most common position for the key light is to split the difference between these two extremes and move the source back around the semi circle to an angled position of about 45 degrees to the subject.
This creates a middle ground where one side of the face is more strongly illuminated than the other, with a clear split in exposure down the middle of the face. However, some of the key light also spills onto the shadow side of the face, creating a triangular spot of illumination which lifts the darker side.
This 45 degree positioning of the key is referred to as Rembrandt lighting - named after the Dutch painter who often used this style of lighting in his portraits.

The position at which you place the key light in relation to the subject has a direct influence on the mood of the scene. The more frontal the direction of the light is, the more fully illuminated the subject will be, and the lighter and brighter the shot will feel - both in appearance and in tone. Which is why this style of lighting is often used for comedies, or upbeat, positive commercials.
While, the more side on the key is, the more shadow will be cast across the face, which gives images a darker, moodier tone. This style of lighting is more suited to genres like drama, horror, noir, or filmmaking that wants to impart a darker feeling to scenes.
FRAMING ON THE SHADOW SIDE
When framing a close up of a subject filmmakers can choose to place the camera, just as they did the key light, anywhere along the semi circle, from a frontal shot to a profile.
The easy trick that many cinematographers like to follow is to place the camera on the opposite side to where the key light is placed. So if the key light is placed on the right hand side of the subject, then the rule states that the camera should be positioned on the left hand side of the subject.

In other words, place the camera on whichever side of the face has shadow. Framing faces on the shadow side is a technique which has been used in various visual mediums from painting to photography and of course filmmaking.
WHY DO THIS TRICK?
Now we know how to position our key light and camera to get this higher contrast look. But why should we do this in the first place?
One practical reason for following this rule is to avoid casting any camera shadows. If the camera is on the same side as the key light, then there is a risk that the camera may move across this light and cast a shadow of filmmaking equipment against either the subject or the background.
However, it’s more often done for aesthetic reasons.
The key light can be frontal or on the same side as the camera - however, this does tend to flatten out shots as everything in the frame will then have the same luminance.
Basically it gets rid of shadows - which may decrease the feeling of dimensionality as there is no contrast in the lighting which would otherwise create a feeling of depth.
This flatter, high key look may however be desirable in certain situations, such as for lighter comedies or in commercials which want to achieve a brighter, lighter happier feel.
However, if you're after a little more mood, drama or tension then framing on the shadow side can help to visually support that feeling.

You can therefore bend this rule depending on what look you are after: using more frontal lit shots framed on the key side for a brighter, lighter feel, or more side lit shots taken from the shadow side for a more dramatic tone.
POSITIONING ACTORS
Creating this lighting setup and framing is easy for say a sit down interview in a studio. However, more thought may be required to apply this principle in real world settings.
Many modern filmmakers want their lighting to be motivated by the natural lighting in the location. For example if there is a window then the key light should come from the same direction as the window to mimic that real world effect.
In this way, the position of the lighting becomes fixed.

So, if the lighting is fixed, then how do you frame on the shadow side? Well, all you need to do is position the subject to best suit the location by placing them so that the key light is on one of their sides.
For example, make them sit perpendicular to a window, rather than them directly facing the window. Then frame your shot so that the camera is on the opposite shadow side to the light coming through the window.
FILMING EXTERIORS
This same idea can even be applied to exteriors. You can’t move the sun around as your key light, however you can control where you place the subject and camera in relation to the sun.
To frame exterior portraits on the shadow side you can orientate the camera so that the sun is on the opposite side of the actor. The only caveat is to get the sun in this position you’ll need to shoot in either morning or late afternoon when the sun is low on the horizon.
Where you place the camera in relation to the sun will affect the mood of the shot. For example, you can position the subject so that they are side lit, and the camera is on the shadow side to create some contrast.
Or, for maximum effect, you can shoot what we call ‘backlit’ - with the subject positioned between the sun and the camera. This will create more of a silhouette and an edge light, or glowing outline, around the subject.

You can choose to either let the lens flare by letting the sun directly hit it, or mask the flare by positioning the subject directly in front of the sun on the shadow side - for maximum beauty.